To create an onboarding track, open the «Onboarding» section and click «Create track» in the middle of the page, or click «Create» in the top-right corner.
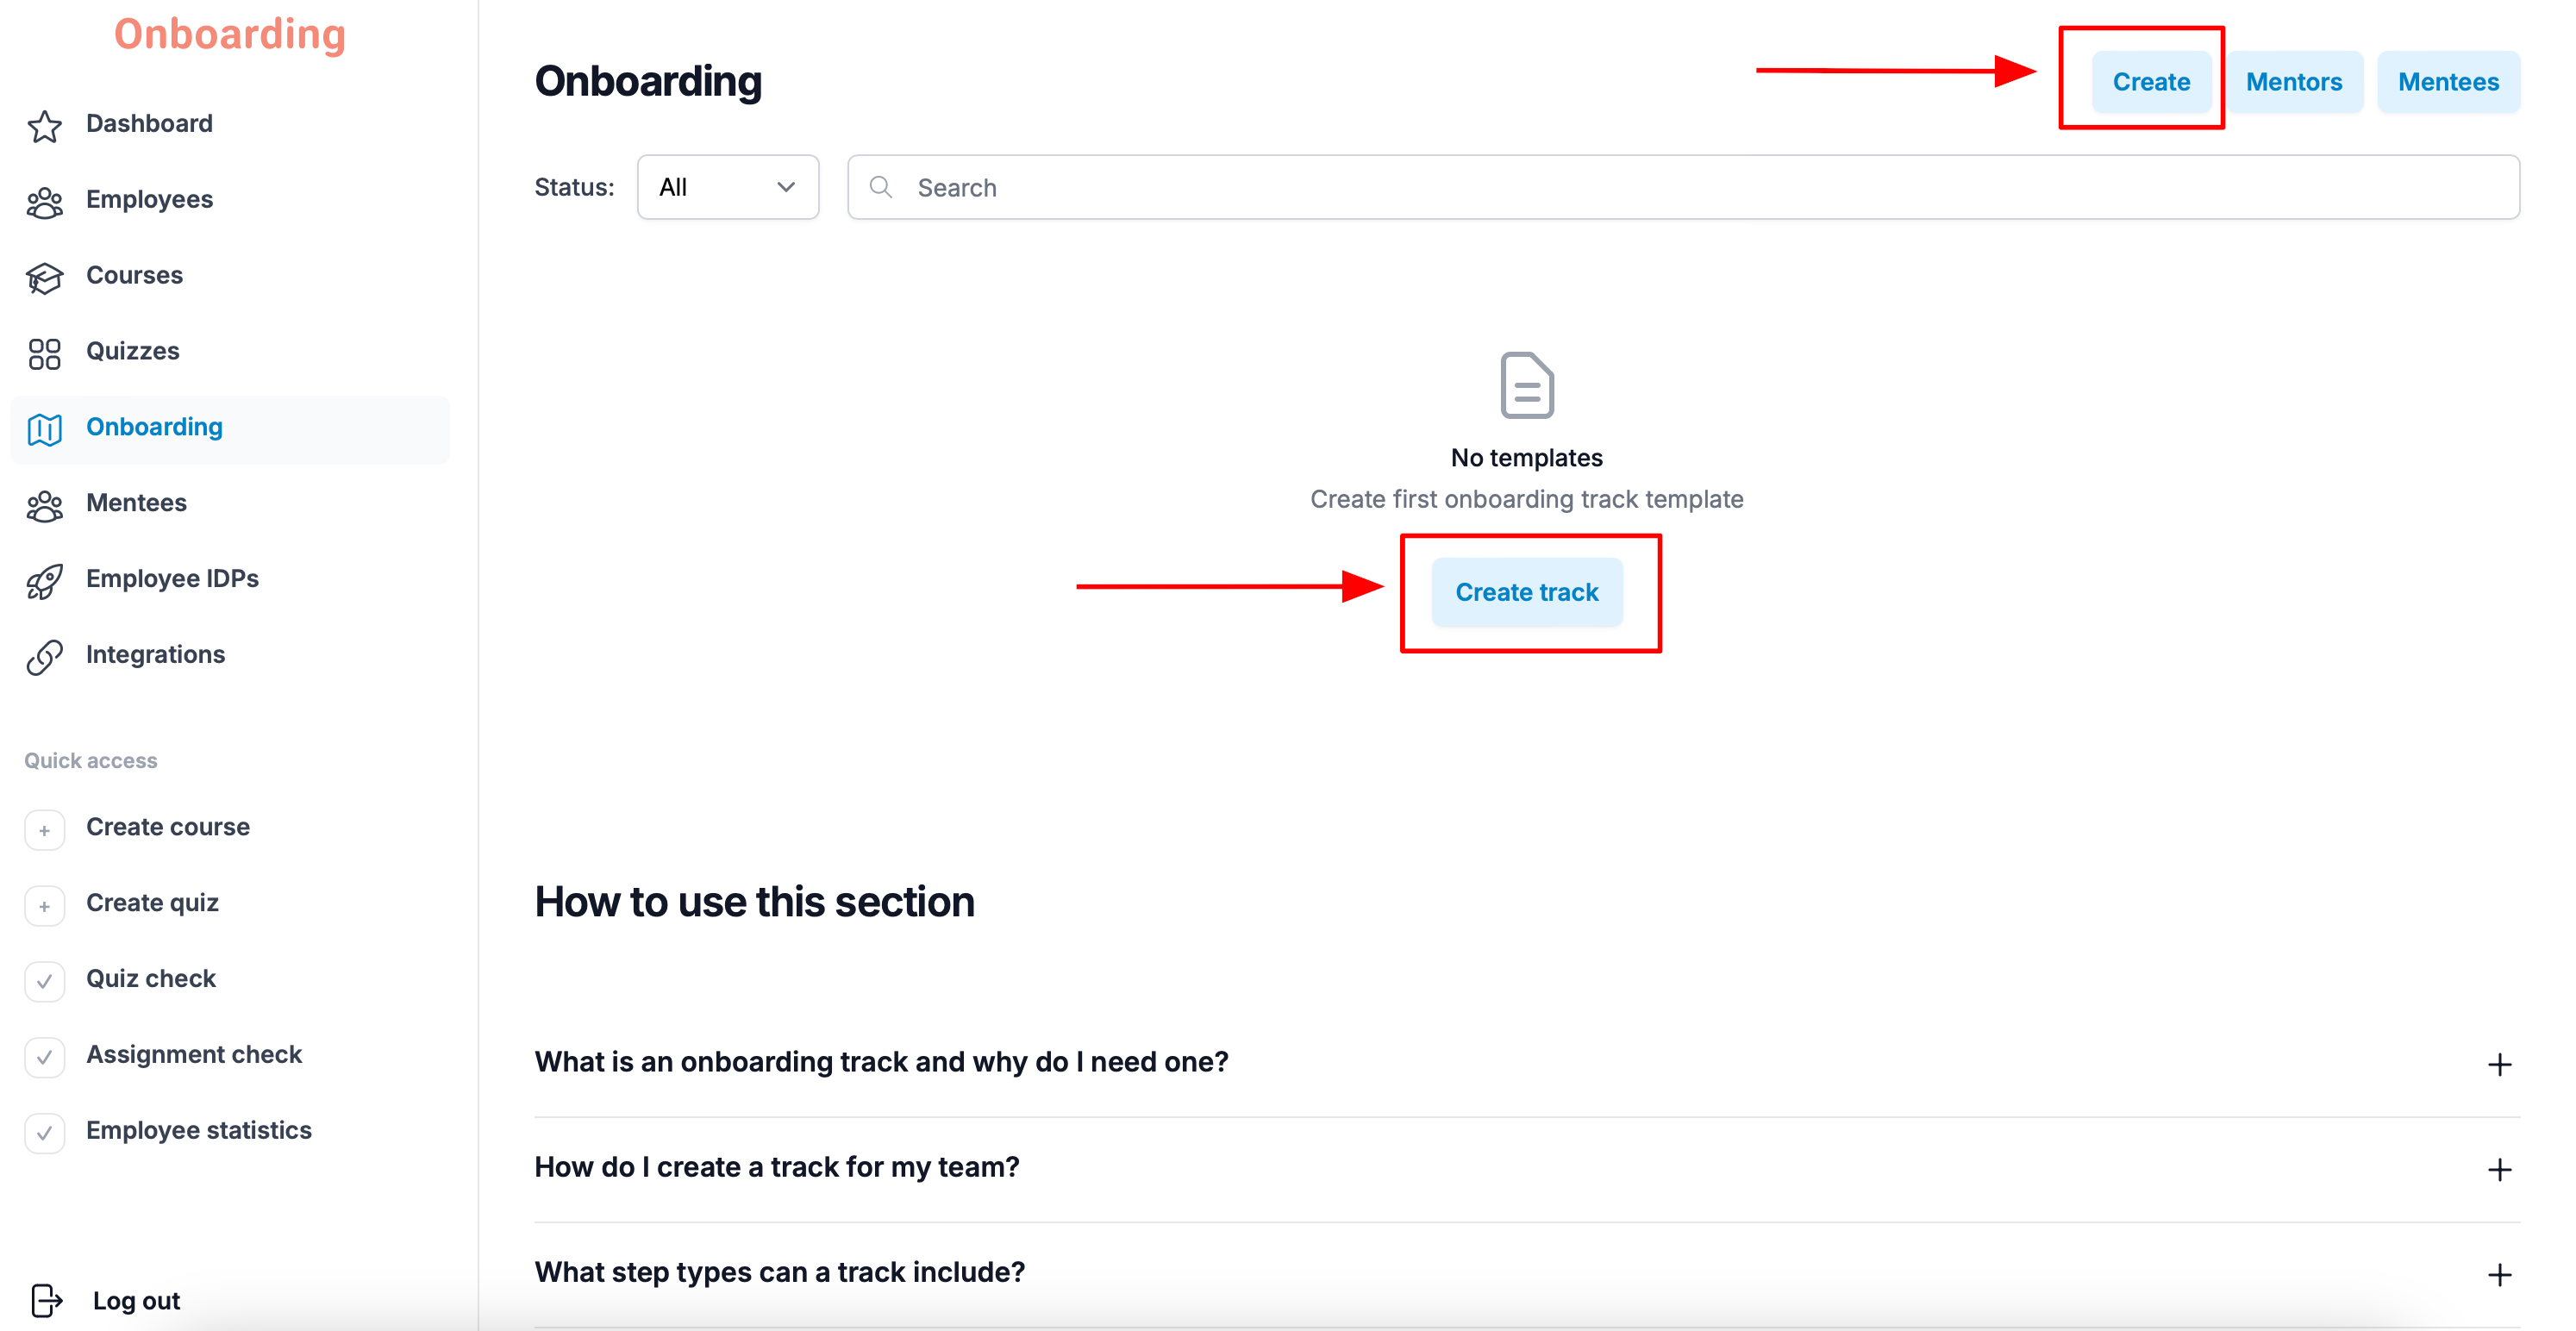
Creating a track takes three steps.
Step 1: Basic information
First, fill in the track's basic settings.
The following fields are available:
- Template name – the track name employees will see.
- Group – the employee group the onboarding track will be assigned to.
- Default mentor – the mentor who will be assigned to employees on this track.
- Mentor contact – the mentor's contact details. This can be a phone number, a messenger handle, a social media link, or any other convenient way to get in touch.
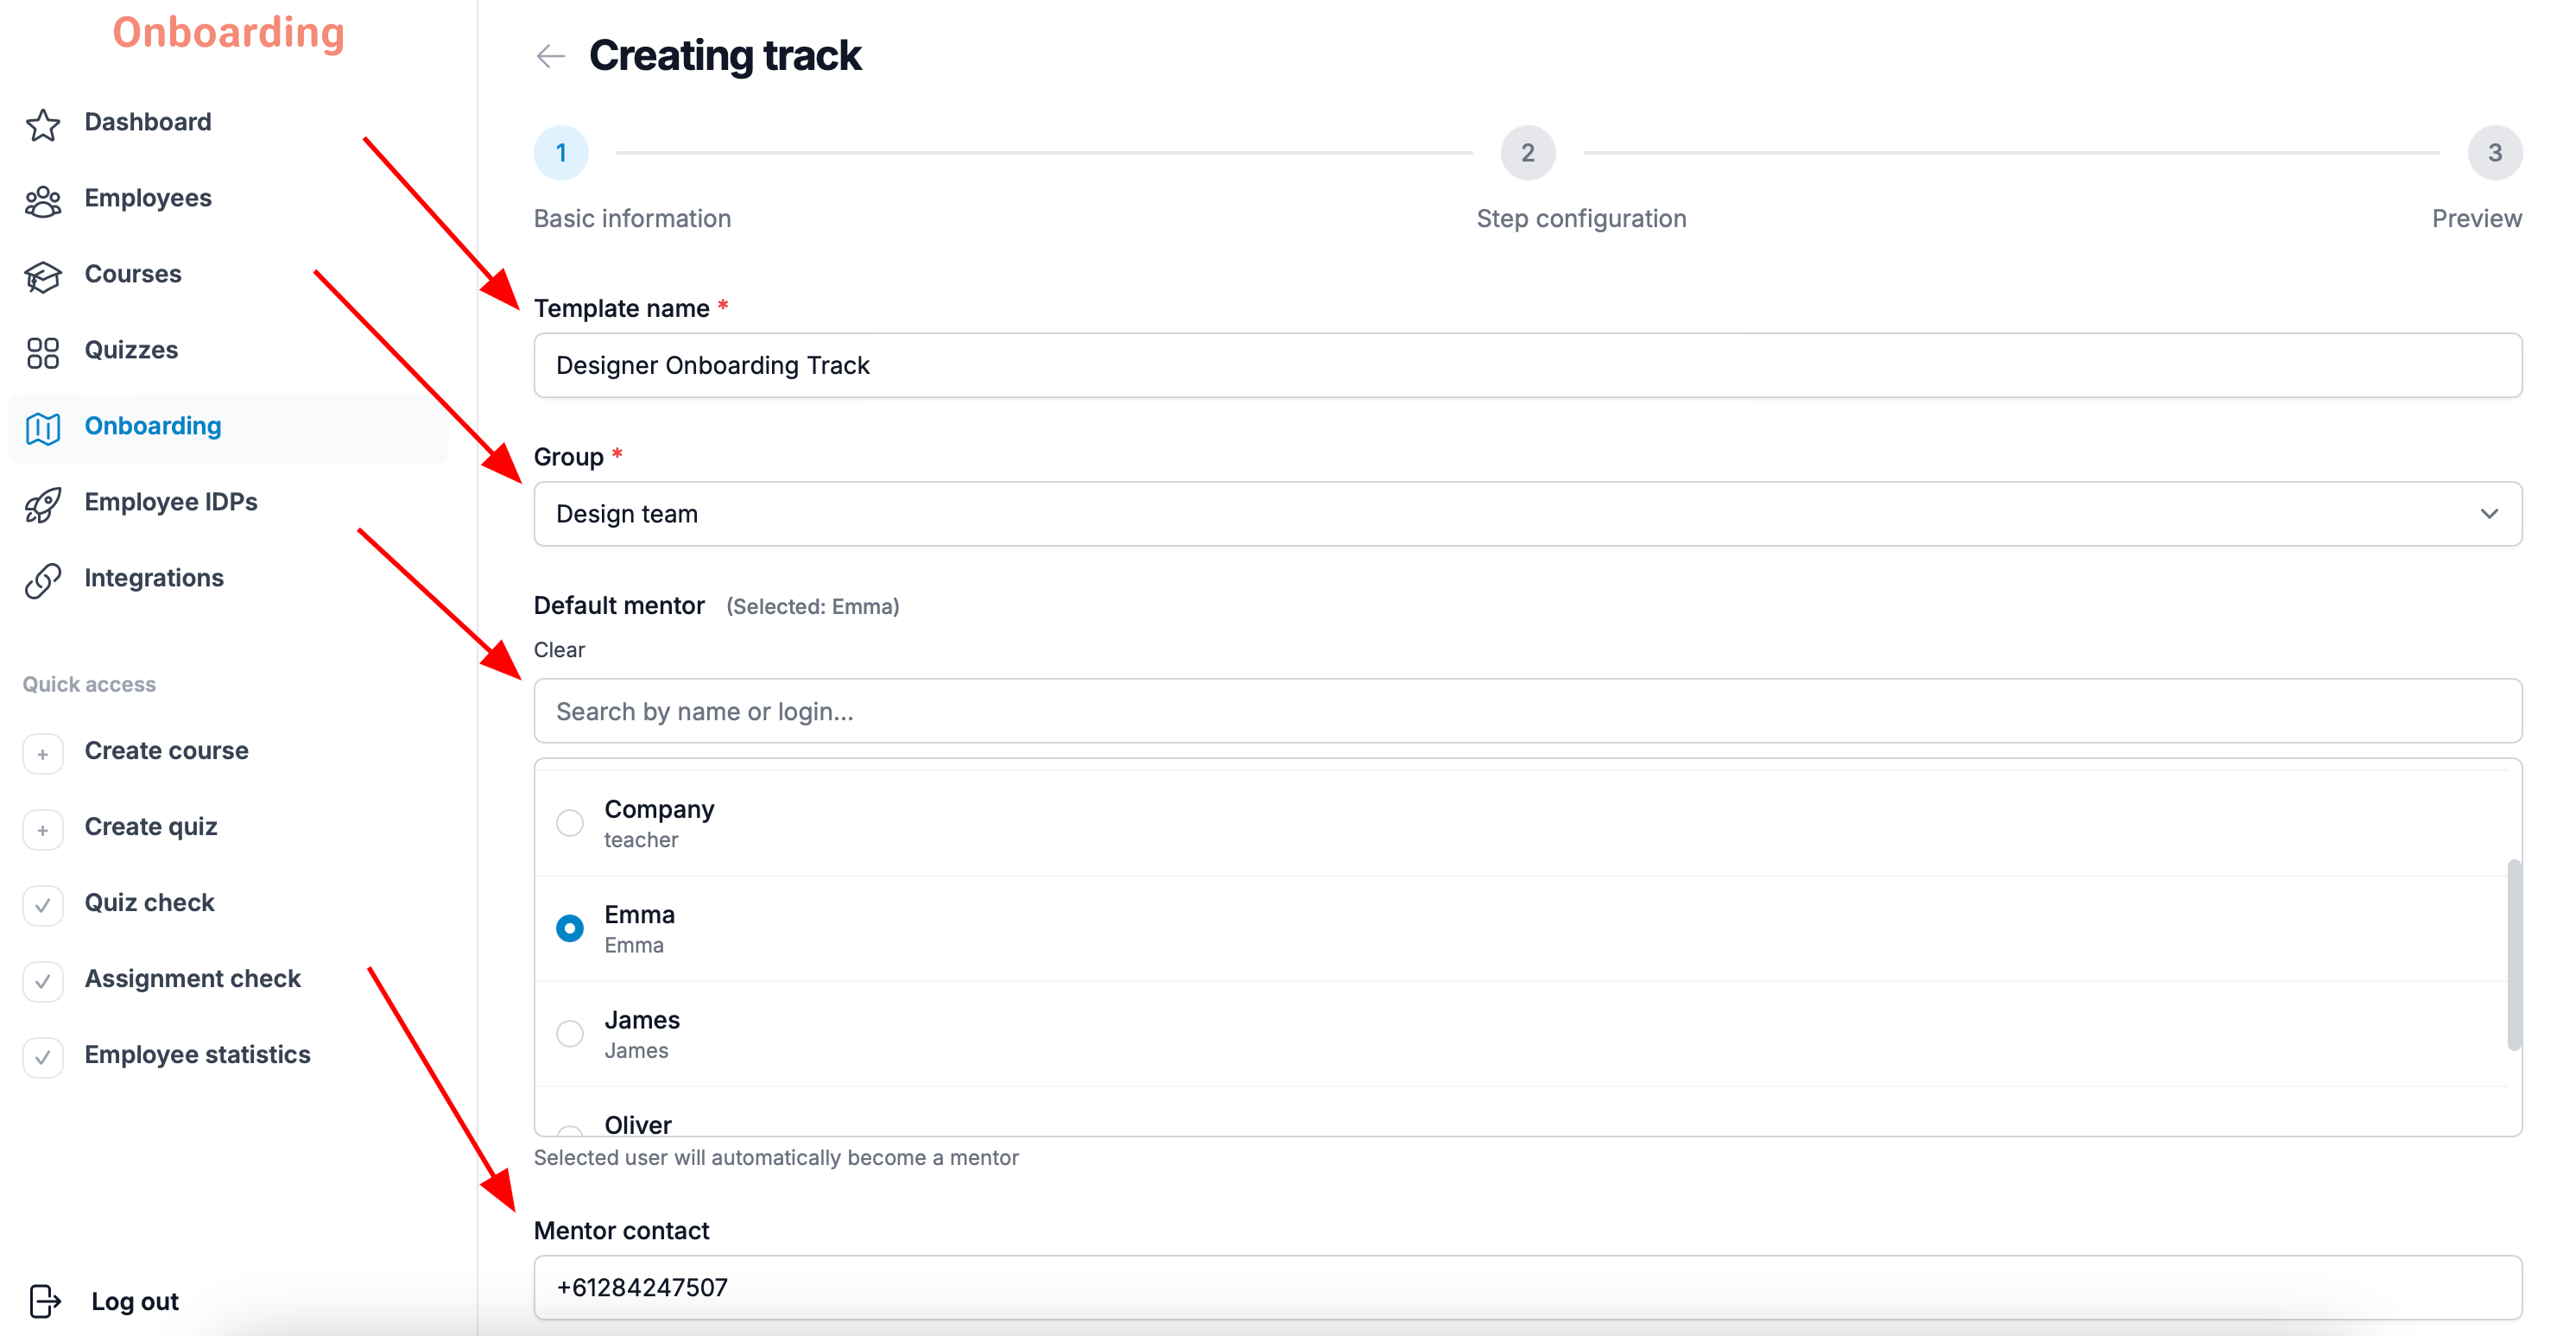
The mentor can be:
- a platform administrator;
- an employee from the group the track is assigned to;
- an employee from a different group;
- or no one at all.
The mentor gets access to the courses assigned within the onboarding track, but the track itself doesn't appear in their account.
At this step you also decide who the onboarding track applies to. The «Assign this track to employees already in the group» checkbox is on by default.
- If the checkbox is on, the track is assigned to all current members of the selected group.
- If the checkbox is off, the track will only be assigned to new employees added to the group after the track is created.
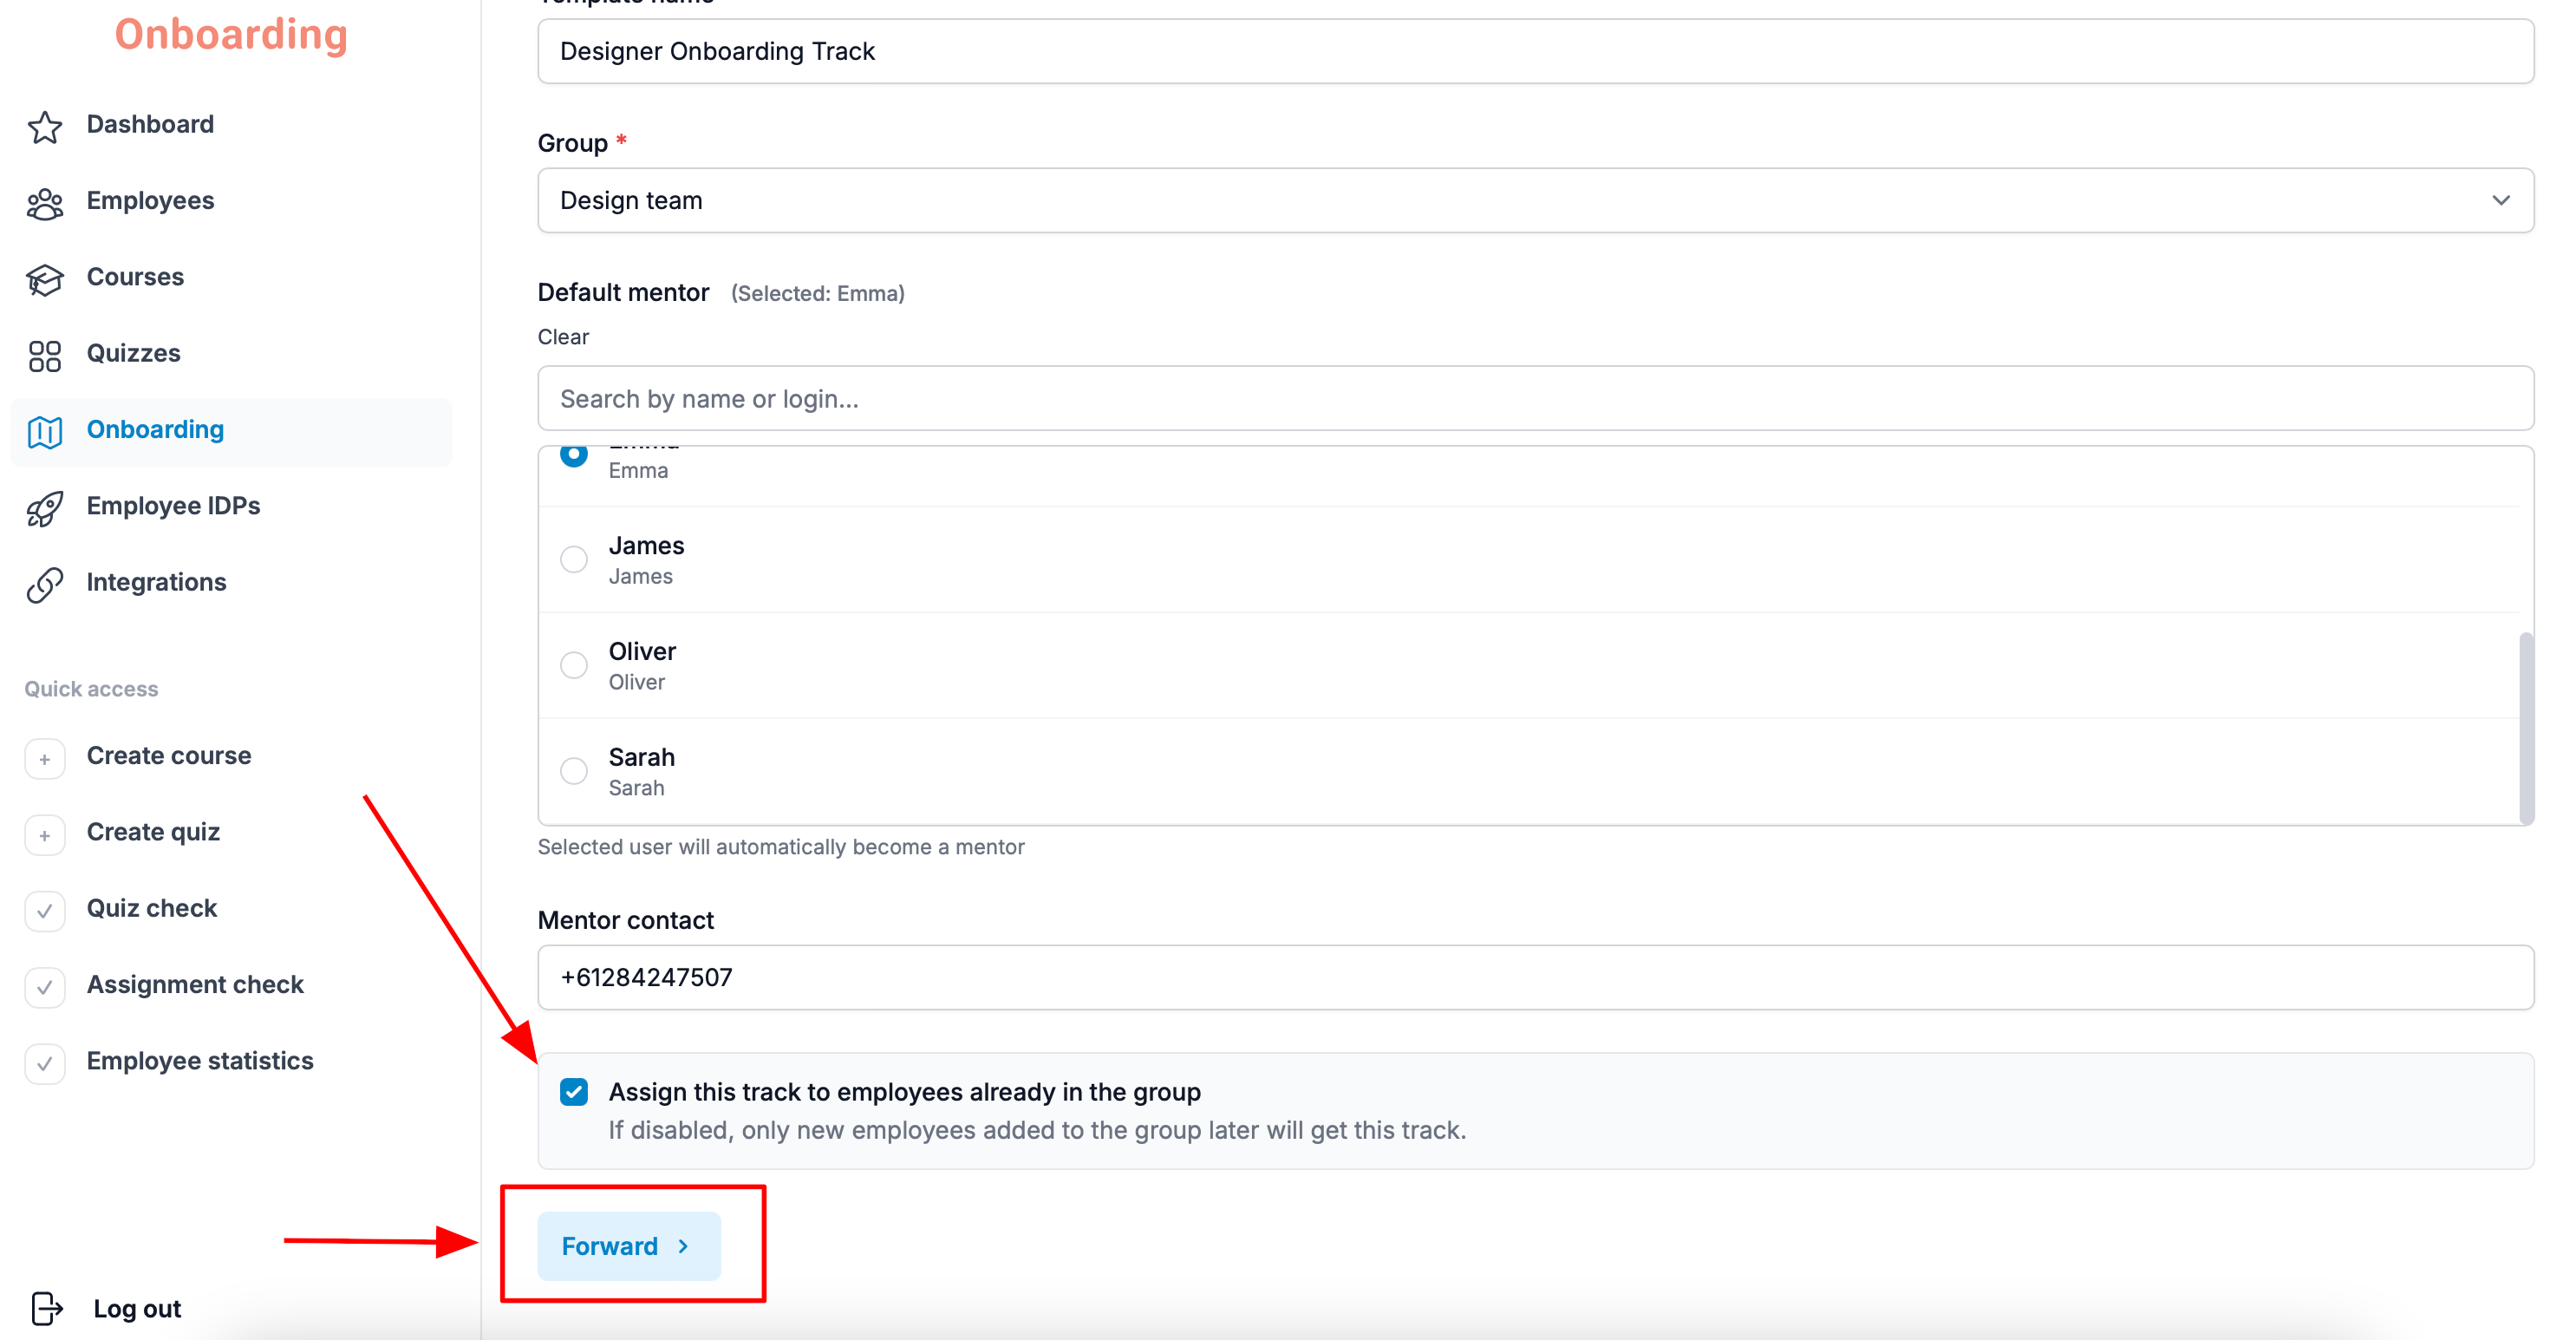
Once you've filled in all the required fields, click «Forward».
Step 2: Step Configuration
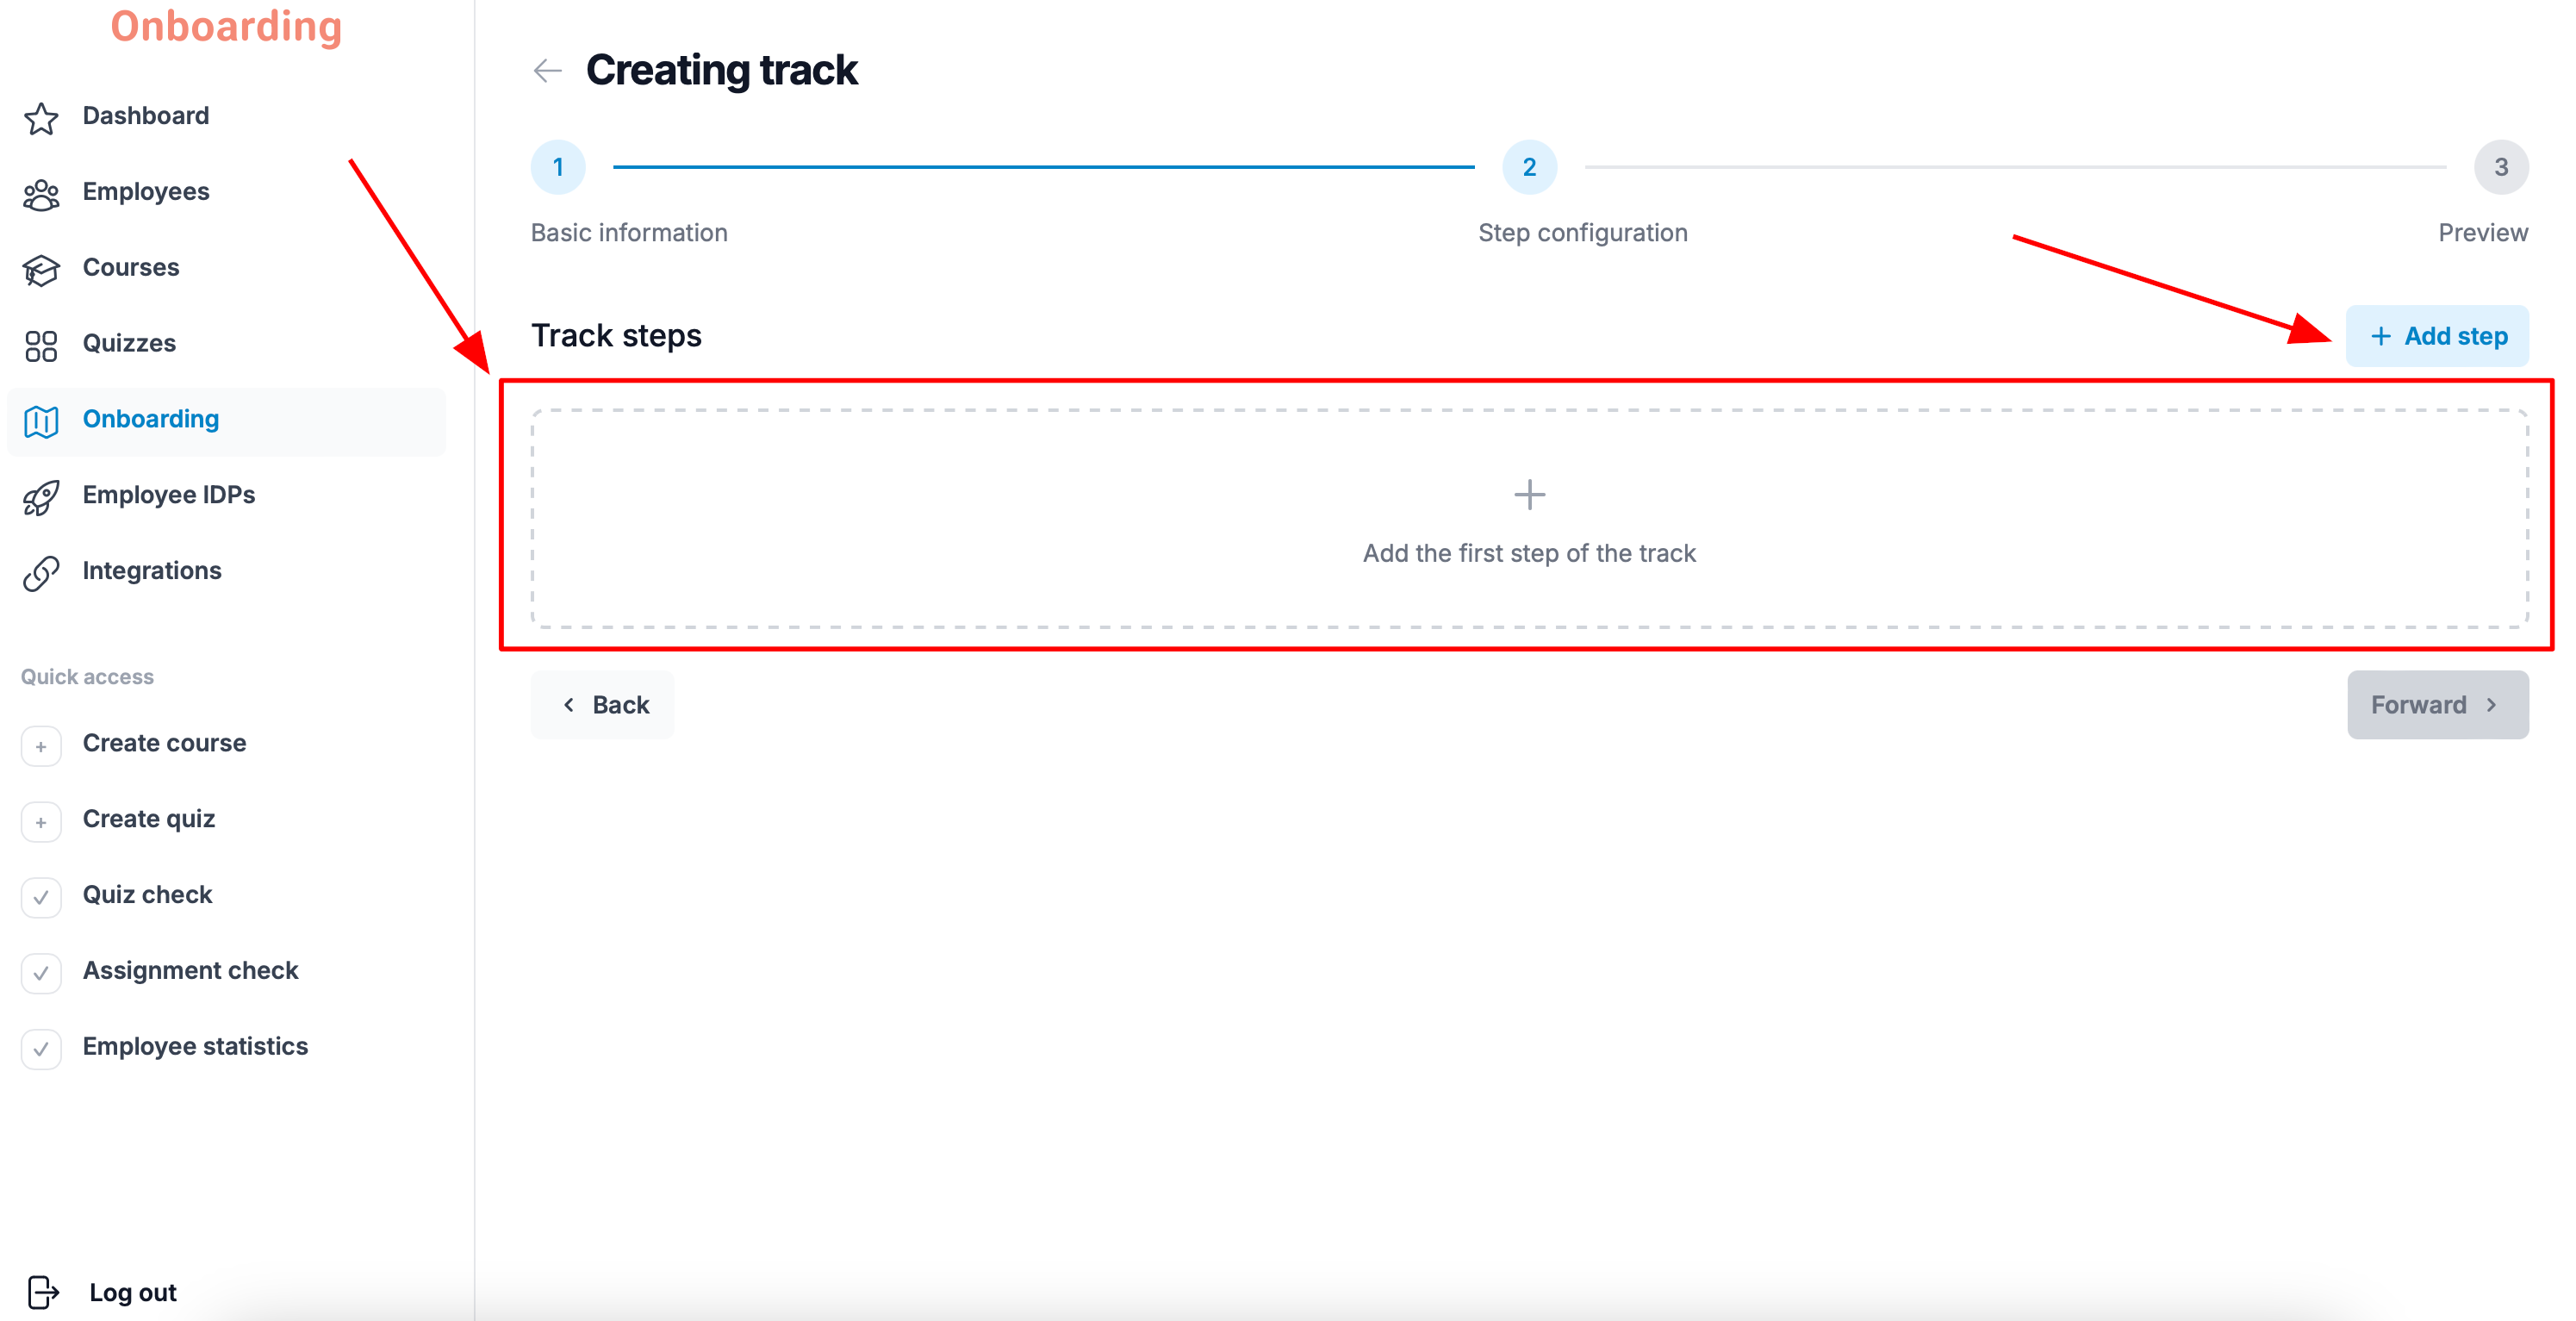
This is where you build the onboarding track itself.
A track step is a single stage of onboarding the employee needs to complete. A step can be either a course or a mentor meeting.
To add the first step, click «Add the first step of the track» in the middle of the page, or «+ Add step» in the top-right corner.
Adding a course to an onboarding track
To add a course, set the «Step type» field to «Course».
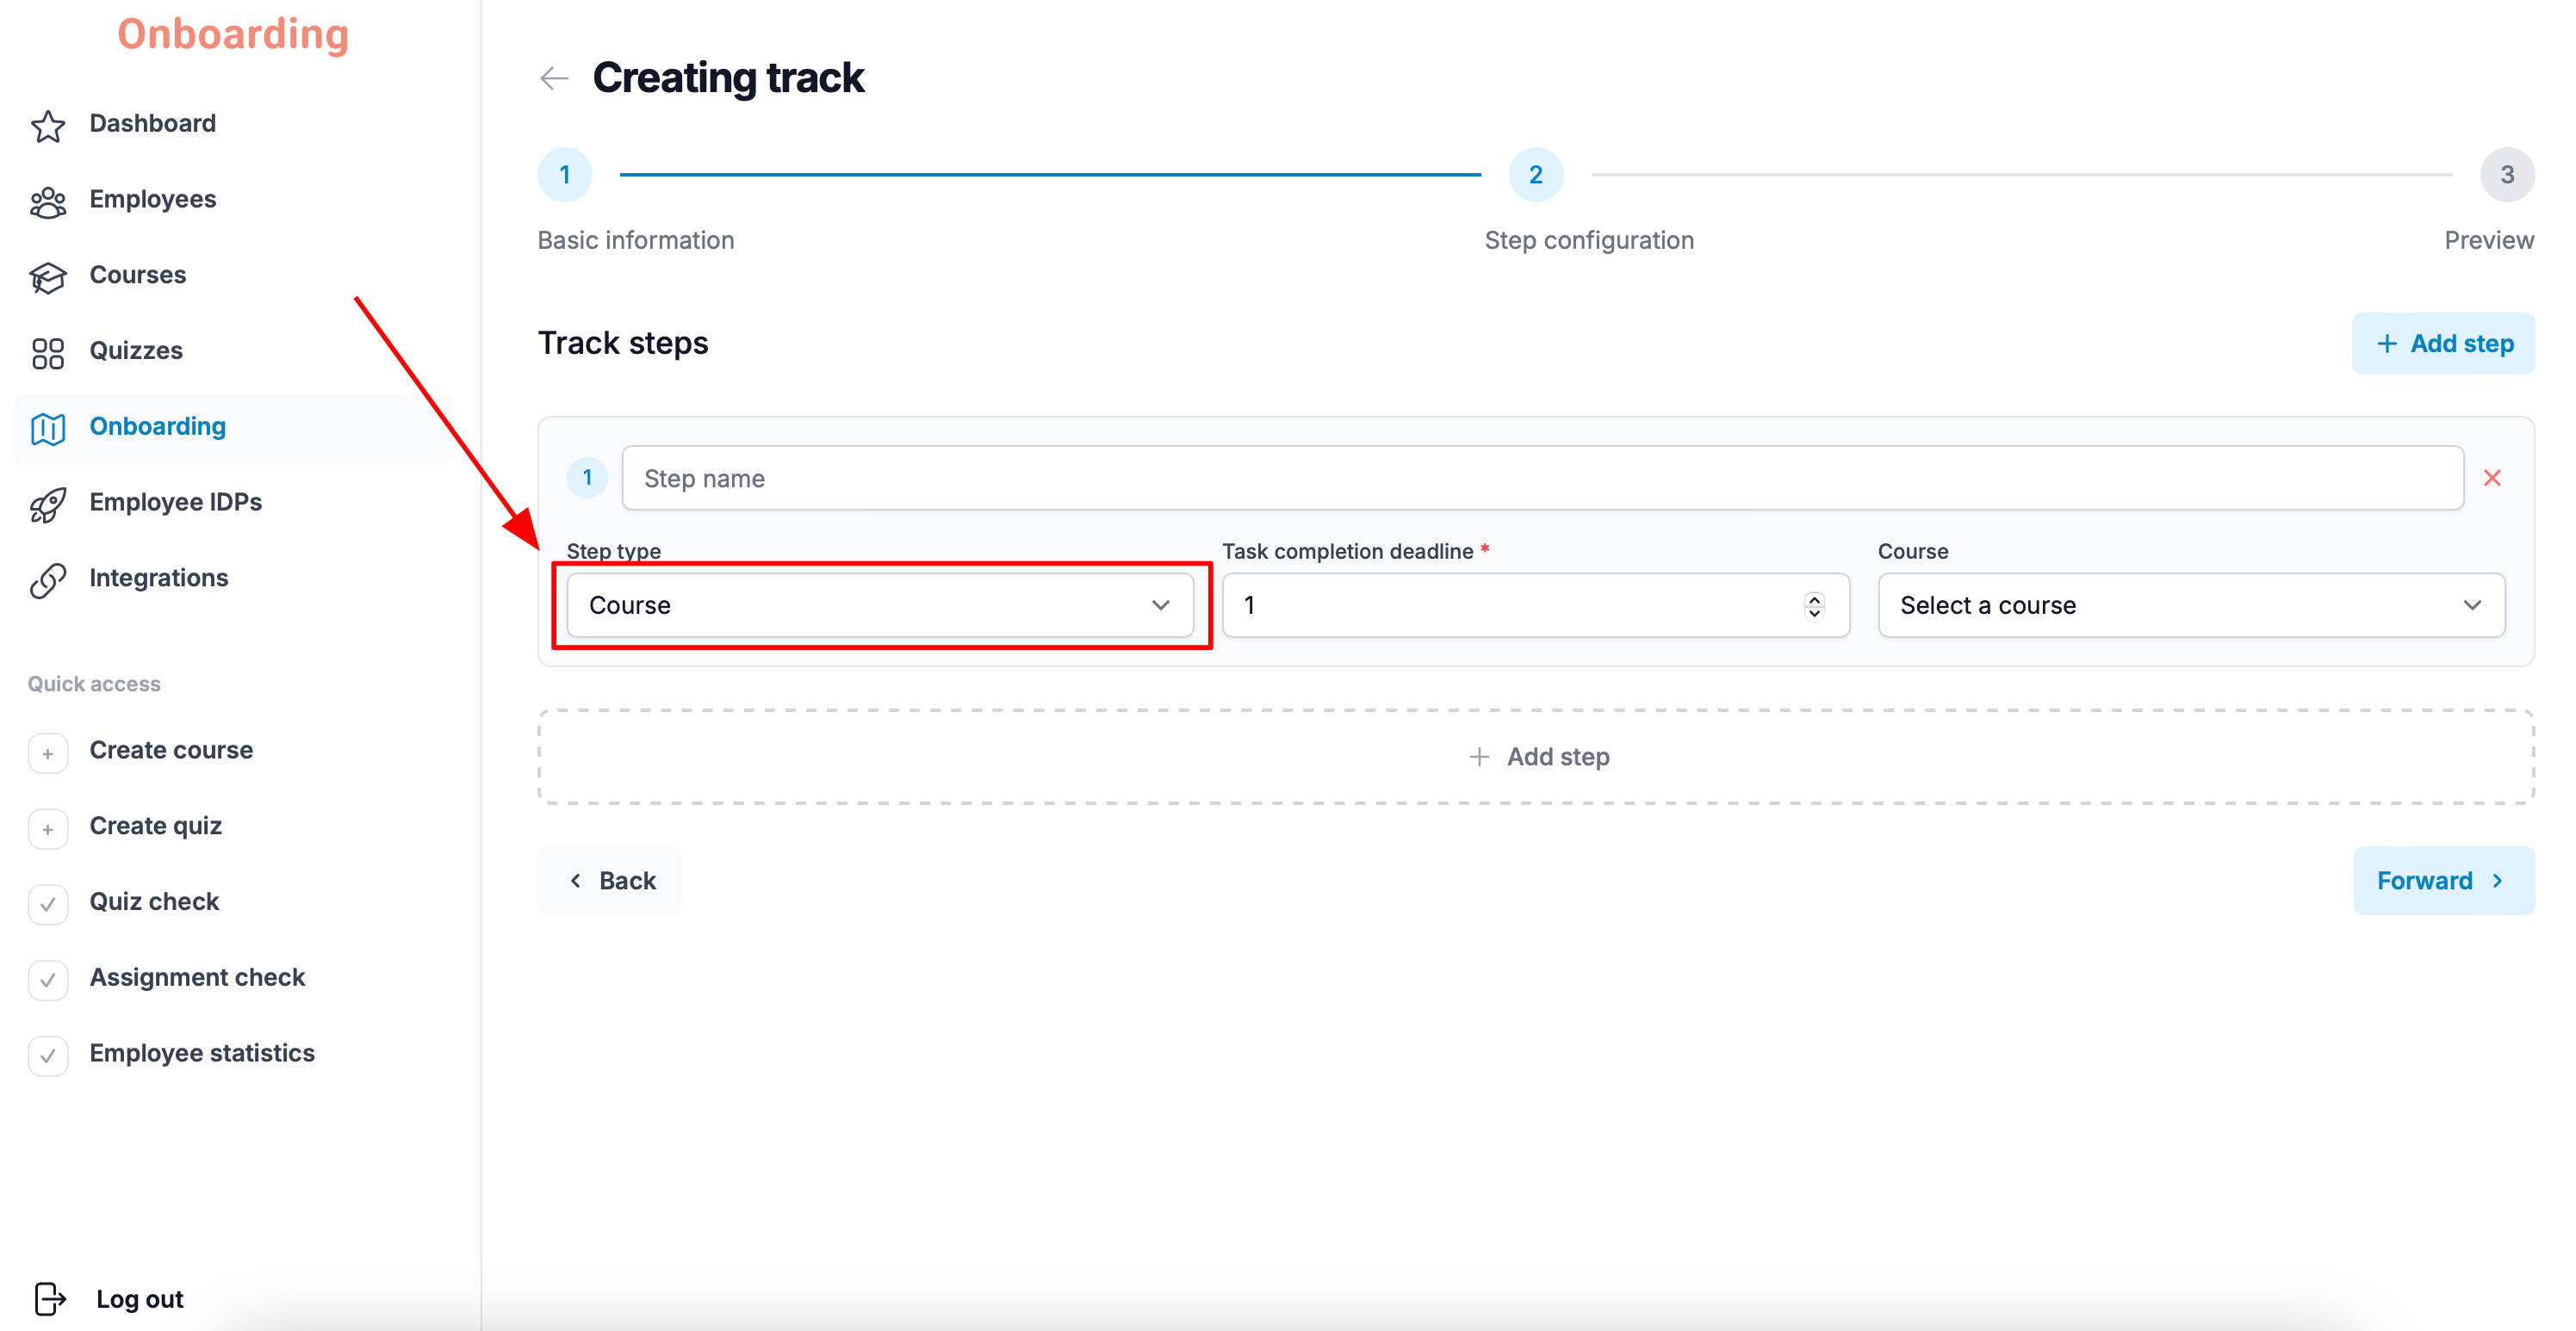
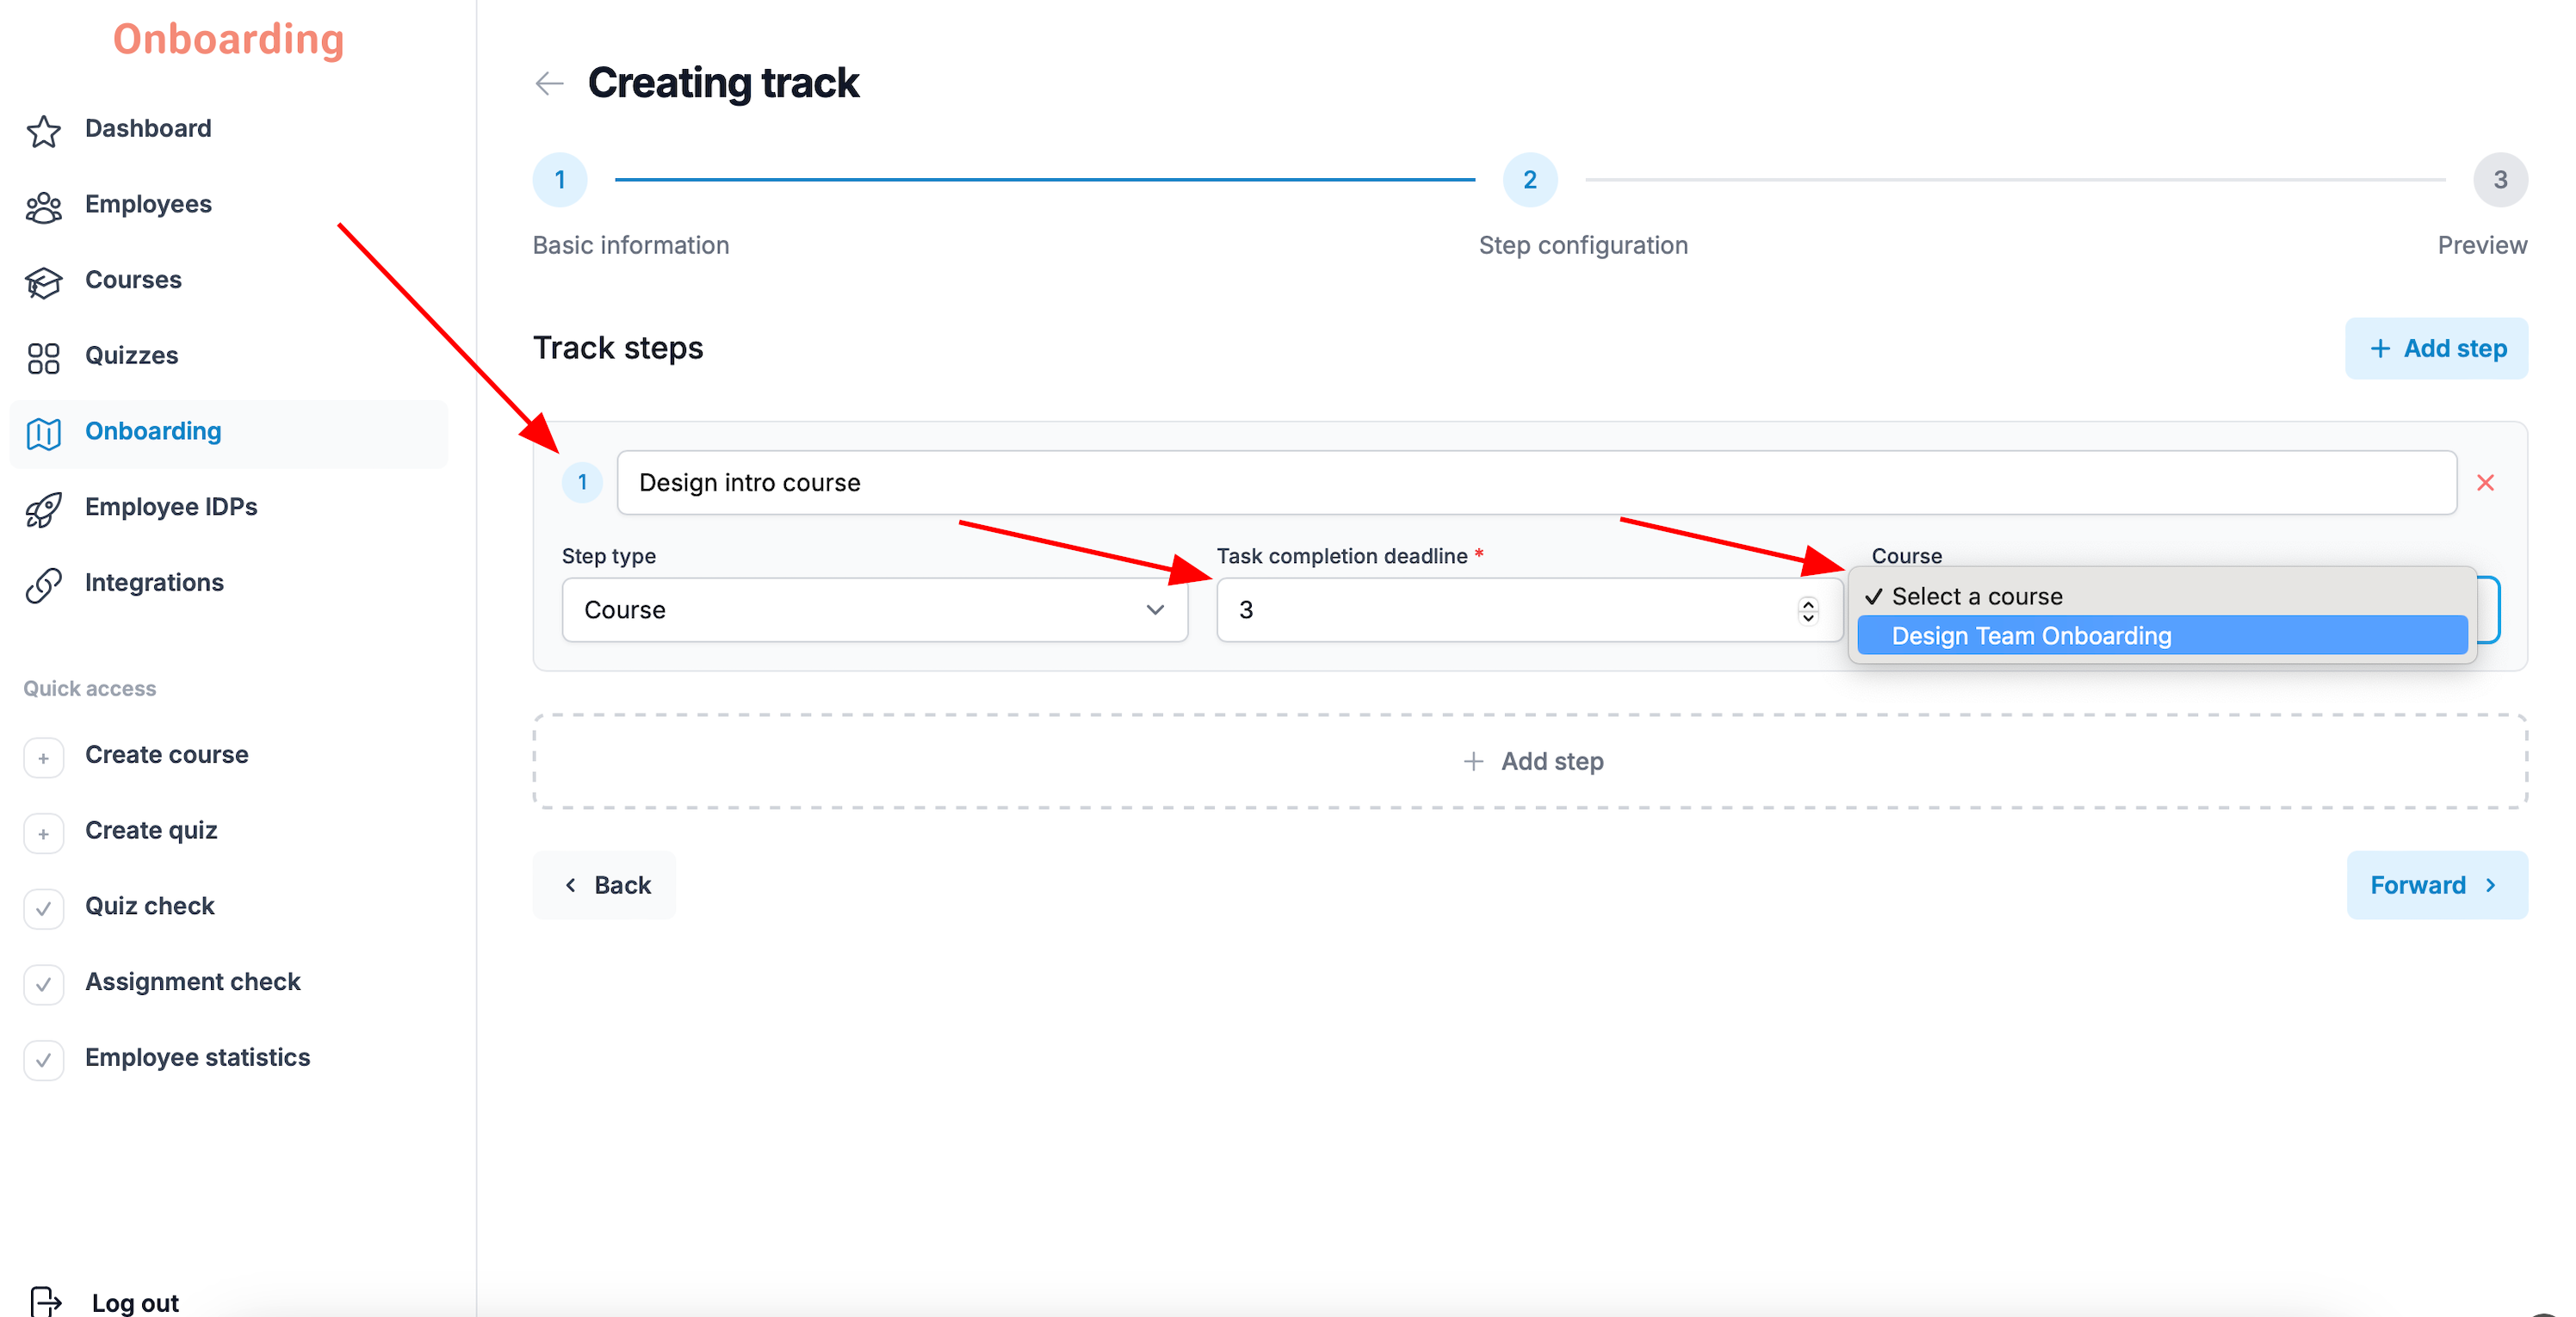
Then fill in the following fields:
- Step name – the name employees will see.
- Task completion deadline – the number of days allowed for finishing the course.
- Course – the course to include in the onboarding track.
Adding a mentor meeting to an onboarding track
To add a meeting, set the «Step type» field to «Meeting with mentor».
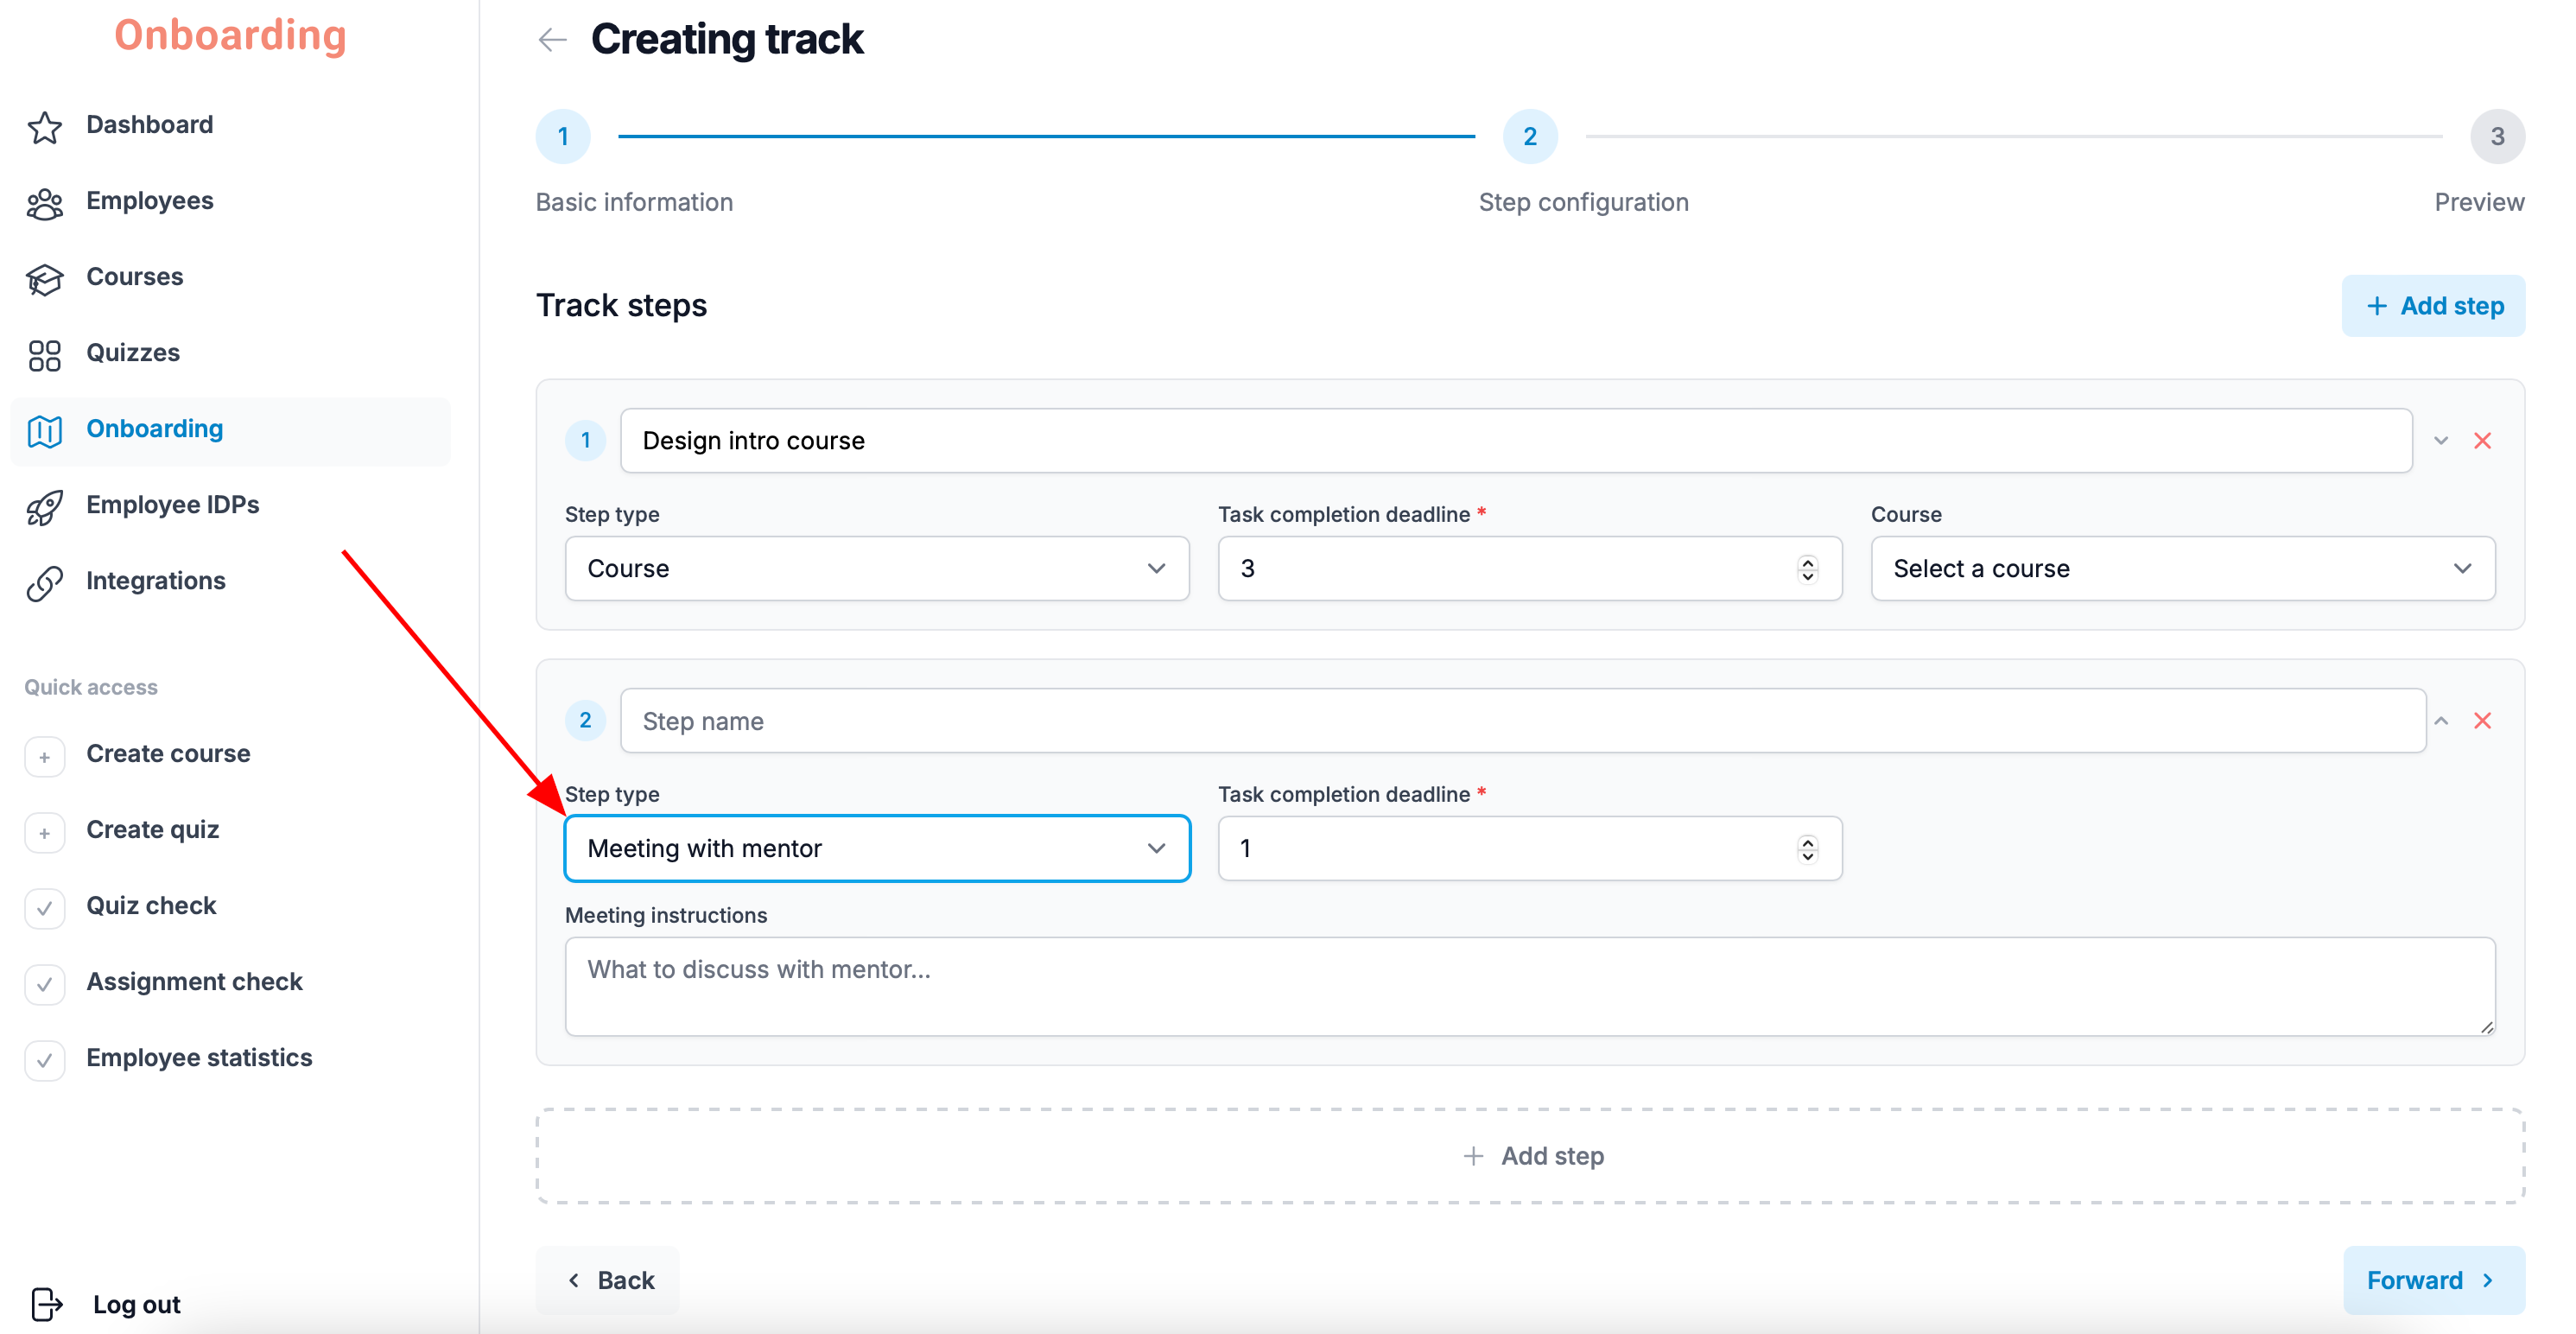
Then fill in the following fields:
- Step name – the topic or title of the meeting.
- Task completion deadline – the number of days within which the meeting should take place.
- Meeting instructions – a description of the meeting, preparation tips, or a list of questions to discuss with the mentor.
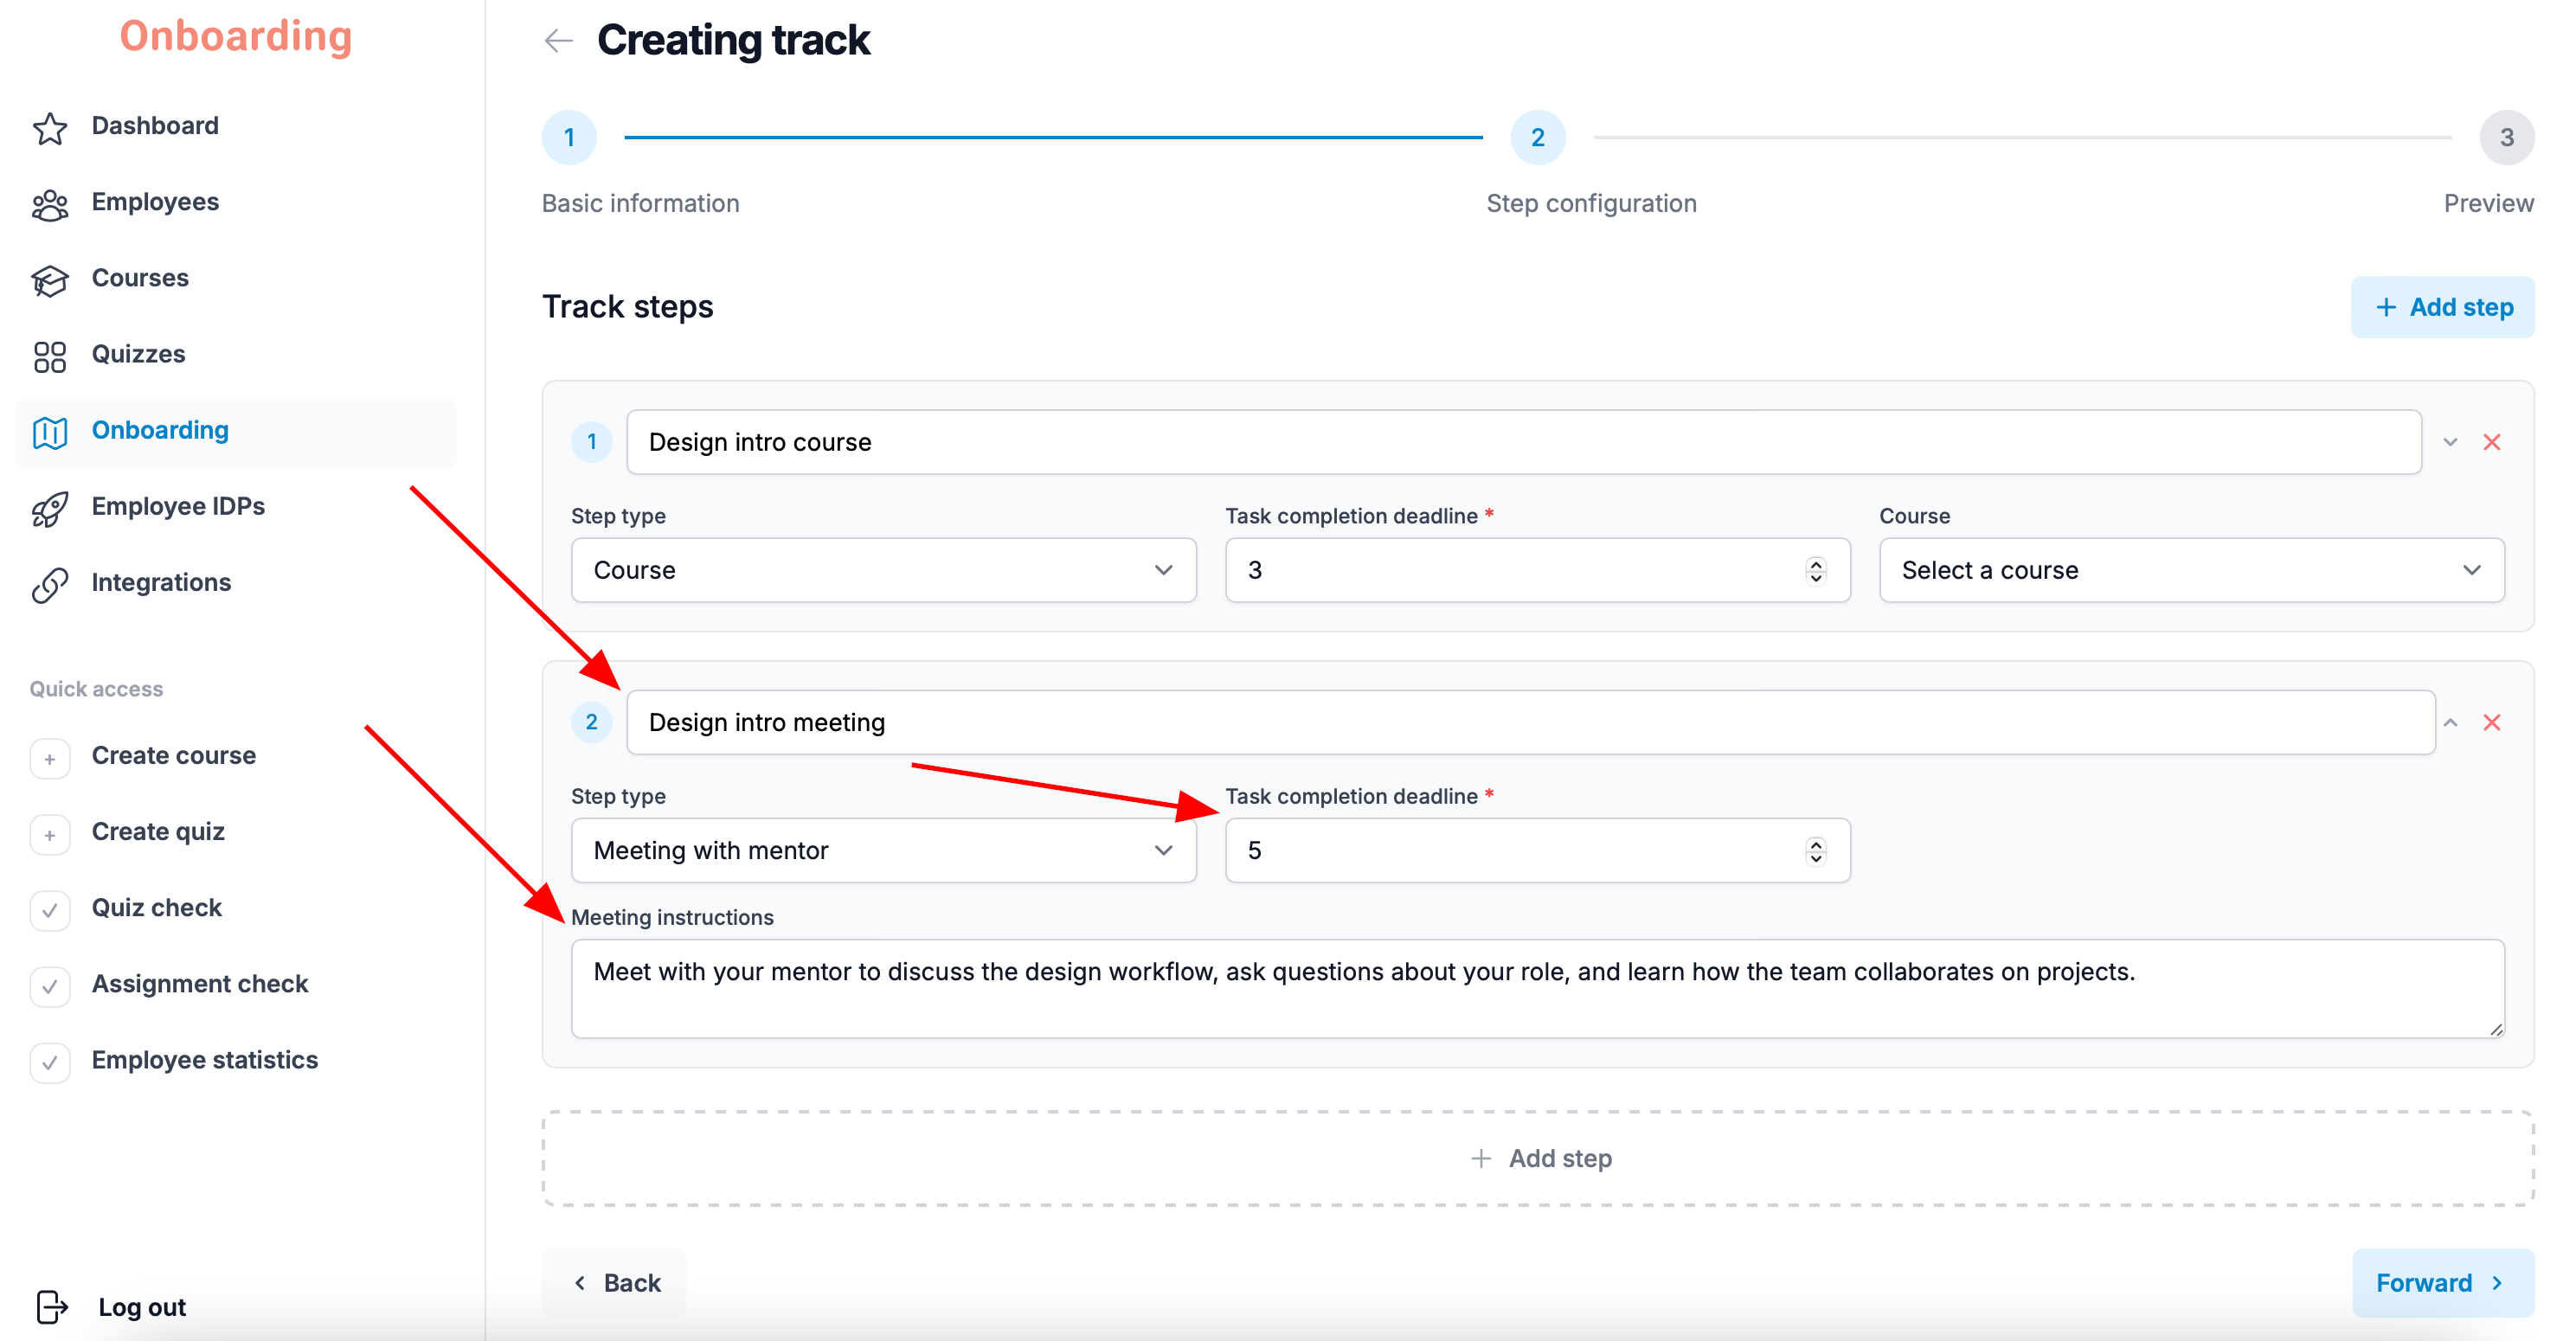
You can add any number of steps to a single onboarding track.
To delete a step, click the red delete icon in the top-right corner of that step.
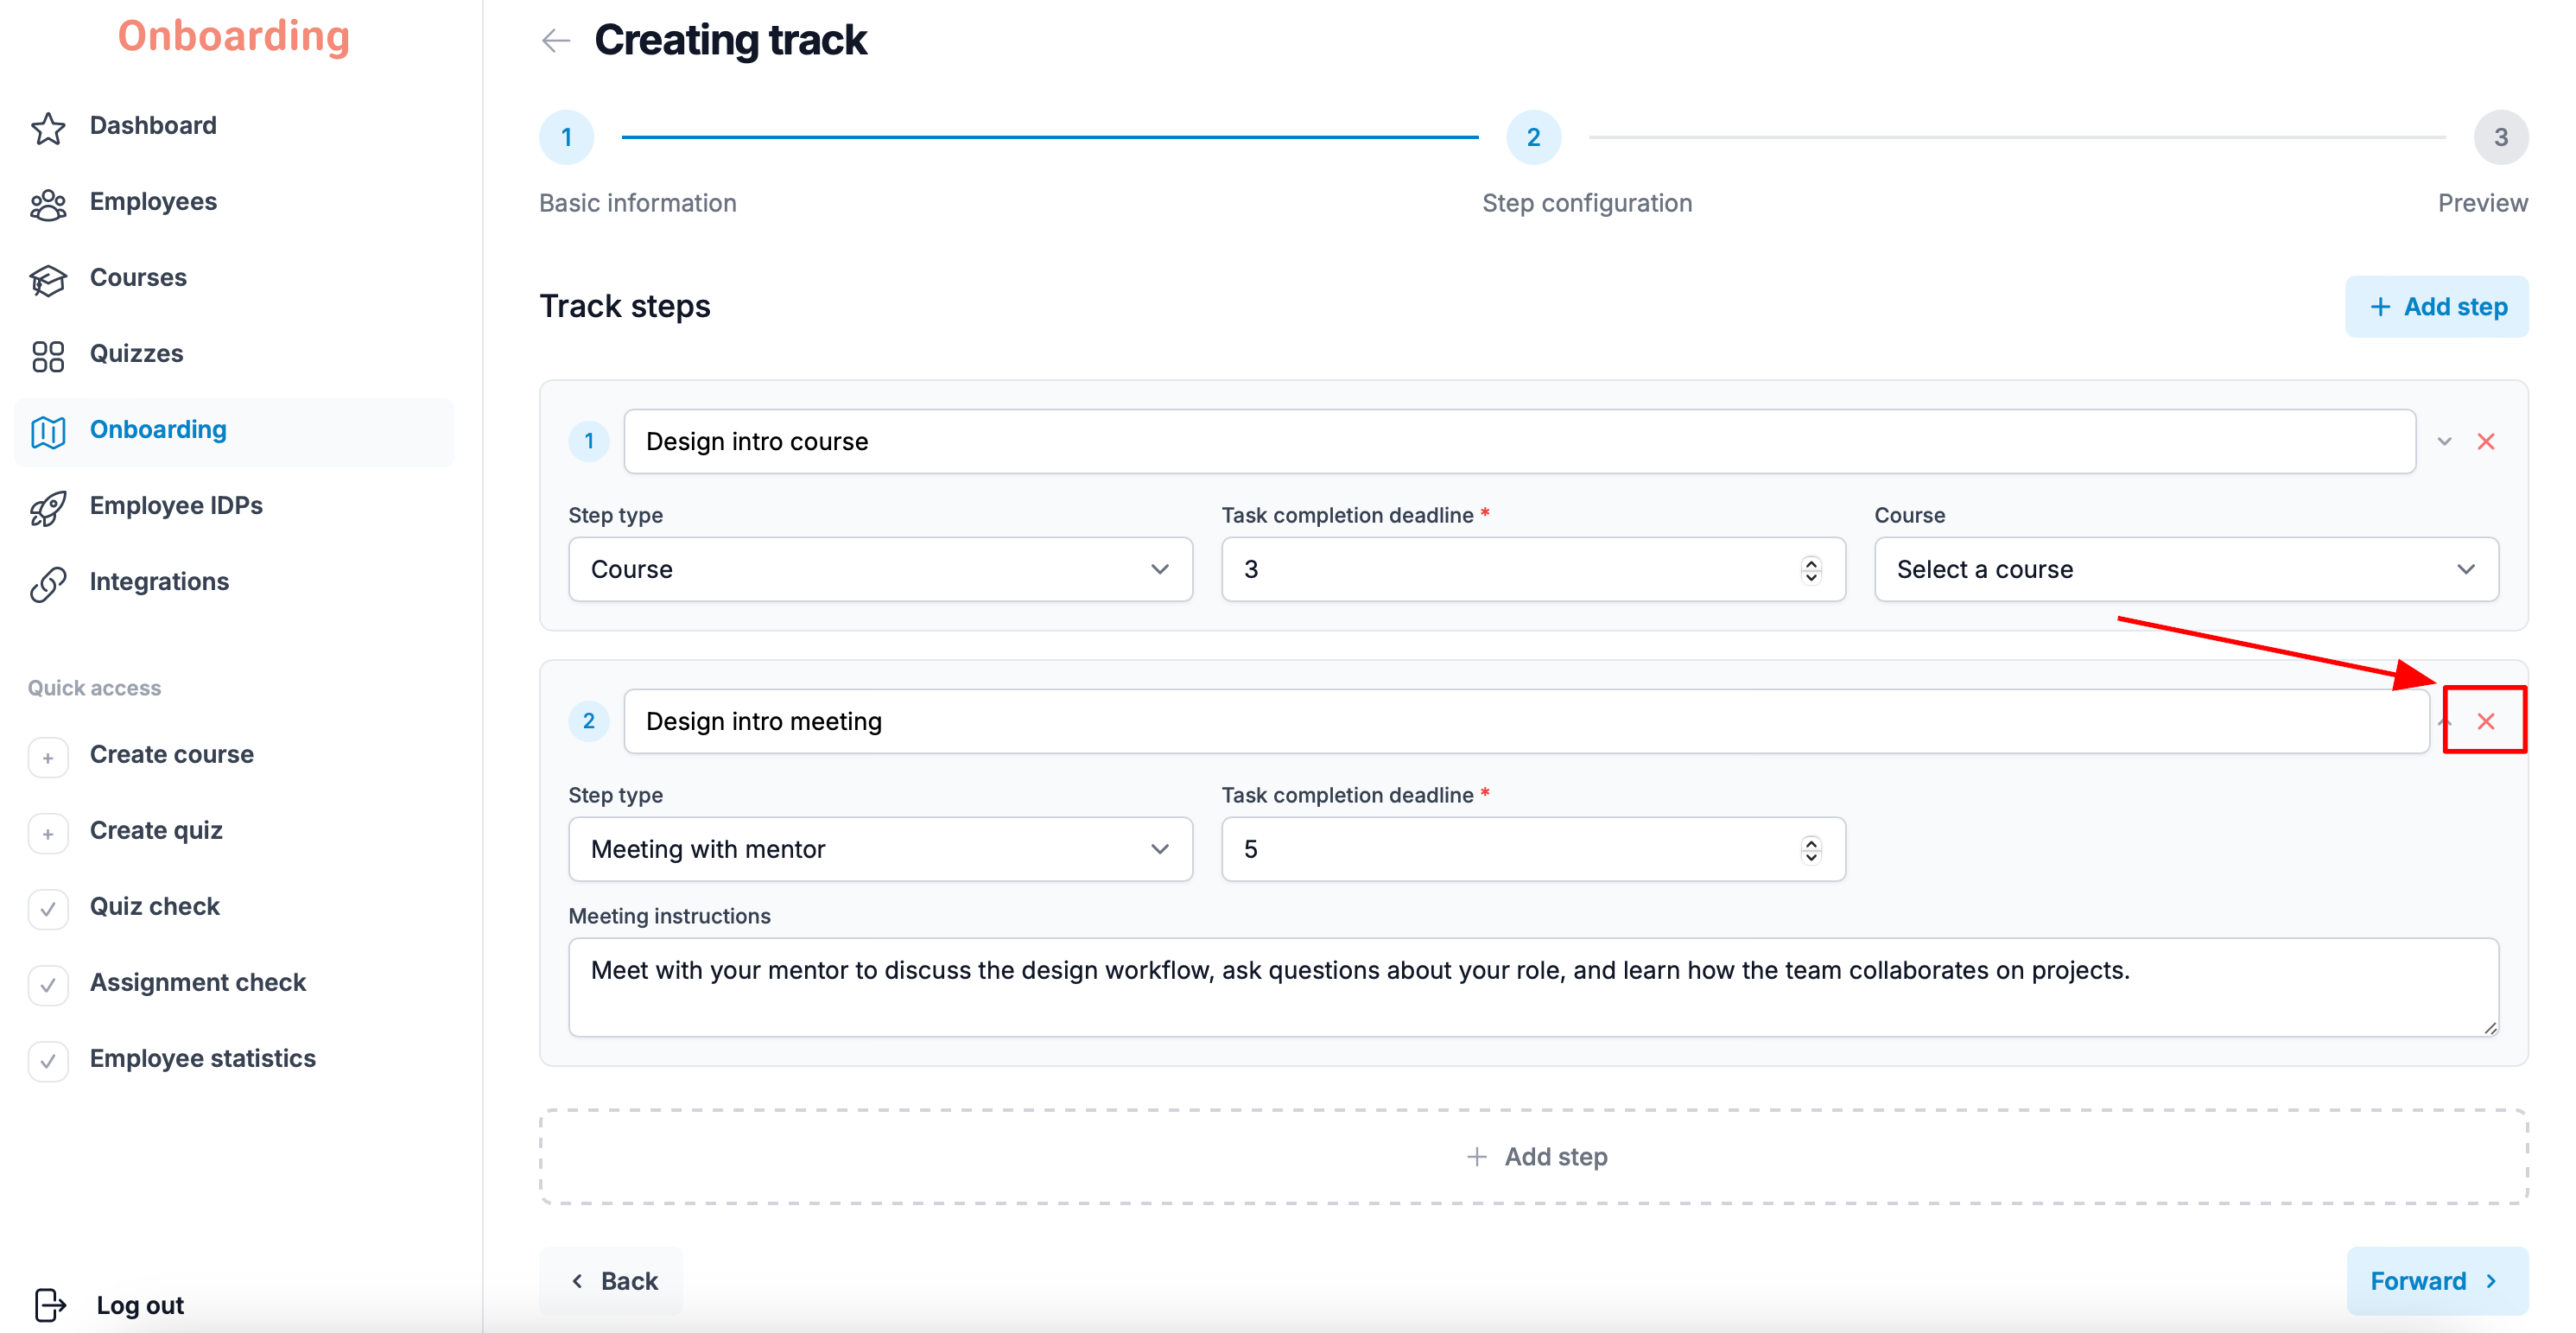
Once you've added all the steps you need, click «Forward».
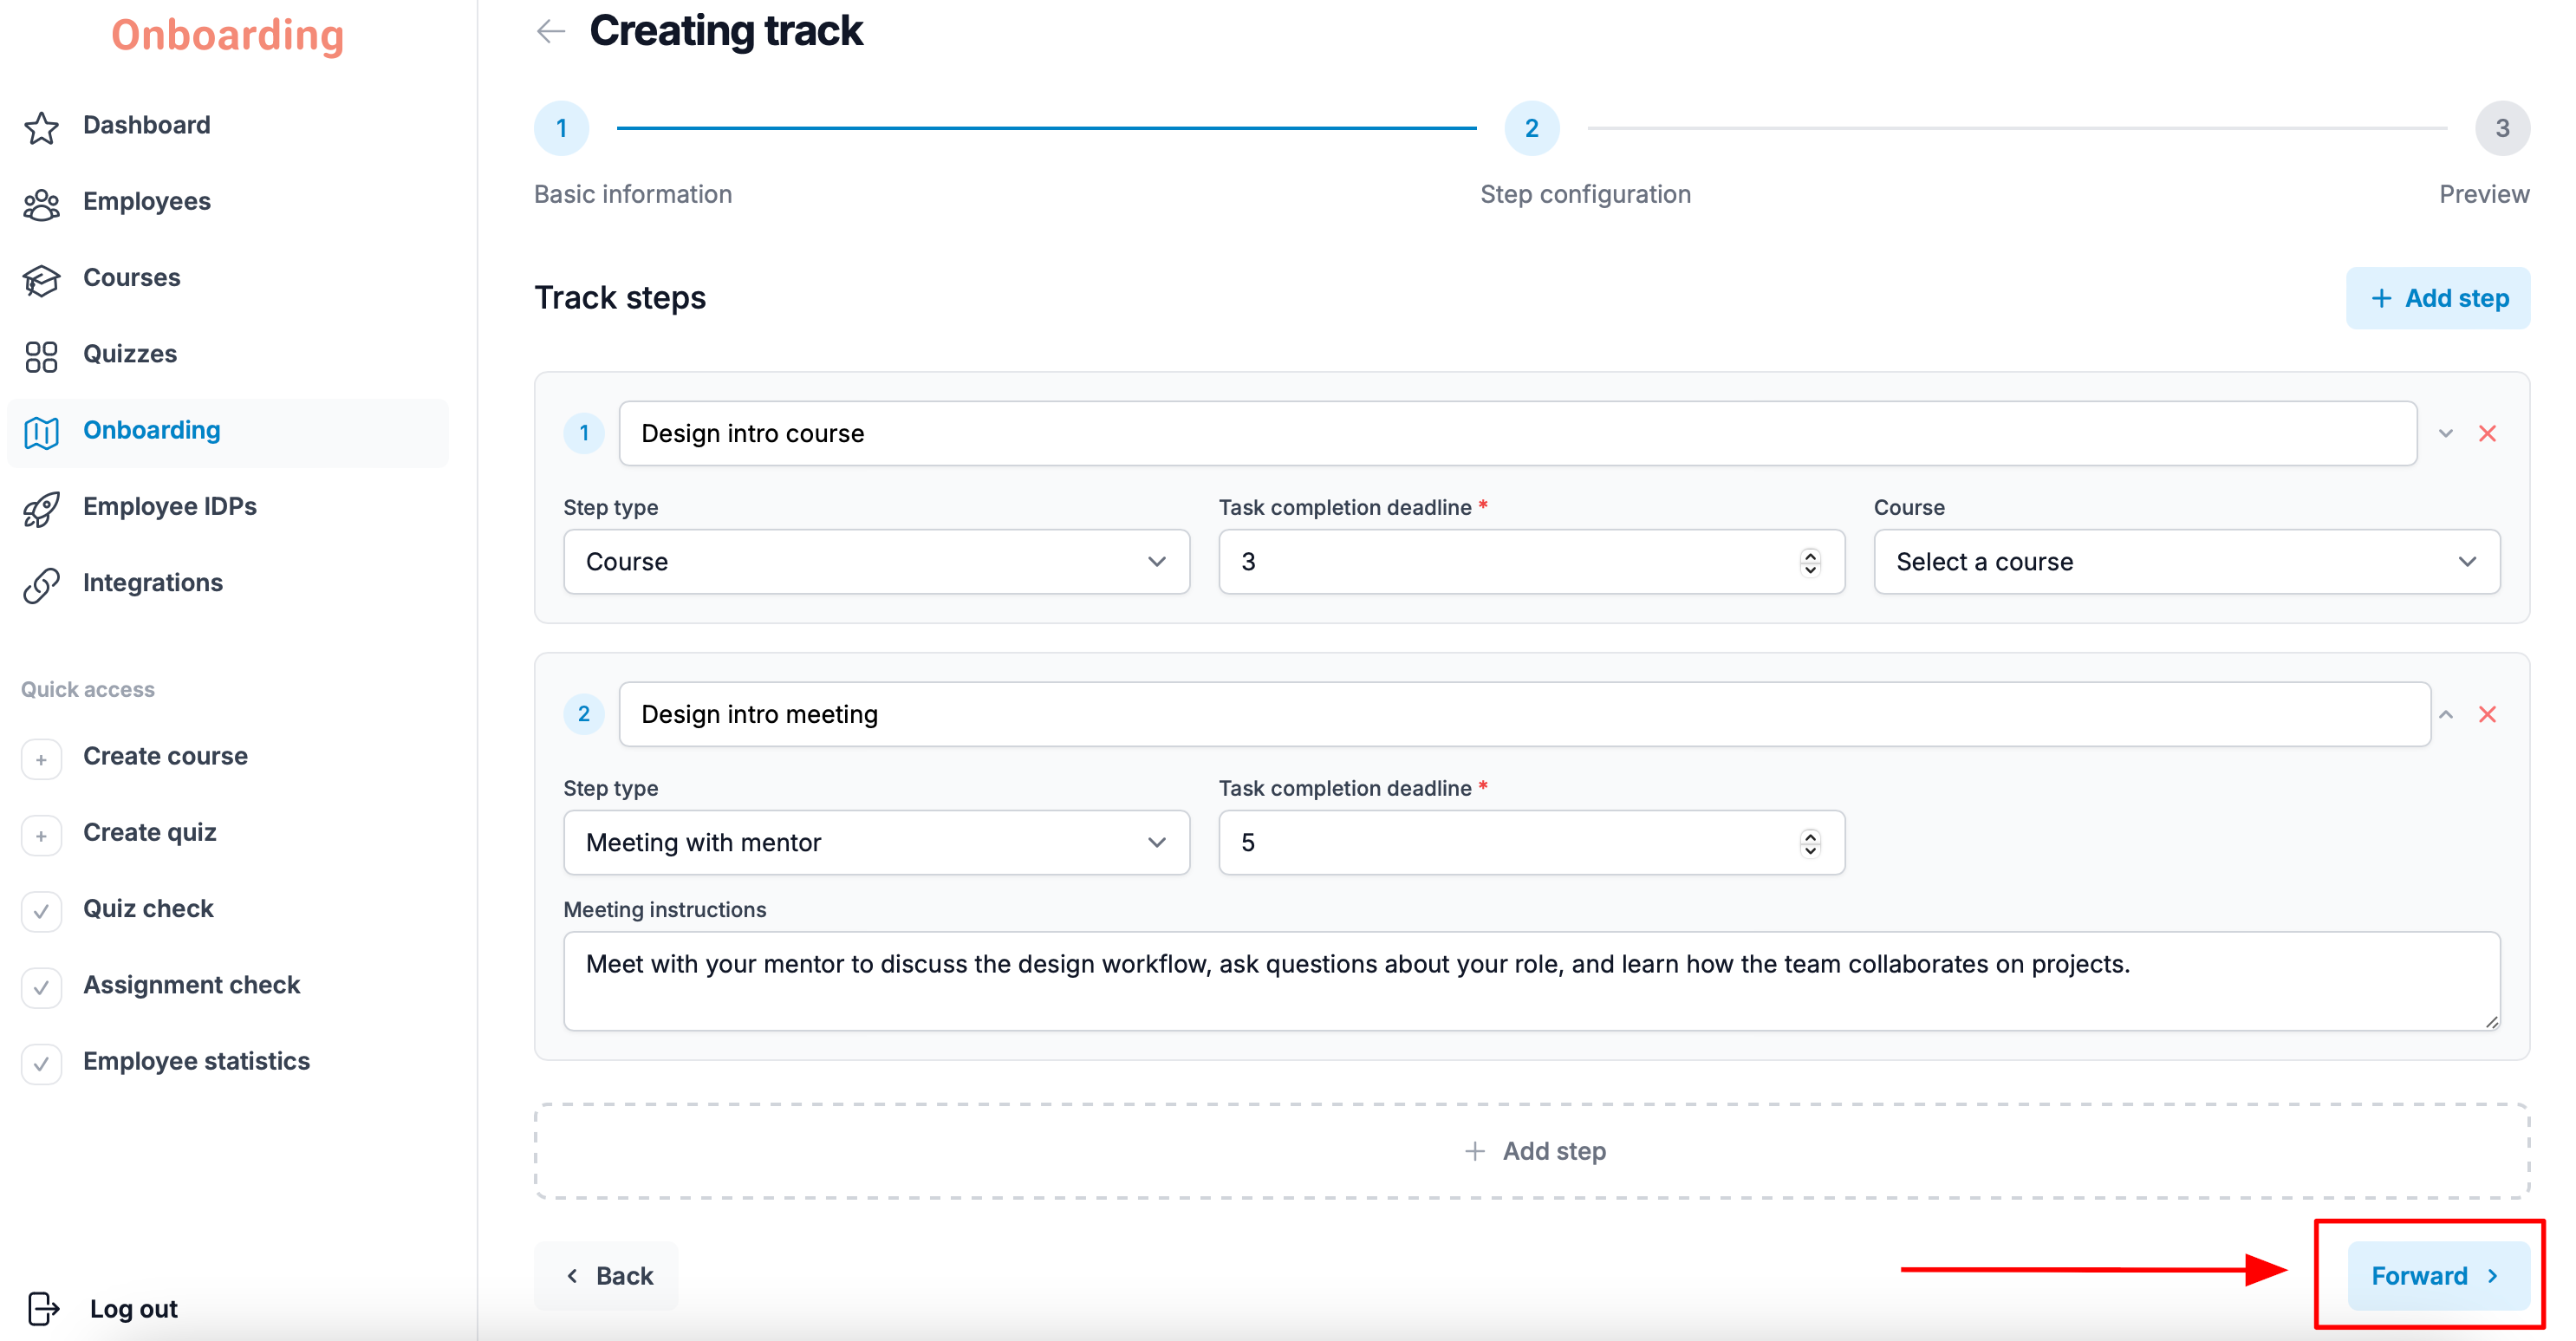
Step 3: Track preview
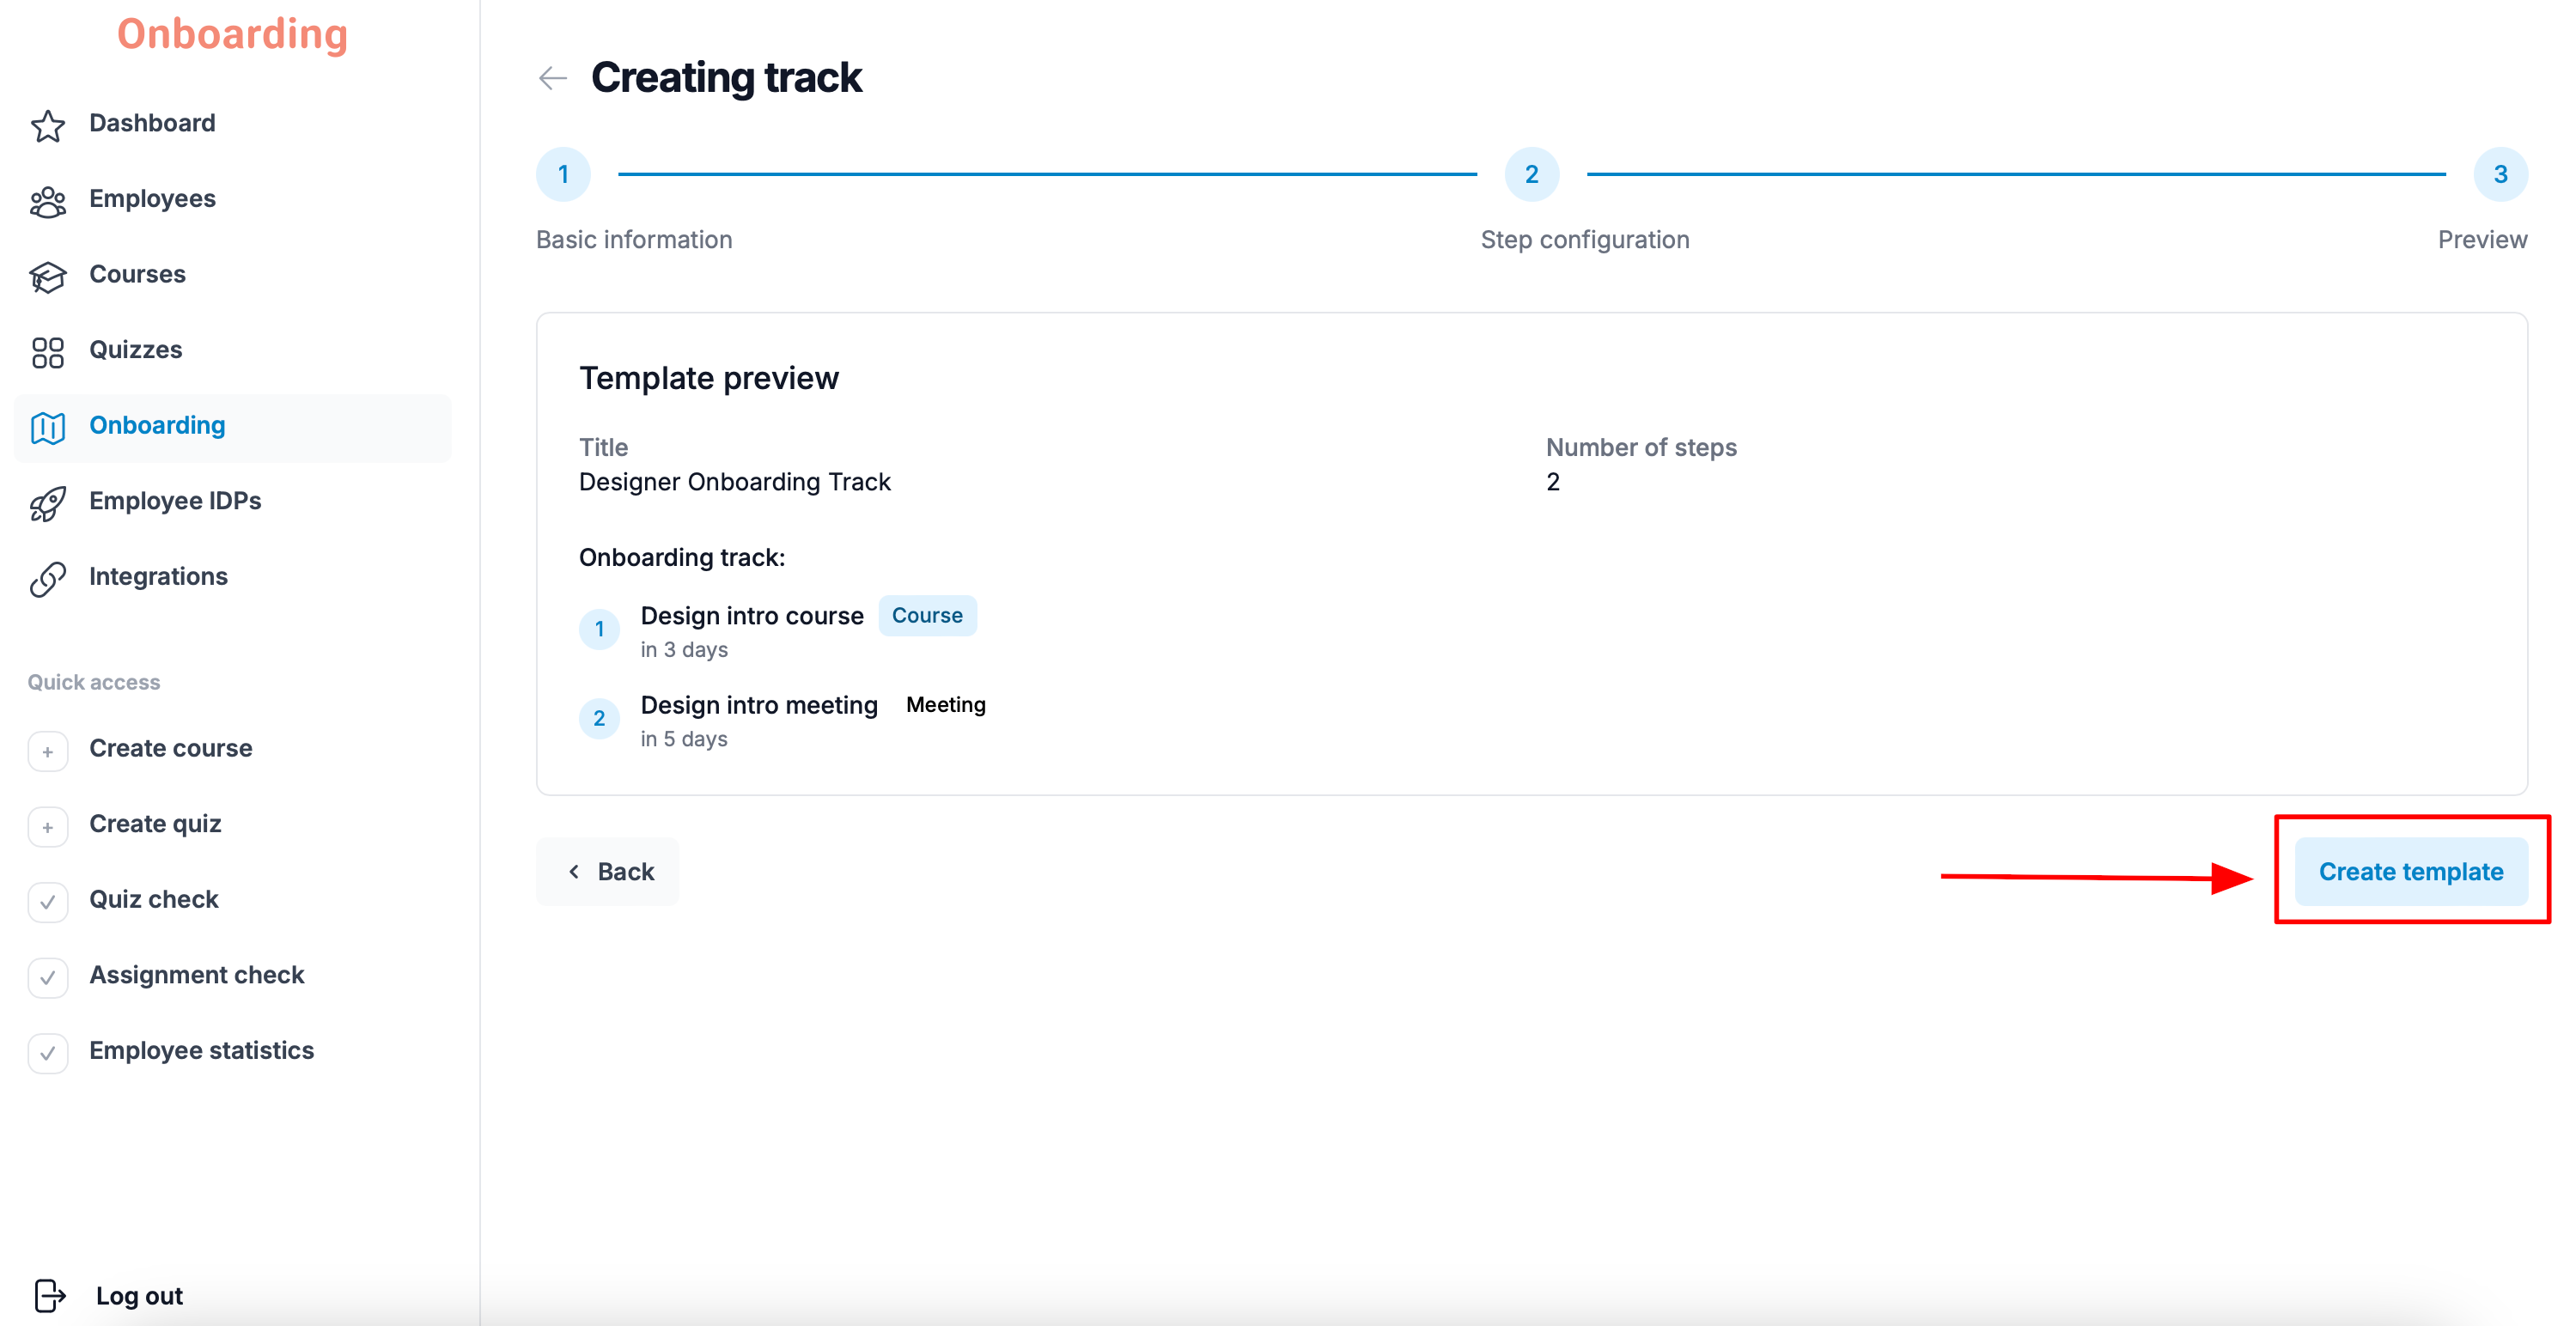
This step shows a preview of the onboarding track. Use it to double-check everything before creating the template.
The preview shows:
- the track's title;
- the onboarding steps;
- the type of each step;
- completion deadlines;
- the total number of steps.
Editing isn't available in the preview. If you need to make changes, go back to the previous step.
If everything looks right, click «Create template».
The onboarding track has been created and assigned to the employees of the selected group 🎉
The assigned onboarding track will appear on the employee’s dashboard in their personal account and will be highlighted accordingly.
To see the details of a track, click «View more» on its card in the «Onboarding» section.
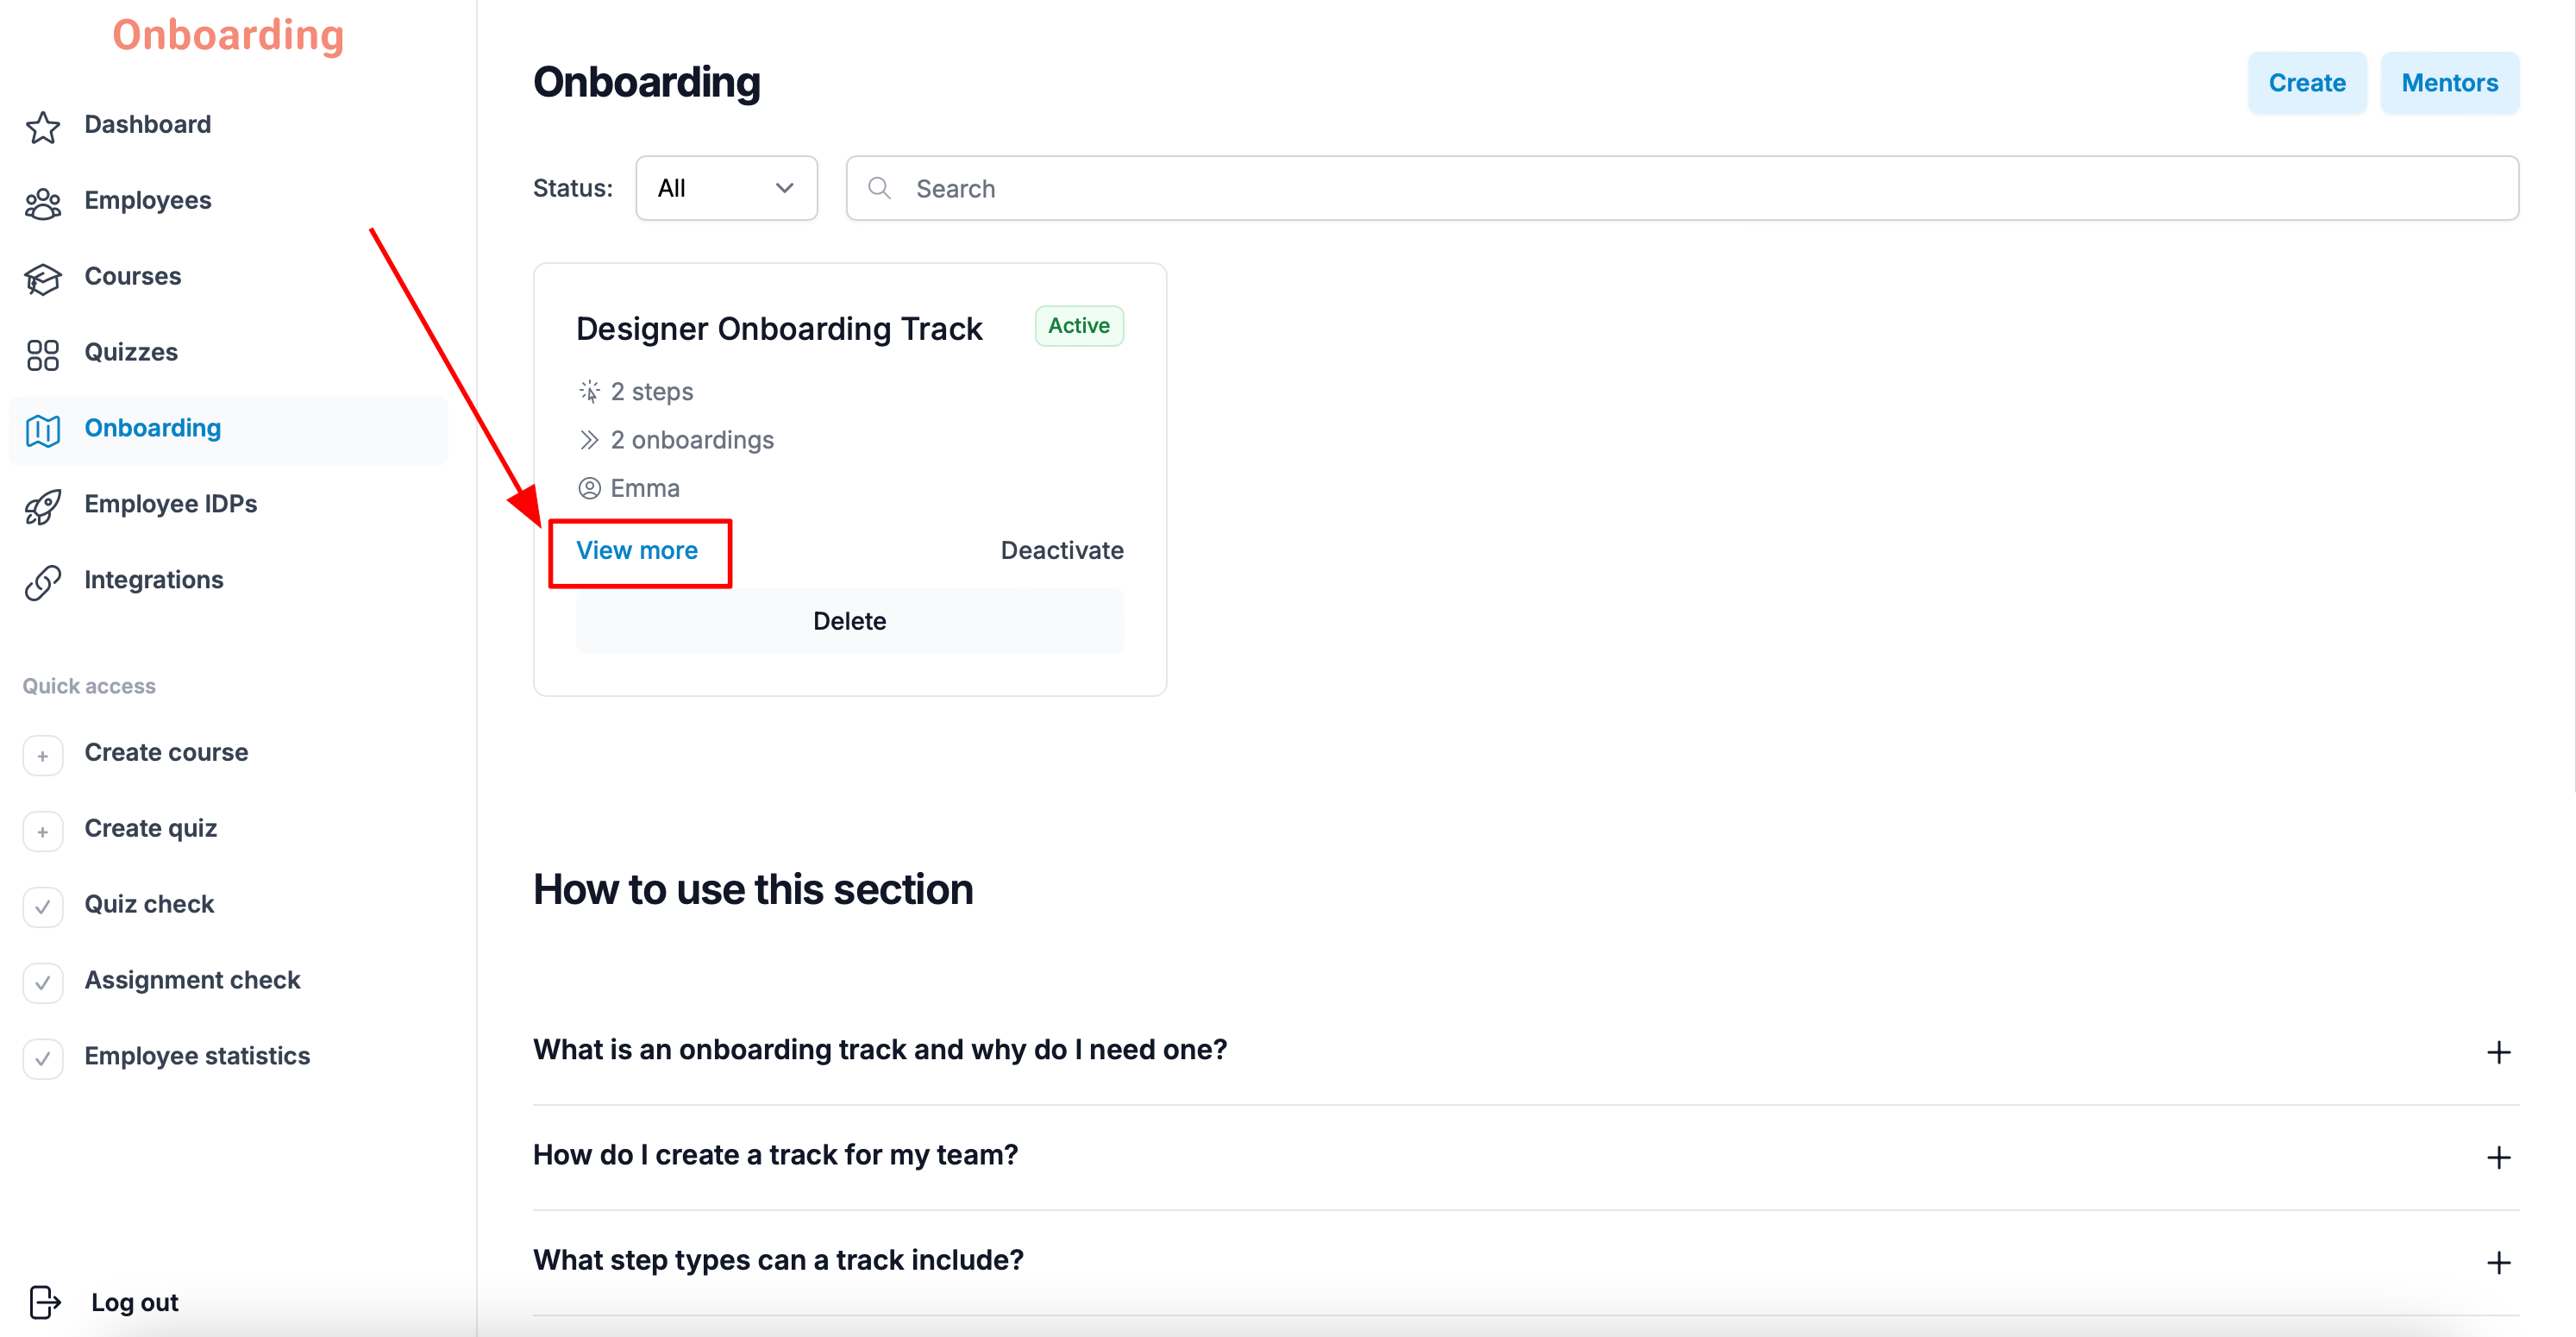
The track page shows its key information, including the steps, the assigned mentor, how to contact them, the employee group, and the track's current status.
If a group has an active track, it starts automatically for any new employee added to the group after the track was created. They're assigned a mentor, and a plan is generated with due dates for every step.
Employees can complete track steps in any order they like. Going through the steps in sequence isn't mandatory, but for the most effective onboarding we recommend following the order set in the track.