Working with individual development plans on the platform revolves around a few key elements. Each one covers its own part of planning, tracking, and developing employees.
In the IDP section you'll come across the following elements:
- IDP Stages – the successive phases an employee moves through in their development plan. Stages help structure the development process and track the current status of an IDP.
- IDP Kanban board – a visual overview of all IDPs by stage. It lets you quickly gauge where employees stand and follow the progress of their development plans.
- IDP Templates – pre-built development plans you can reuse whenever you create new IDPs for employees.
- Budget items – categories of expenses related to employee development, used to plan and track spending within an IDP.
IDP Stages
To view and manage the existing IDP stages, open the «Employee IDPs» section and click the «IDP Stages» block on the main page.
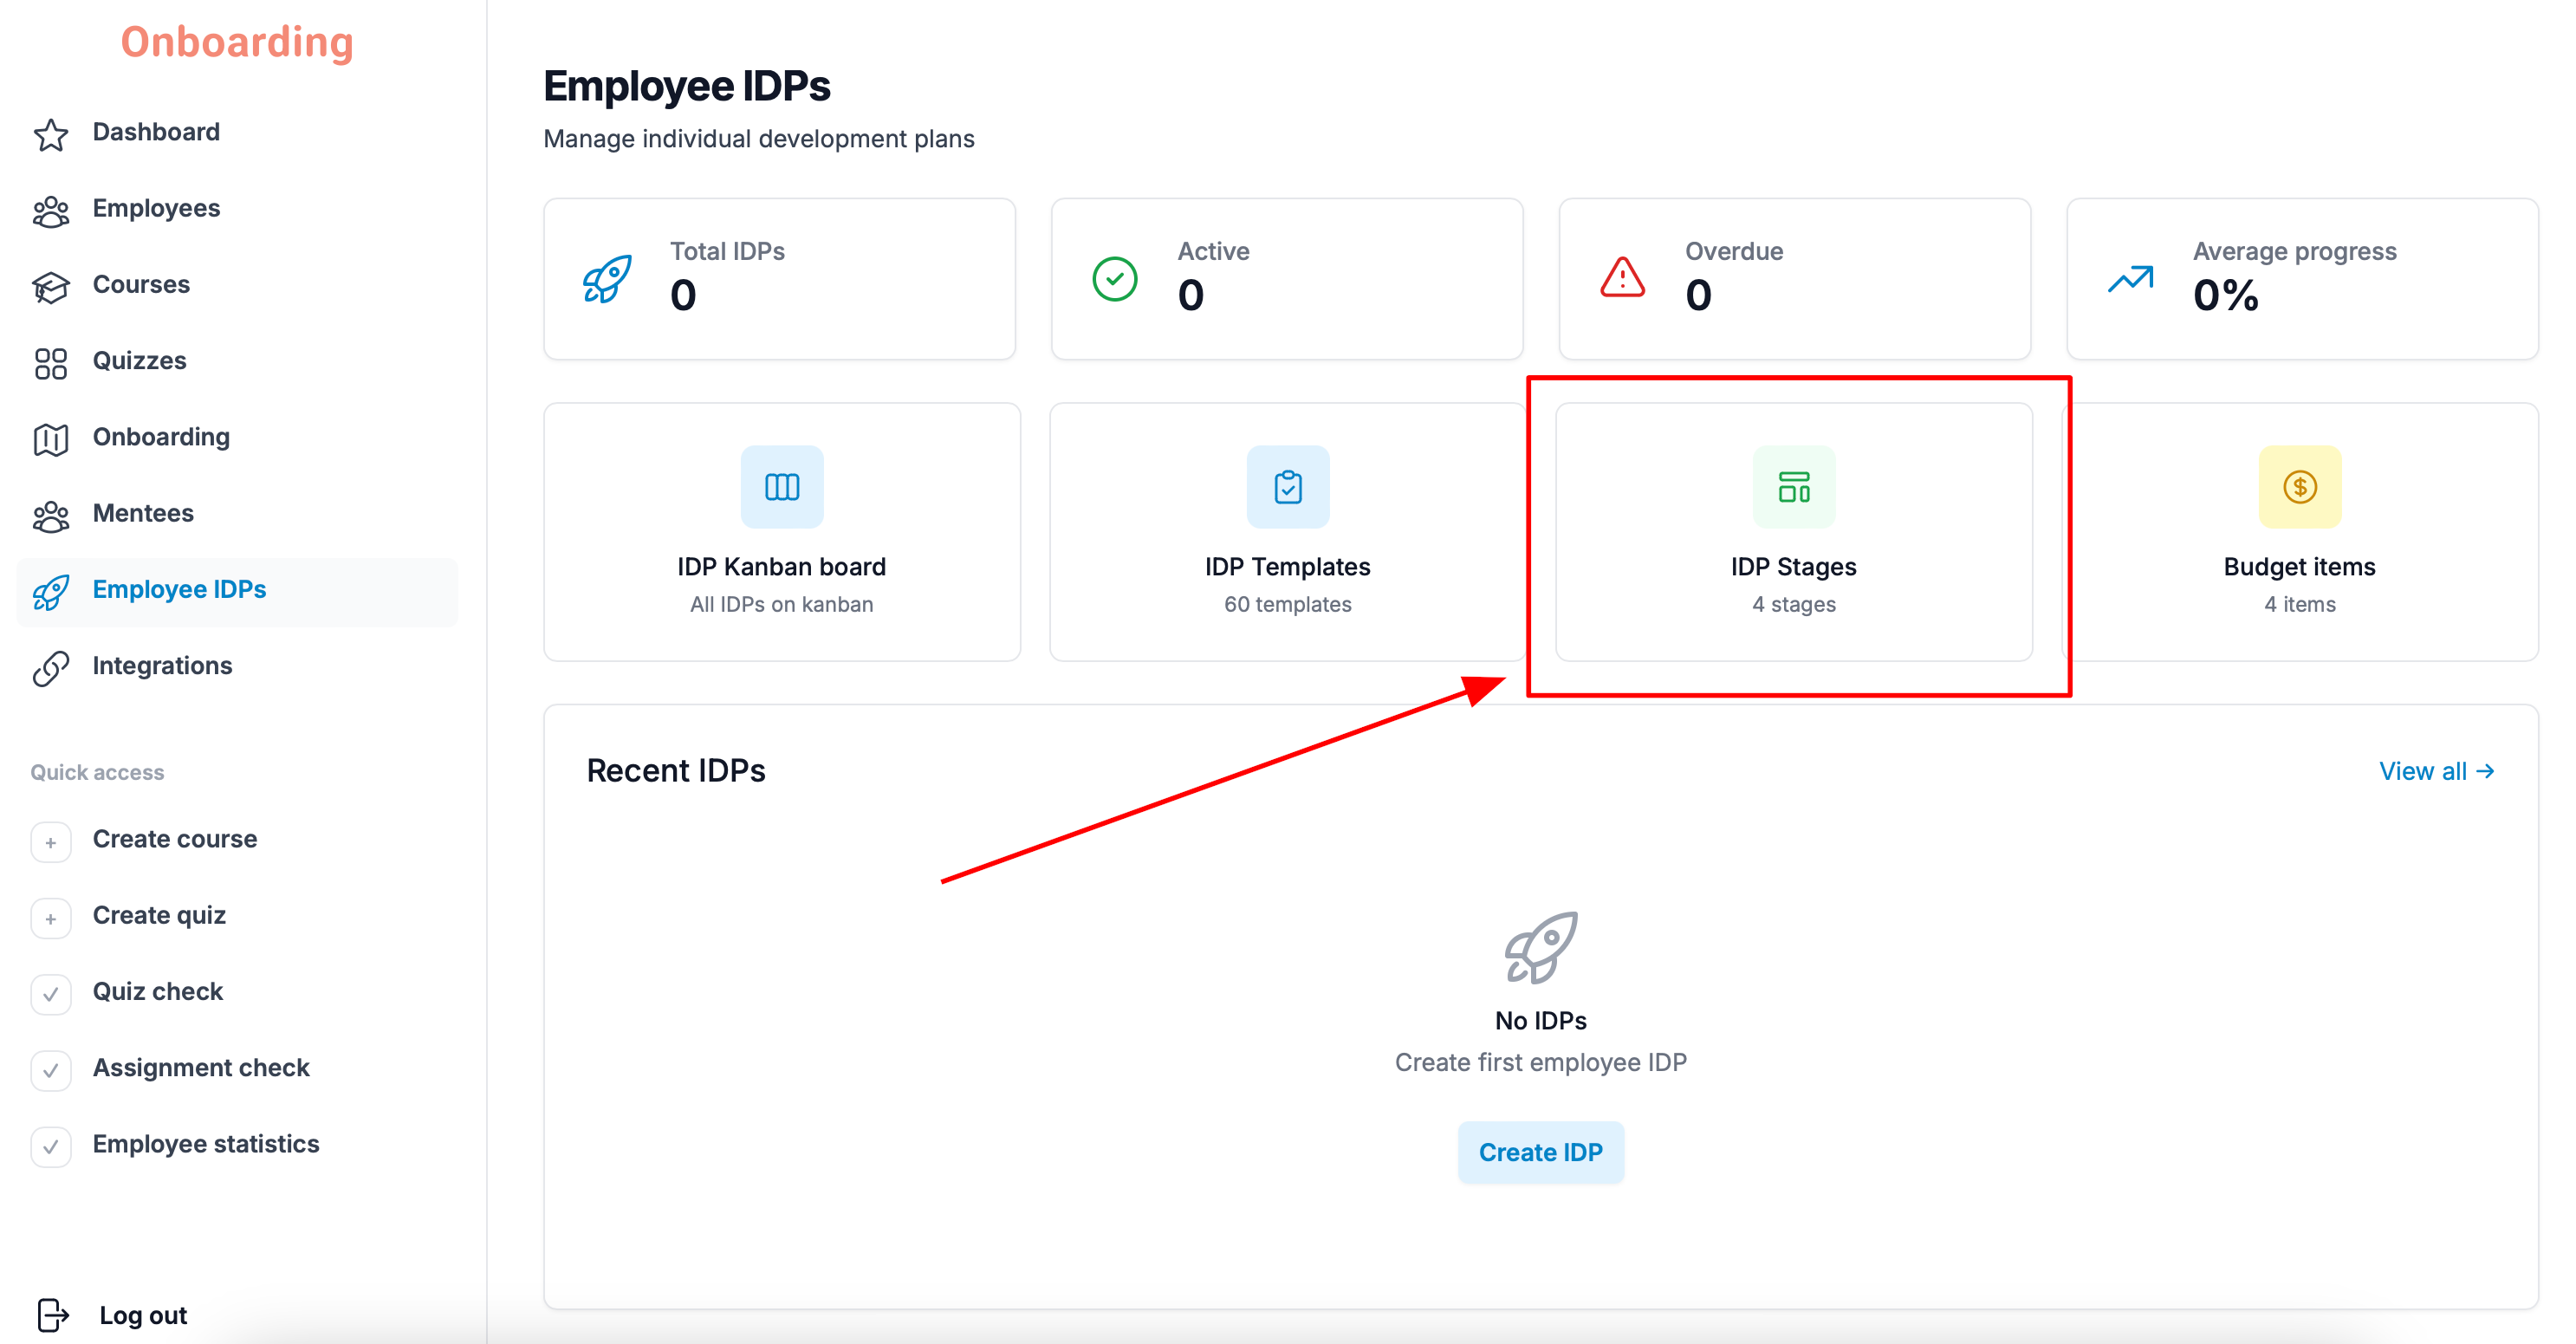
The stage management page opens.
The platform comes with the following stages by default:
- Onboarding;
- Training;
- Practice;
- Completed.
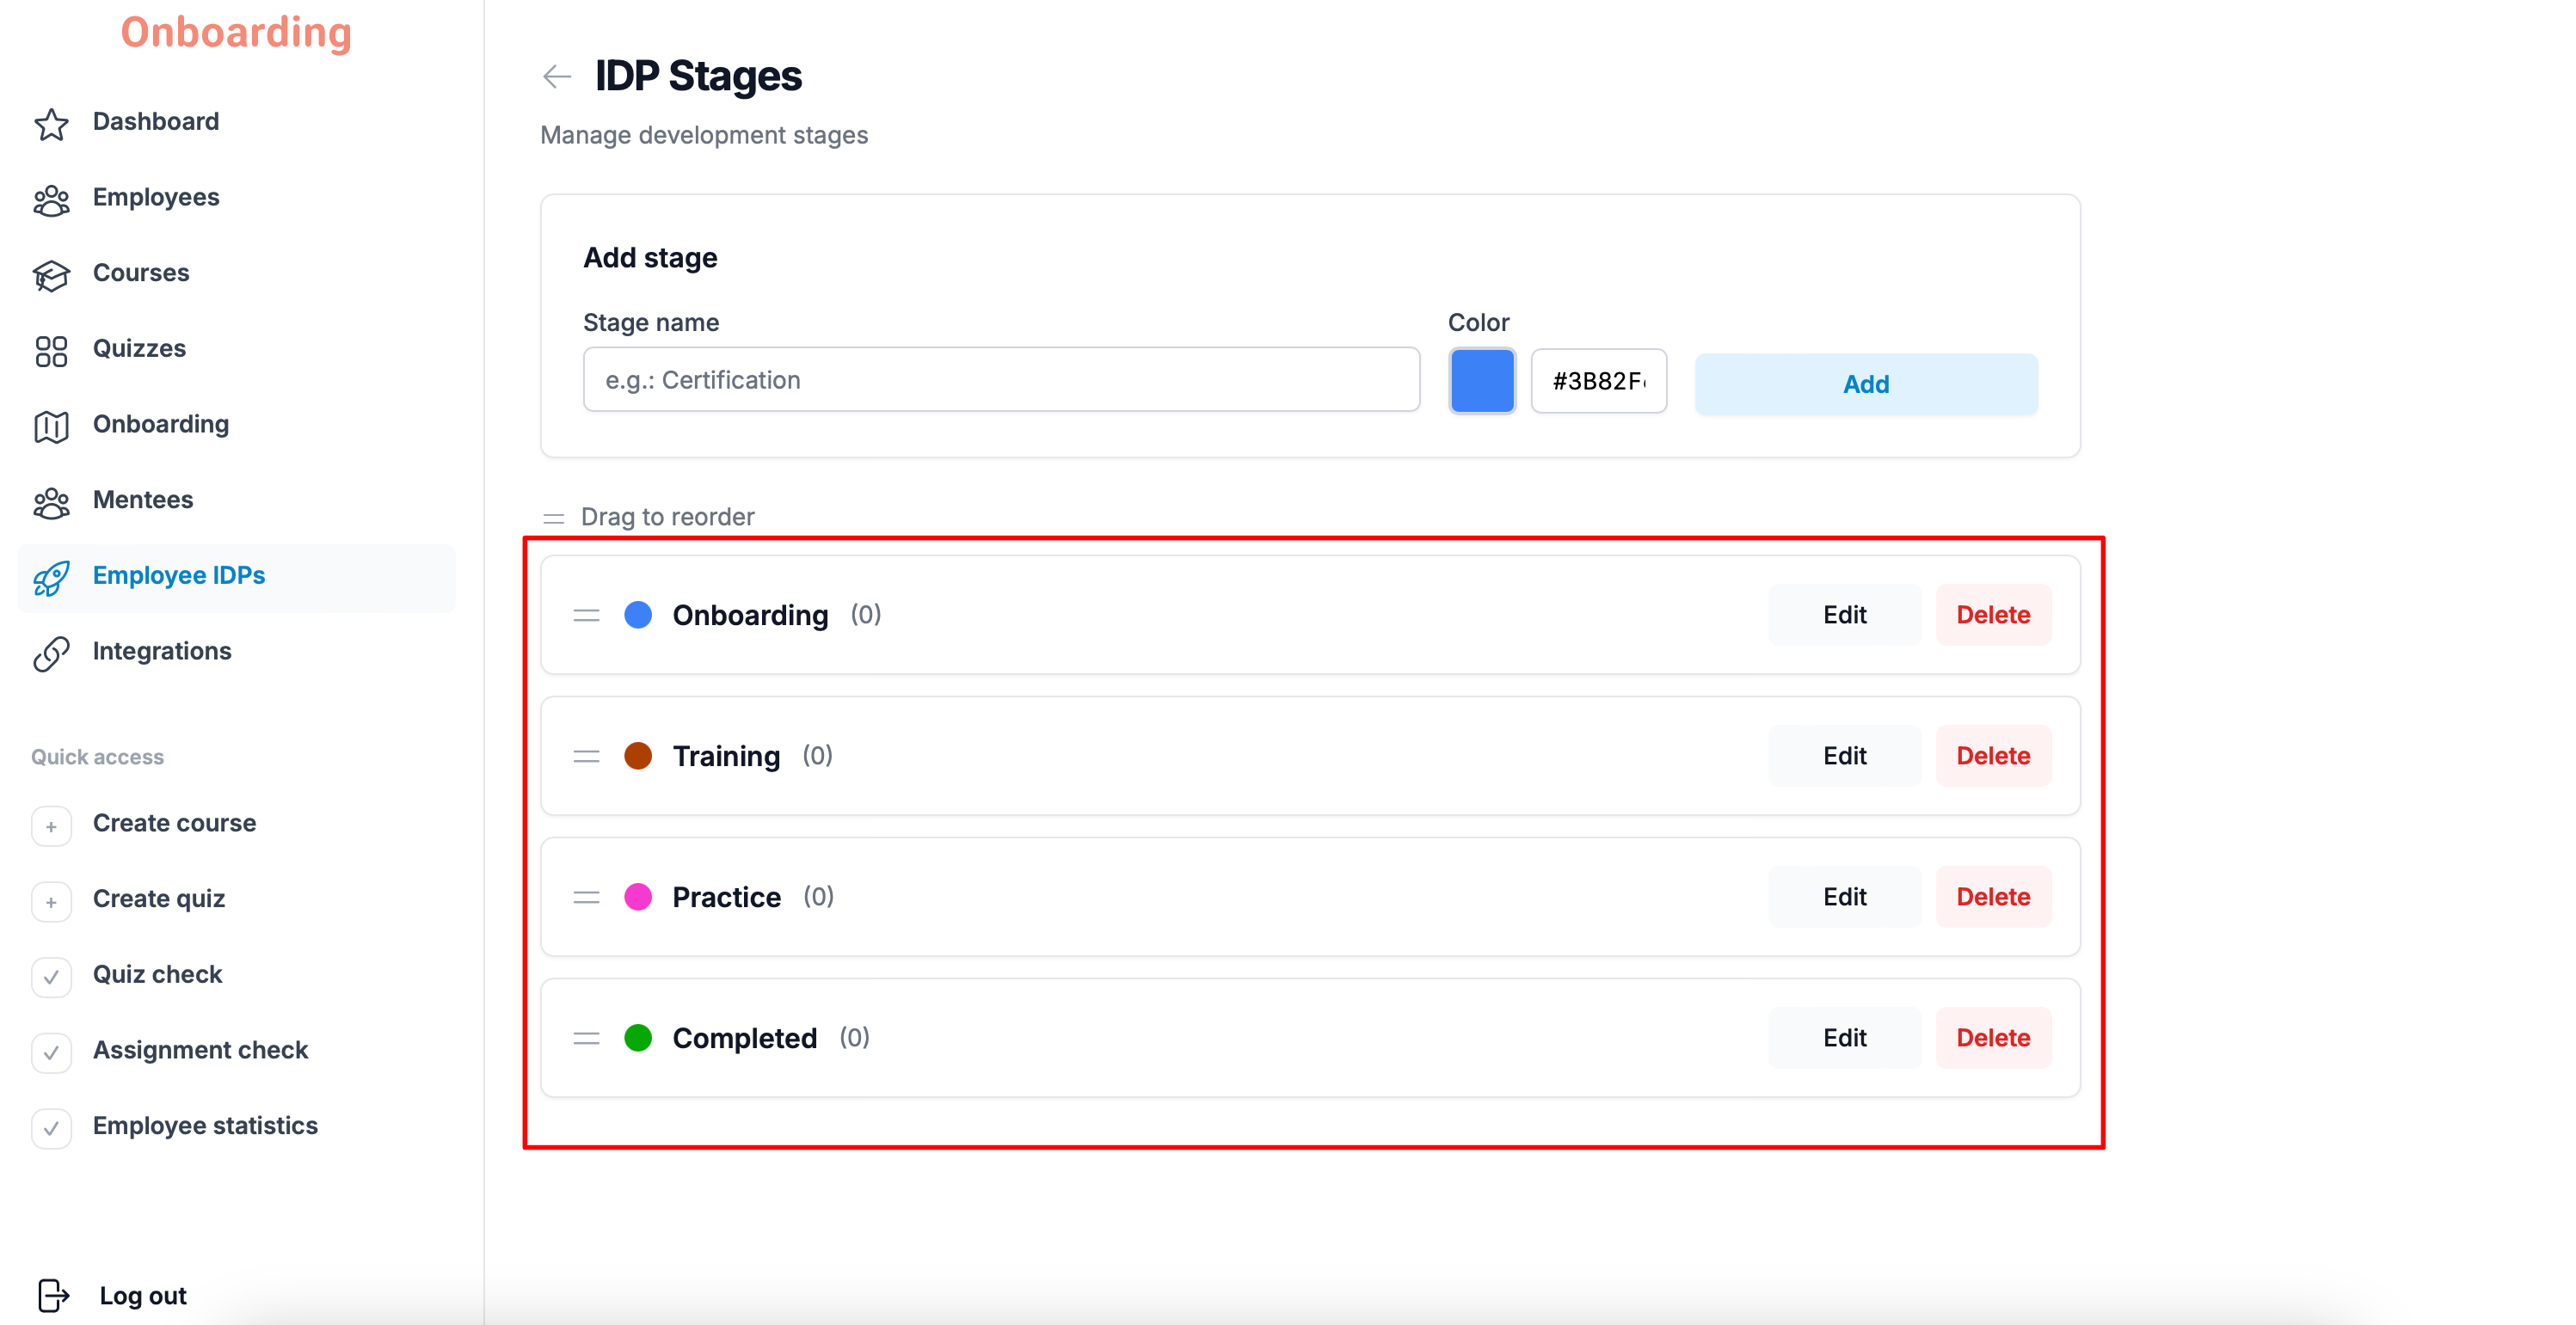
On the stages page you can:
- add new stages;
- edit existing stages;
- reorder stages;
- delete stages.
Adding an IDP stage
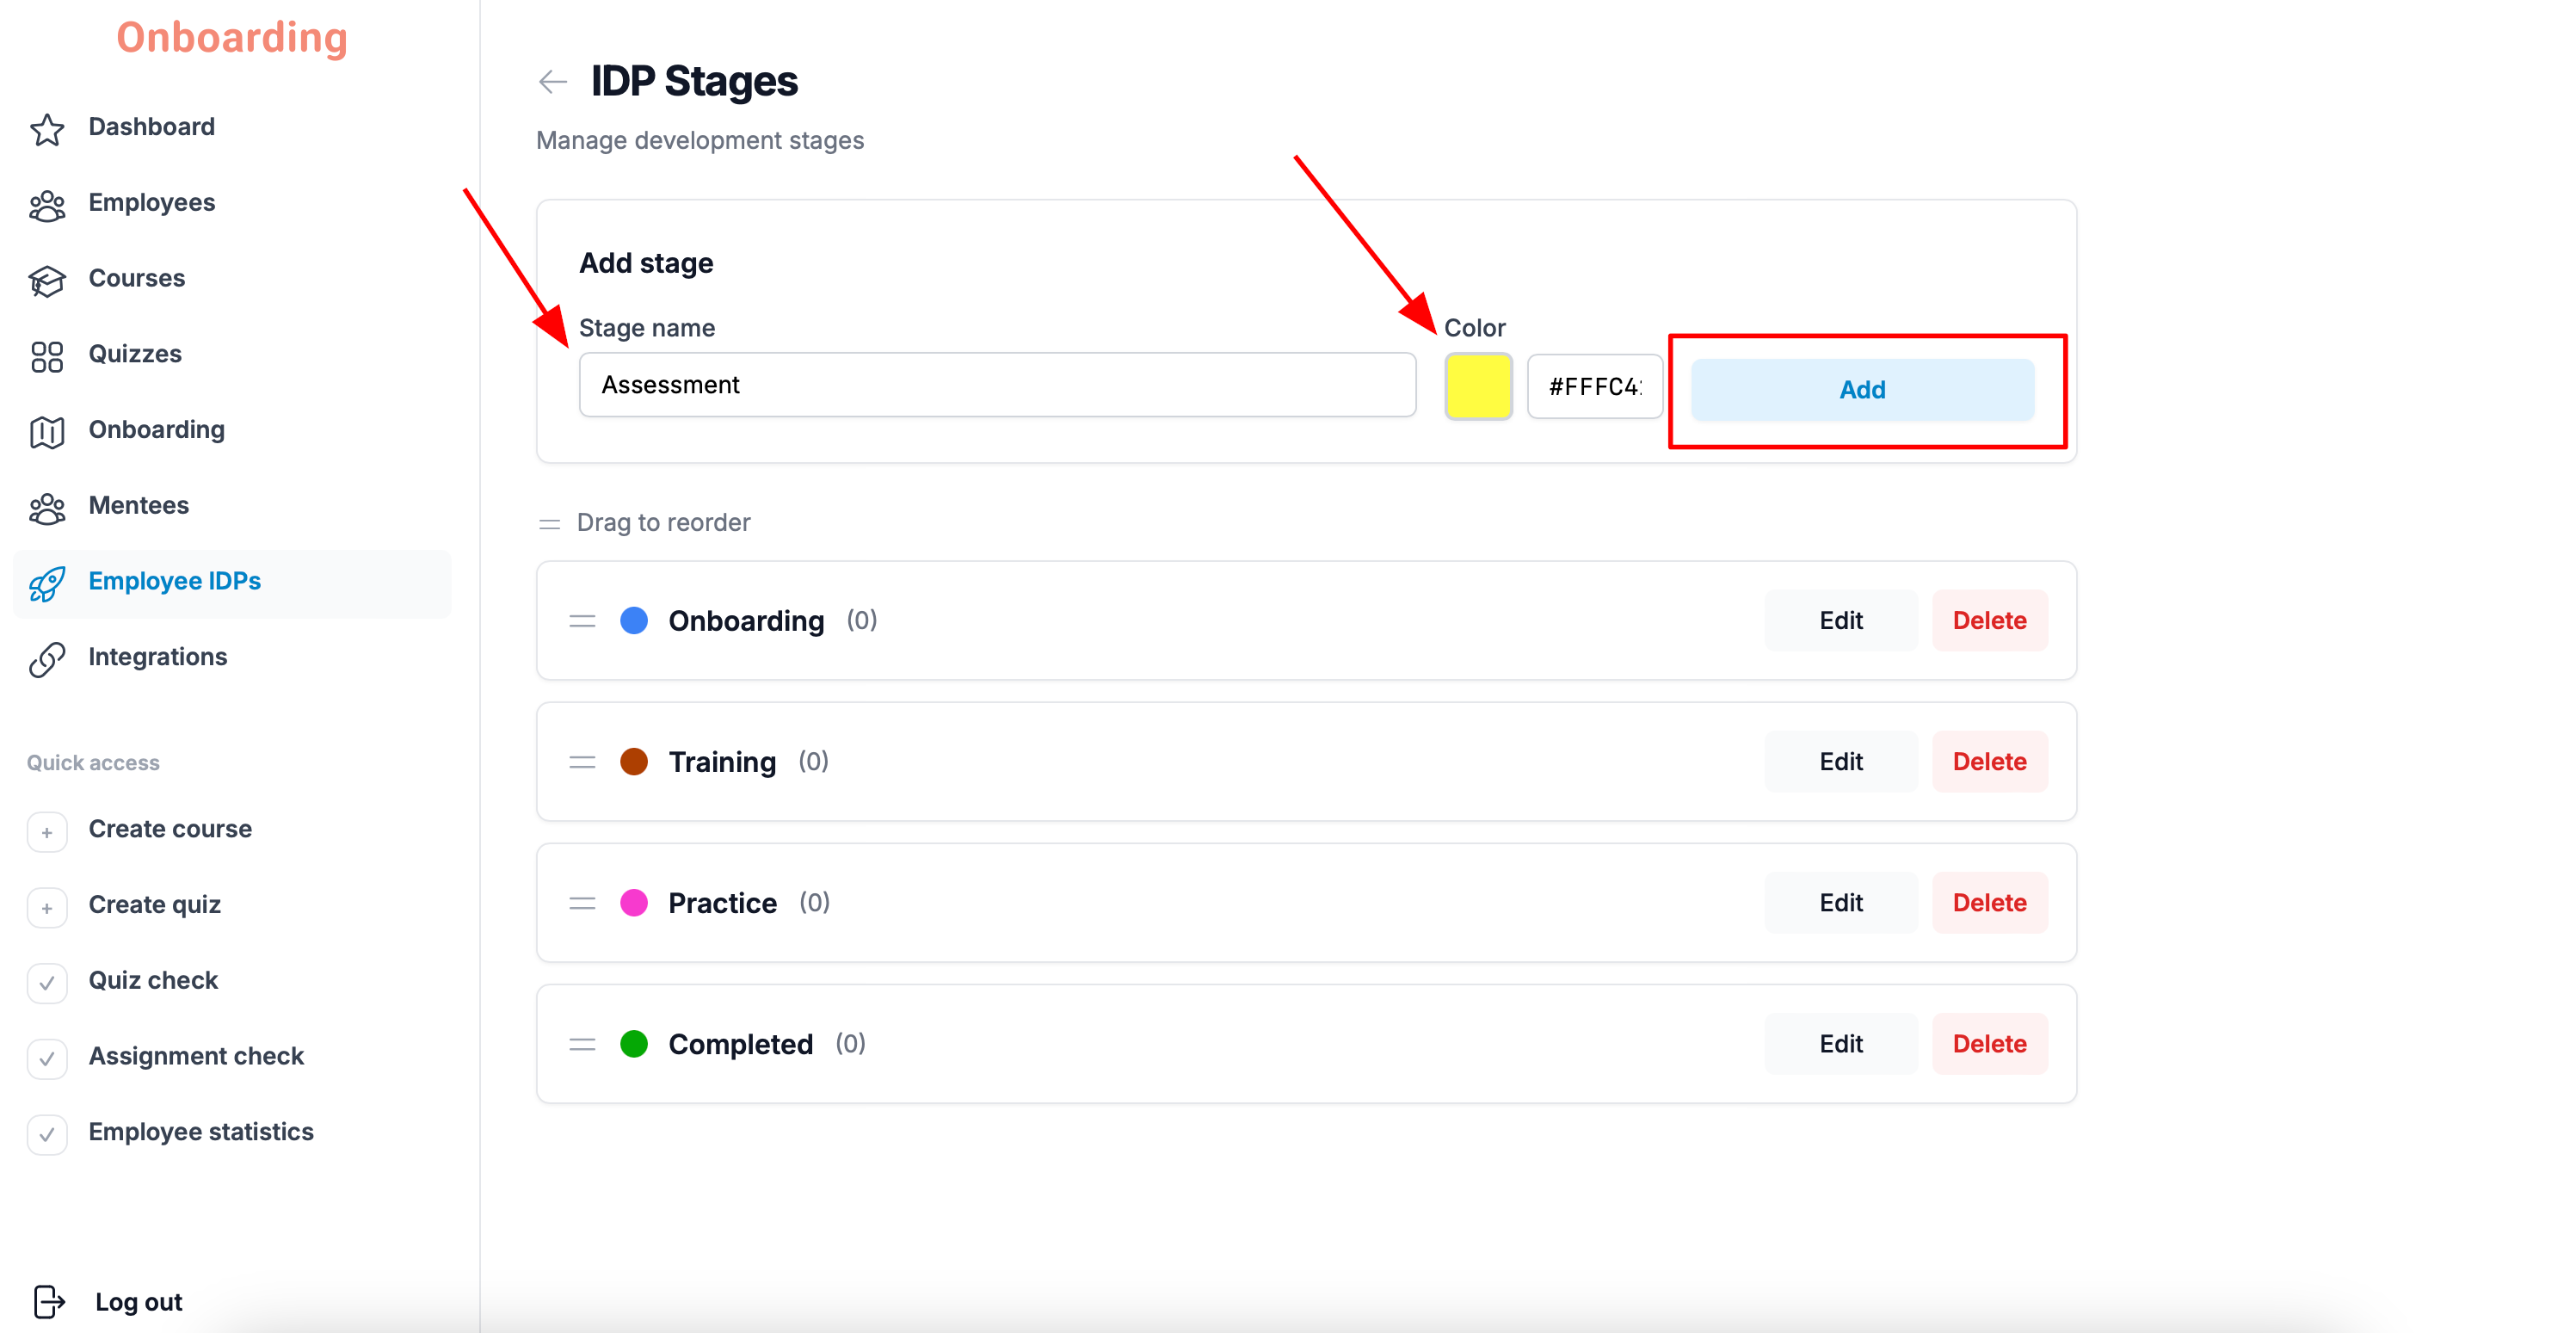
To add a new stage, open the «IDP Stages» page and fill in the form at the top of the page.
Enter:
- the stage name;
- the stage color.
Then click «Add».
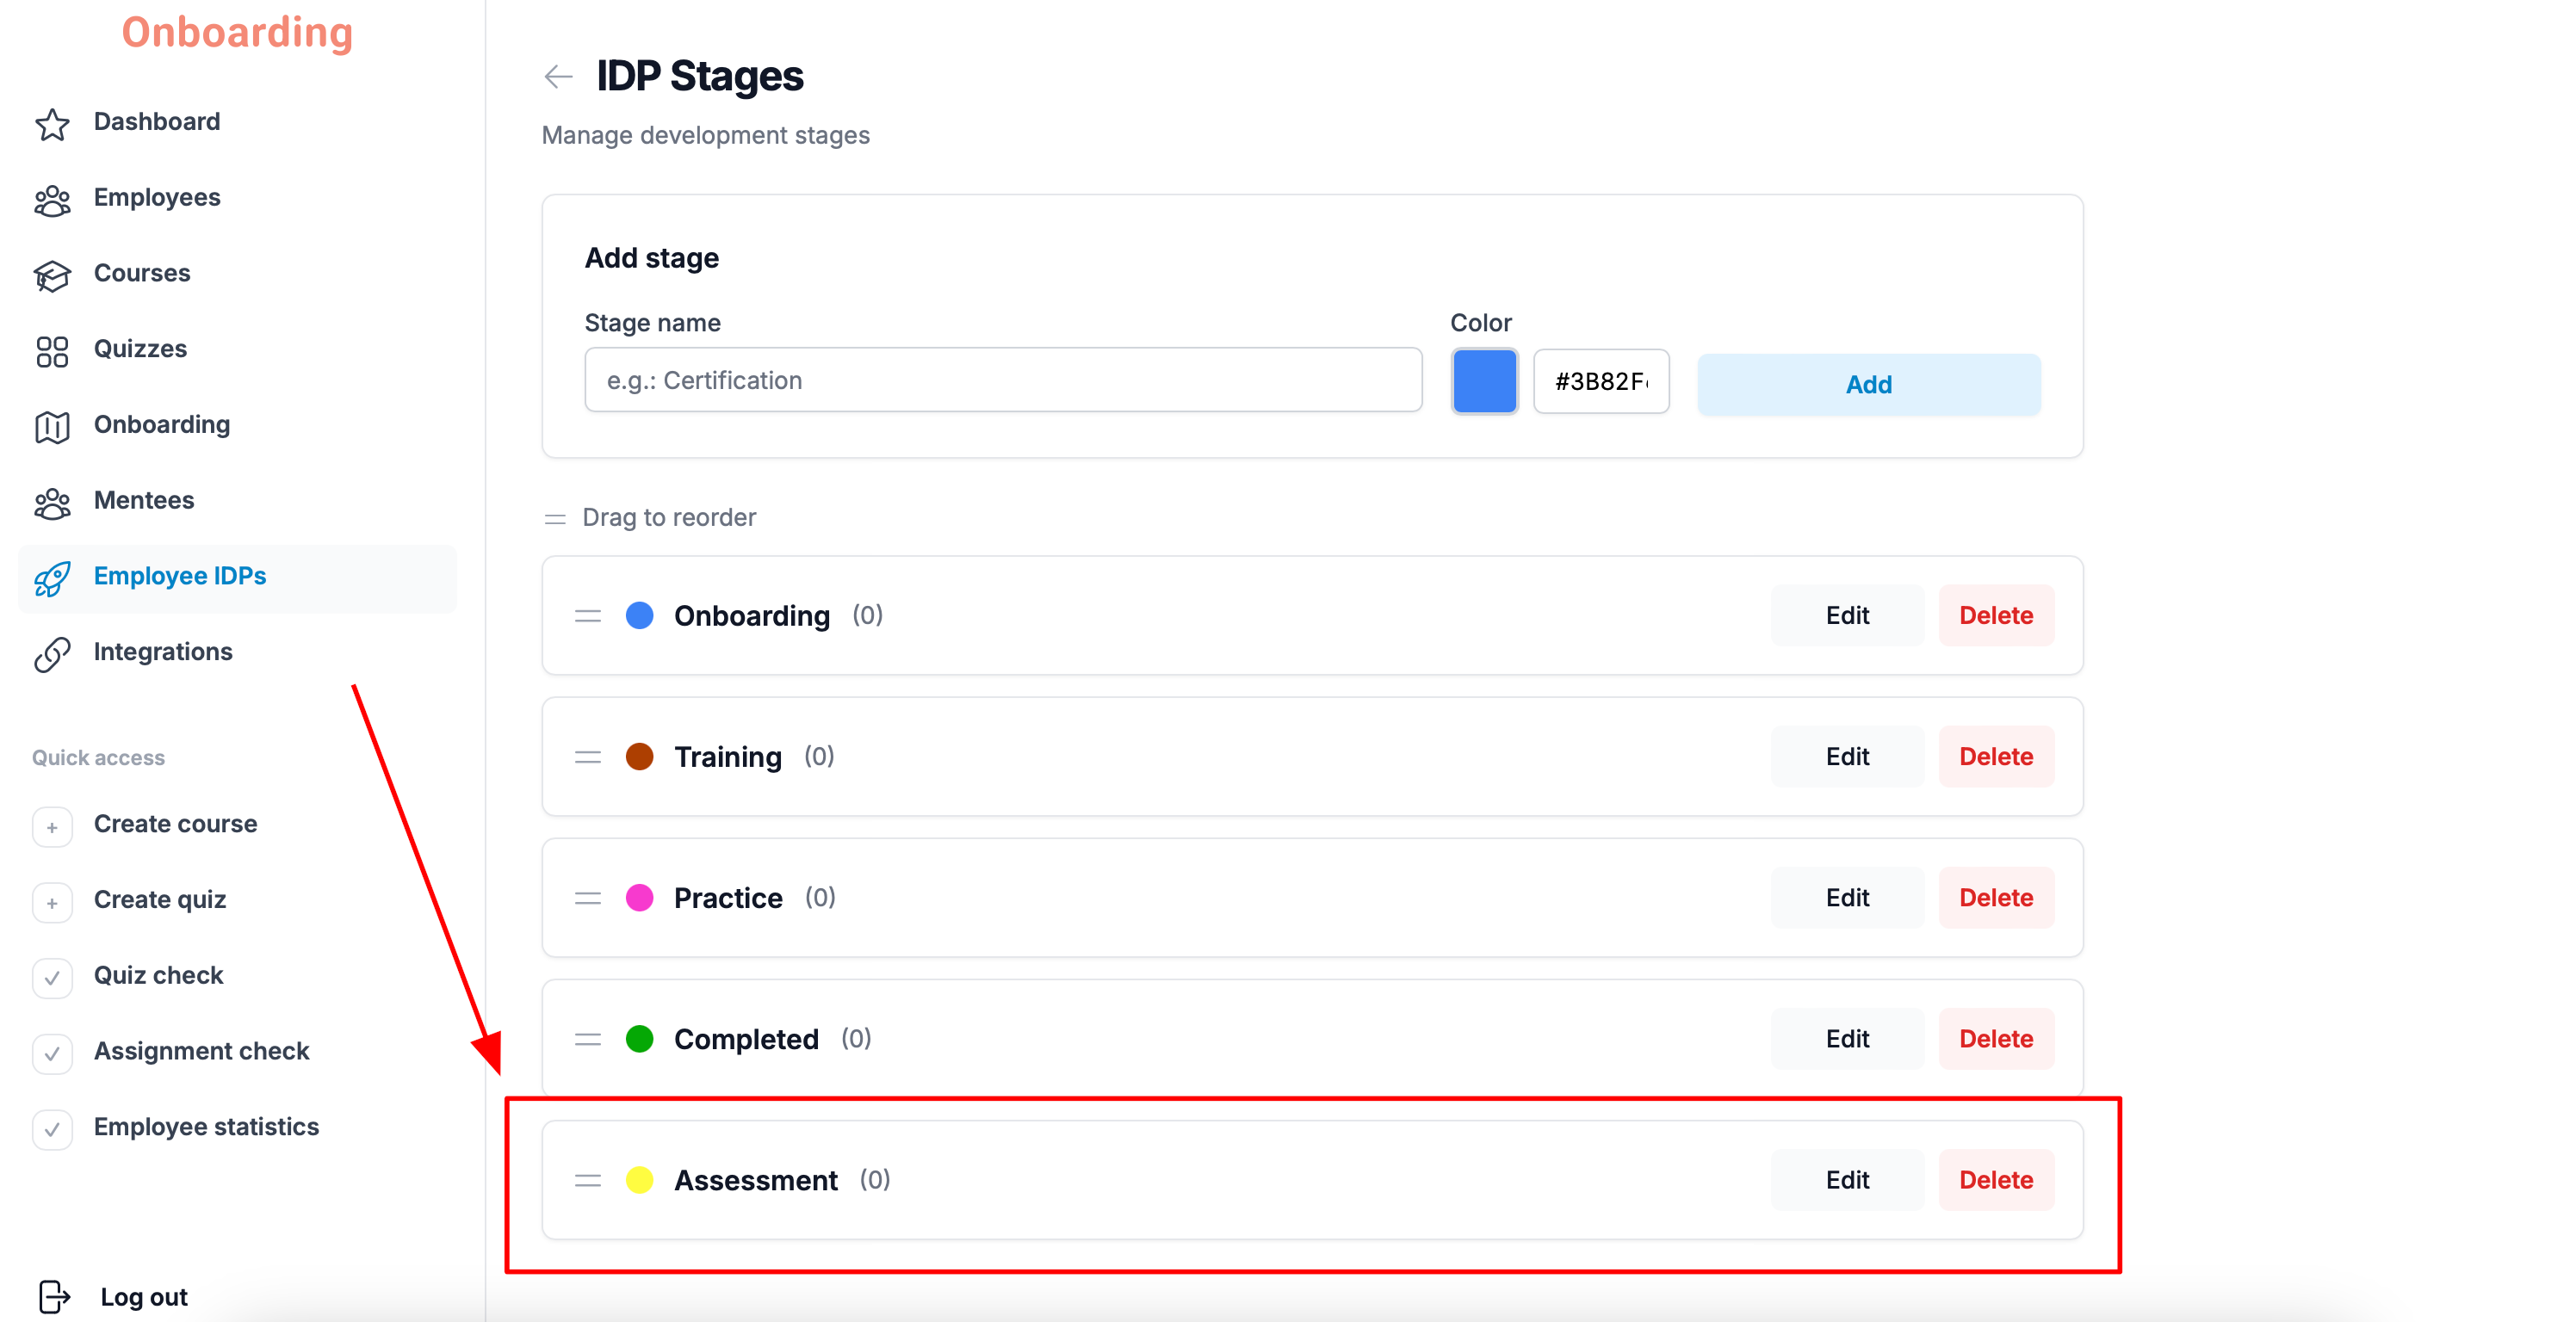
The new stage now appears in the list of IDP stages 🎉
Editing an IDP stage
You can change the name and color of an existing stage.
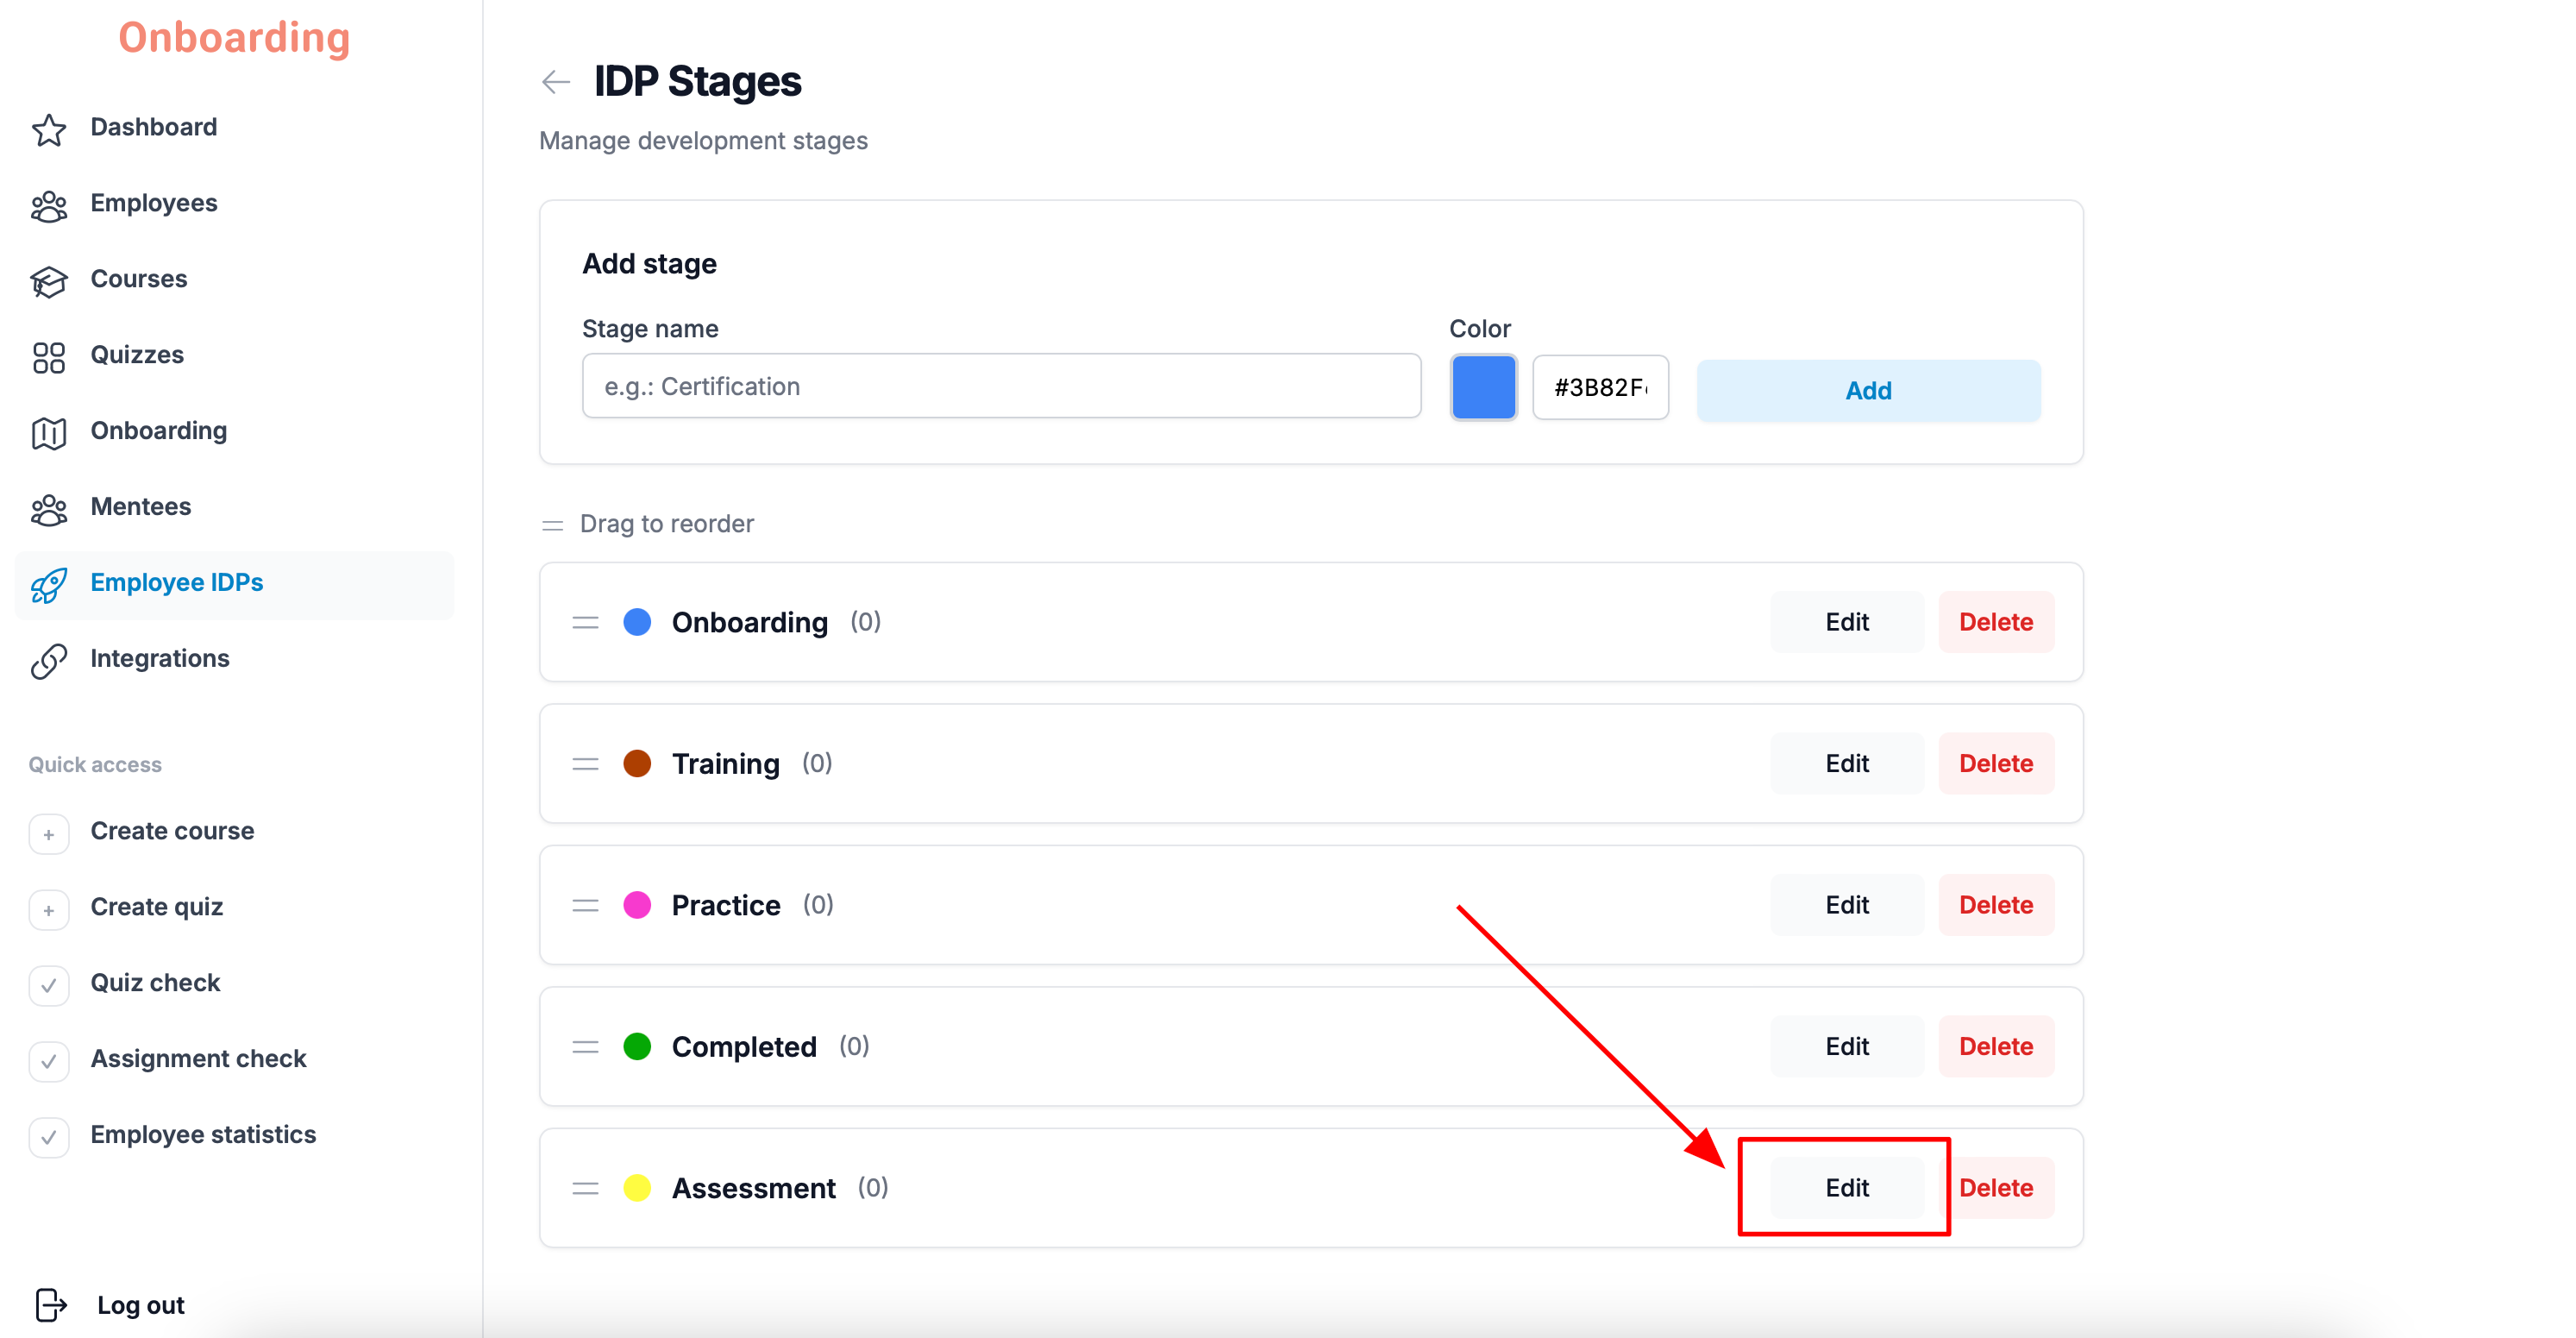
To do that, click «Edit» next to the stage on the «IDP Stages» page.
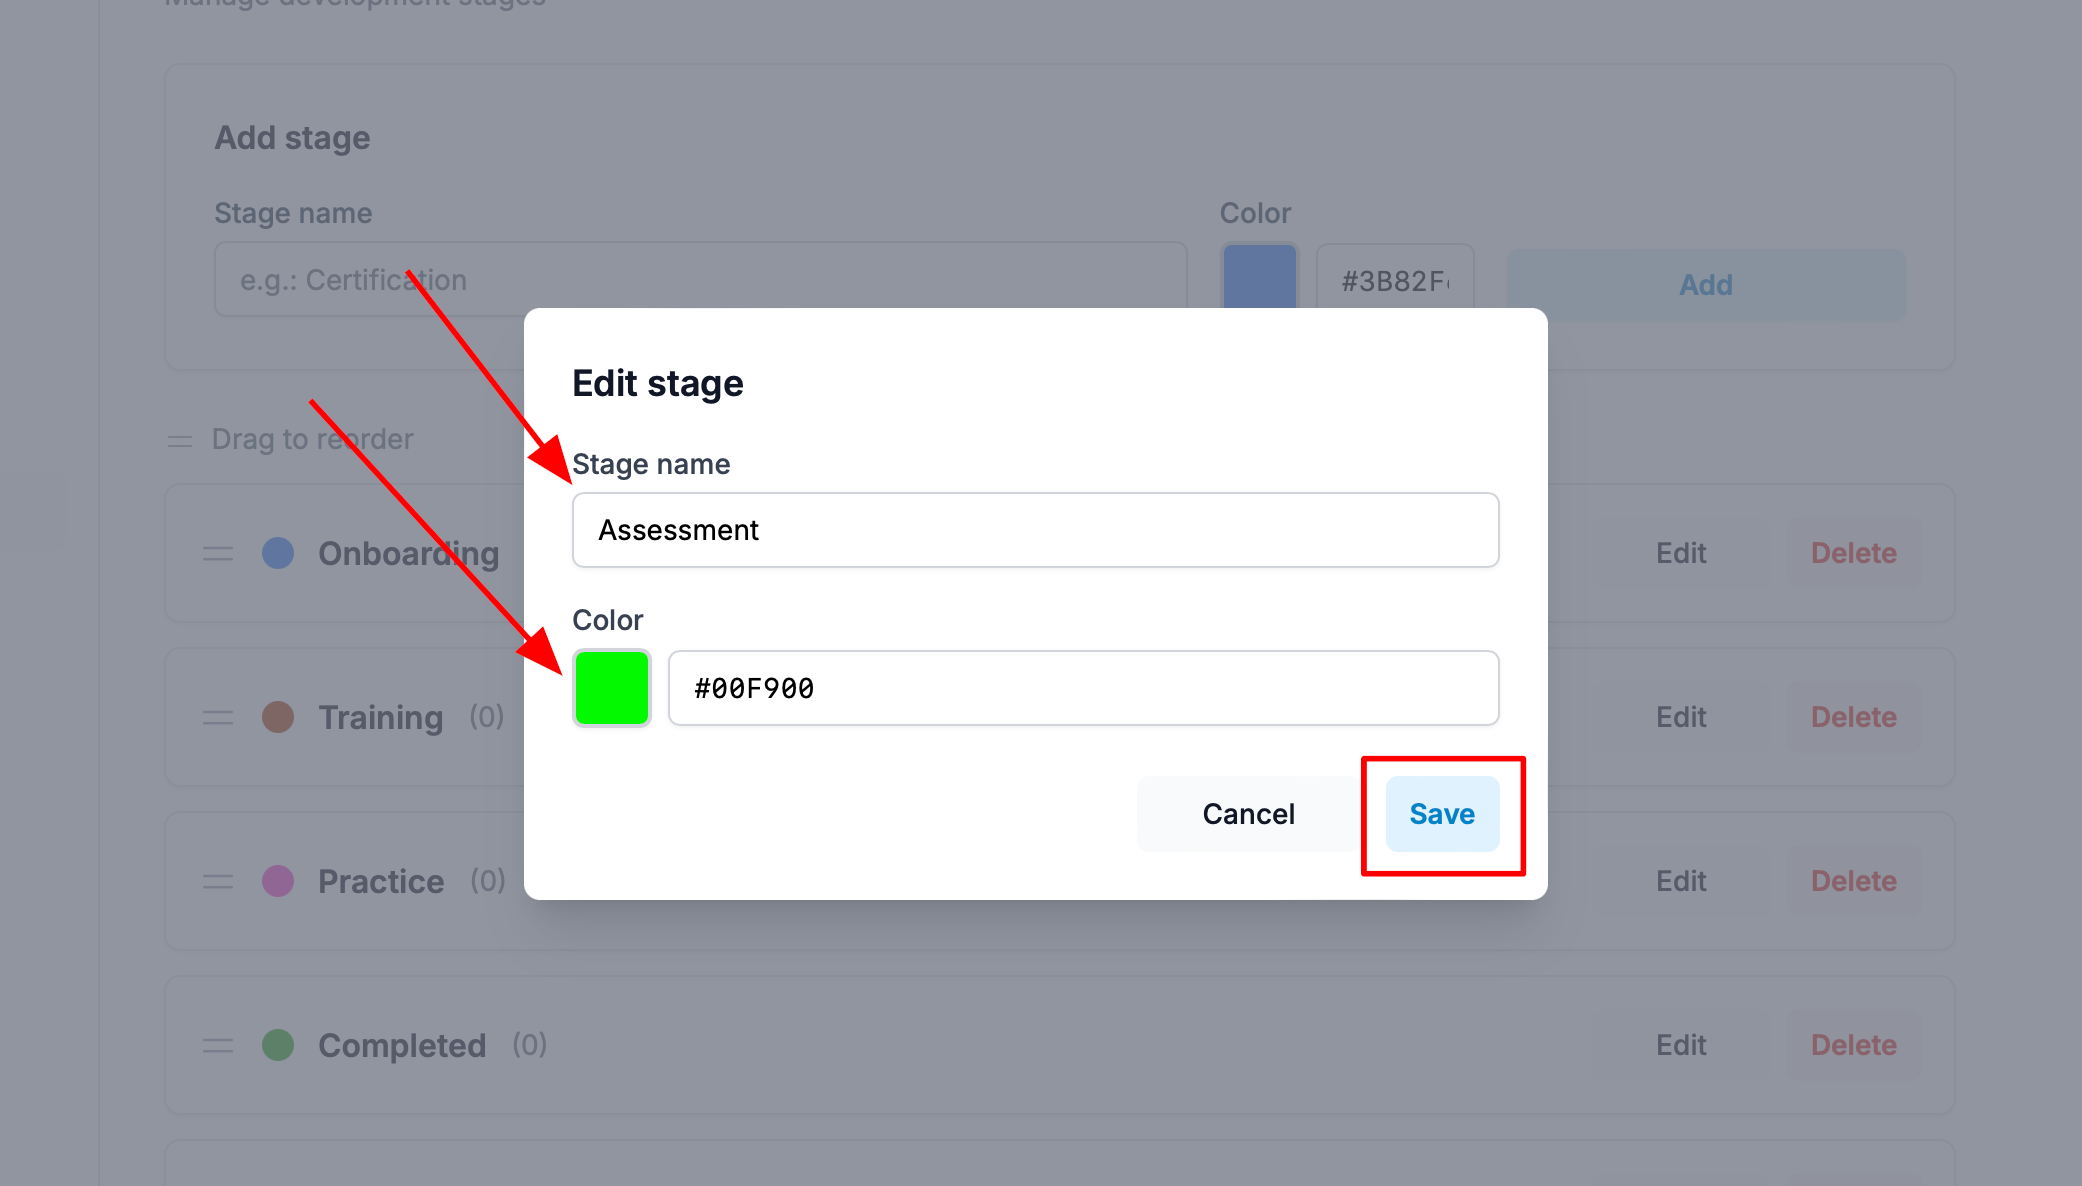
In the window that opens, you can change:
- the stage name;
- the stage color.
When you're done, click «Save».
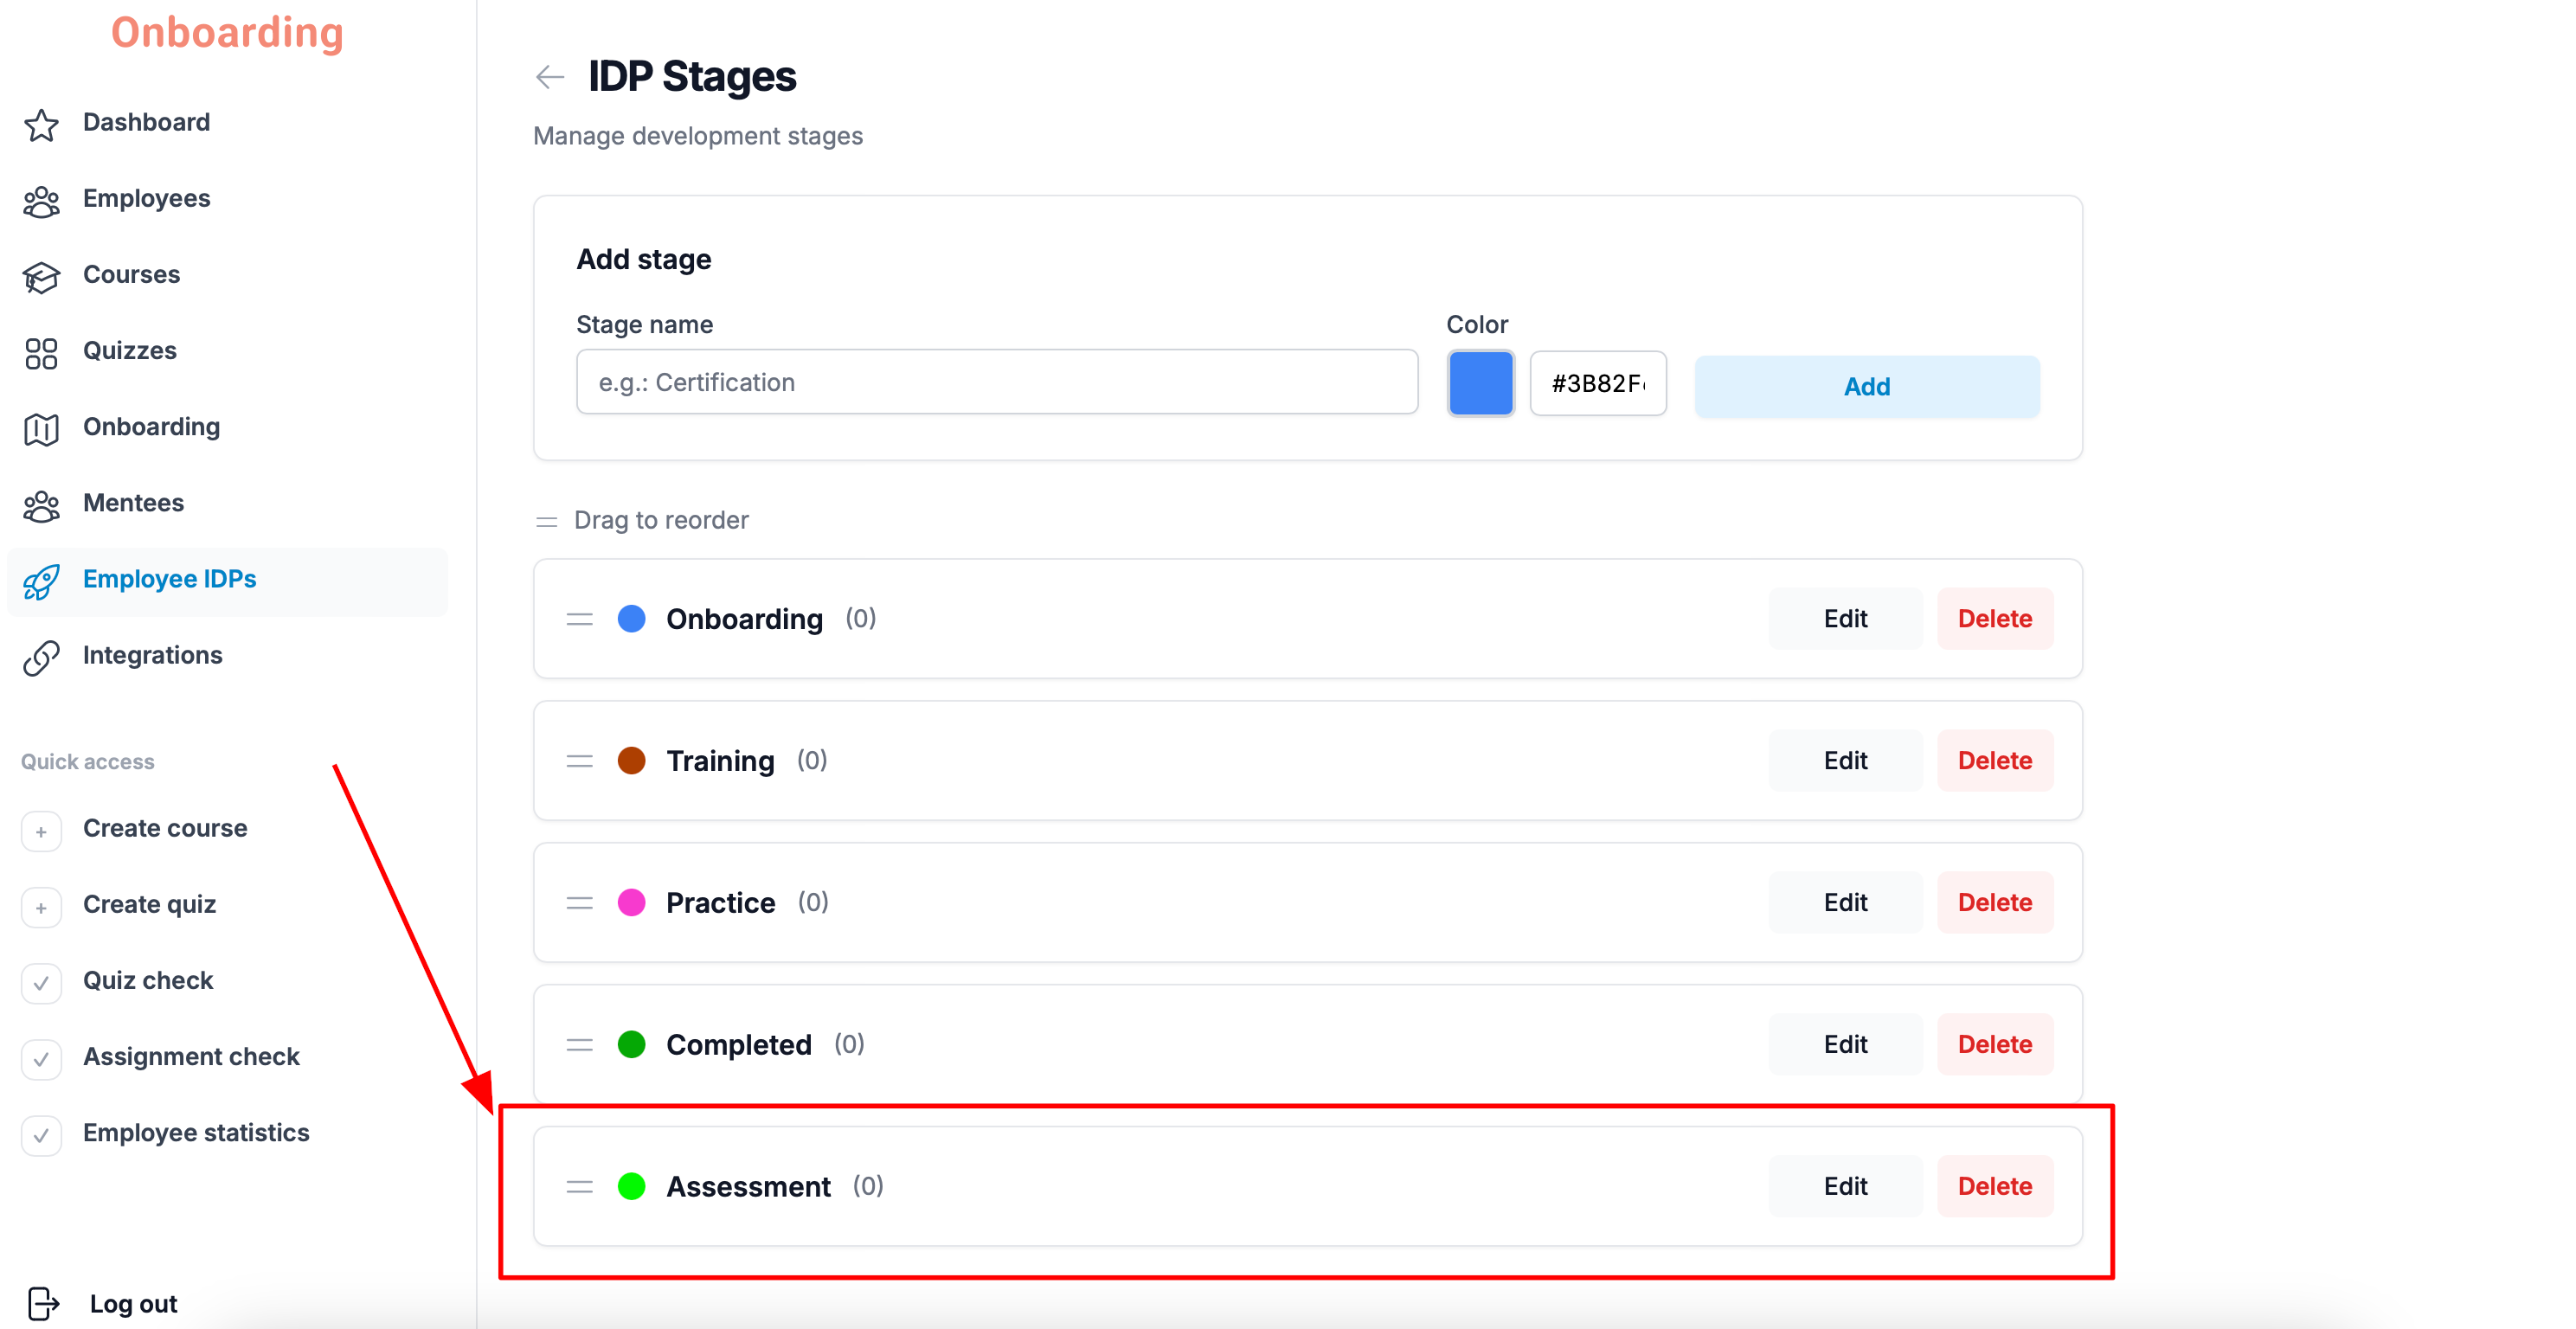
Your changes are saved and reflected in the list of IDP stages 🎉
Reordering IDP stages
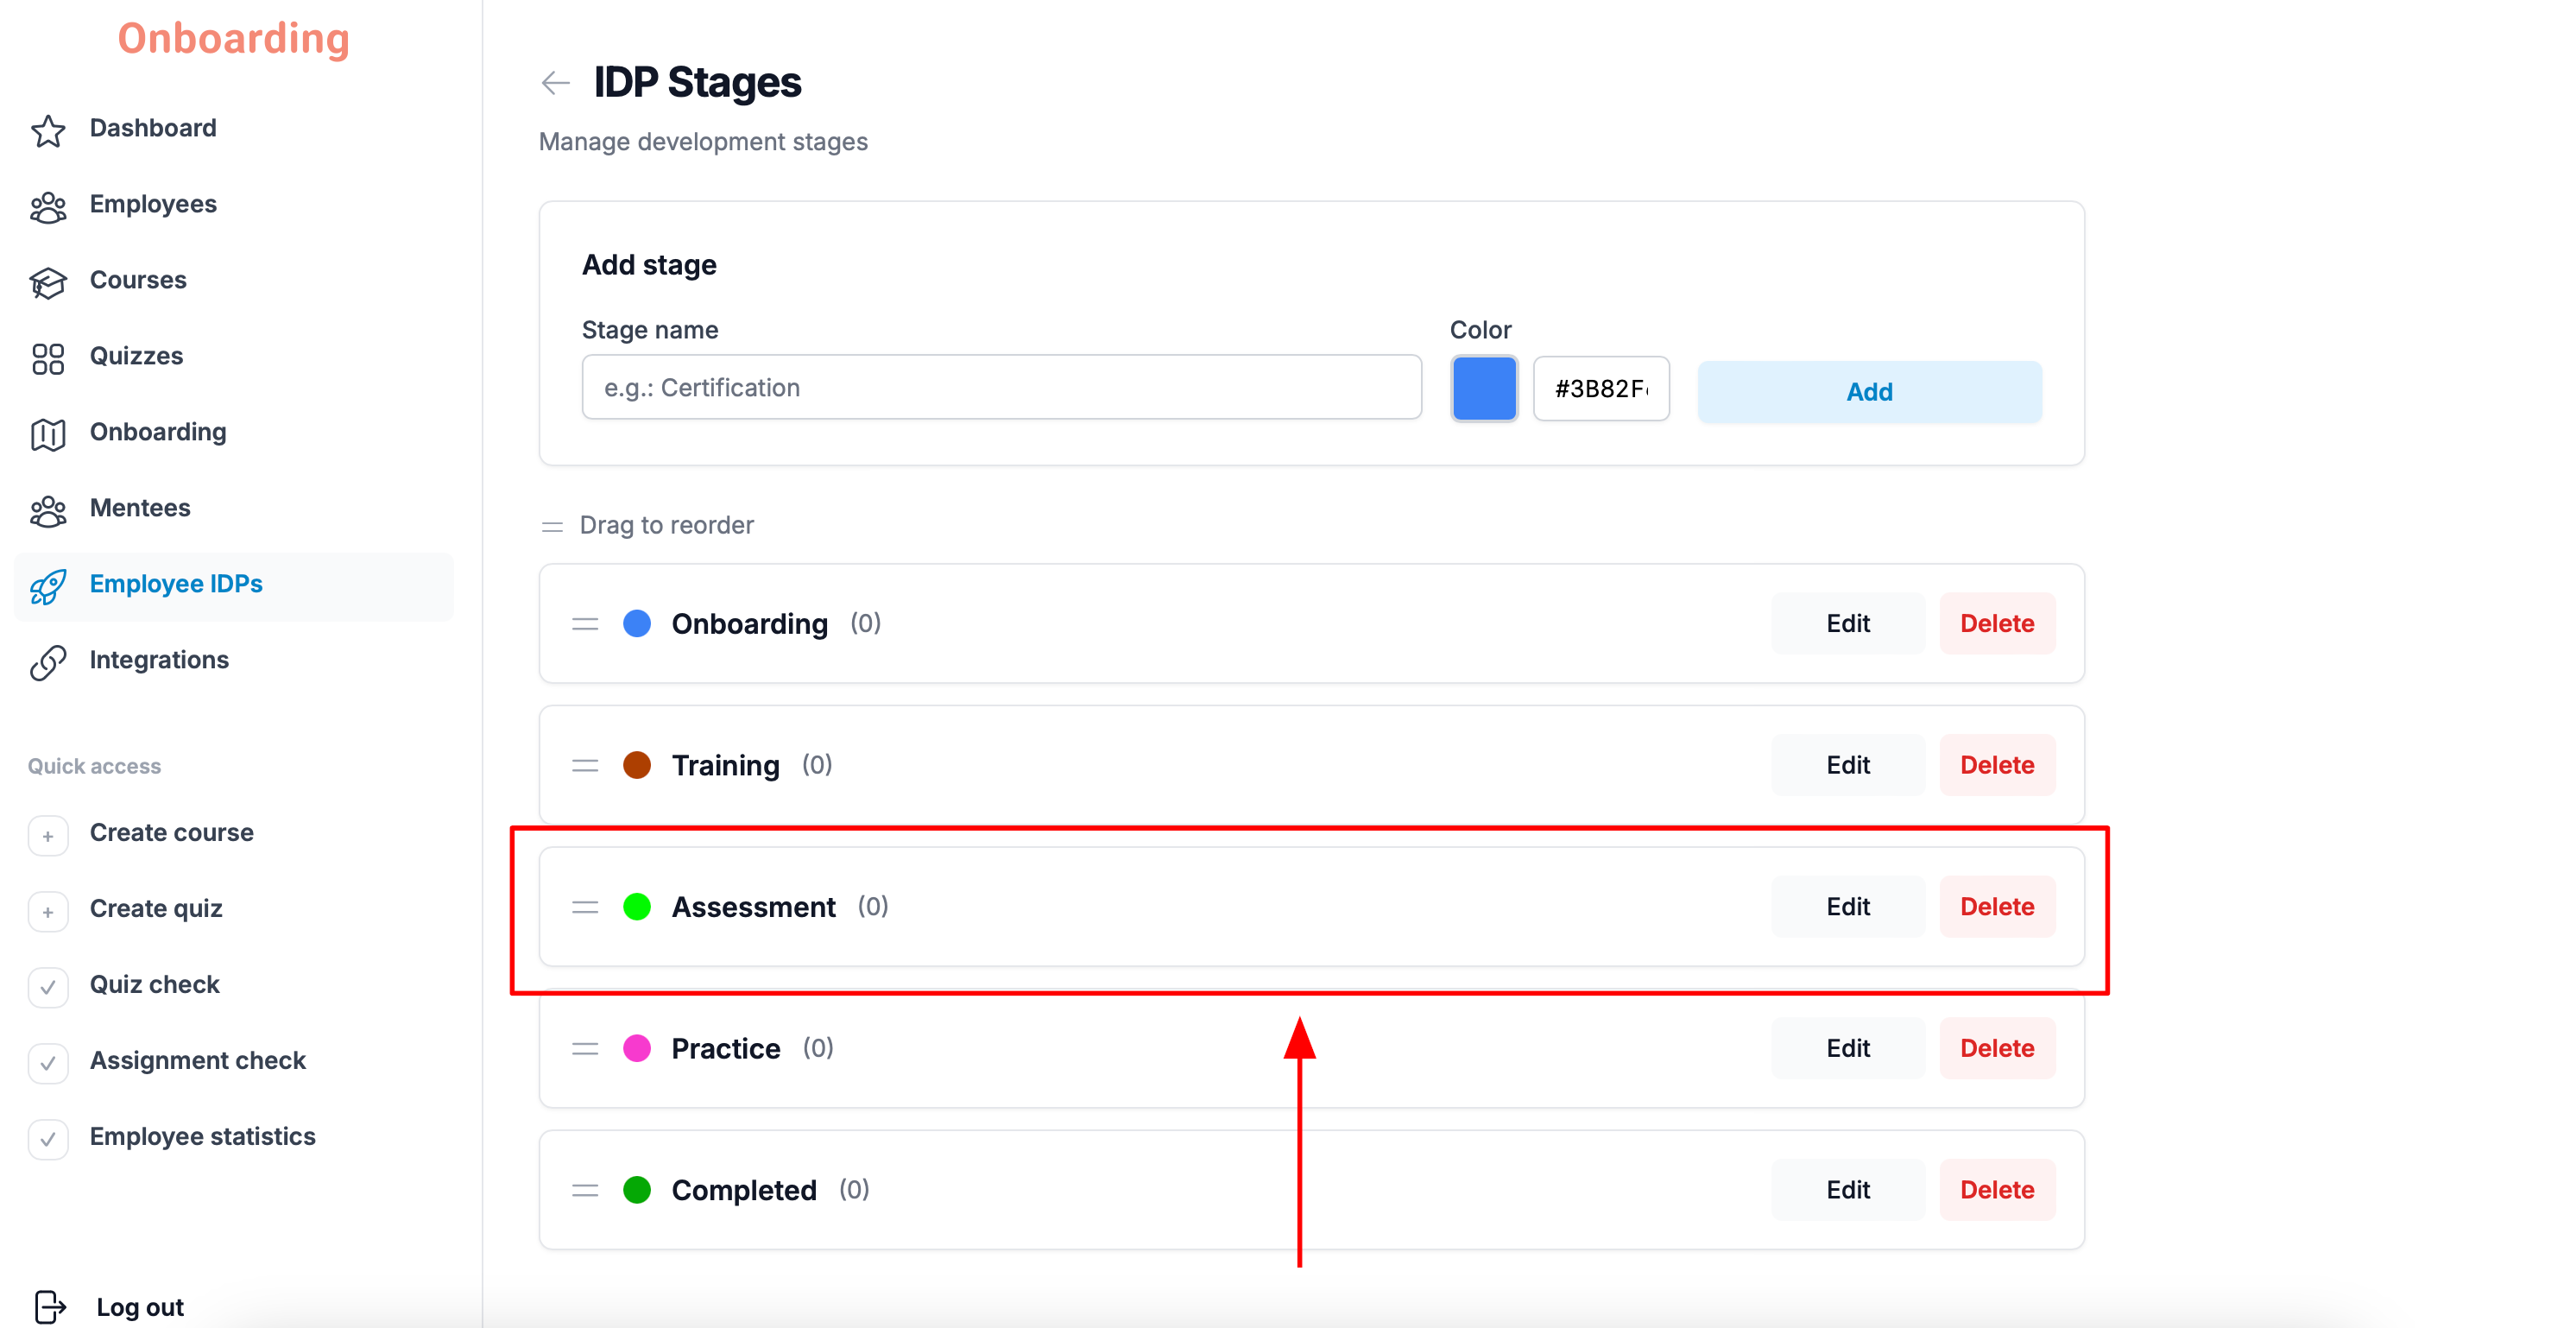
You can change the order of the IDP stages if needed.
Just press and hold the stage you want to move, then drag it to its new place in the list.
Changing a stage's name, color, or order doesn't affect the IDPs already sitting in those stages.
The stage order does, however, determine how they appear on the Kanban board. Once you reorder them, the Kanban board columns follow the new sequence.
Deleting an IDP stage
To delete a stage, open the «IDP Stages» page and click «Delete» next to the stage.
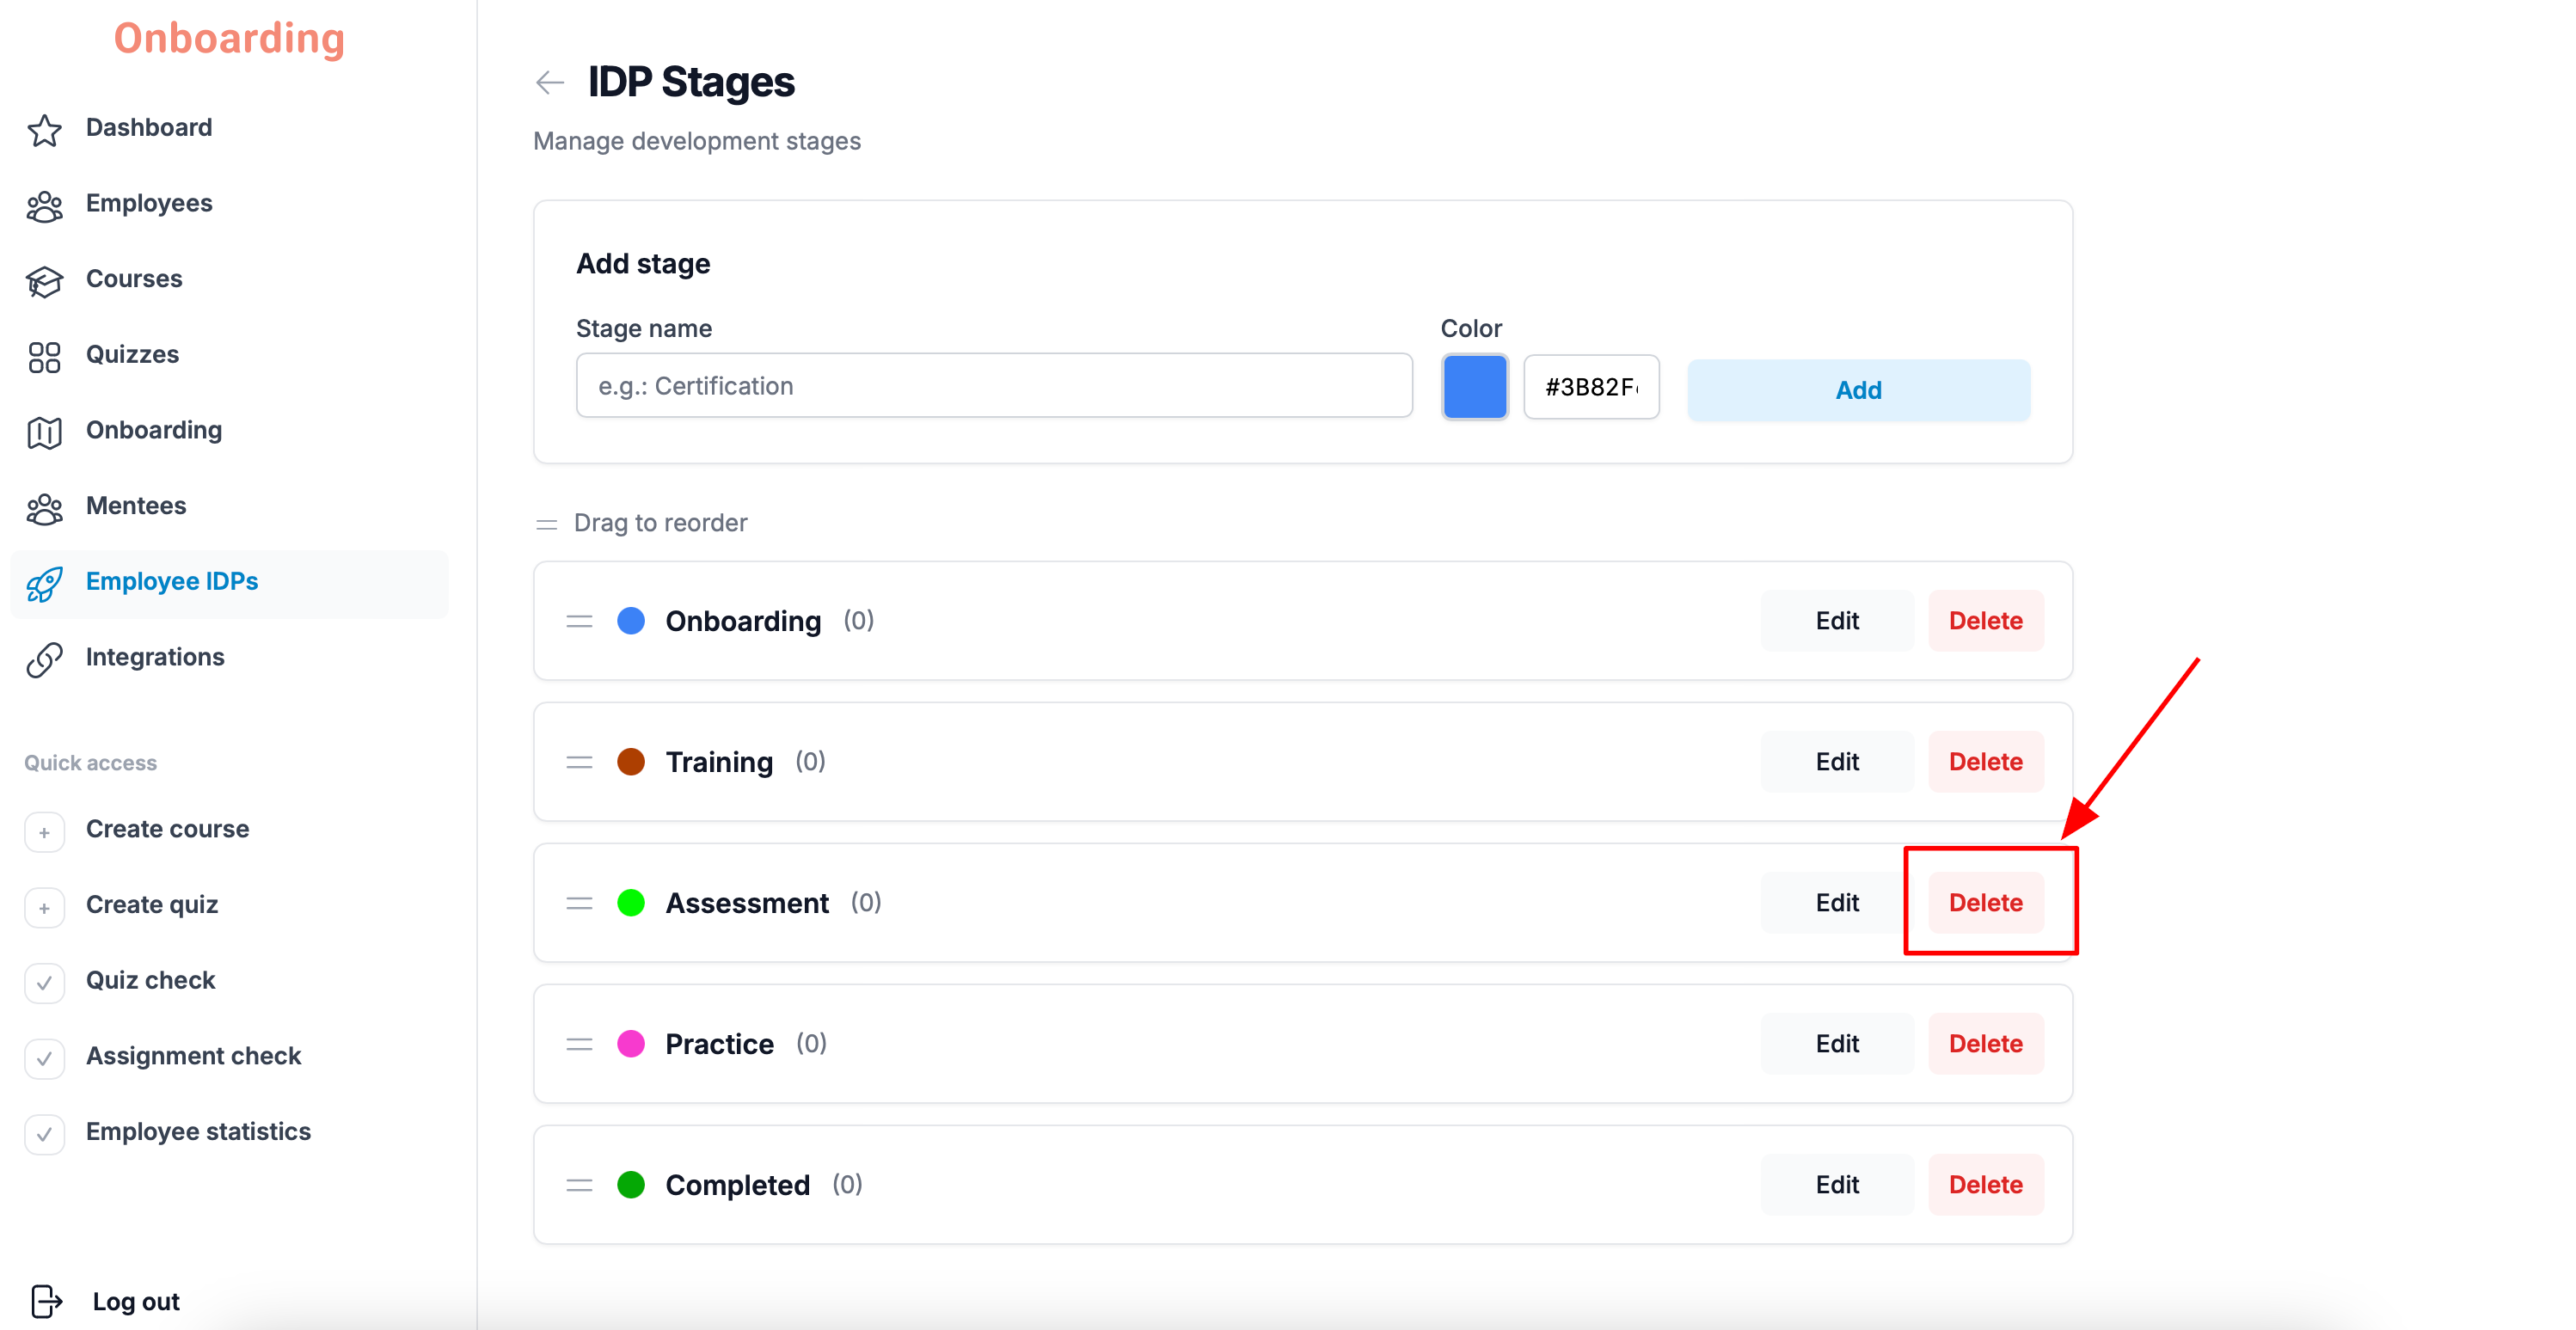
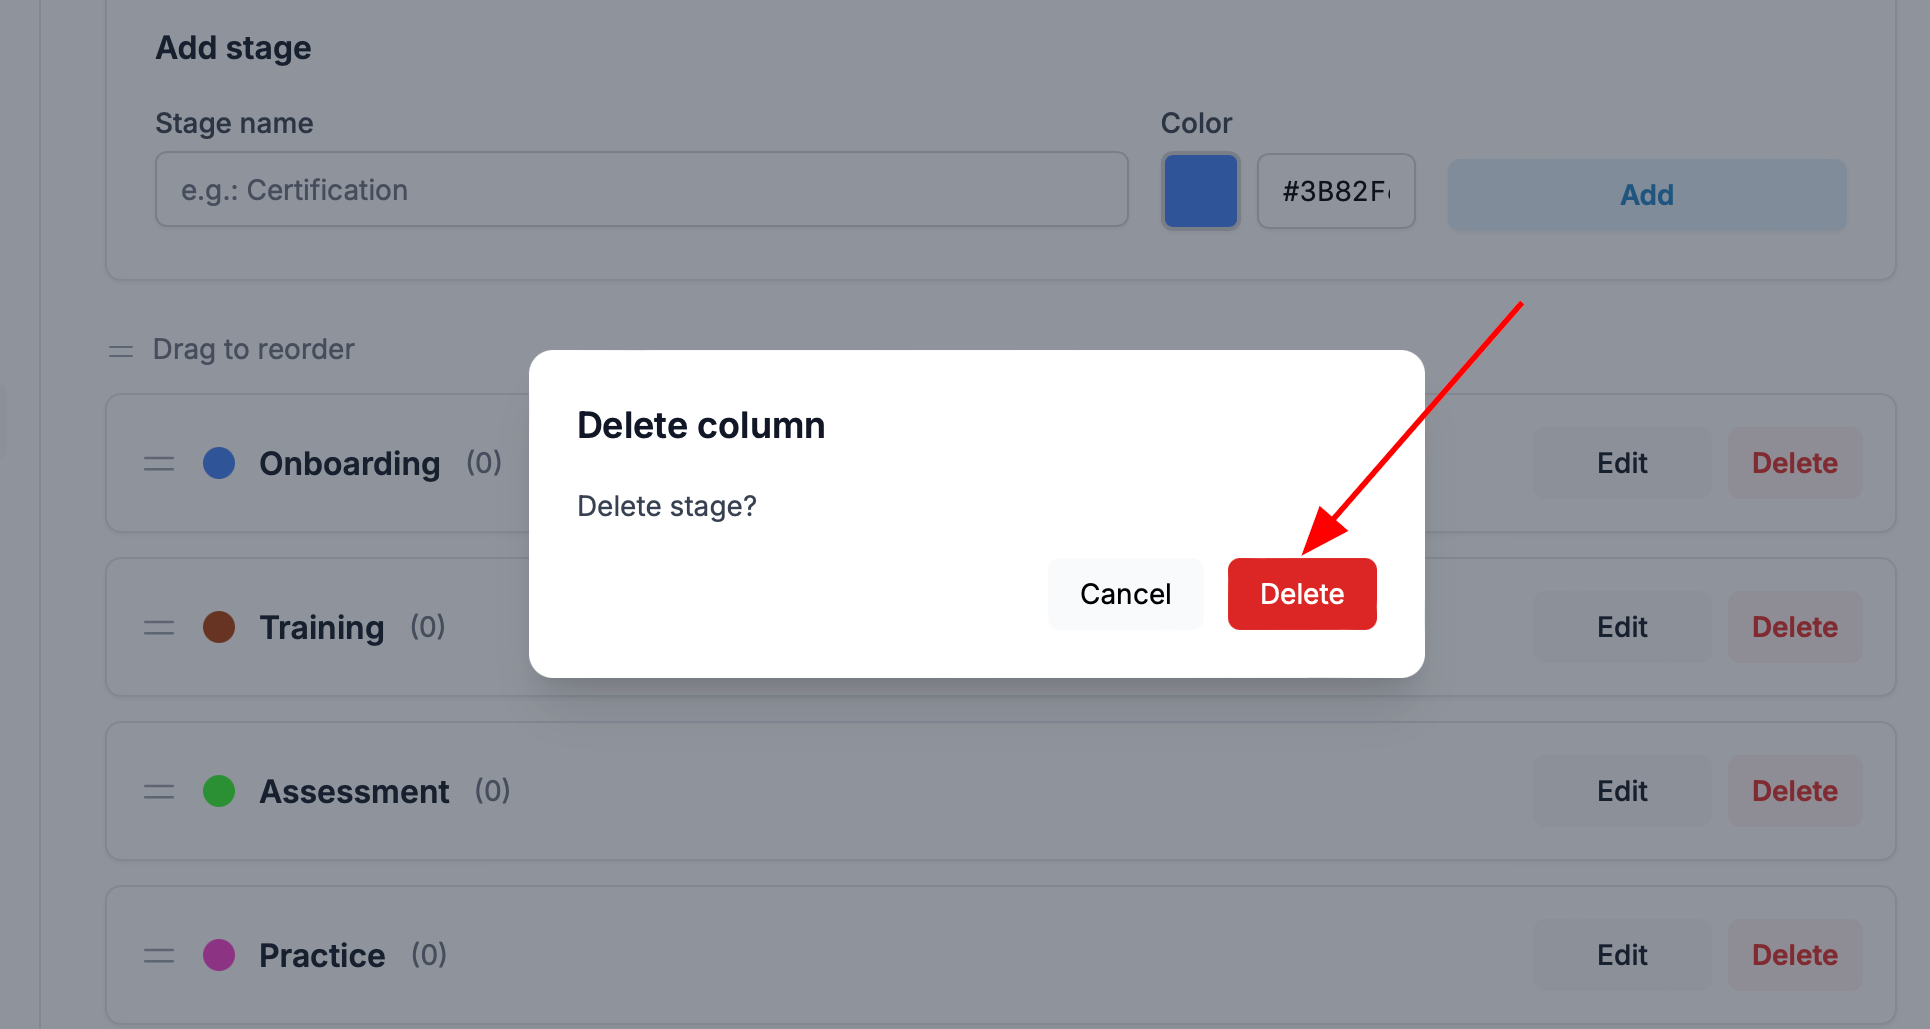
Confirm the action by clicking «Delete» again in the window that appears.
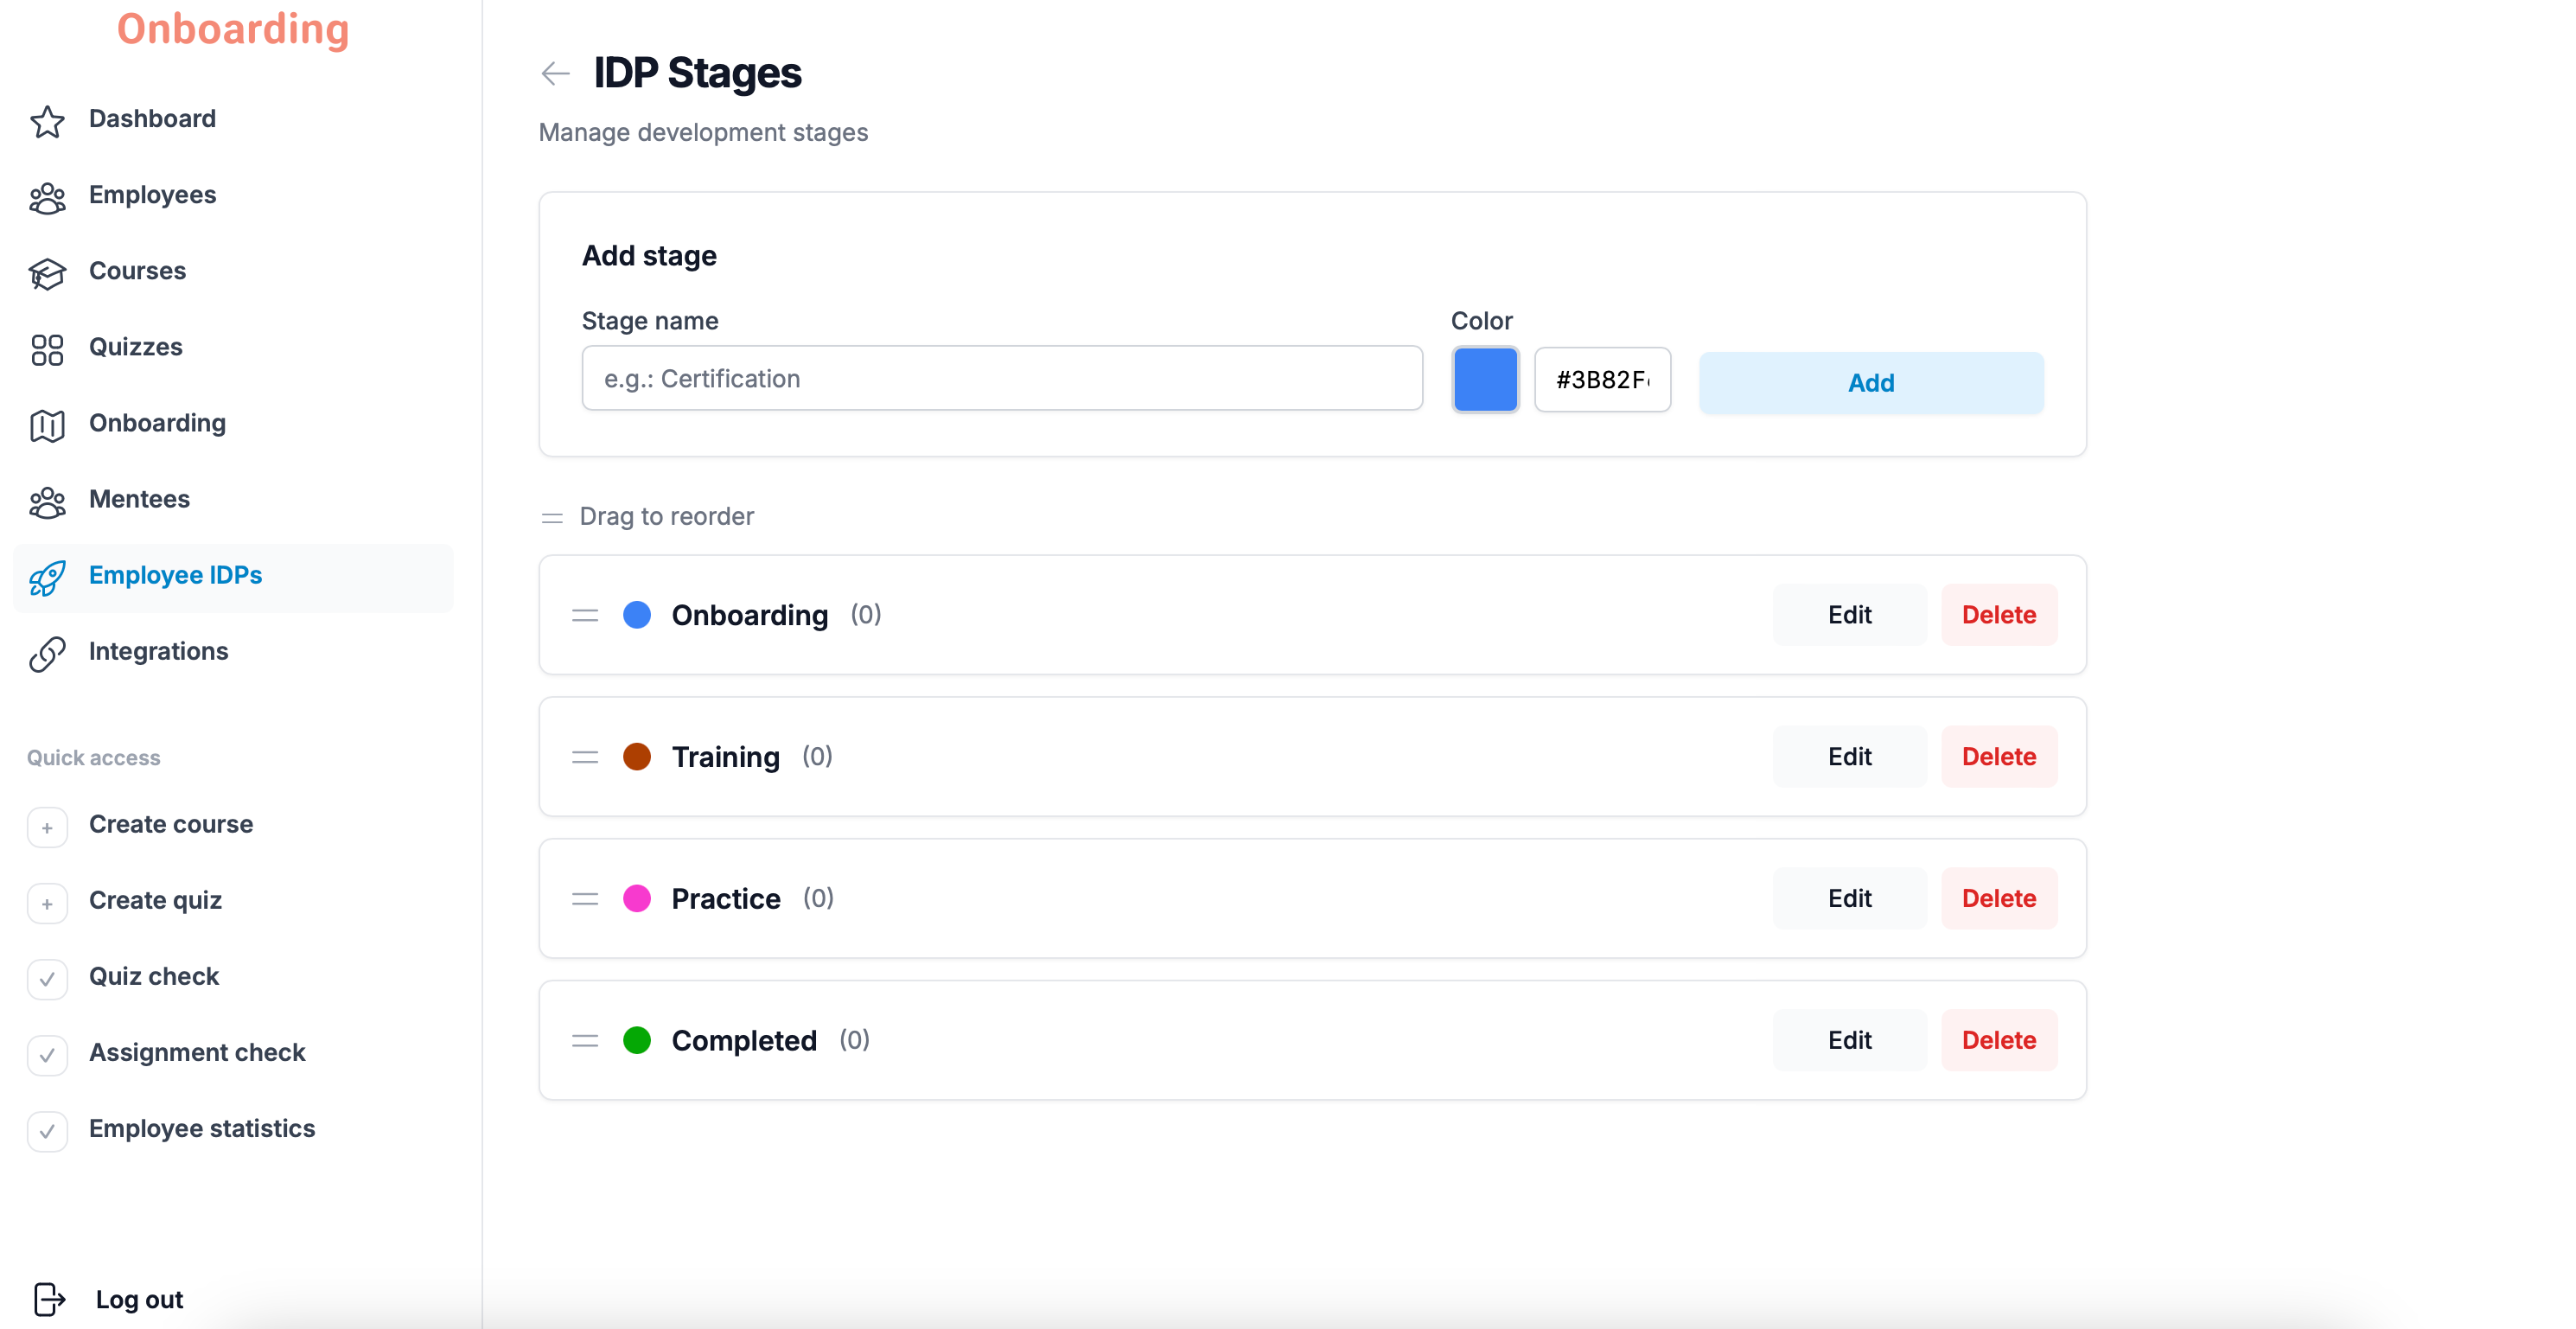
The stage has been deleted and no longer appears in the list of IDP stages.
If a stage has IDPs in it, the platform will first ask you to move them to another stage. Only then can the stage be deleted.
Deleting an IDP stage cannot be undone. Once you confirm the deletion, the stage cannot be restored.
Kanban Board
To open the Kanban board, go to the «Employee IDPs» section and click the «IDP Kanban board» block on the main page.
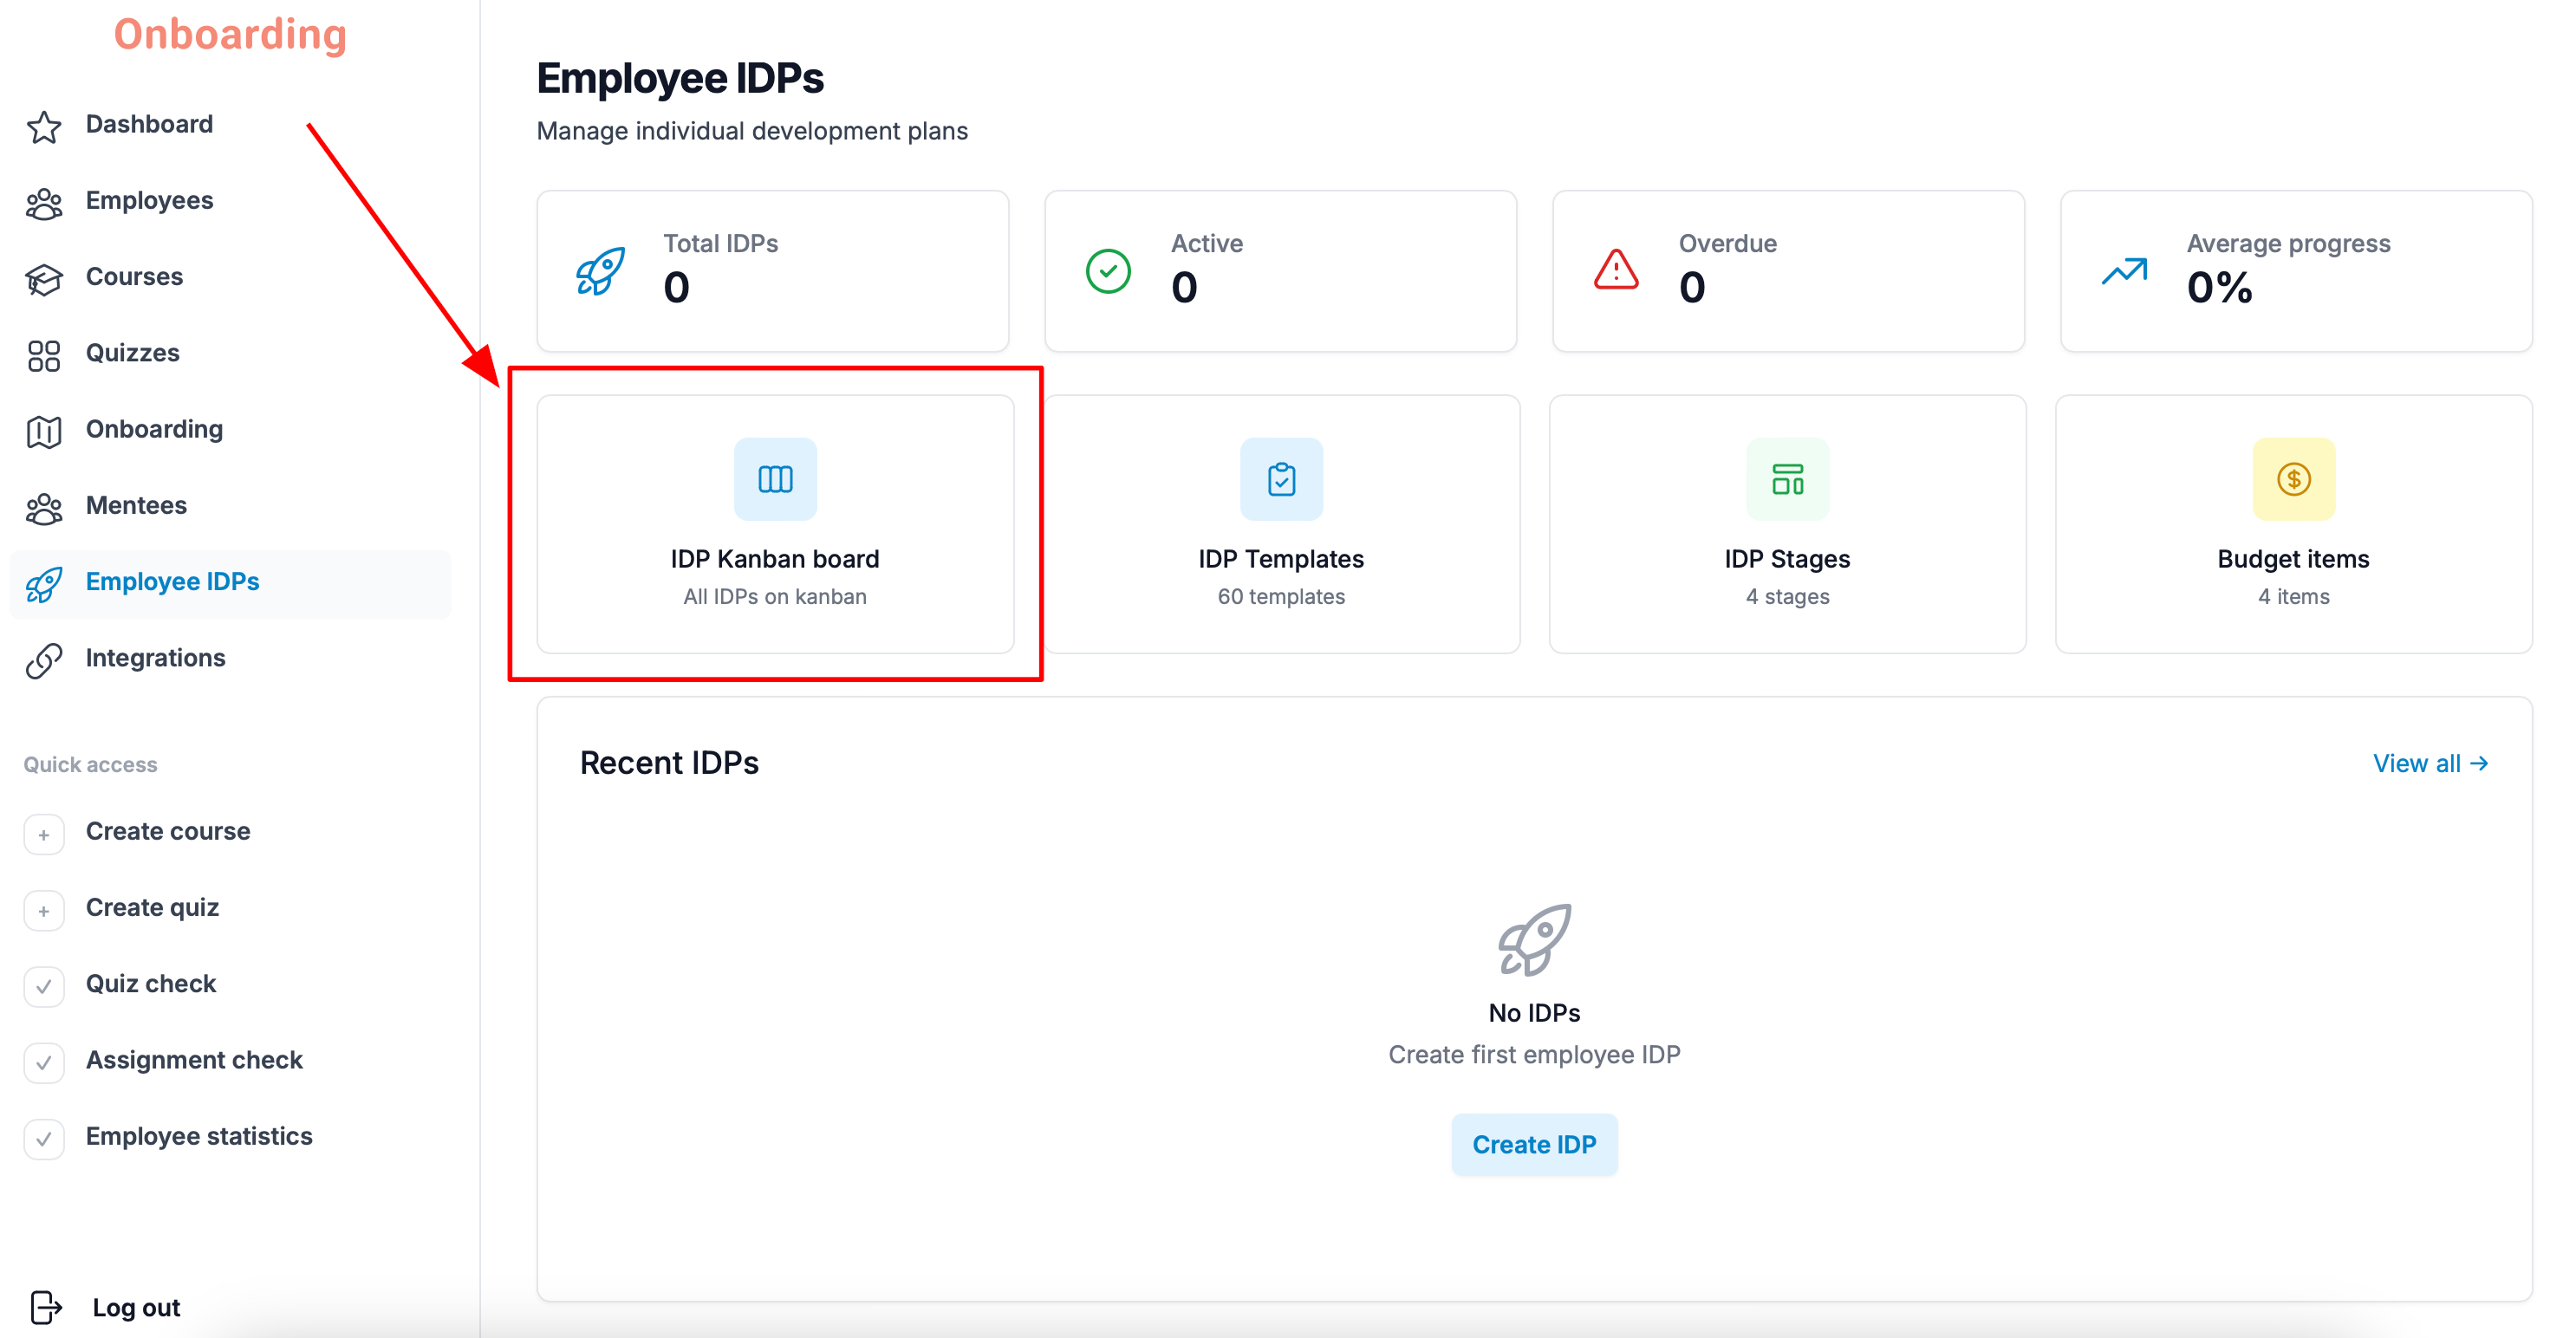
The Kanban board opens with all the employees' active IDPs.
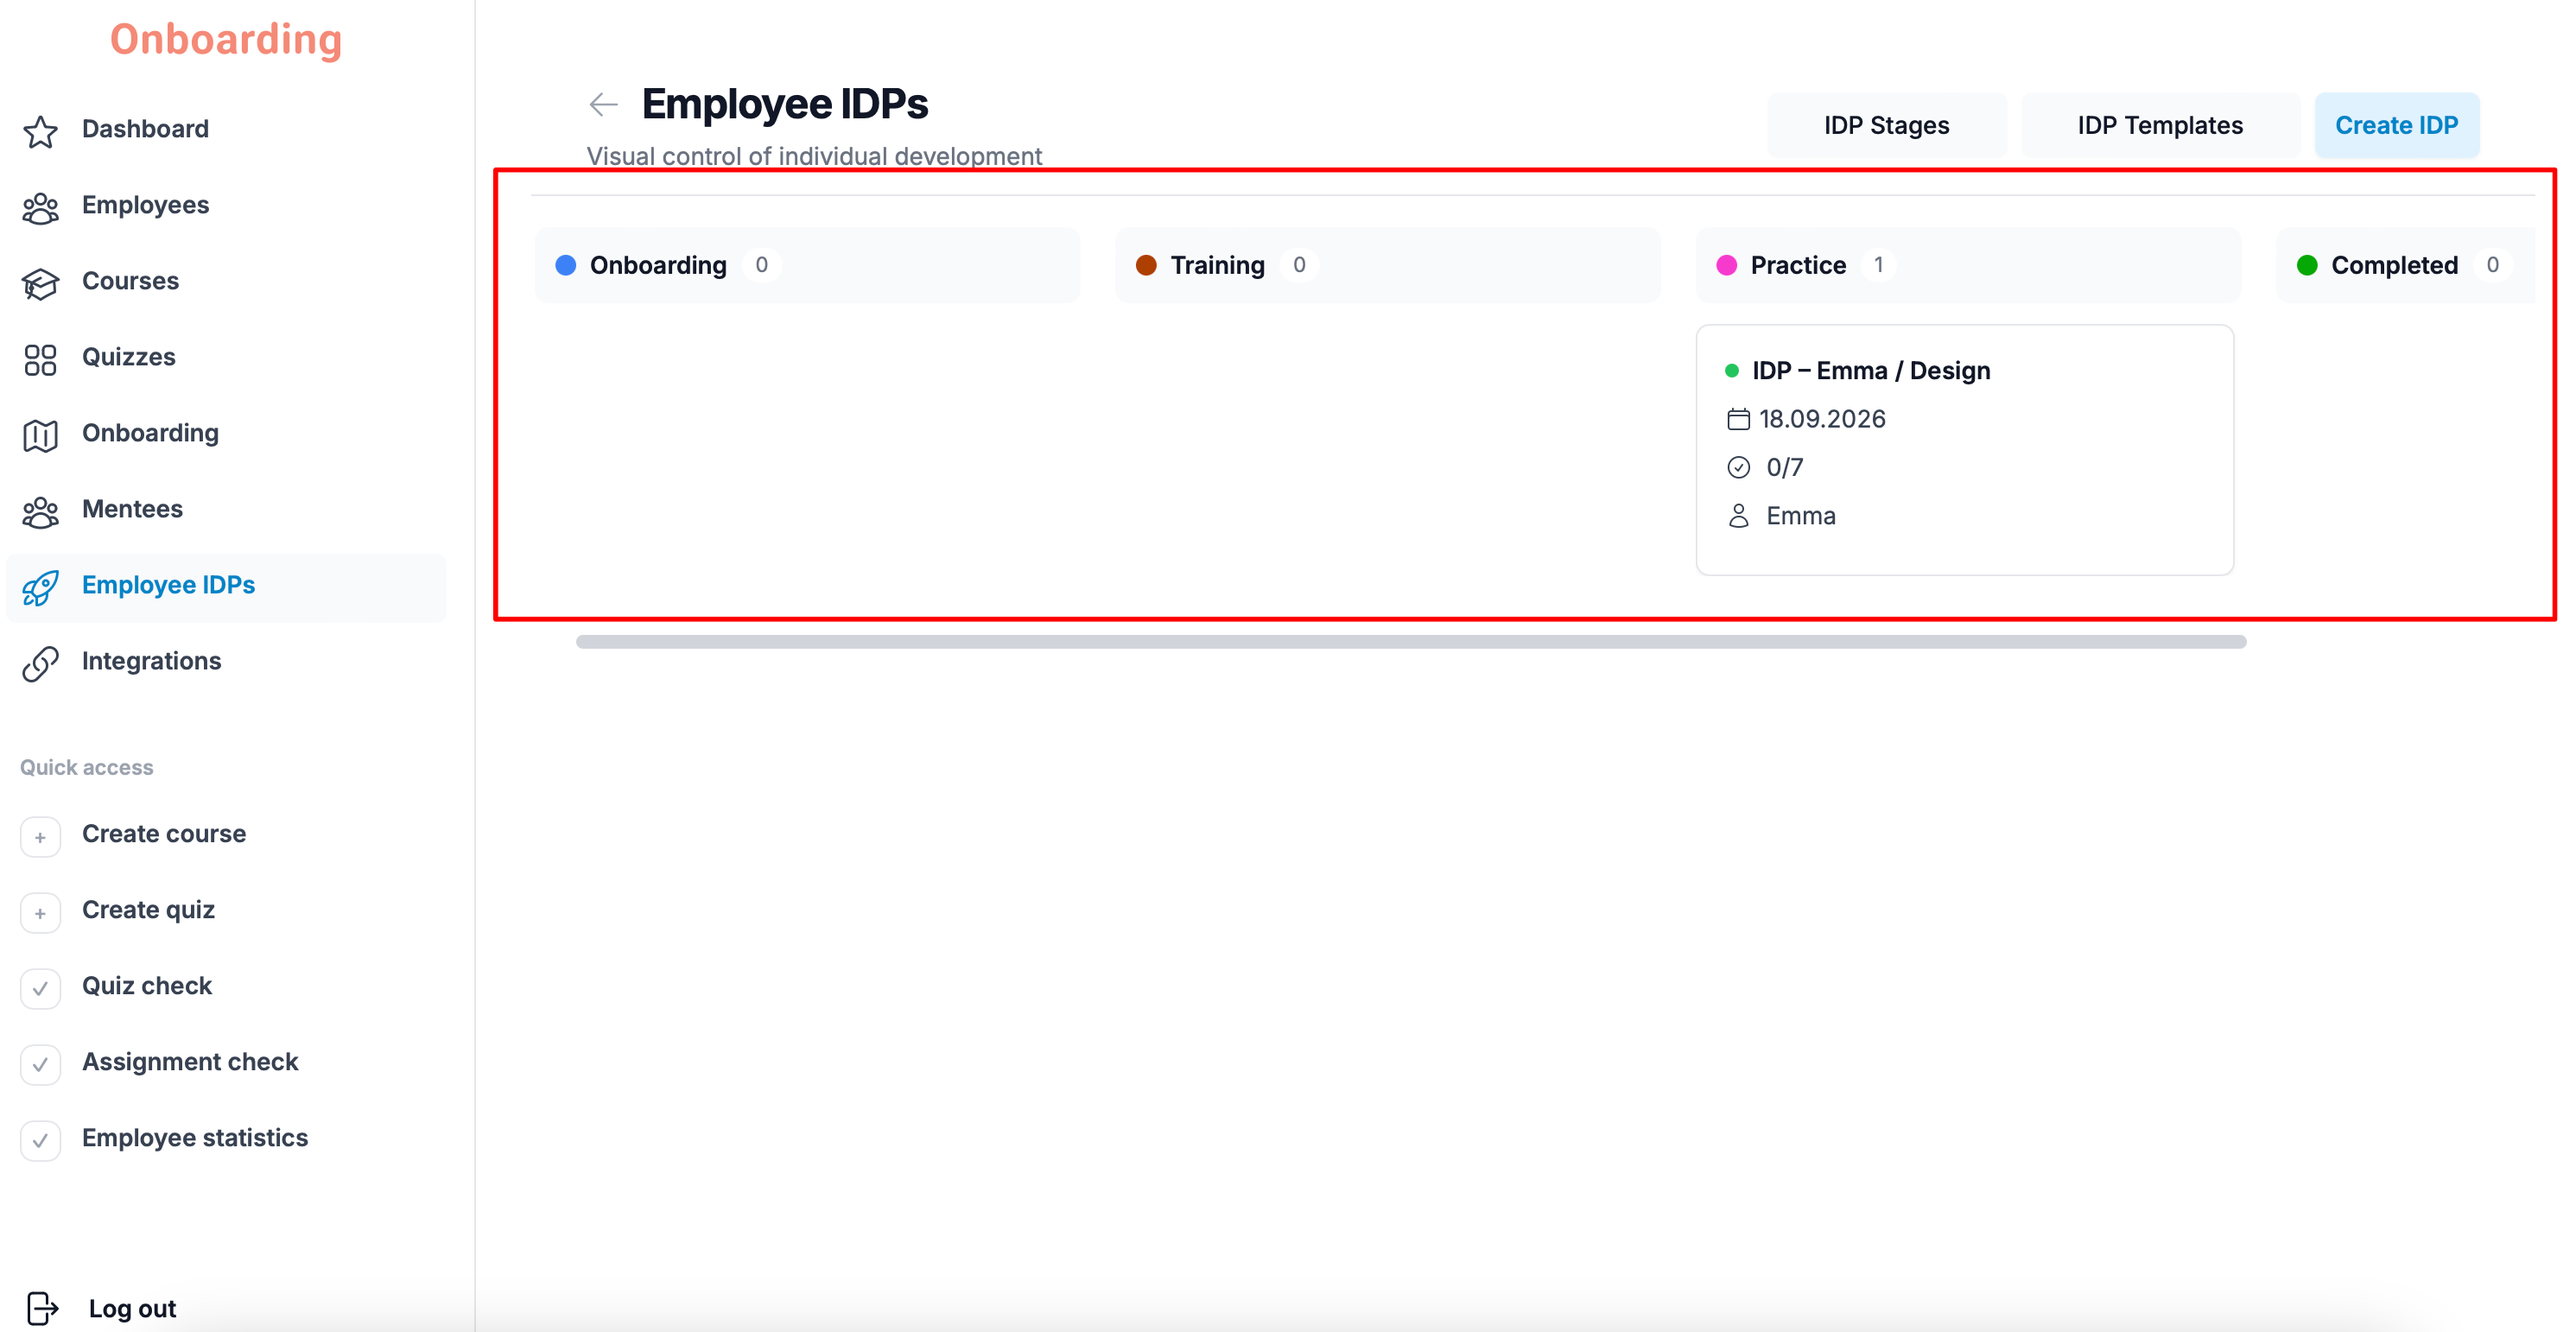
On the board, IDPs are grouped into stages according to their current status. This gives you a quick read on employees' progress and shows exactly which stage each individual development plan is in.
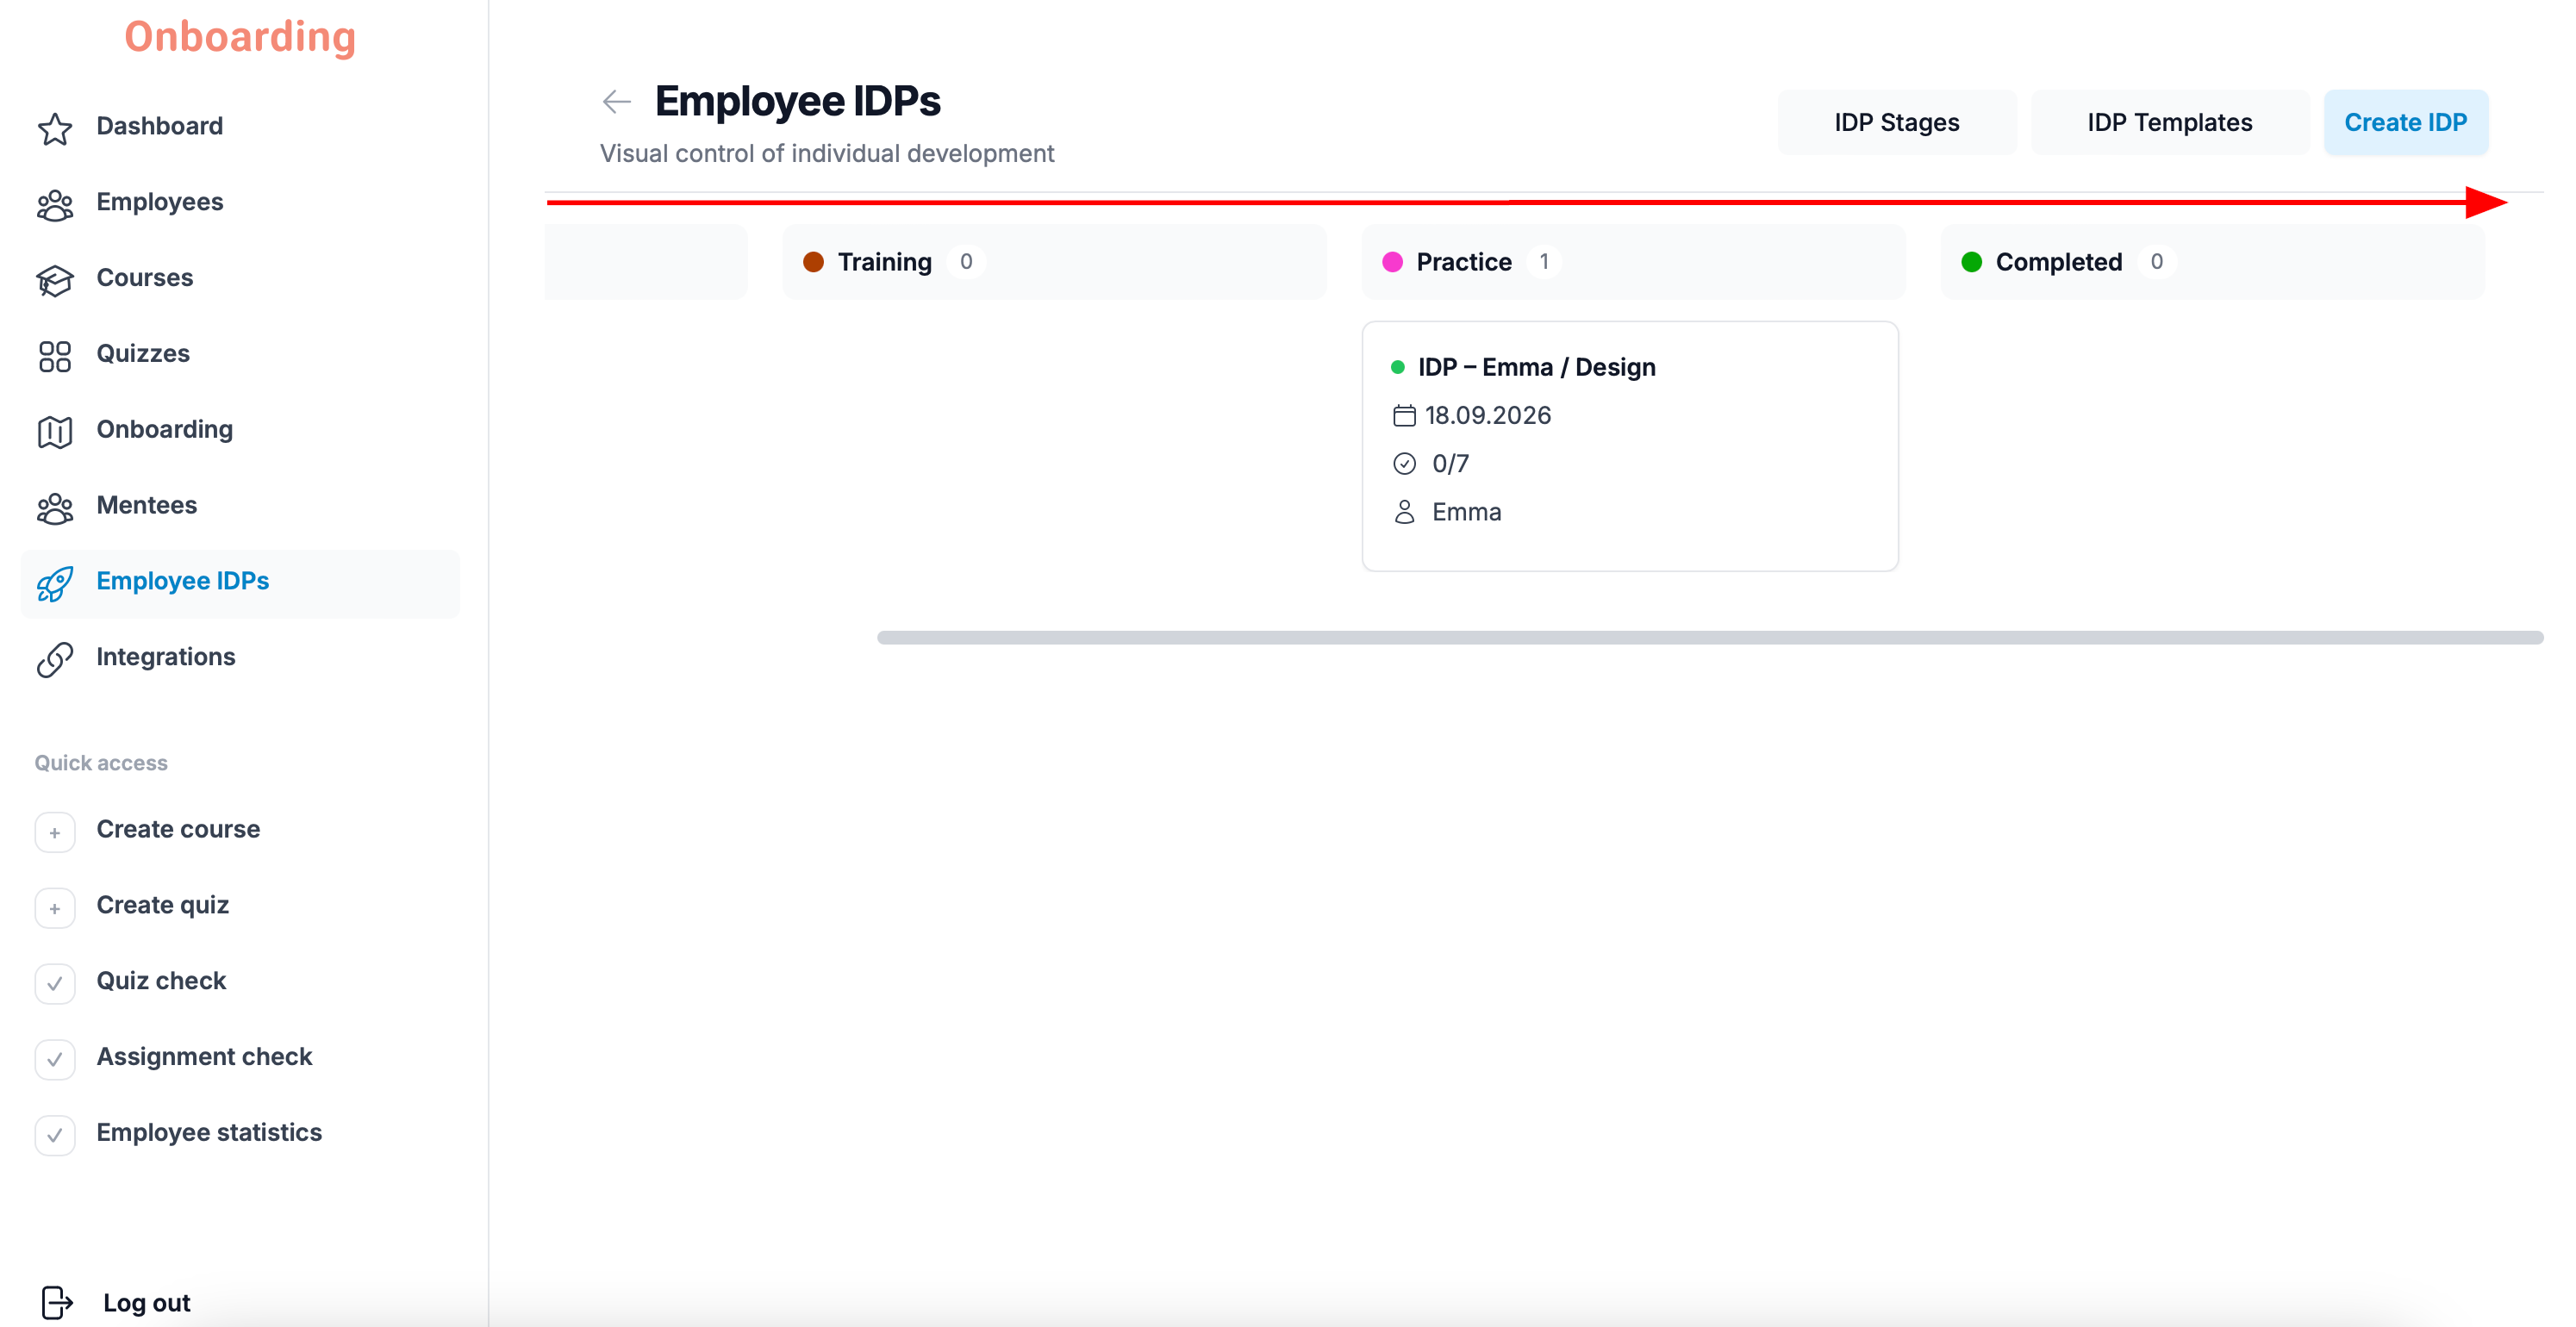
Every active stage appears as its own column. If needed, scroll the board to the right to see all the stages.
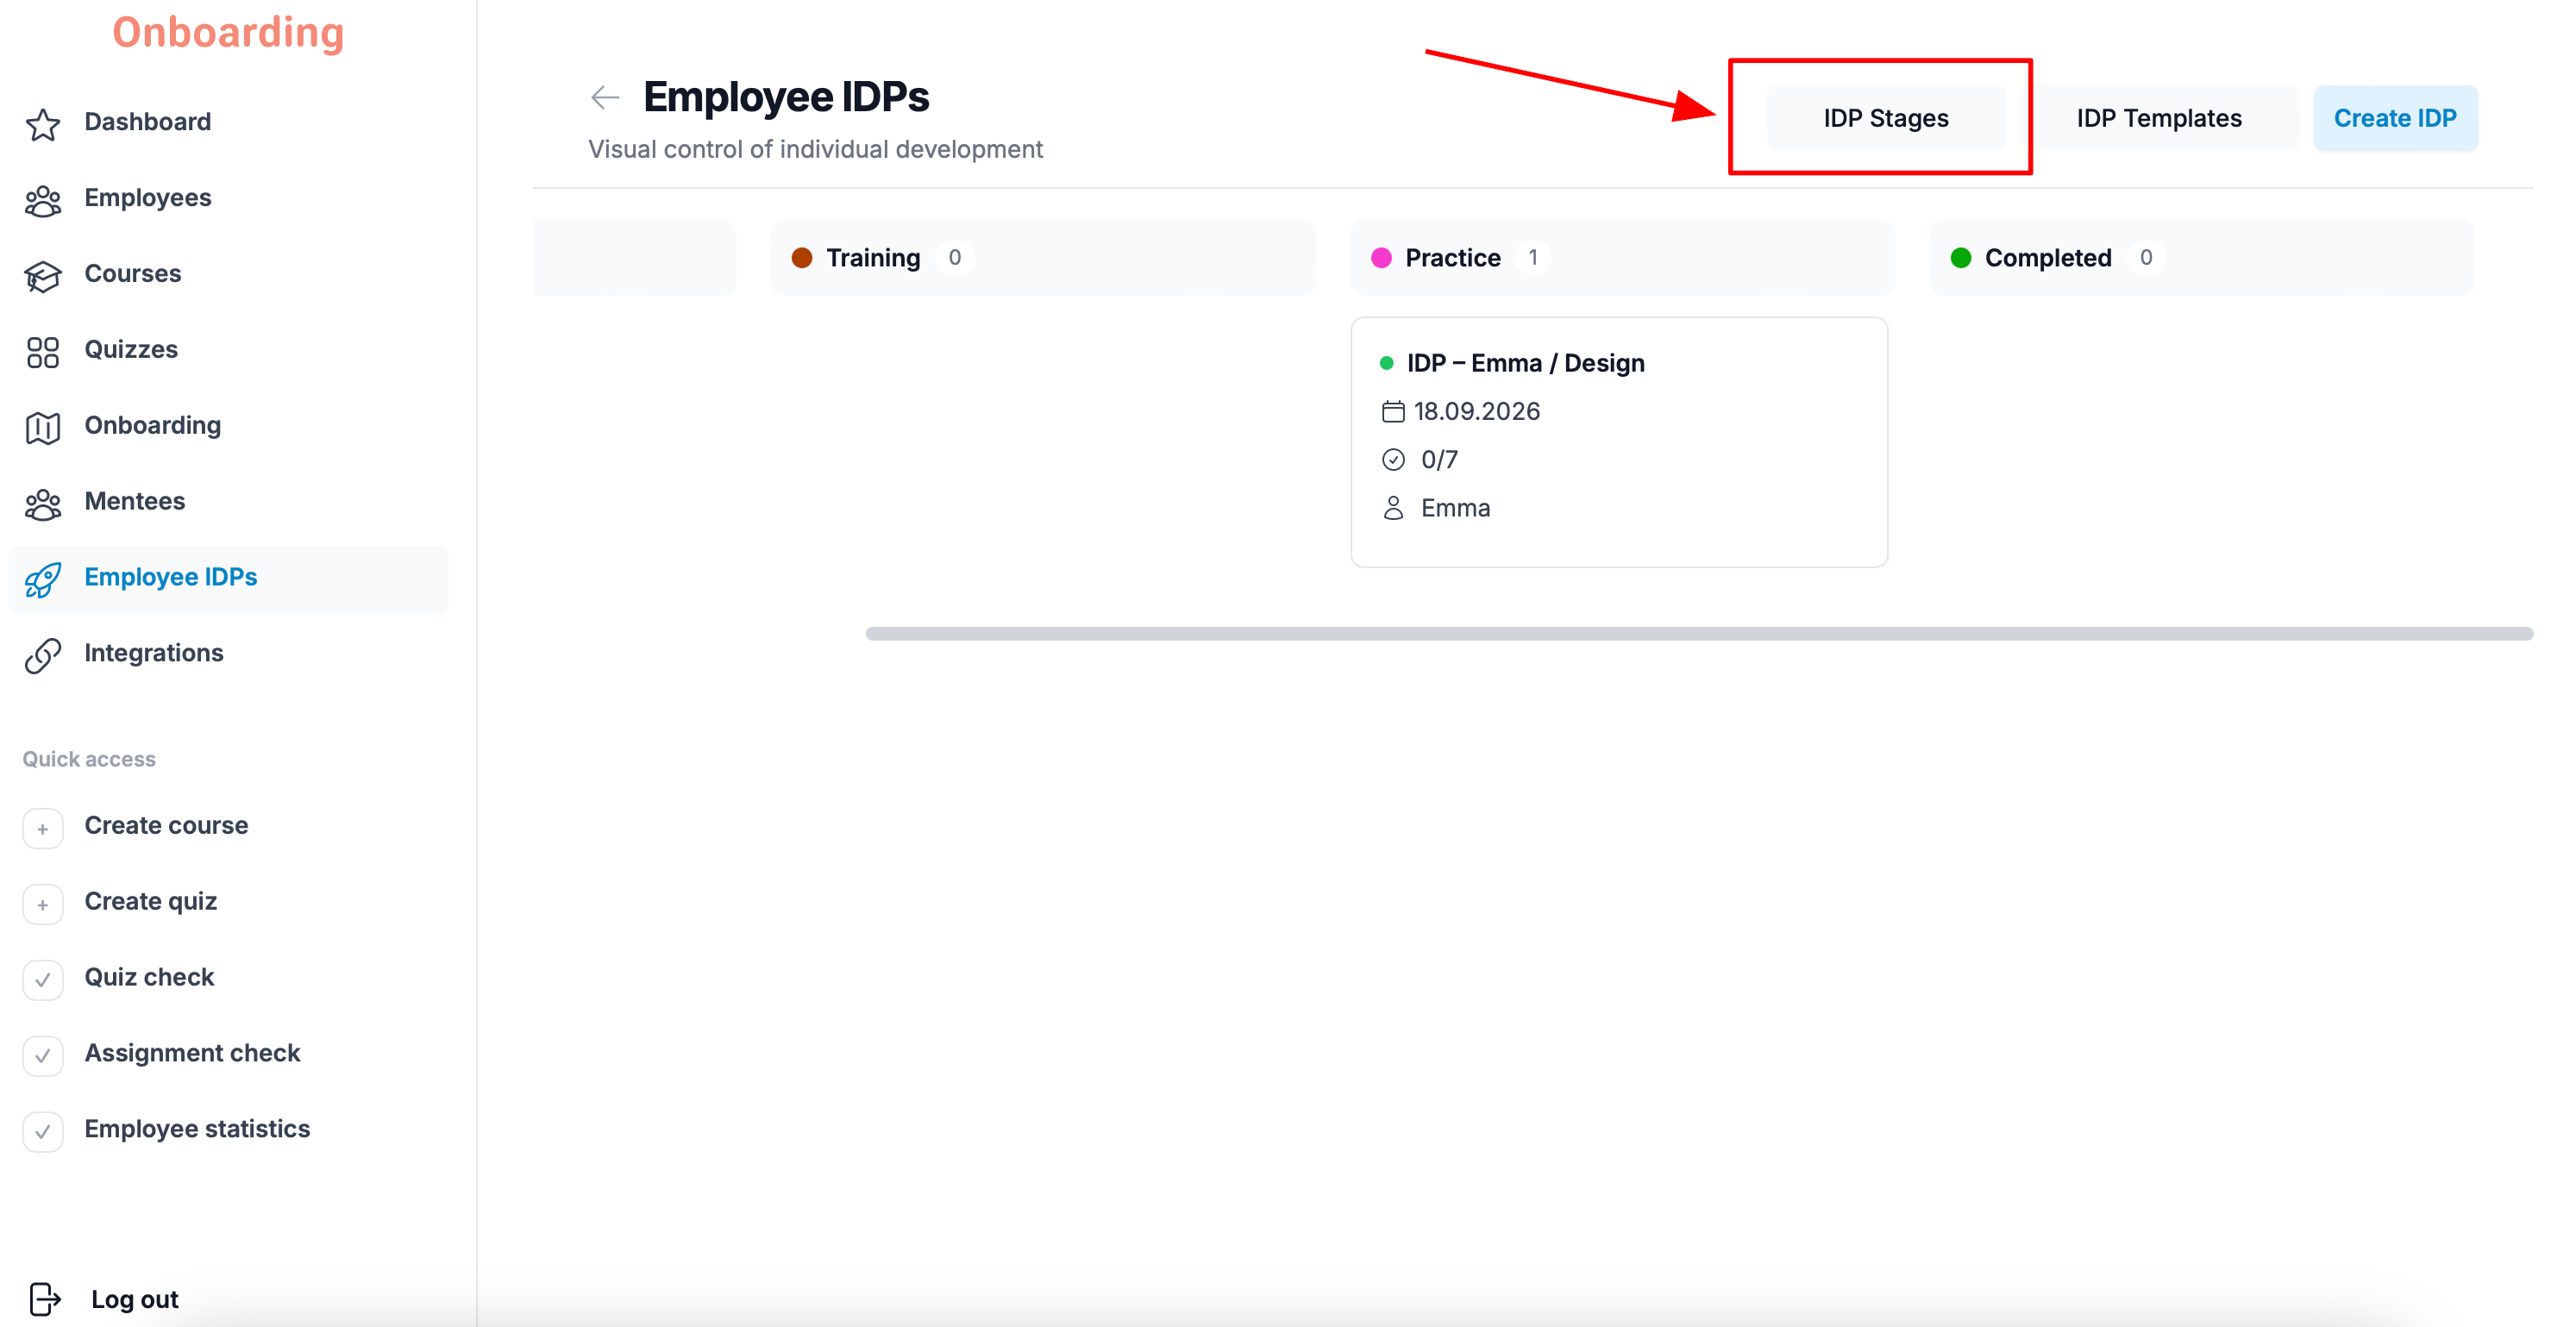
From the Kanban board you can jump straight to stage management by clicking the «IDP Stages» button in the top-right corner of the page.
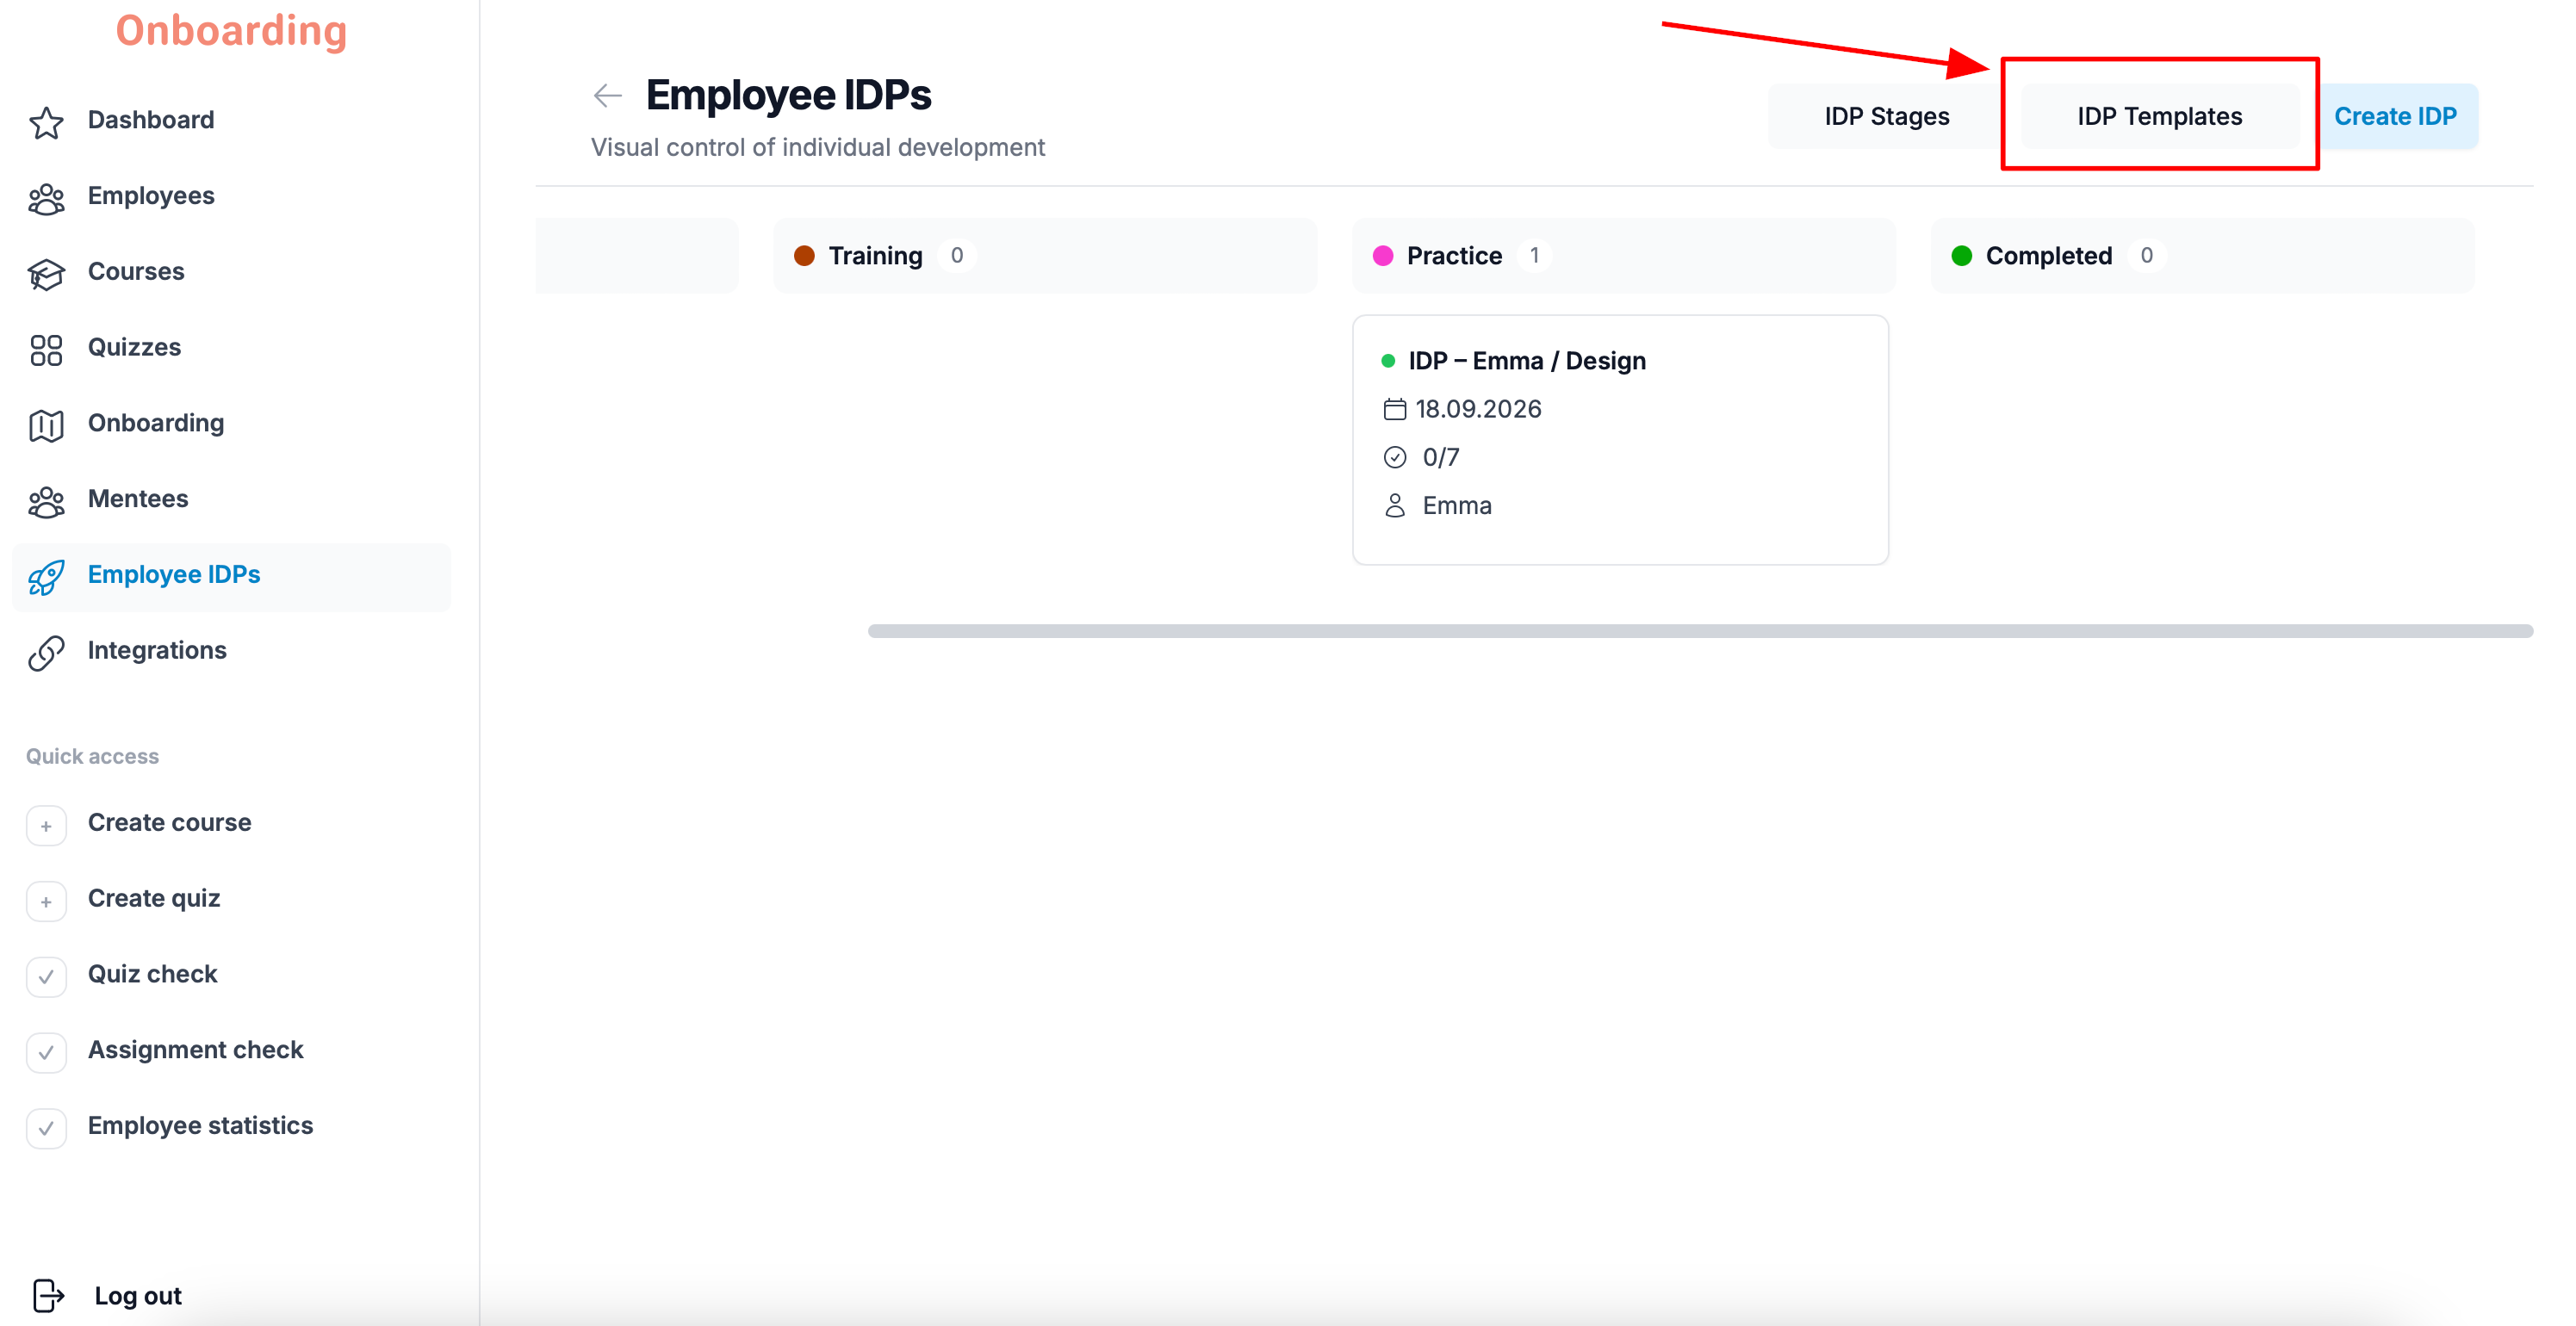
You can also go to the IDP templates from here by clicking the «IDP Templates» button.
IDP Templates
To open the templates, go to the «Employee IDPs» section and click the «IDP Templates» block on the main page.
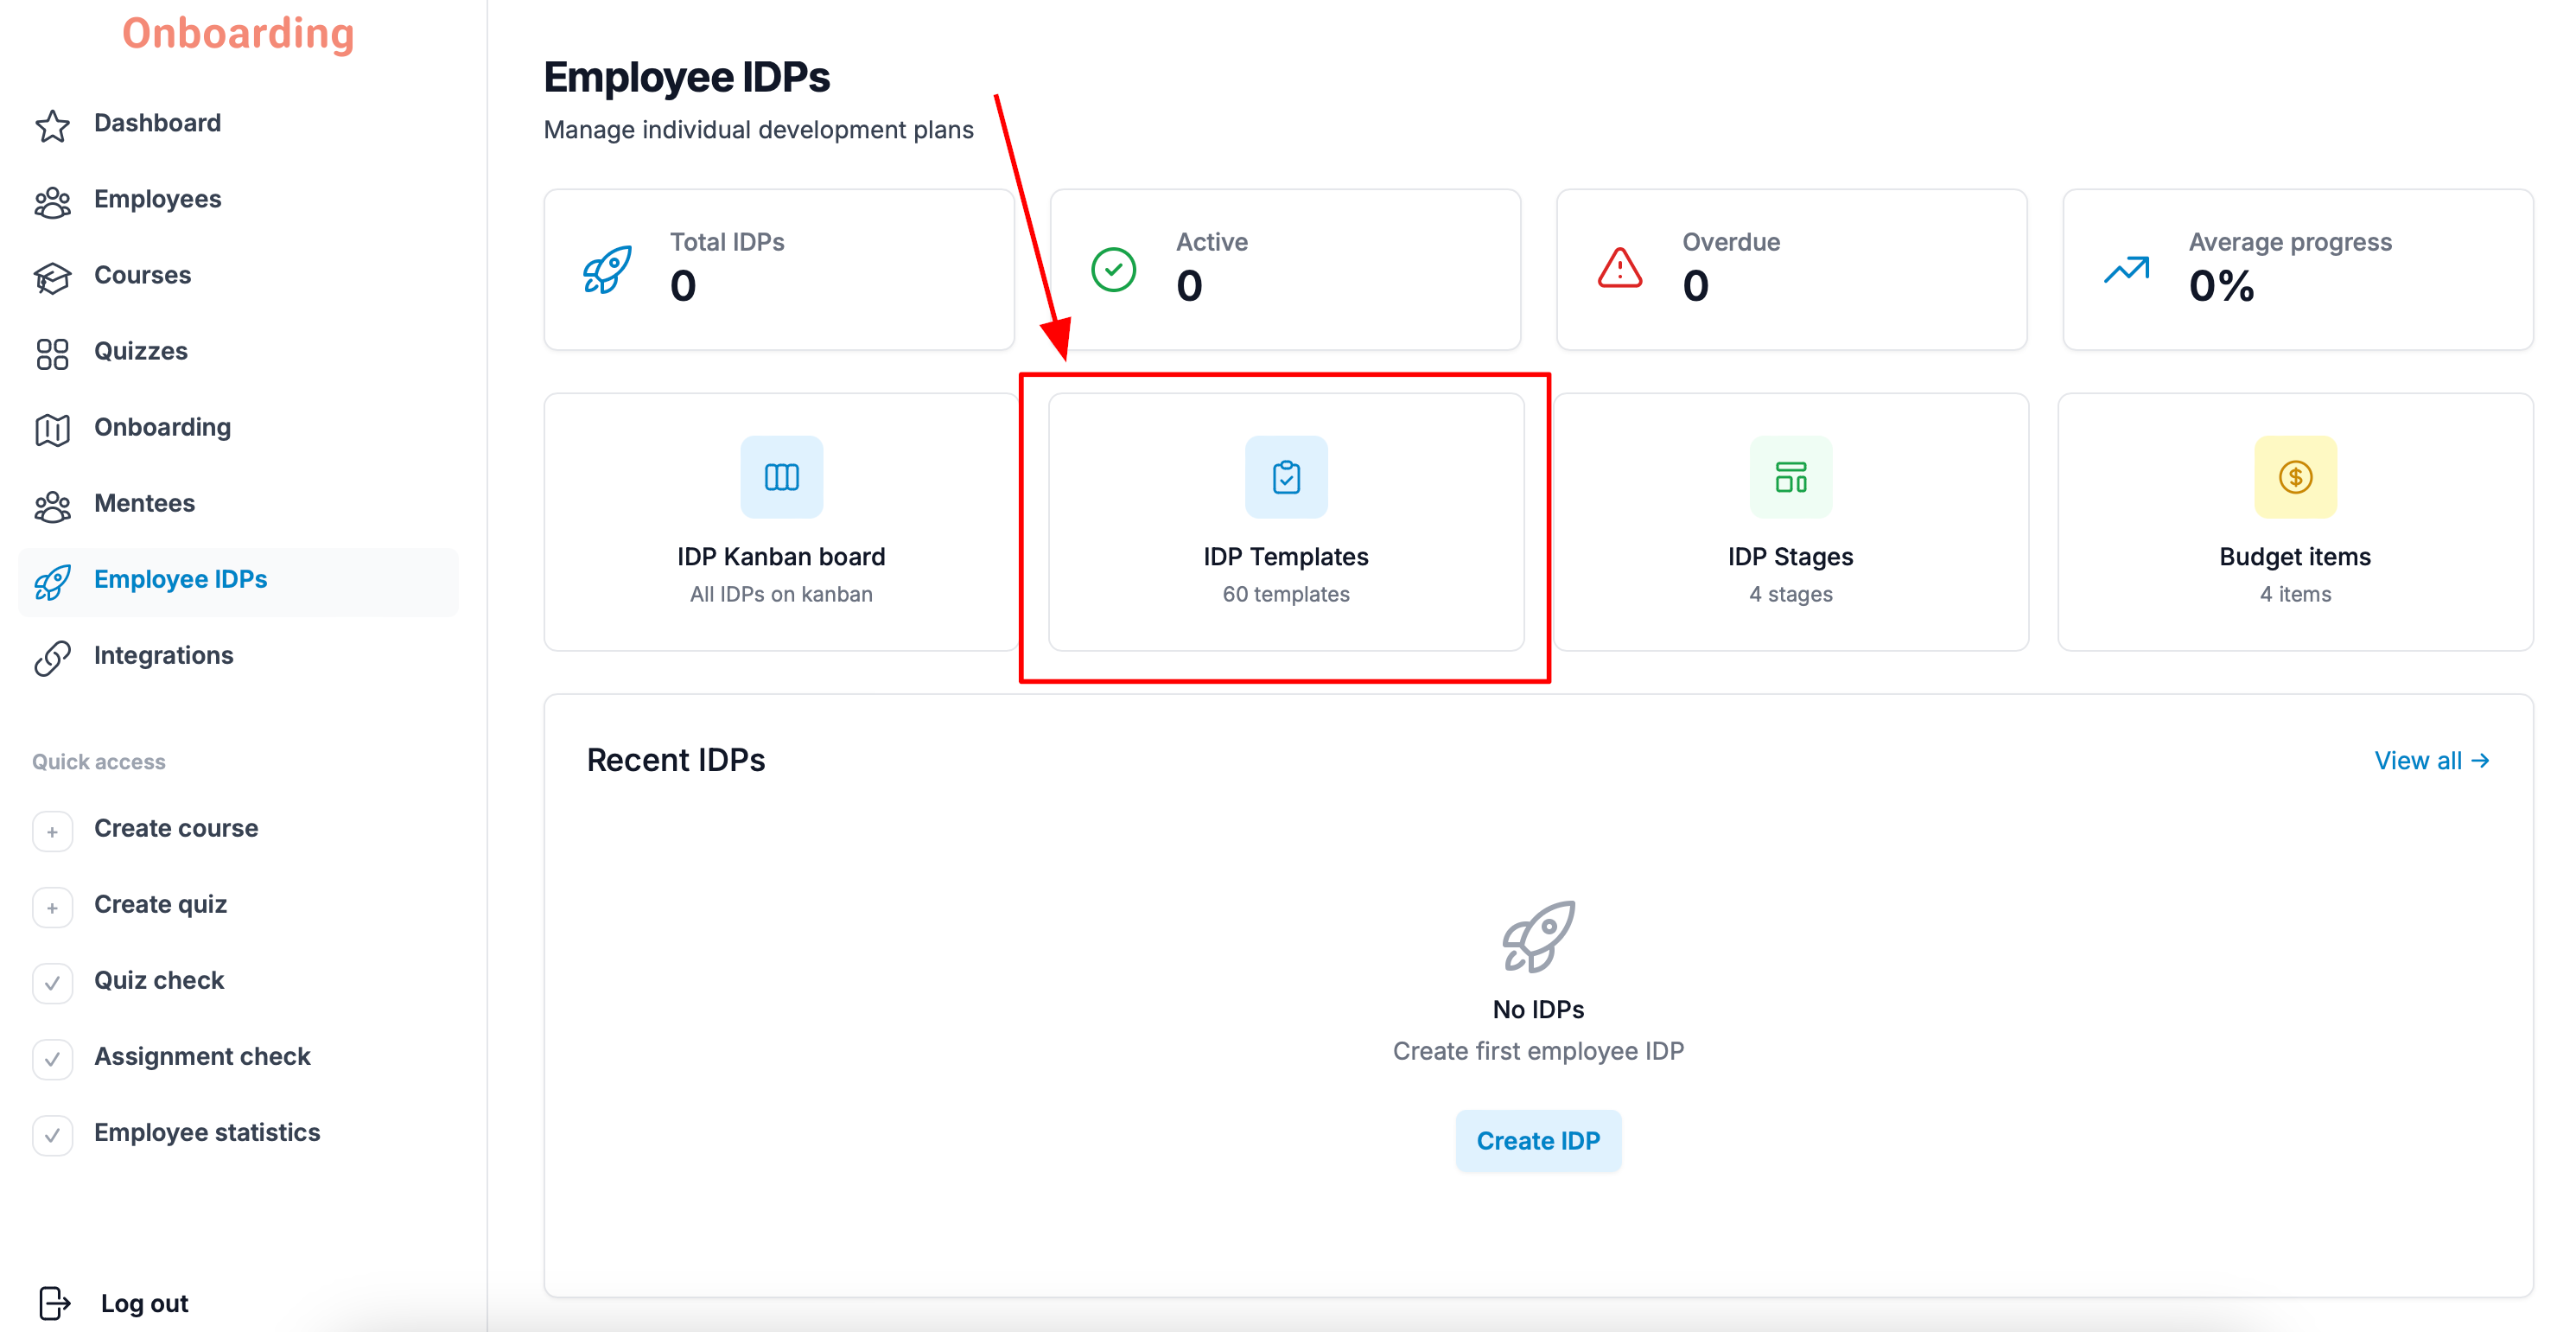
A page opens with all the available IDP templates.
For your convenience, the platform ships with more than 60 ready-made IDP templates for a wide range of professions and roles, ready to use when creating individual development plans.
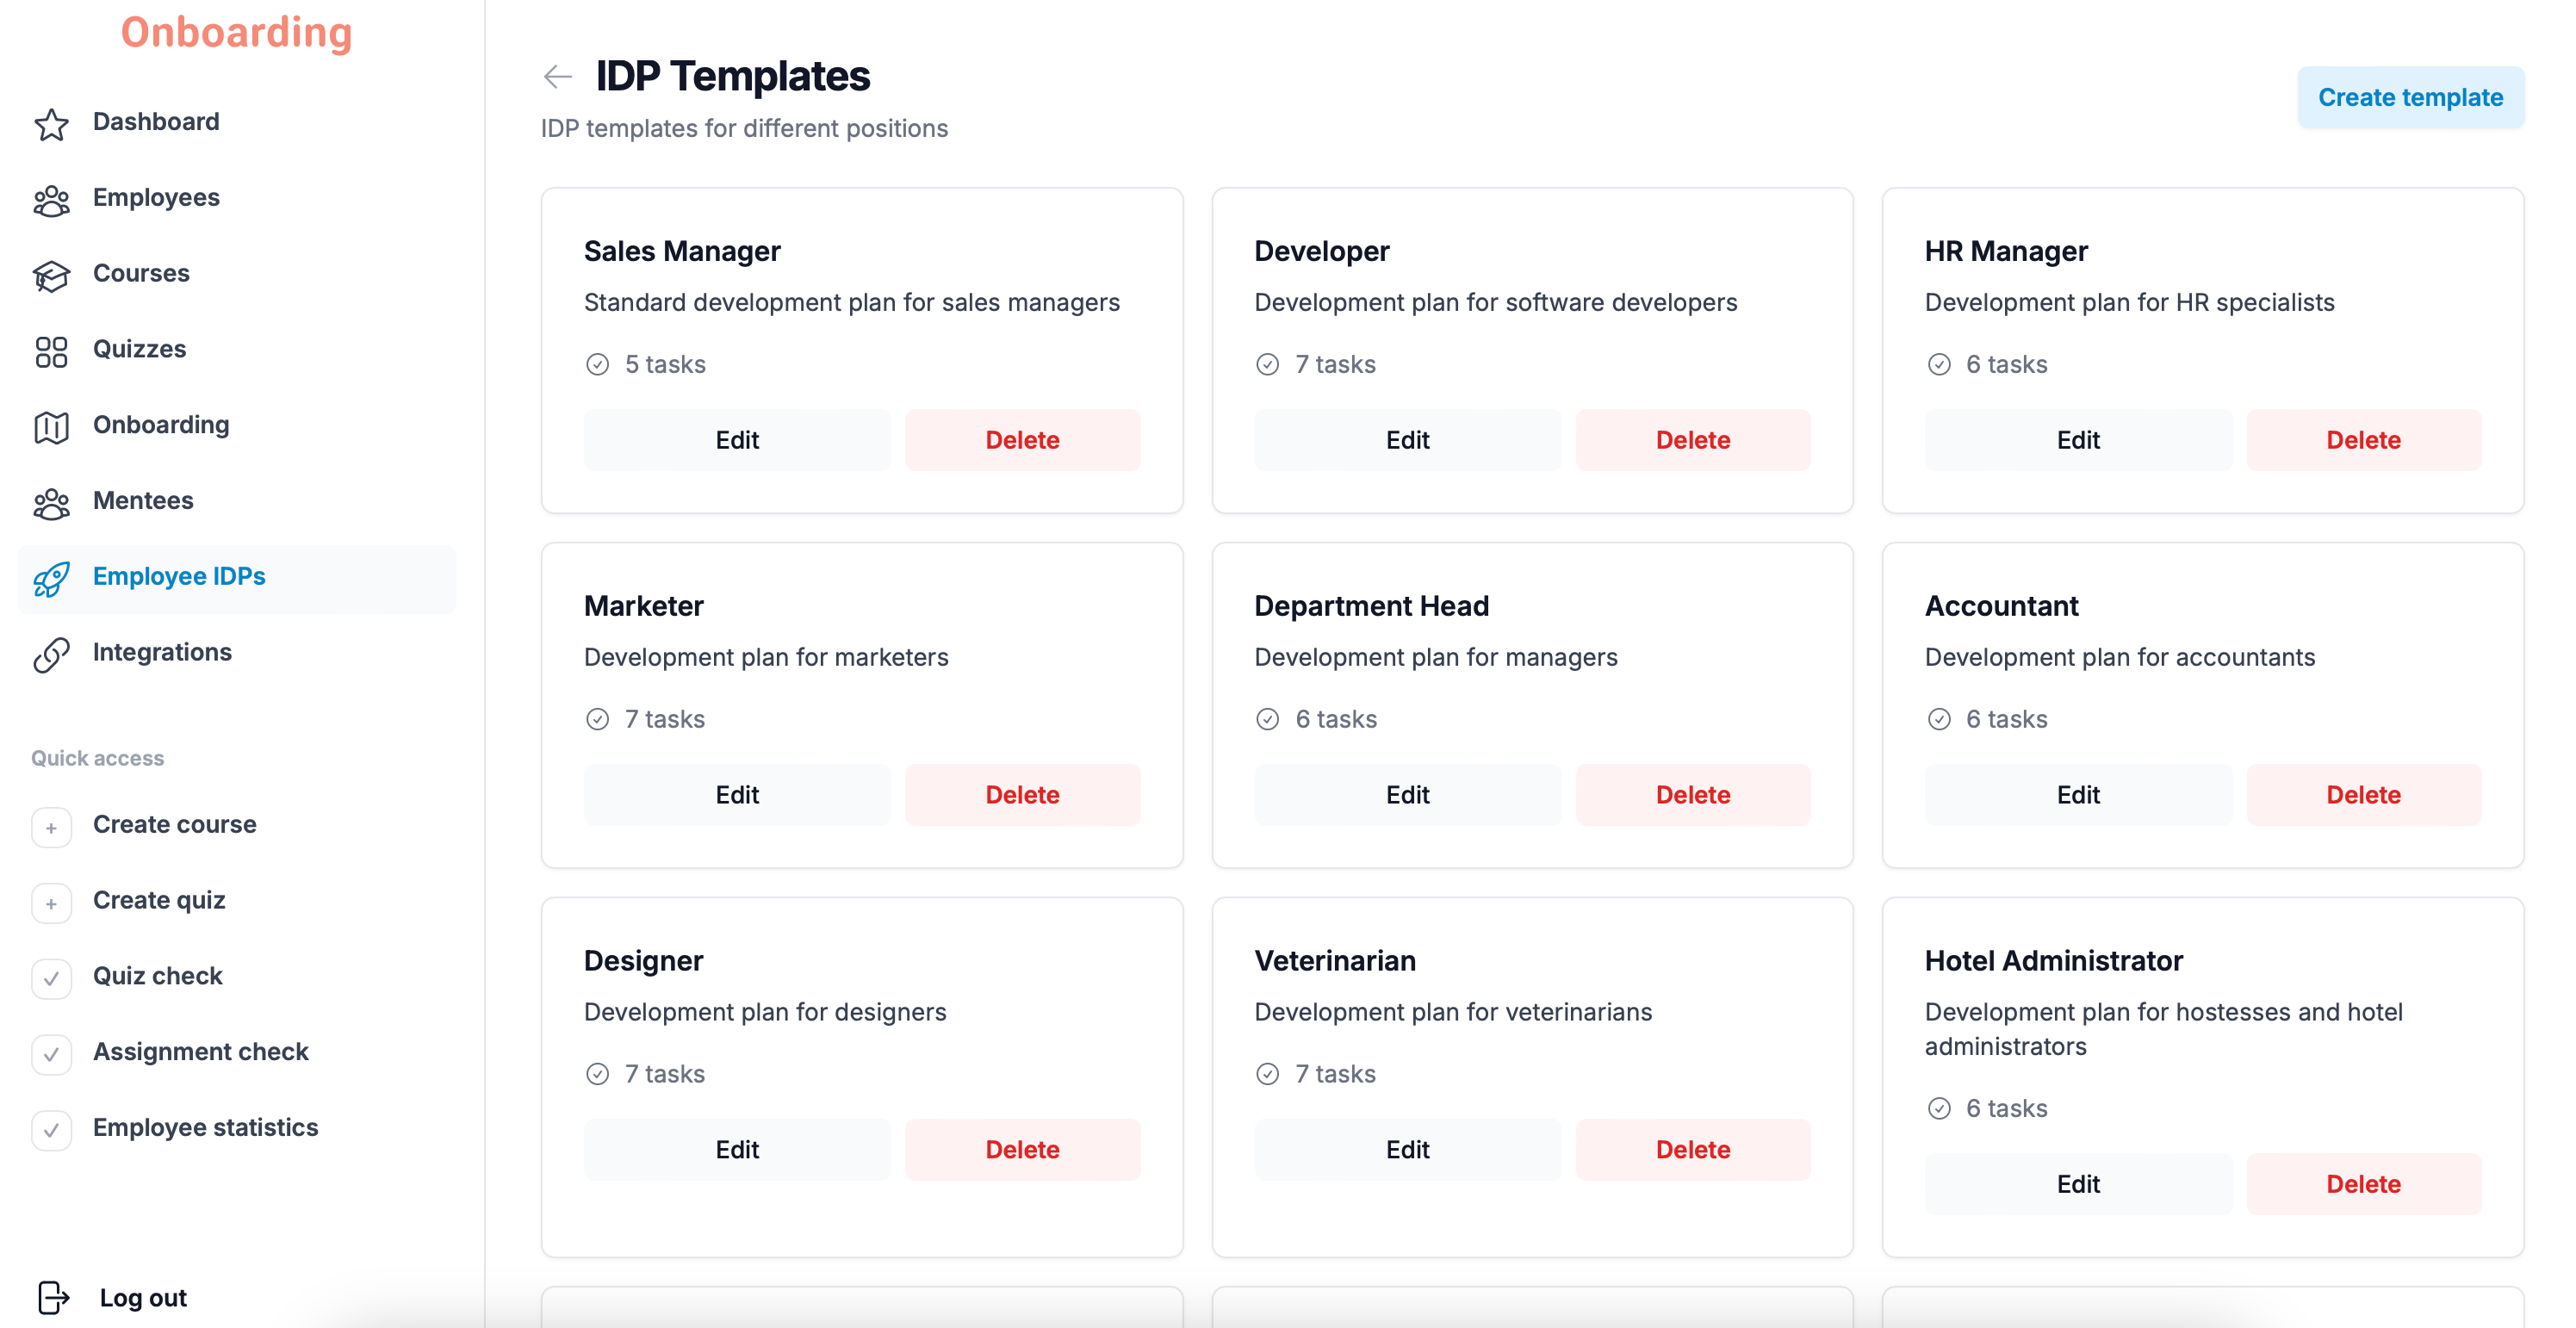
On the templates page you can:
- create new templates;
- edit existing templates;
- delete templates.
Creating a template
To create a new template, open the «IDP Templates» page and click «Create template» in the top-right corner of the page.
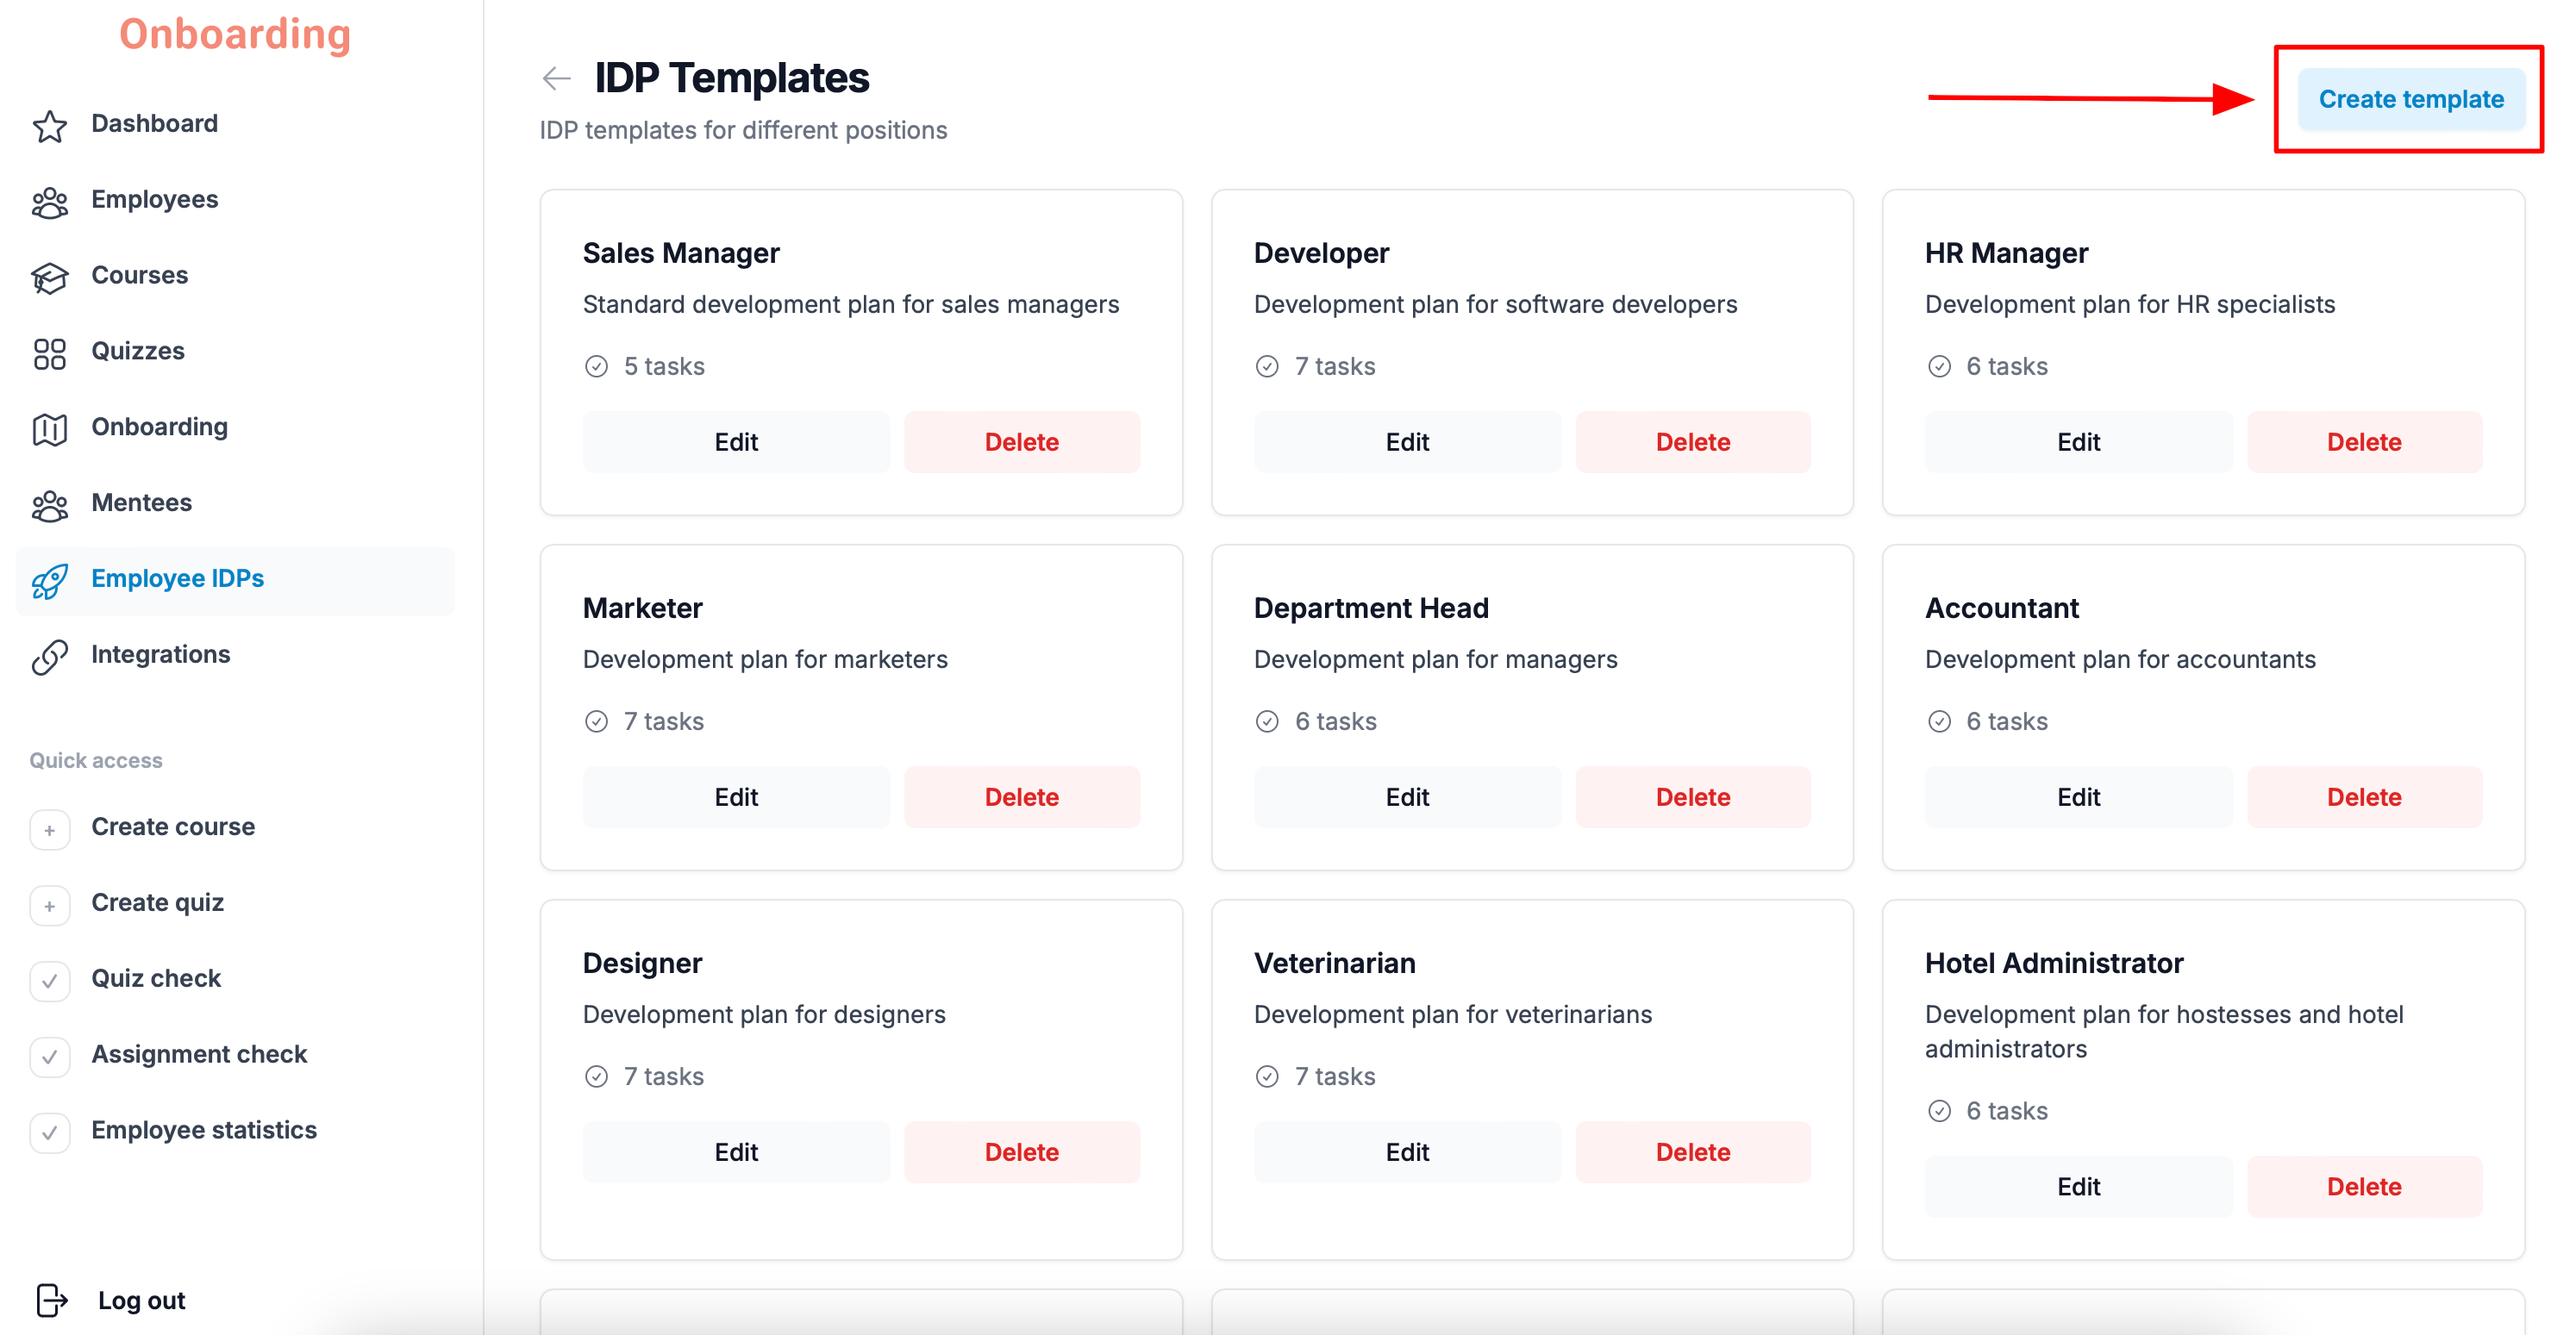
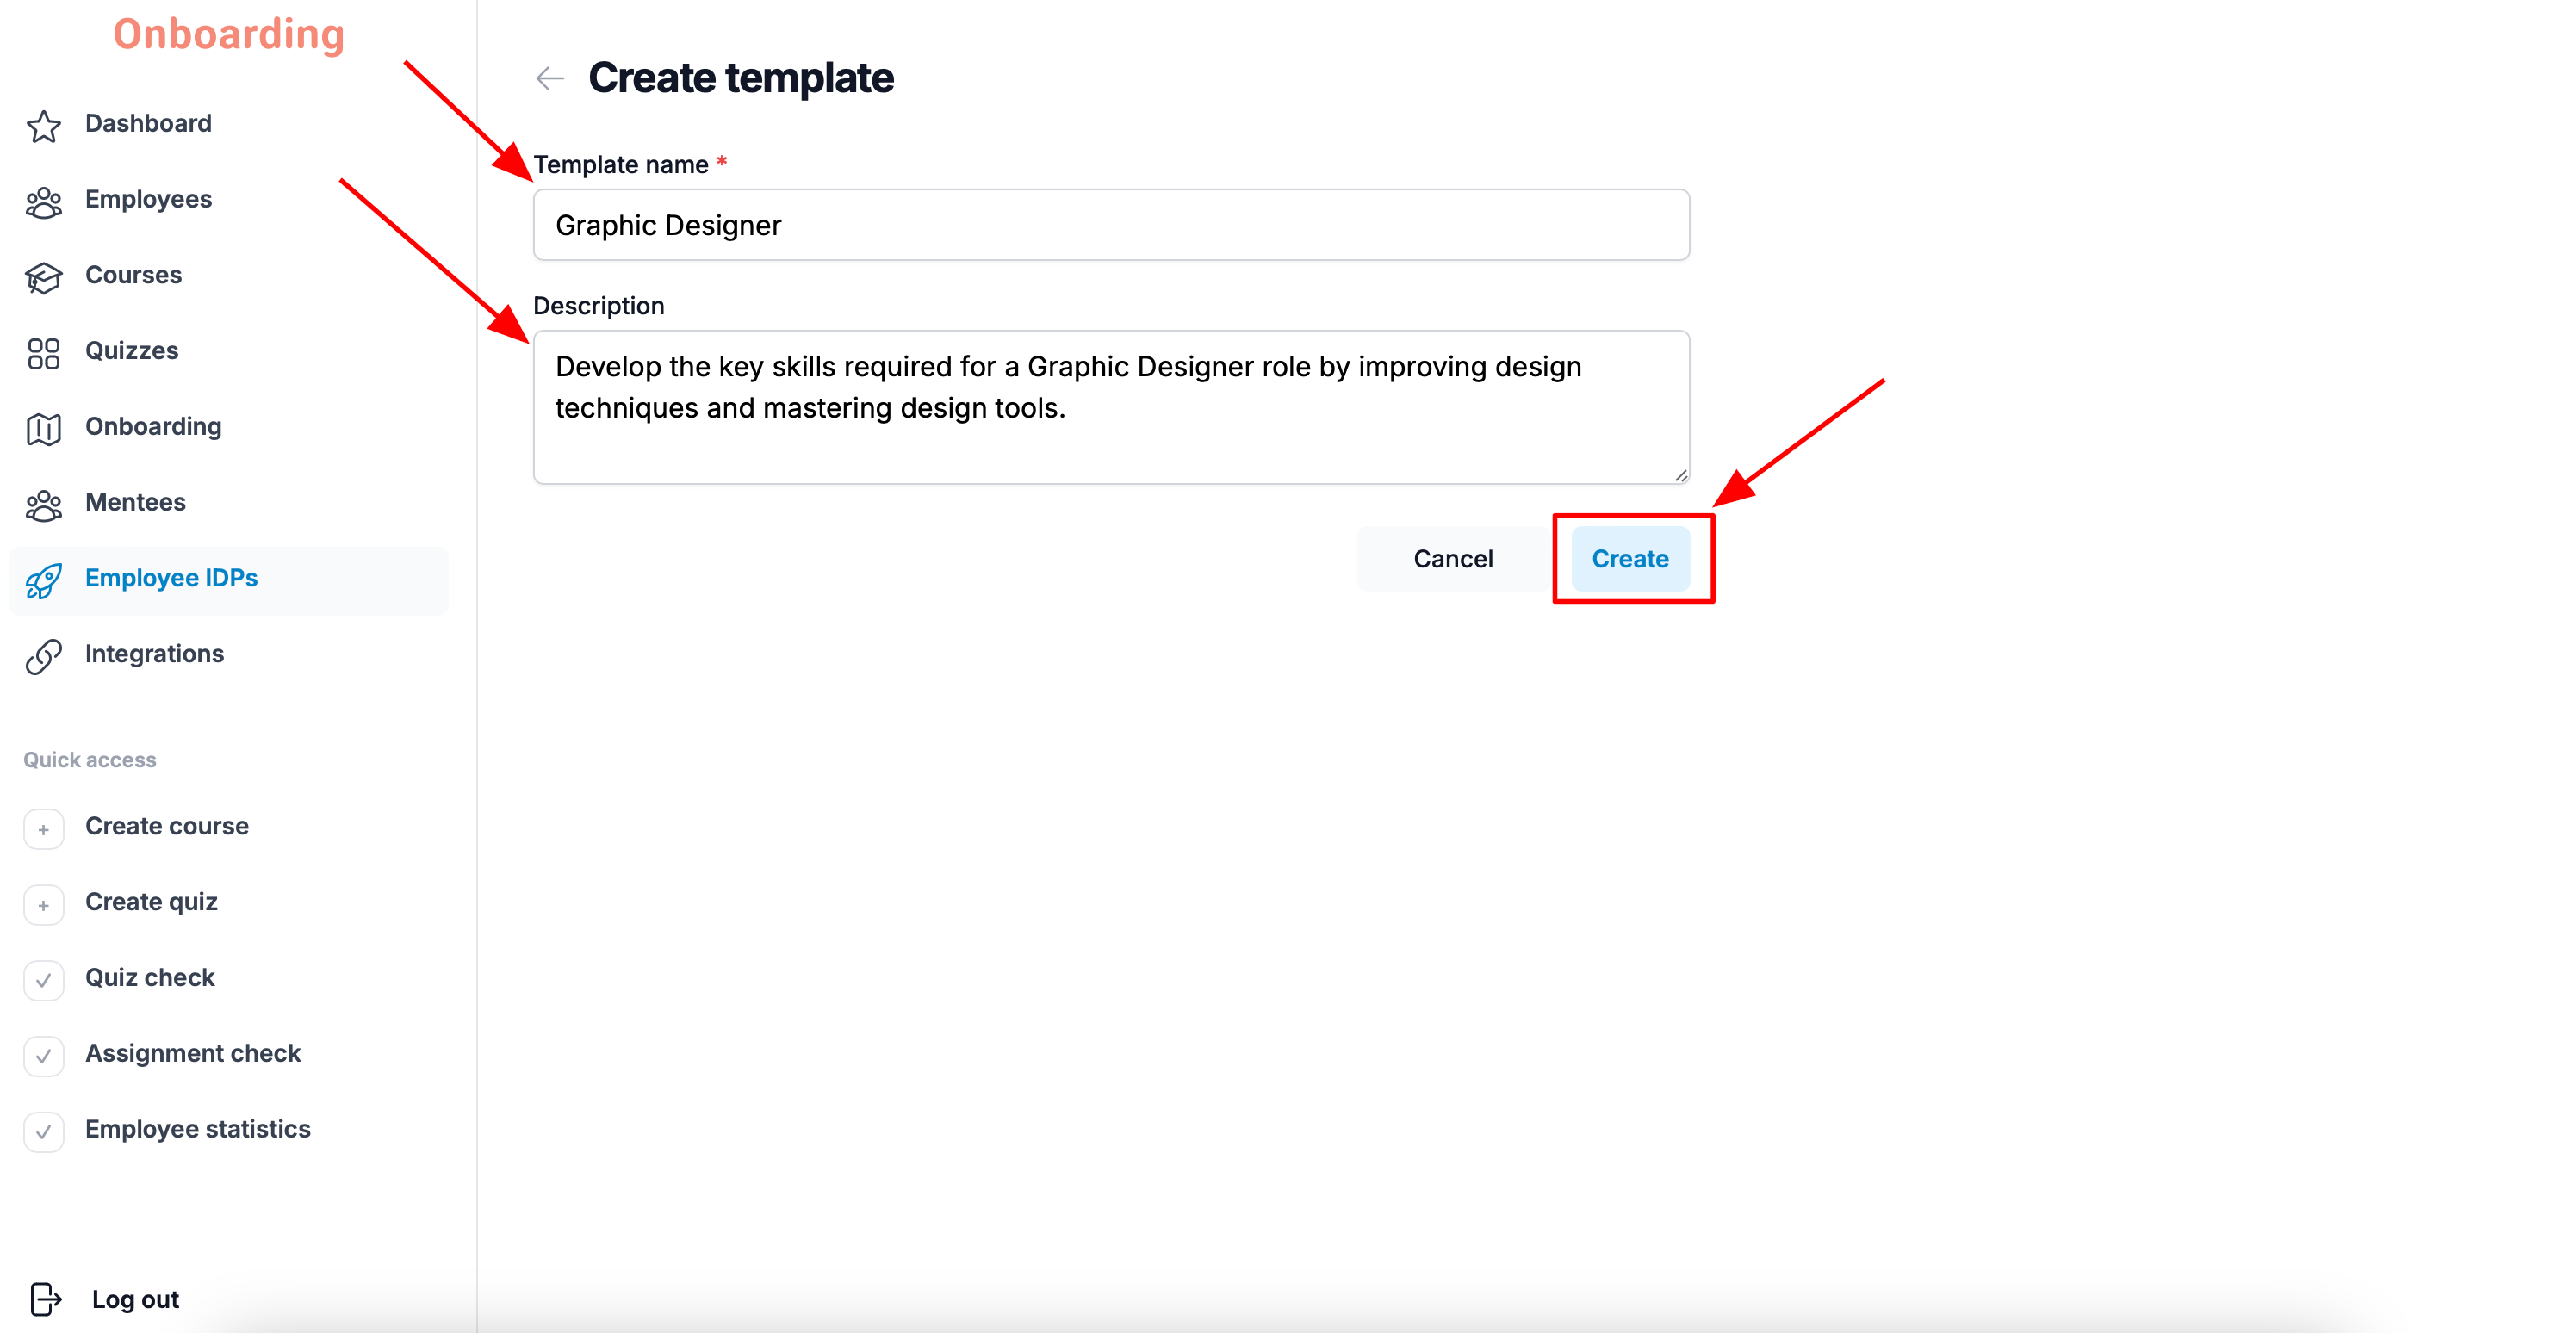
The template creation page opens.
Start by filling in the basic information:
- the template name;
- a short description.
Then click «Create».
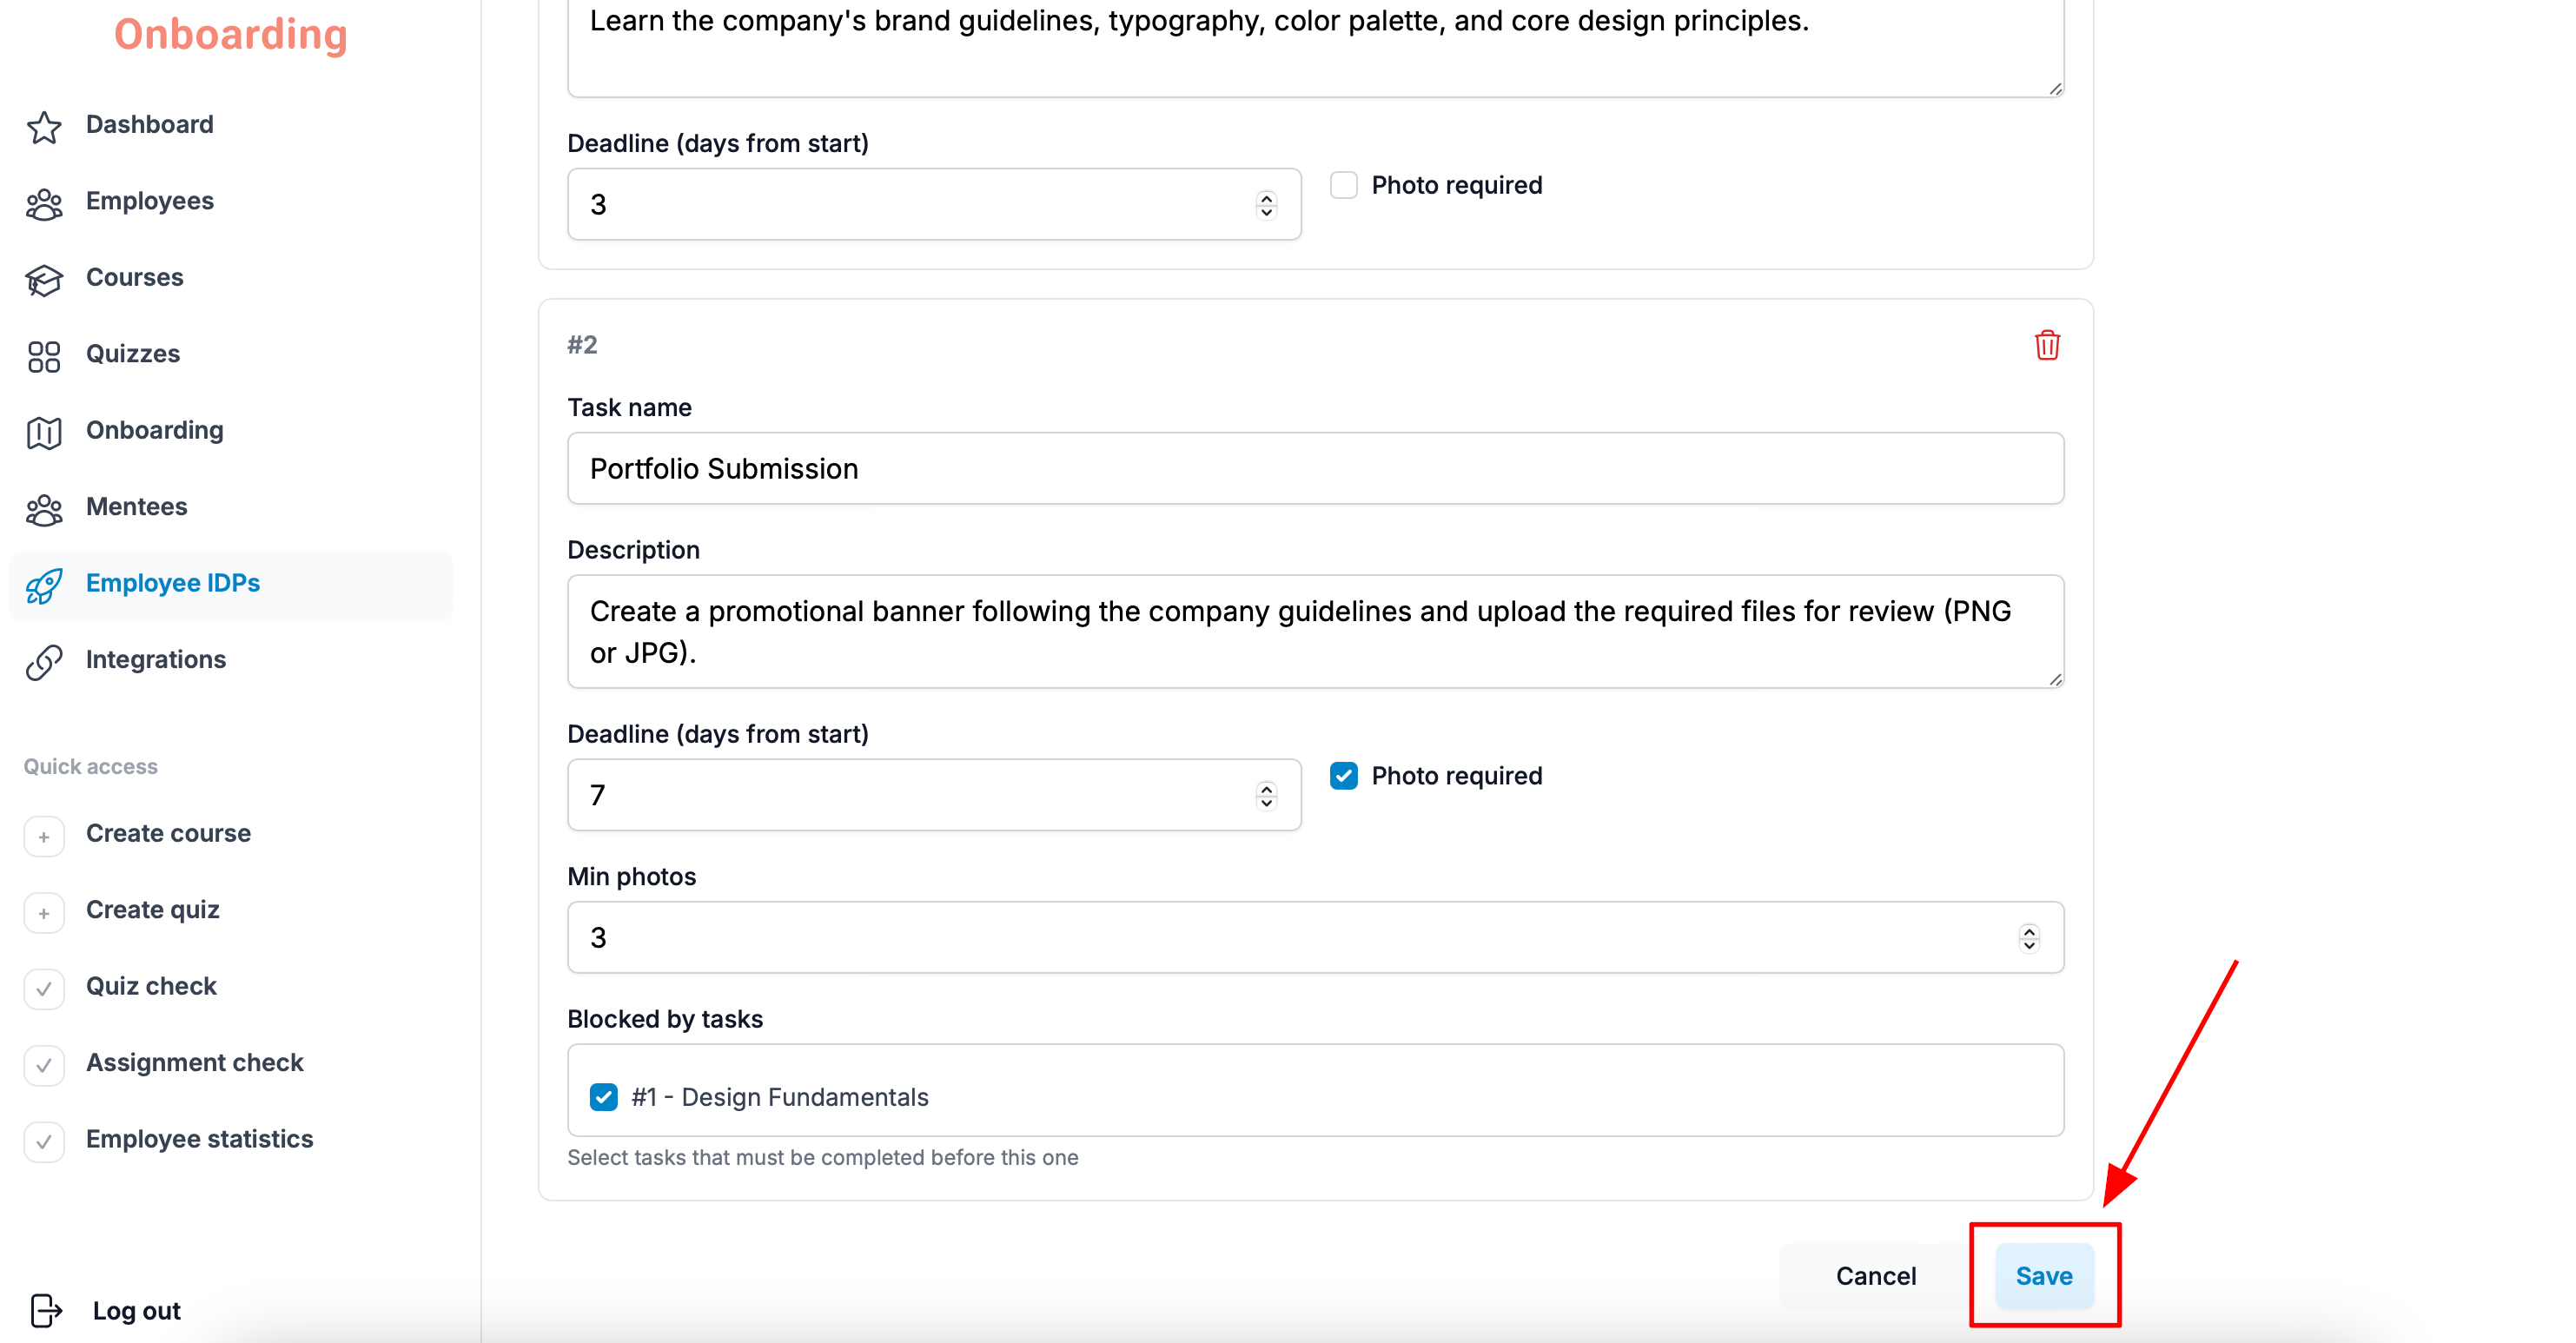
Below, a task checklist opens — this is what the IDP will be built from.
To add a task, click «+ Add task».
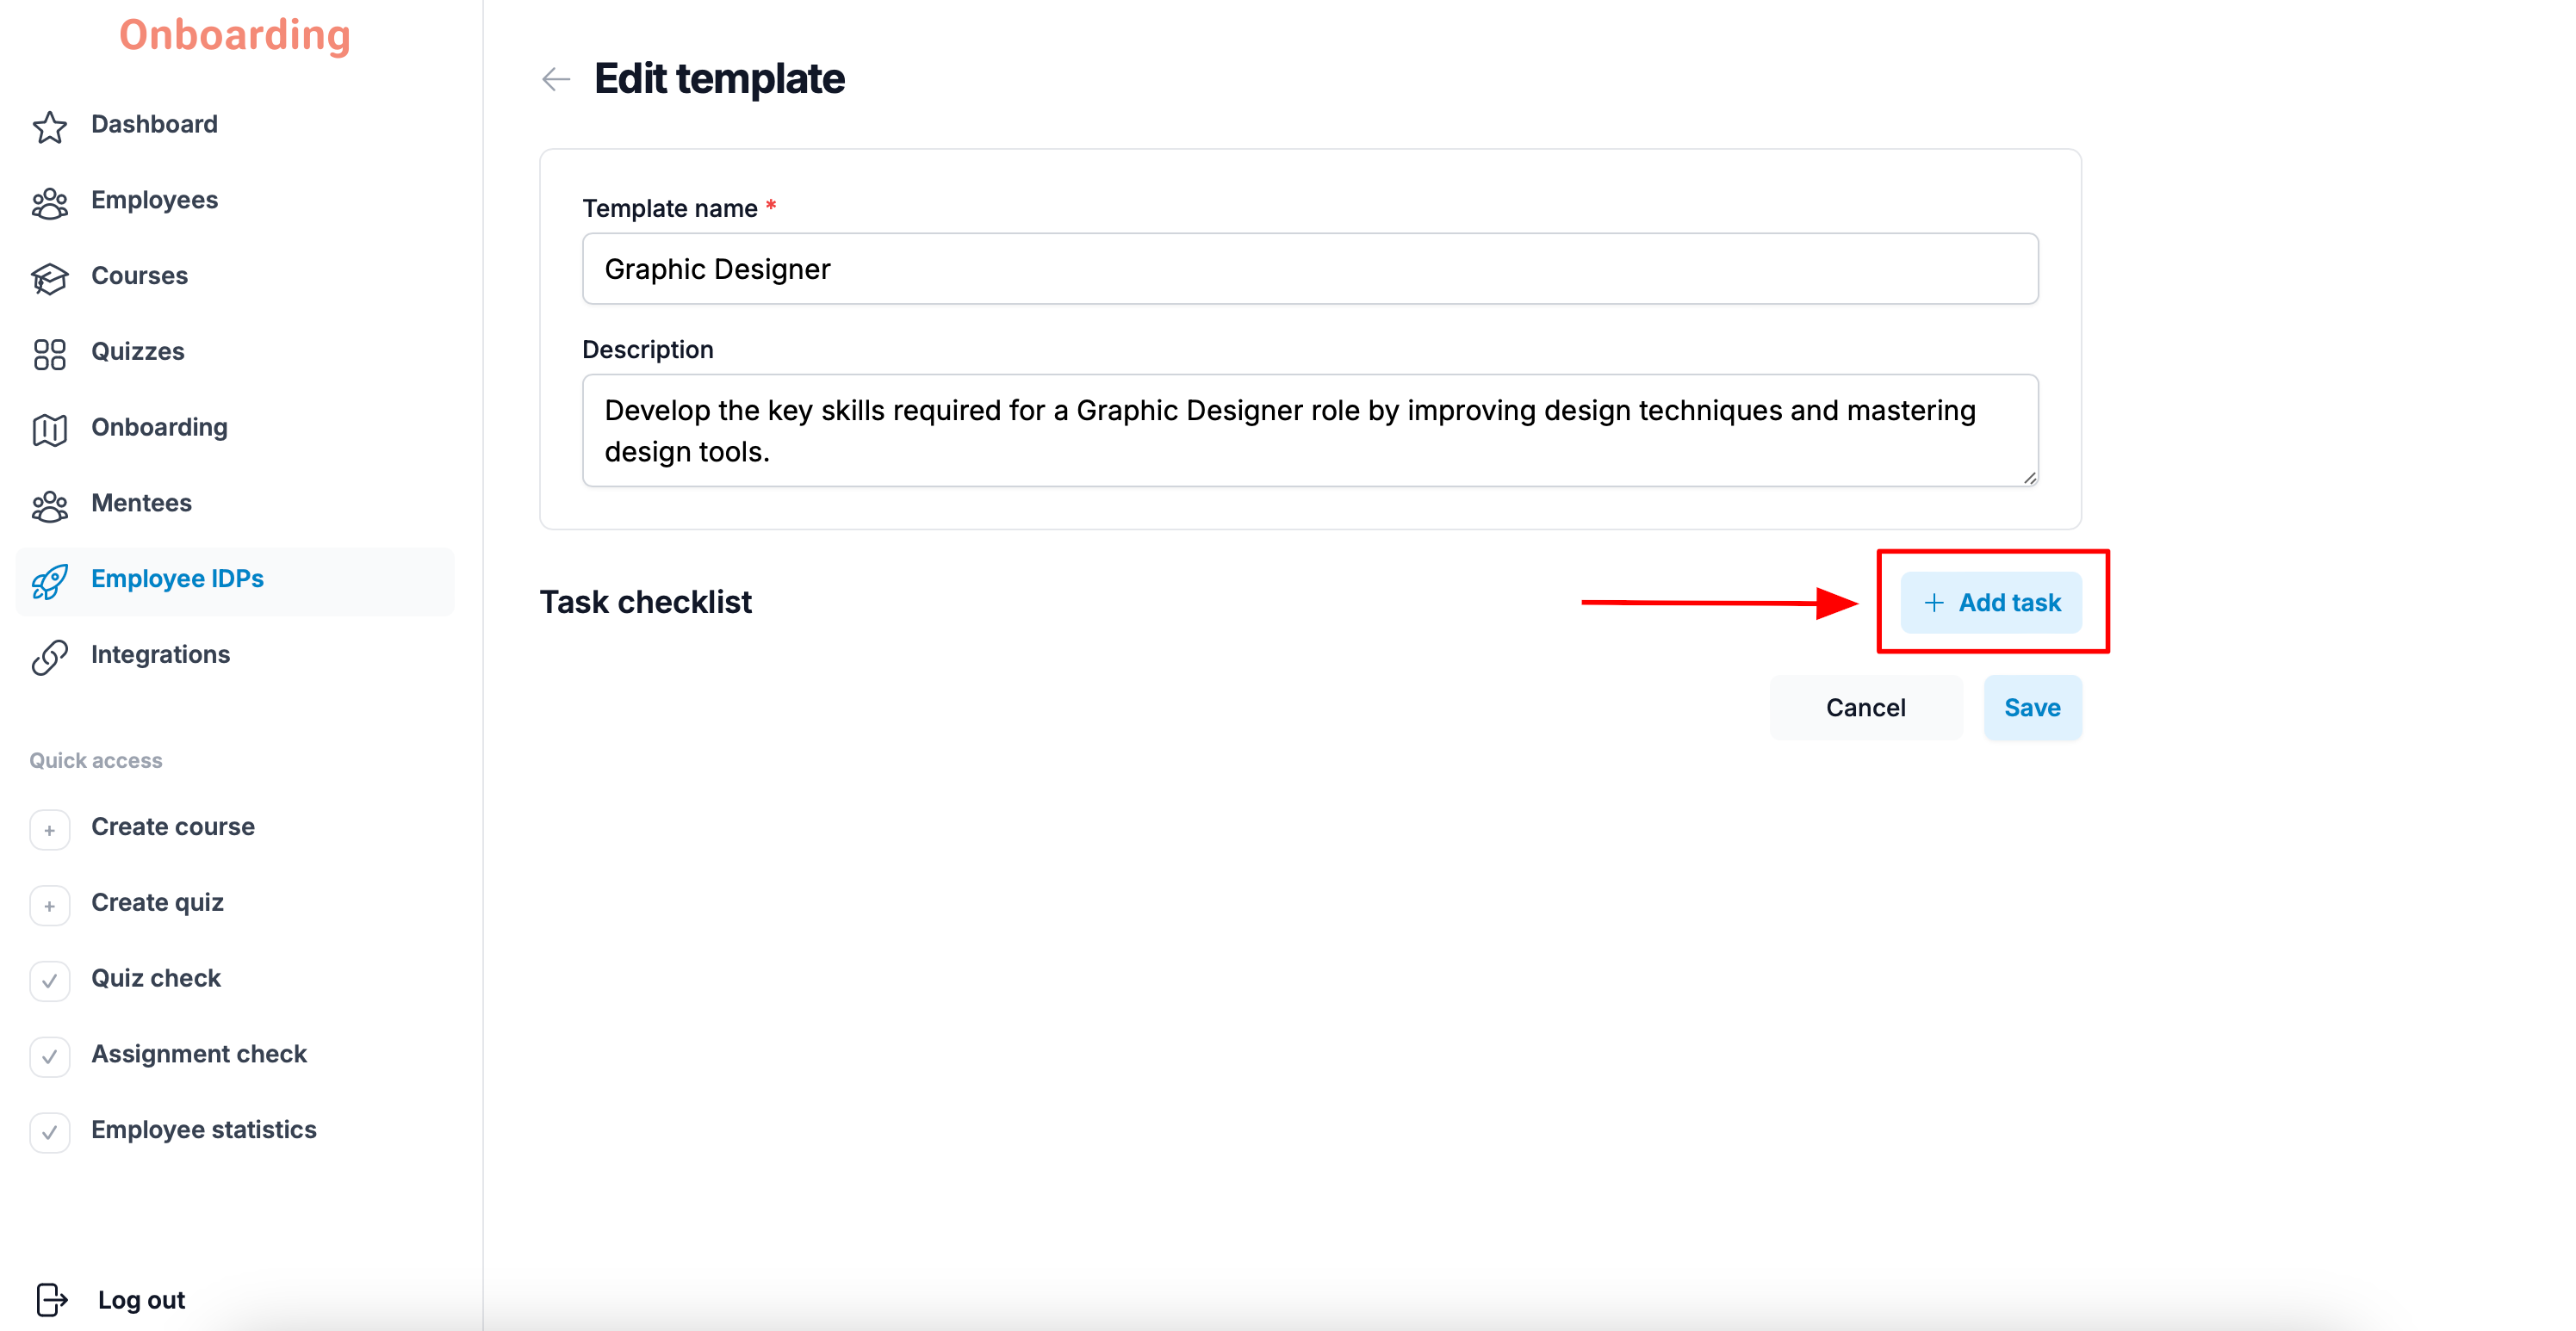
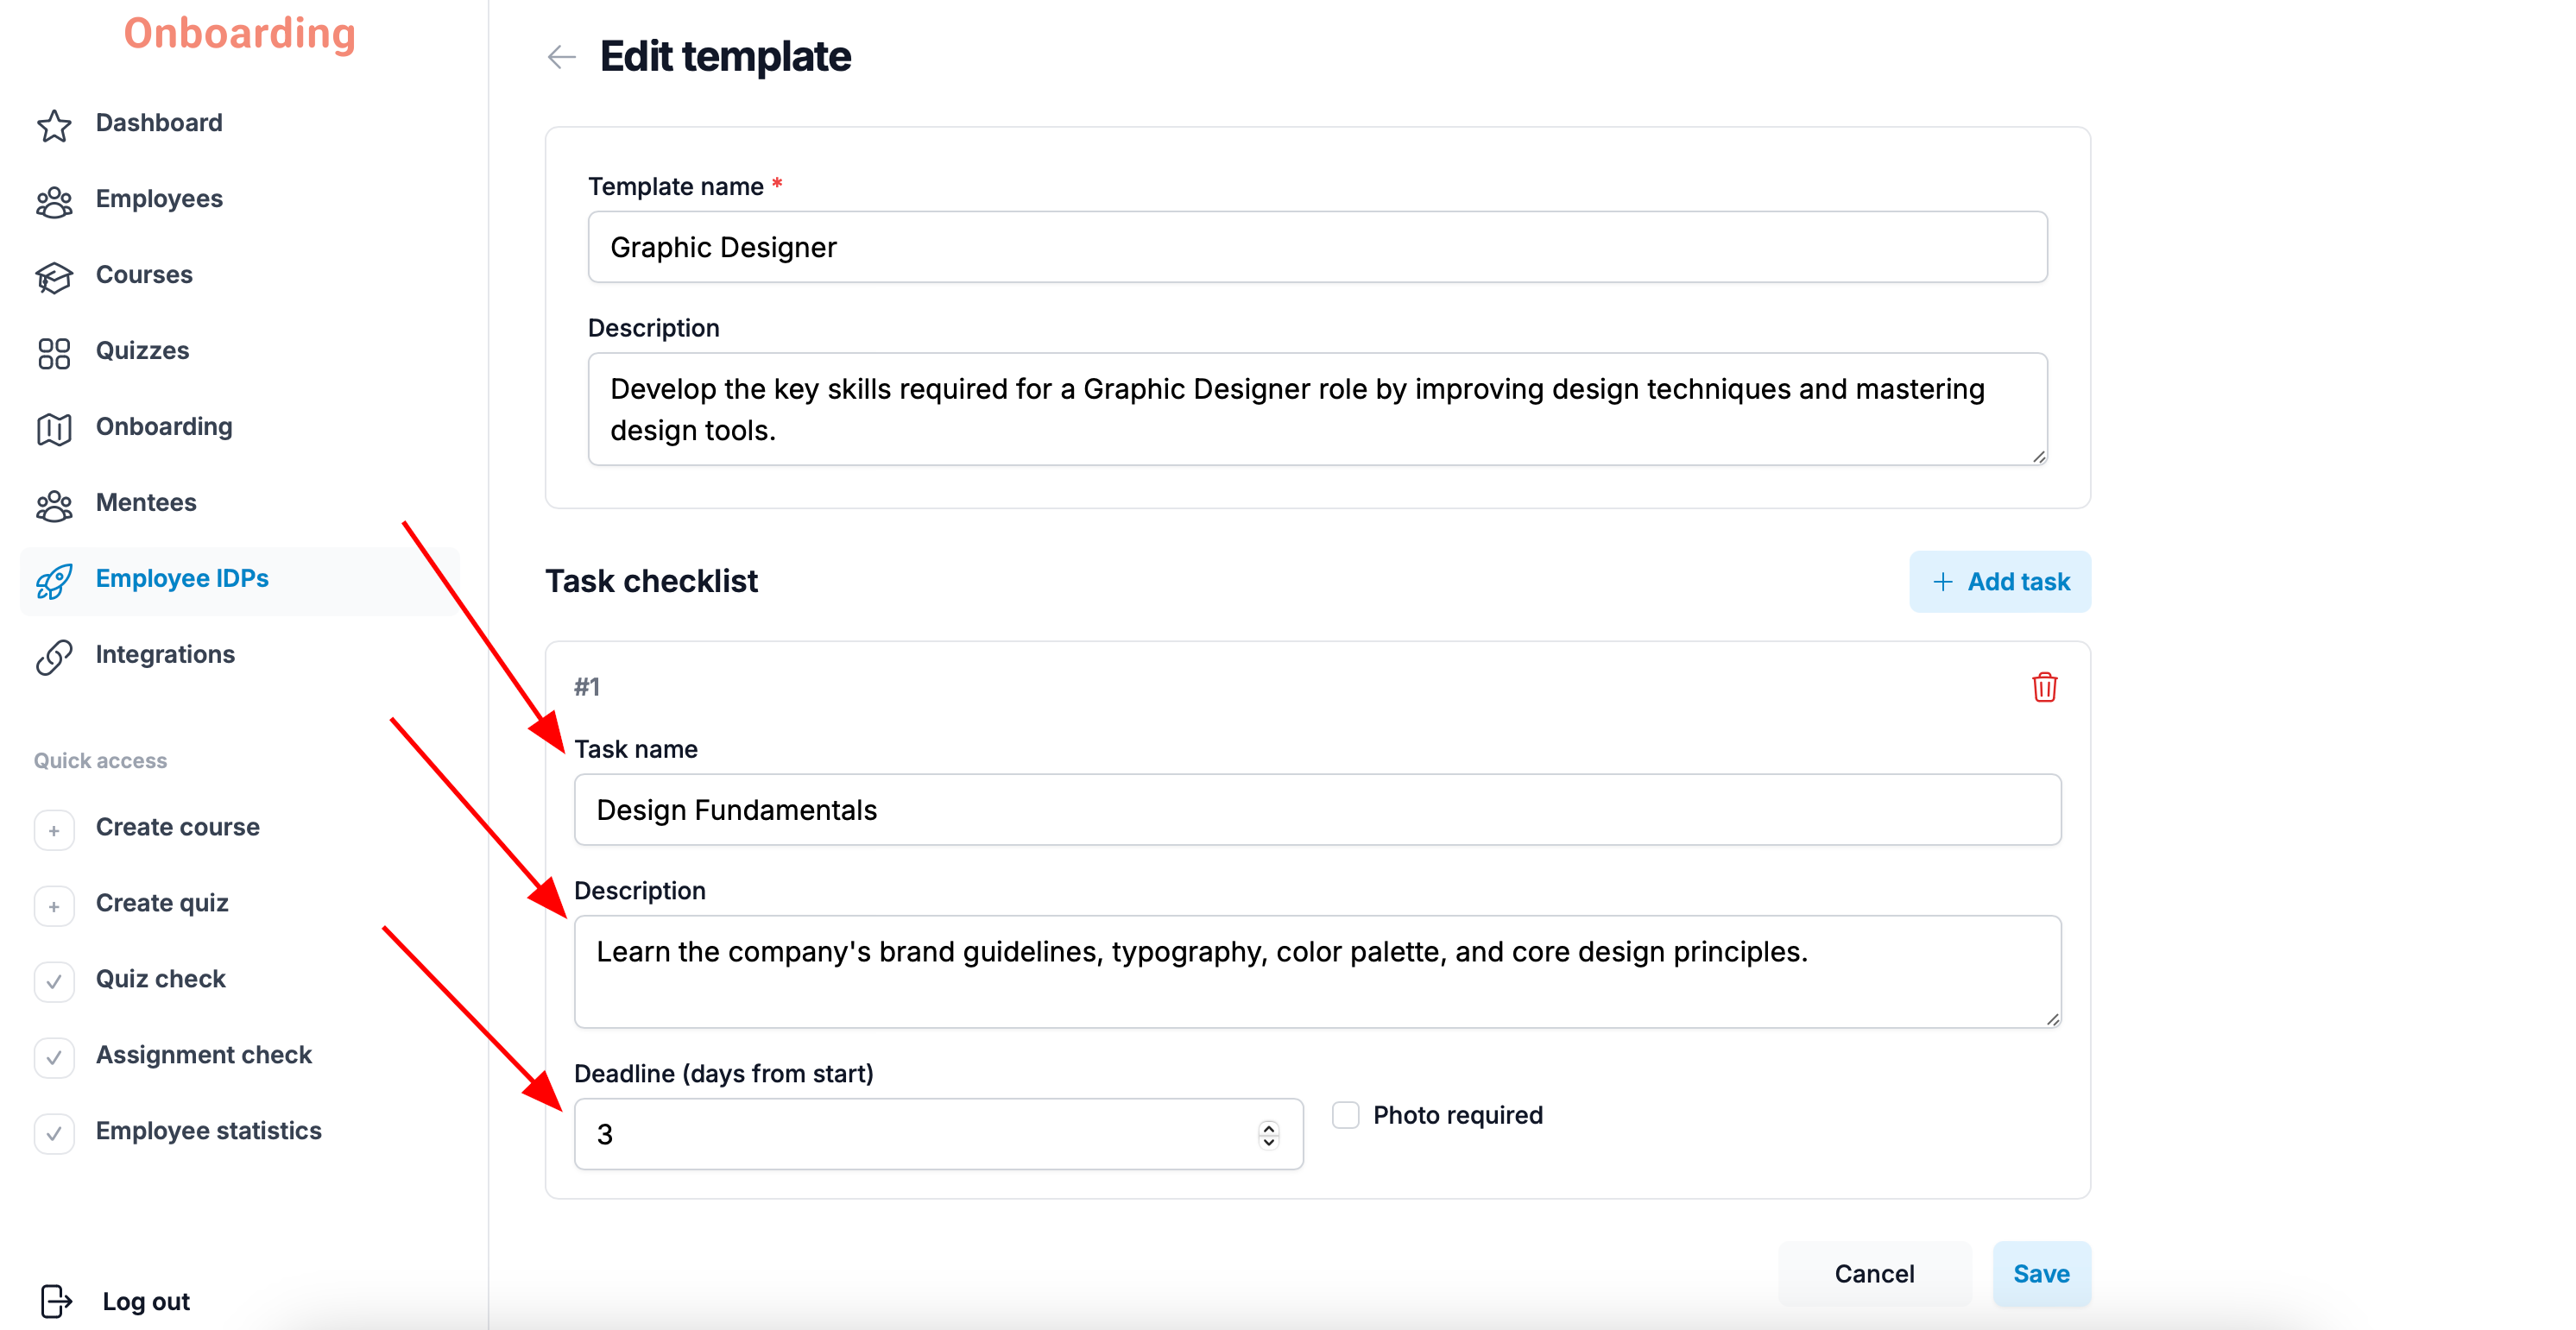
For each task, fill in the following fields:
- the task name;
- the task description;
- the deadline (days from start).
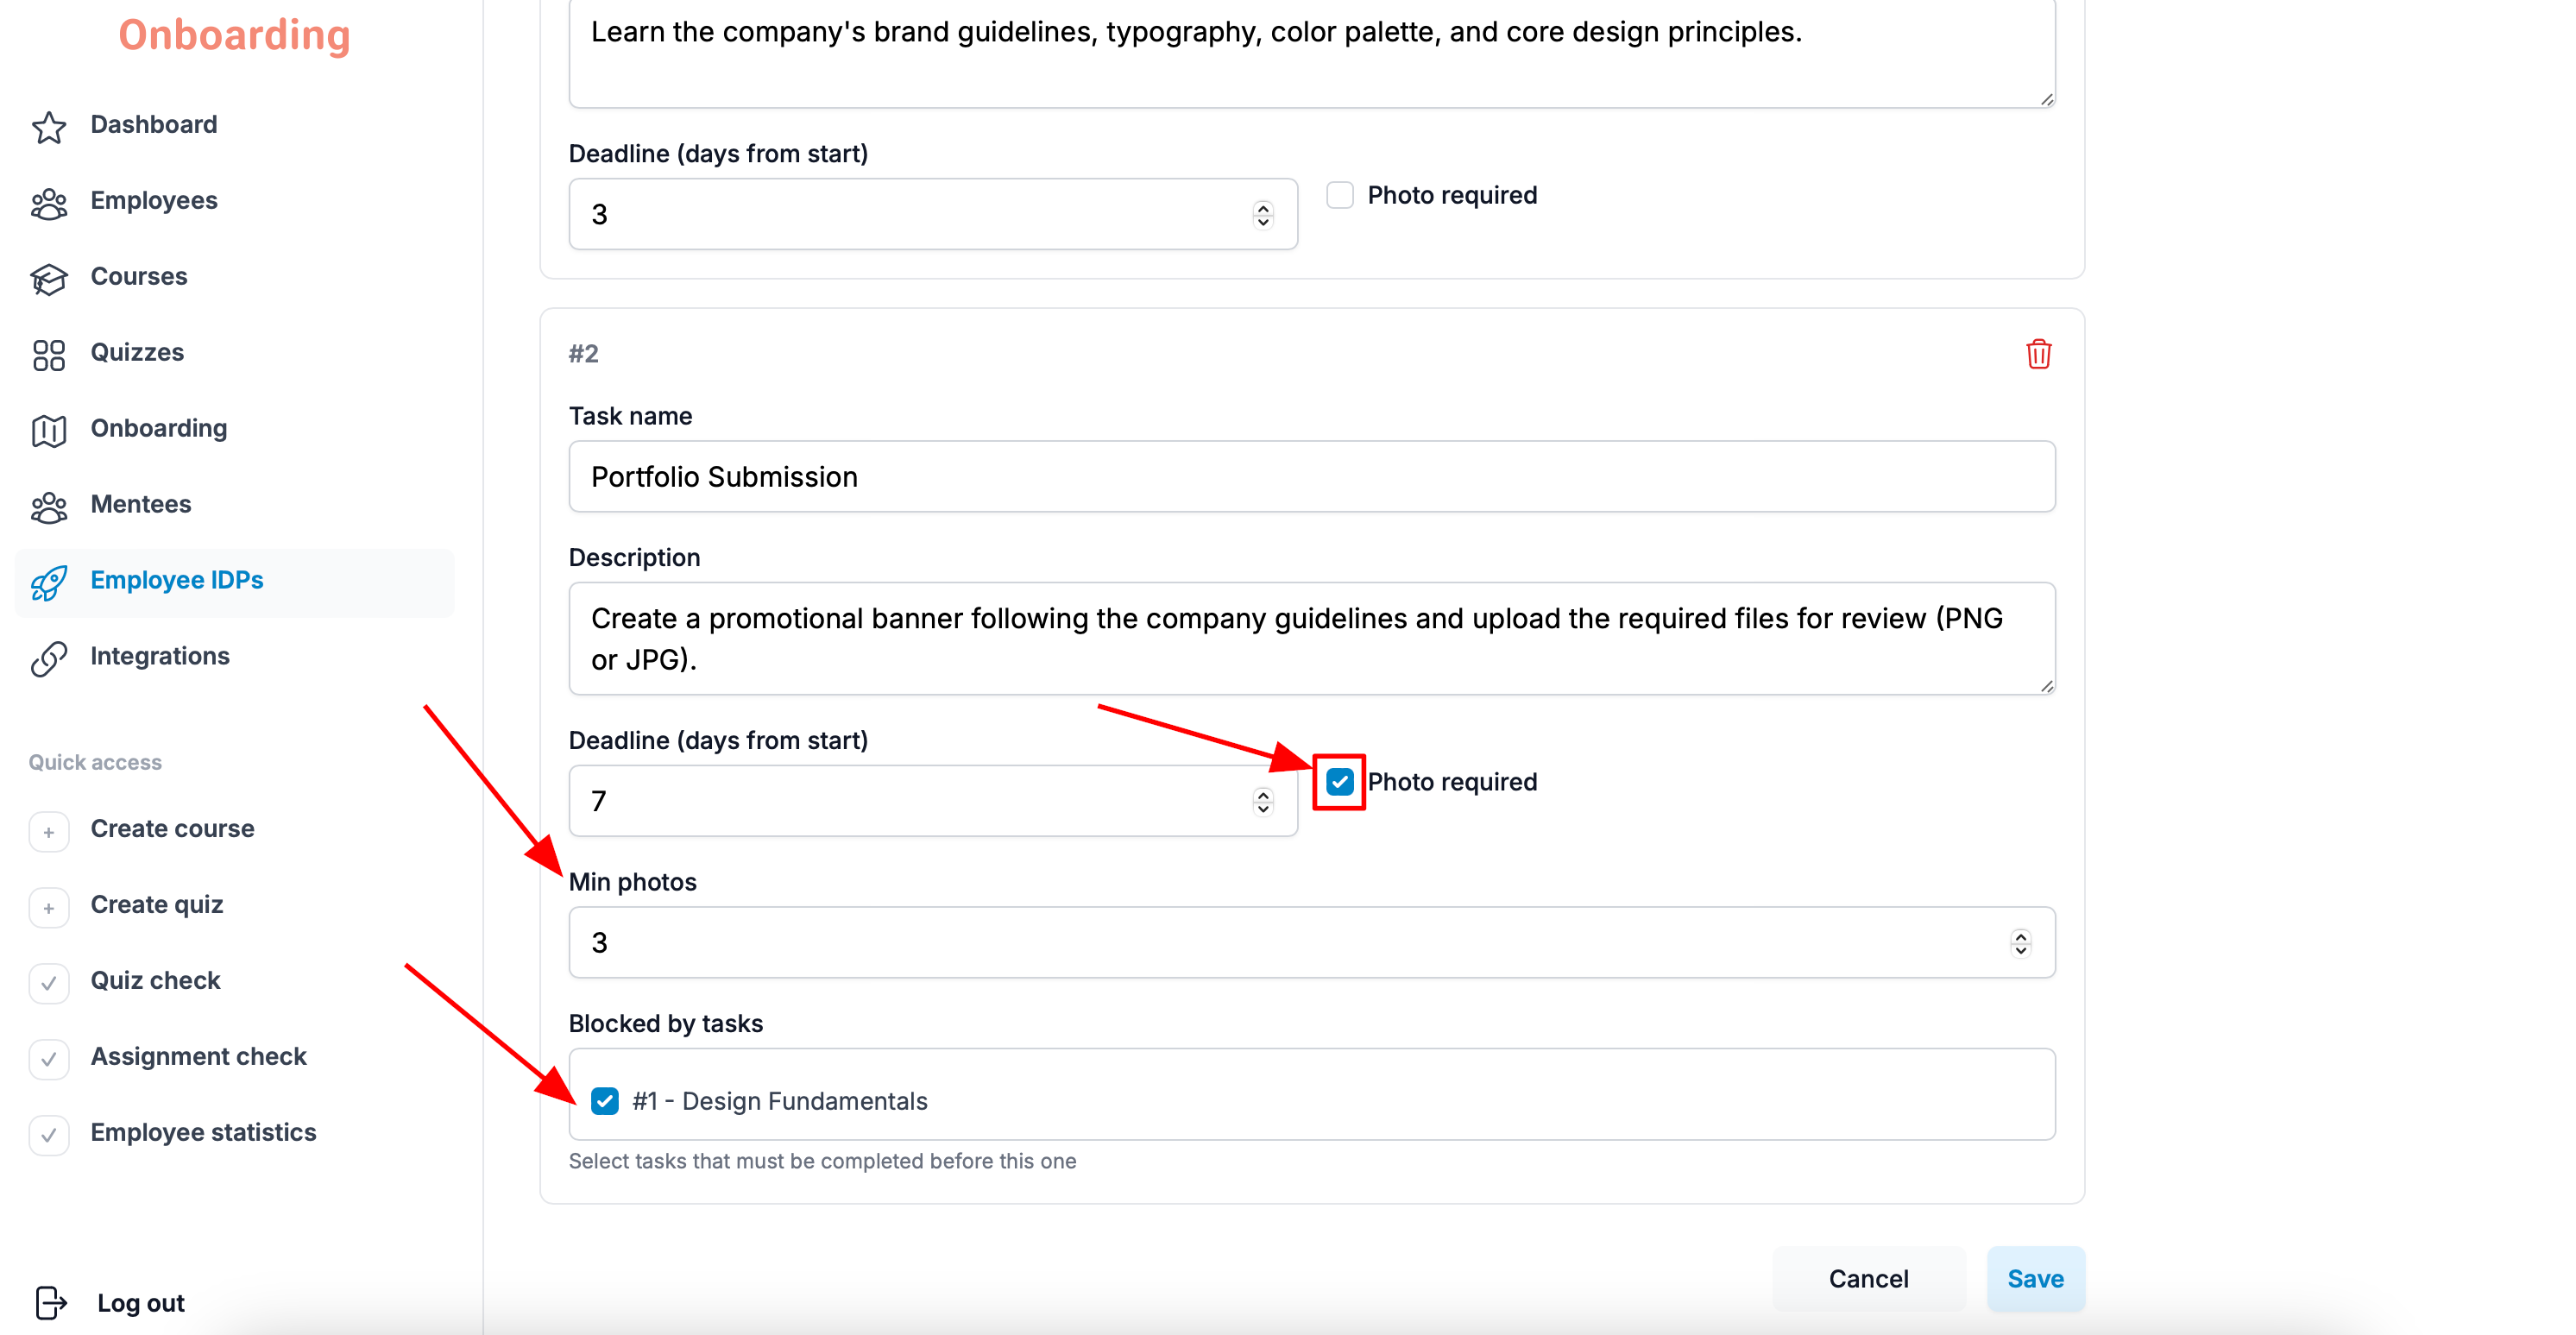
If needed, turn on the «Photo required» option and set the minimum number of photos the employee must attach when completing the task.
If a template has several tasks, you can set up dependencies between them with the «Blocked by tasks» field.
In that case, the employee can only start a task after finishing the tasks that block it.
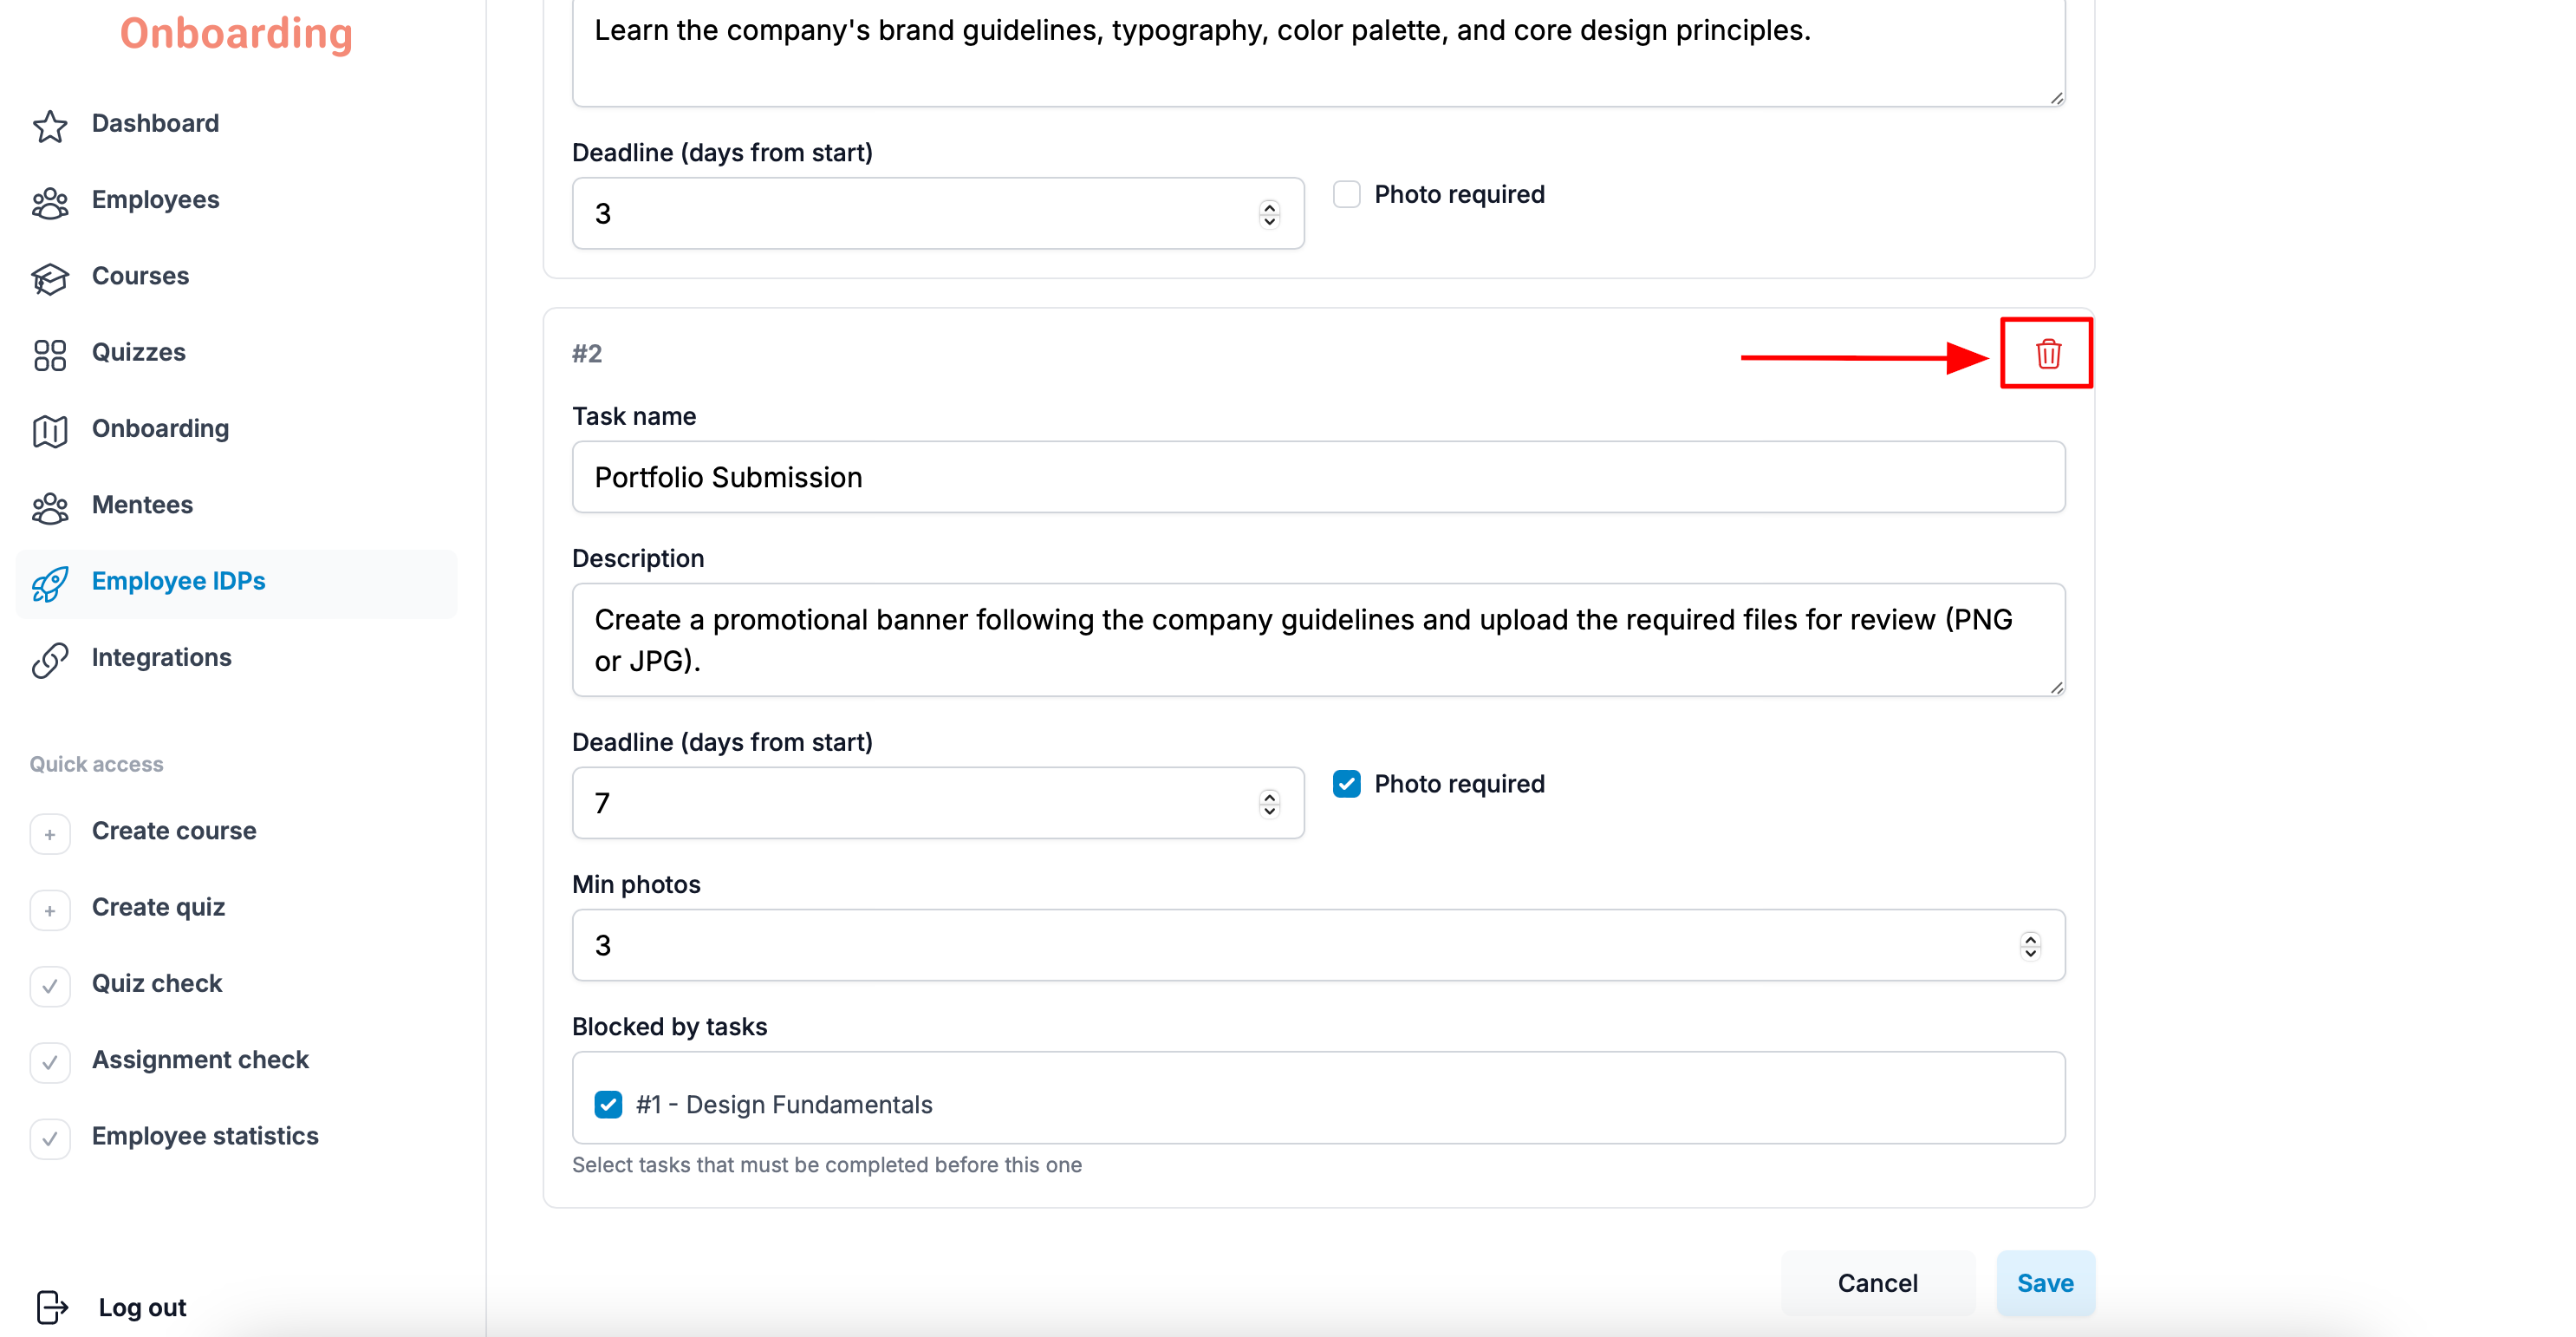
To remove a task from the template, click the trash icon in the top-right corner of that task.
Once all the tasks are added, click «Save».
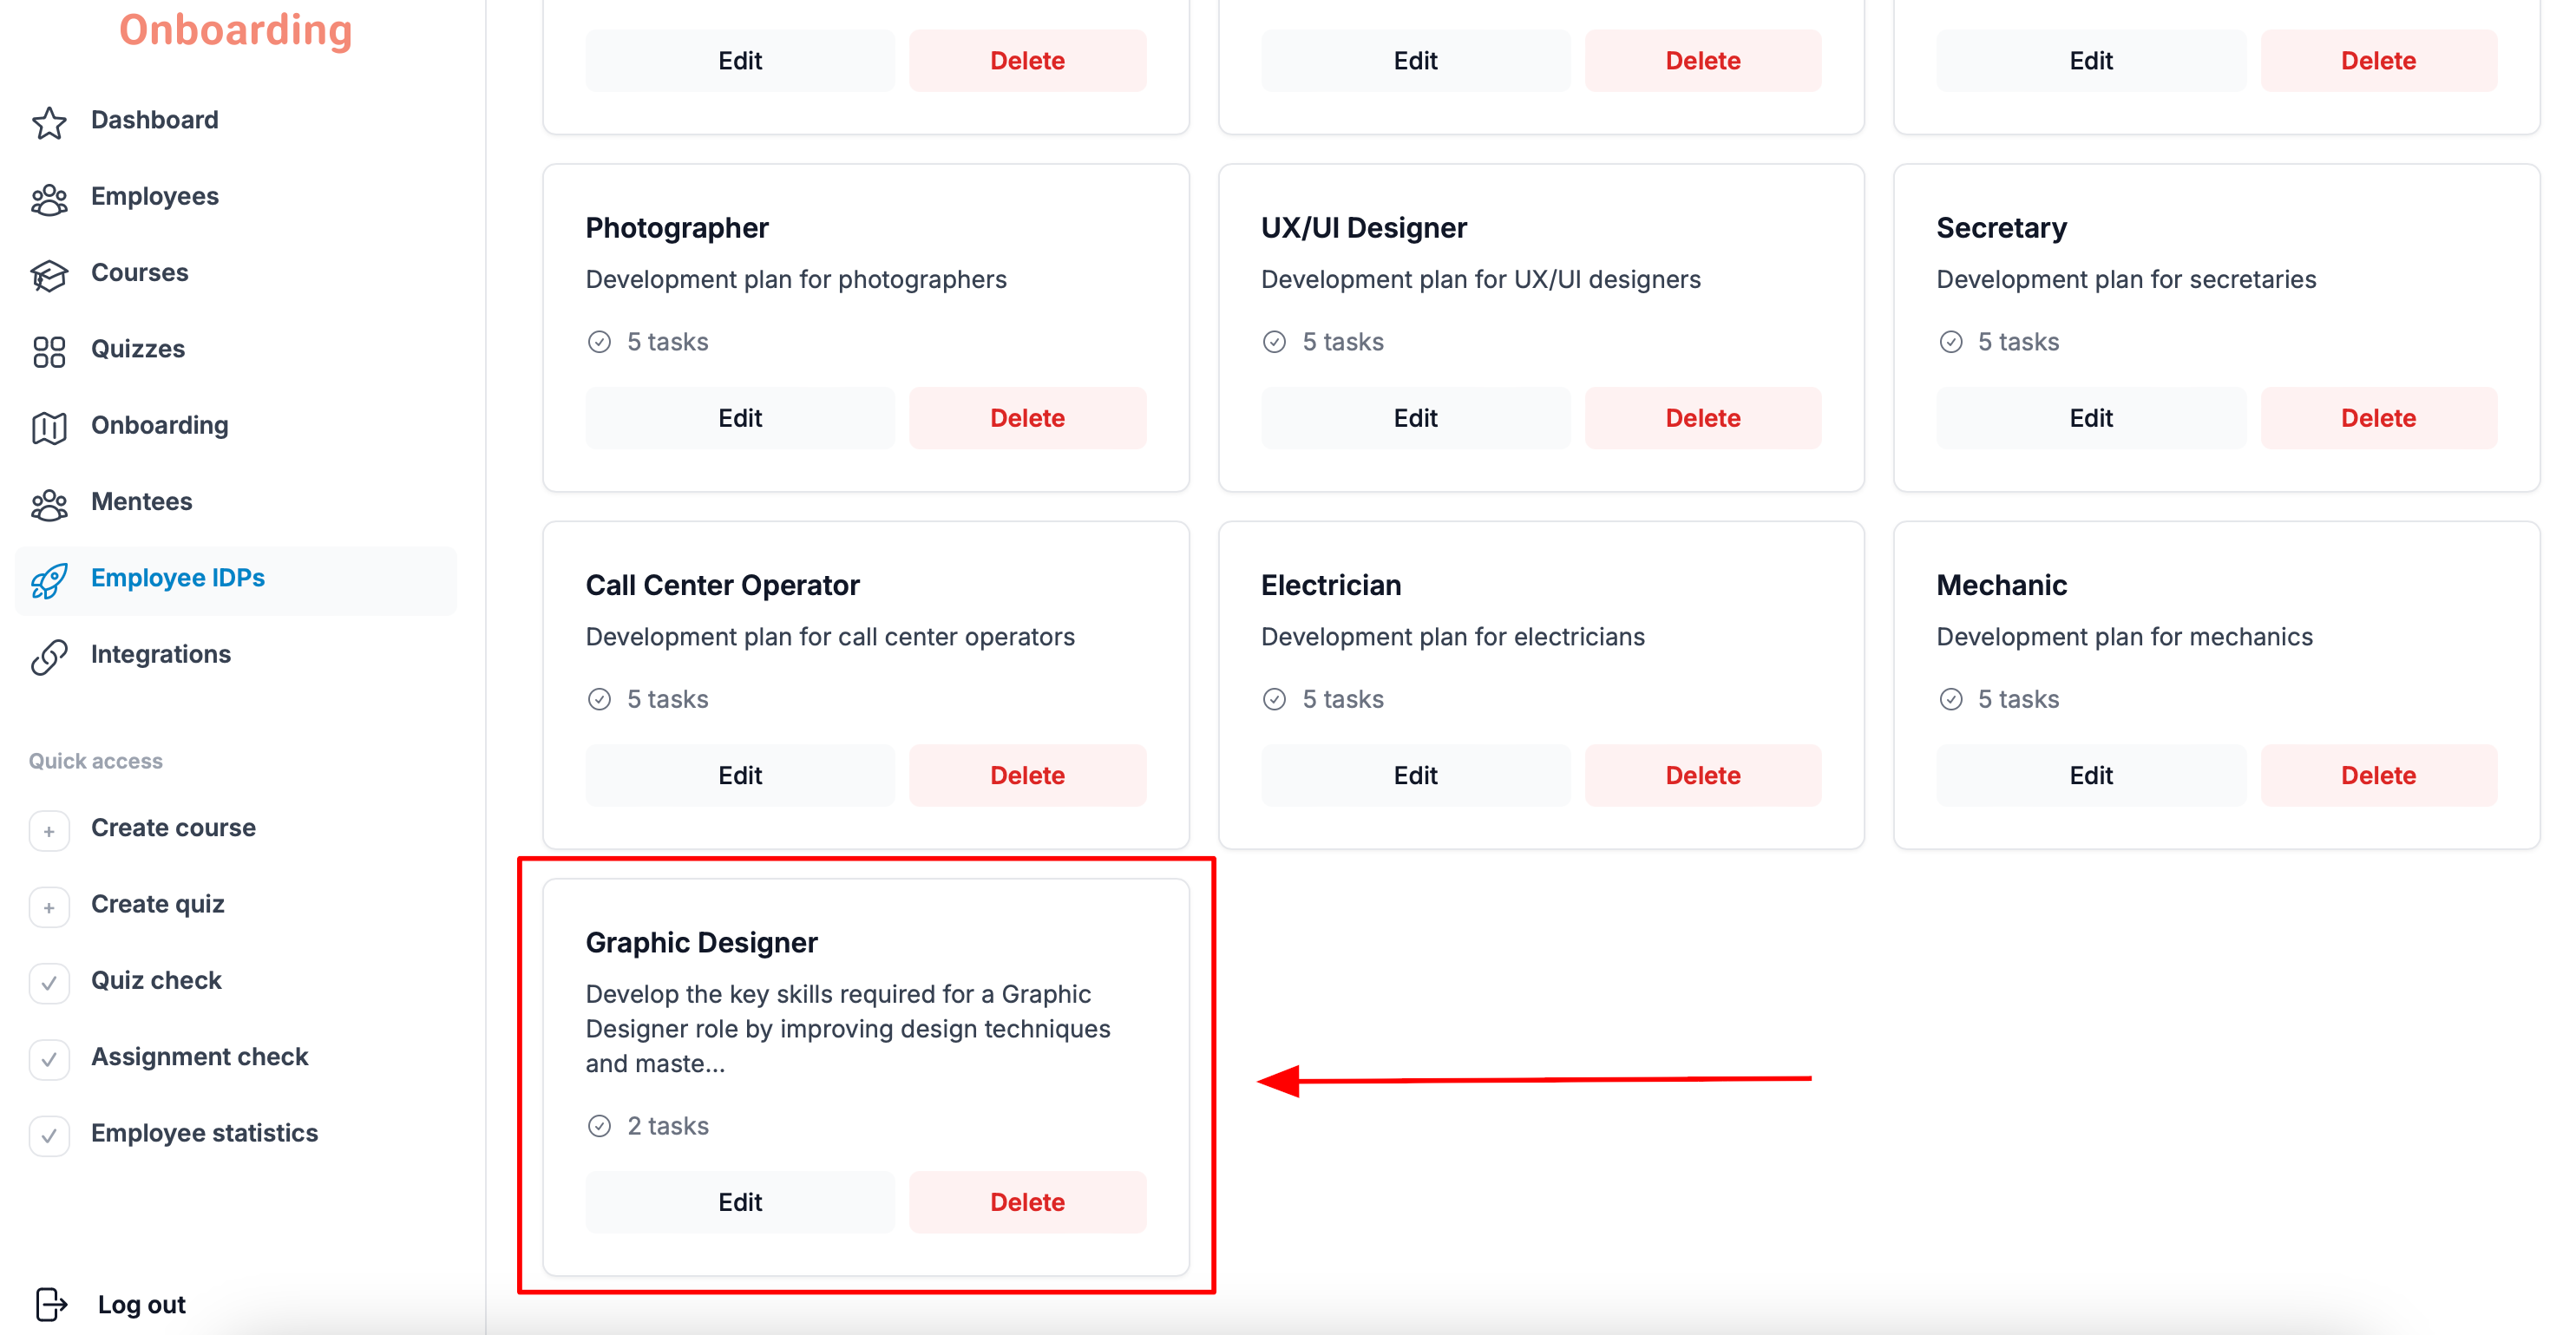
The template has been created and now appears in the list of IDP templates 🎉
Editing a template
You can change an existing template whenever you need to.
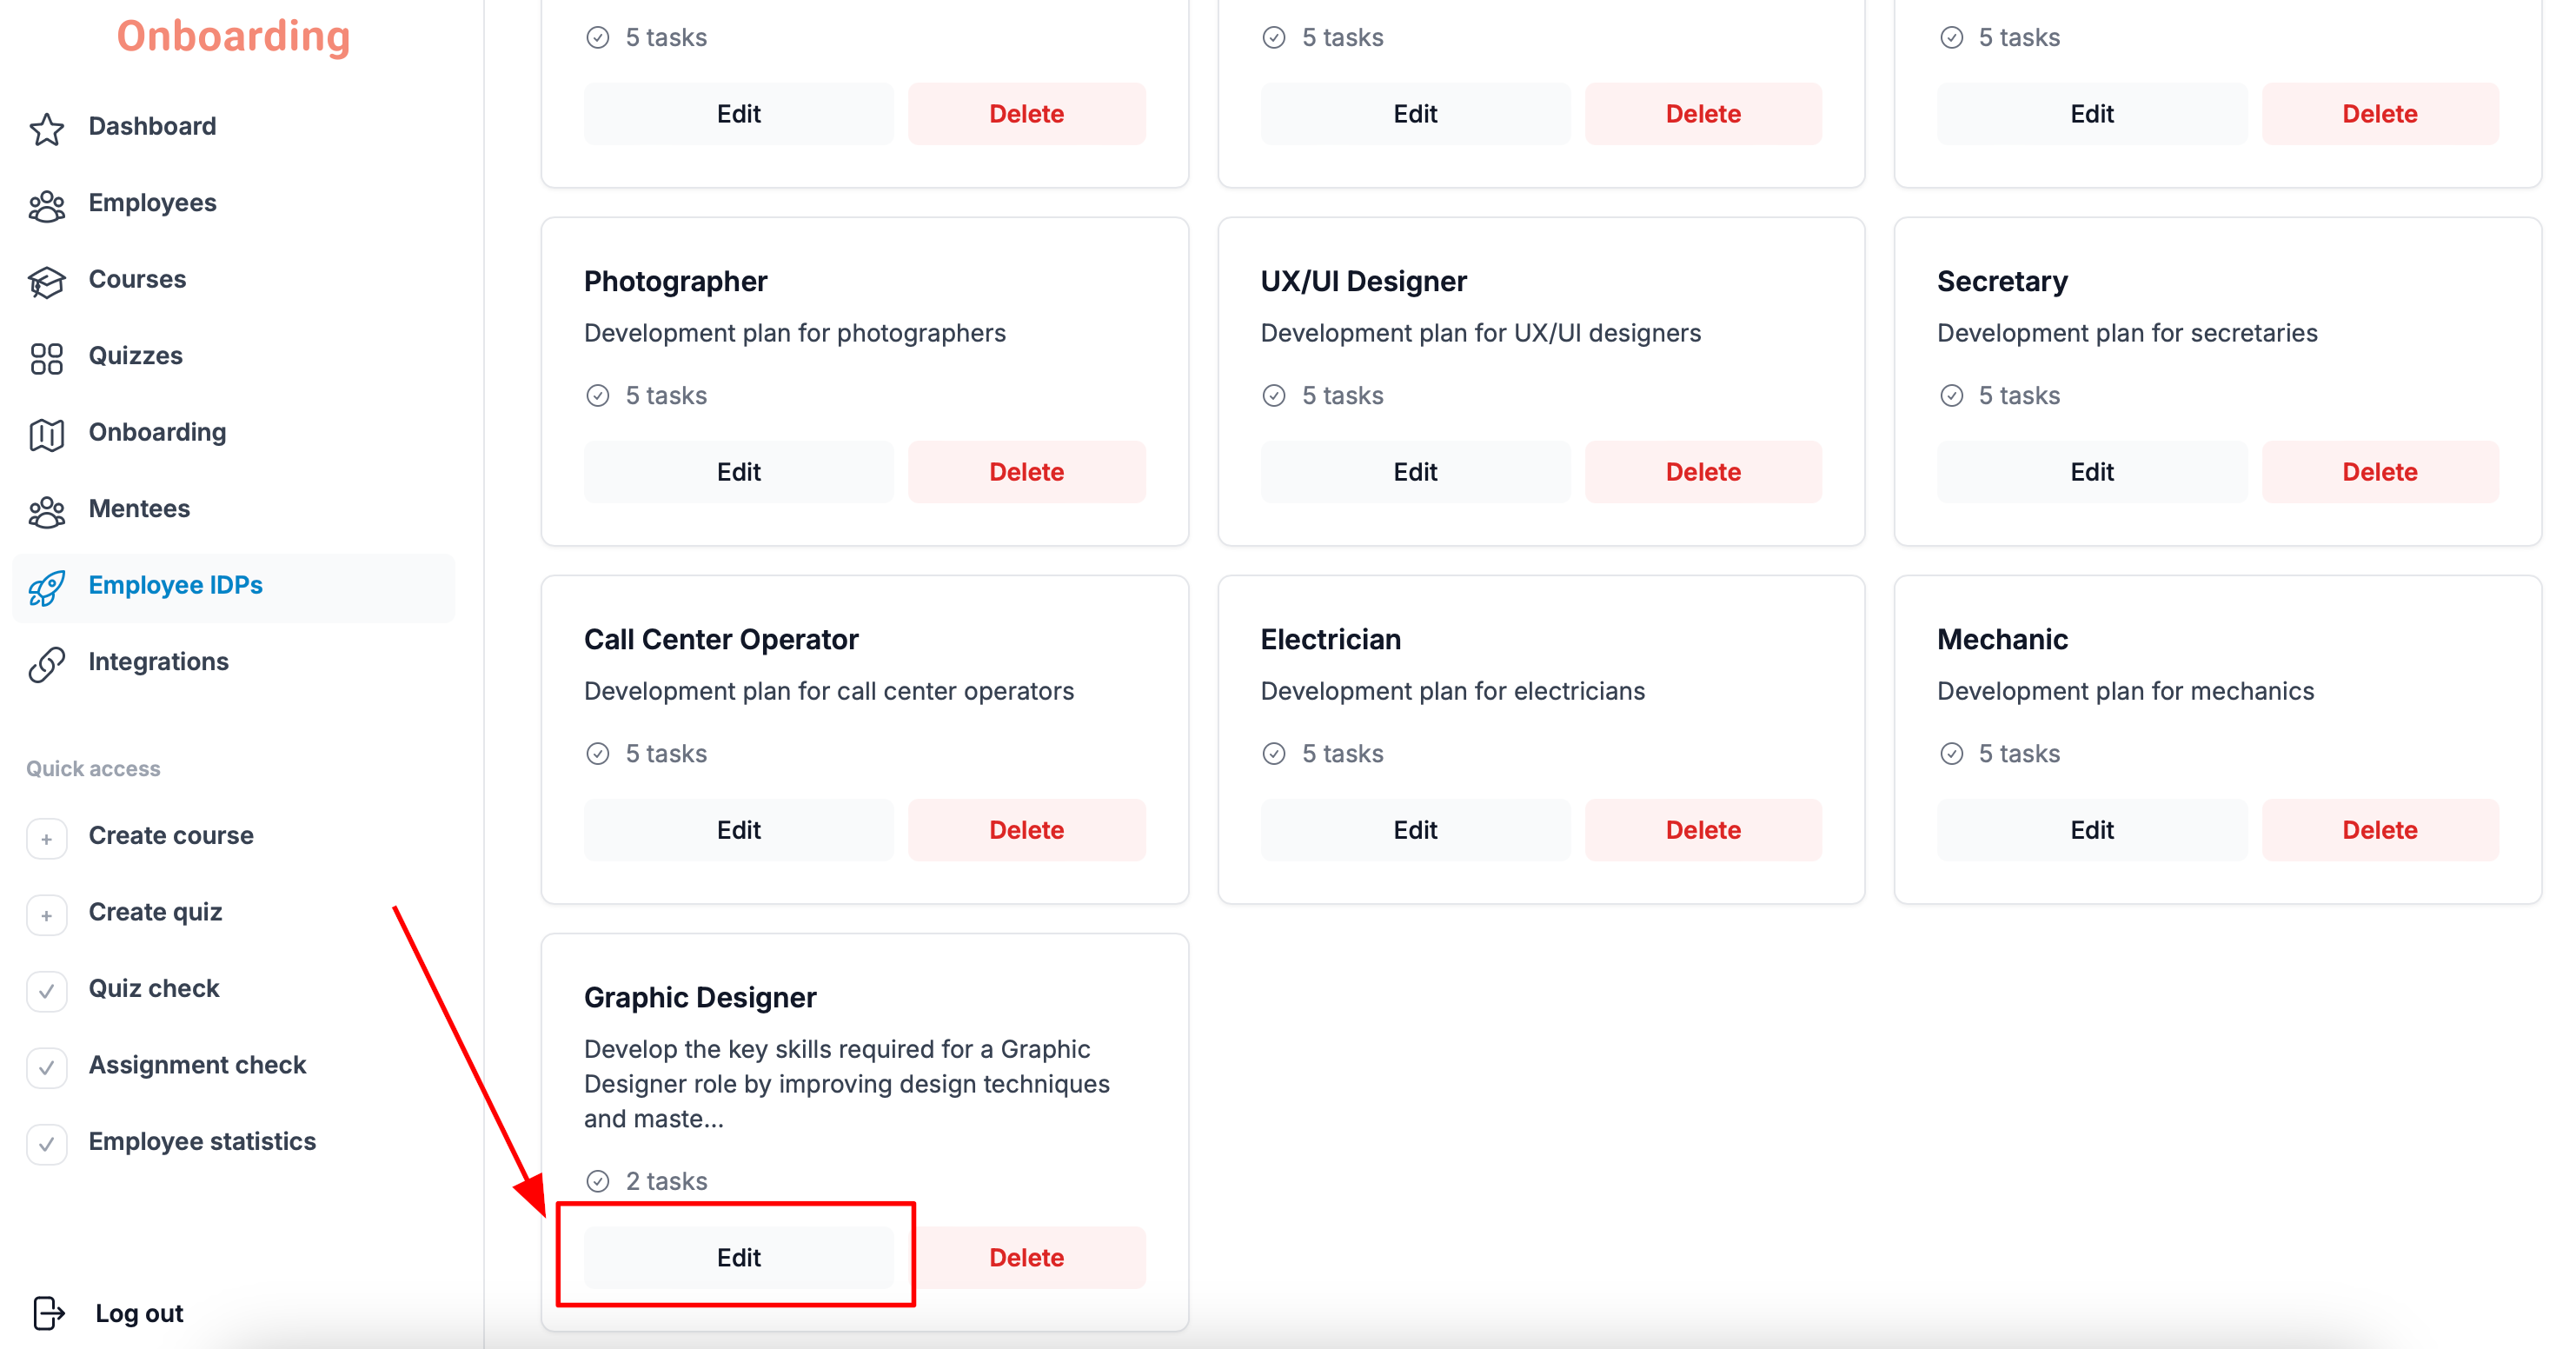
To do that, open the «IDP Templates» page, pick the template you need, and click «Edit» on its card.
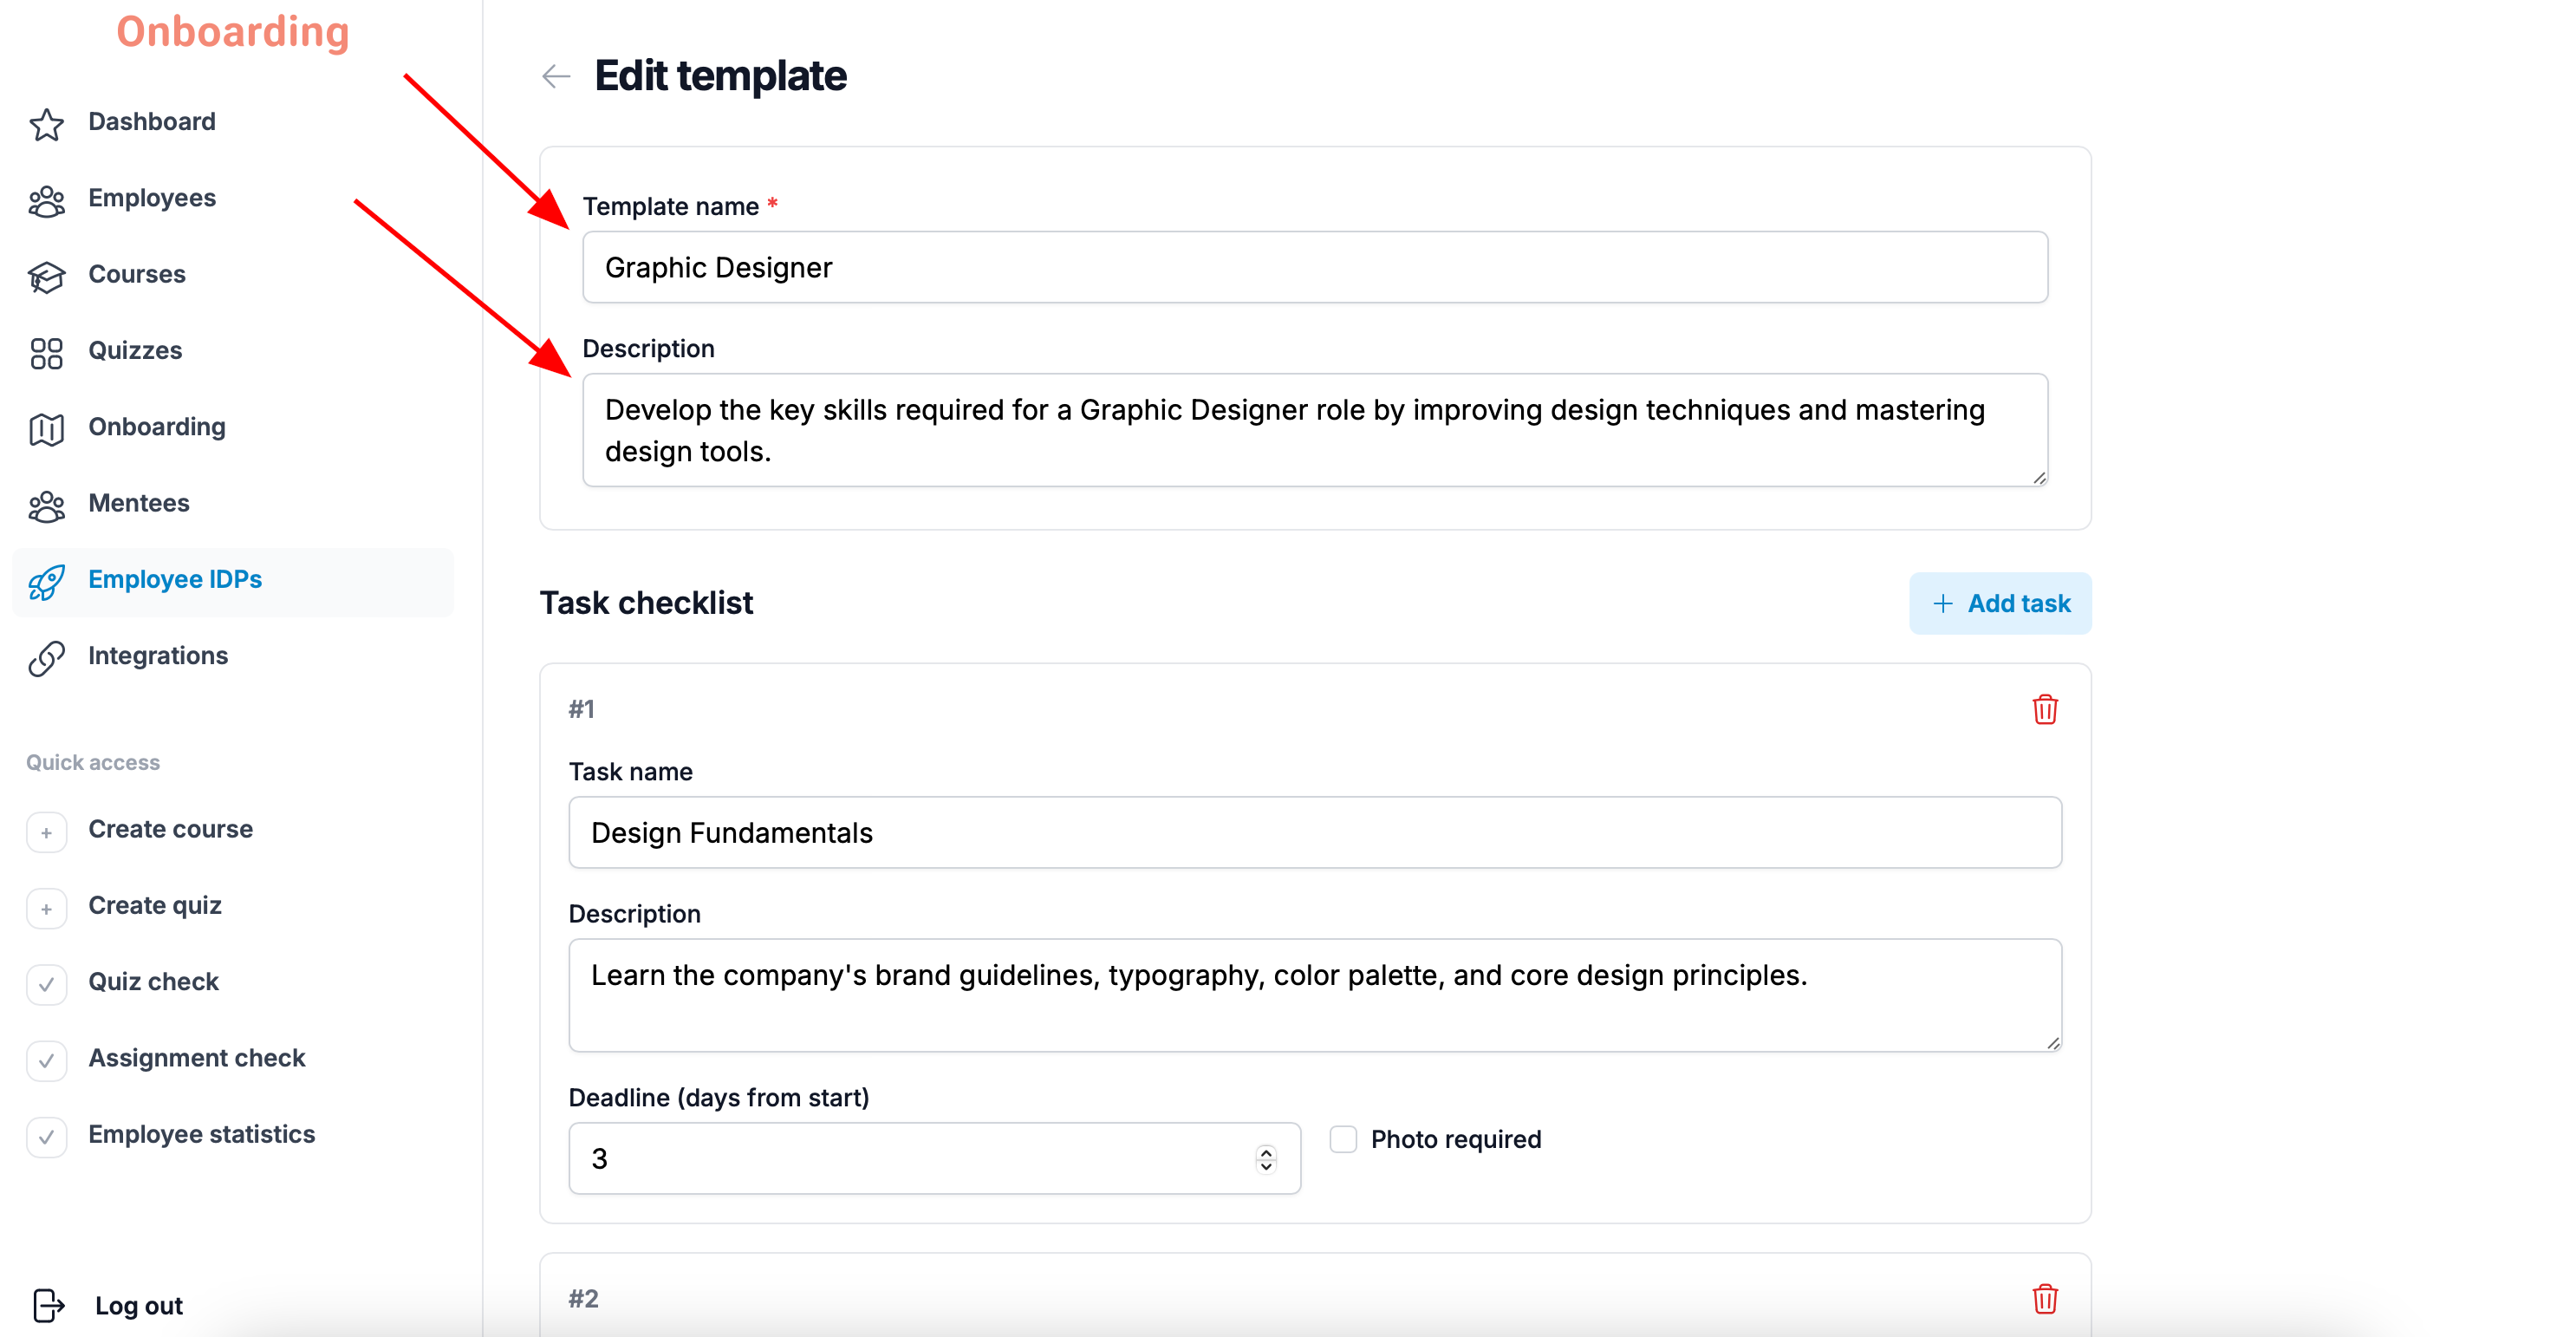
On the editing page you can change:
1) The basic information
- the template name;
- the template description.
2) The task checklist
- add a new task;
- delete an existing task;
- change a task's name;
- change a task's description;
- change its deadline;
- turn the «Photo required» option on or off;
- change the minimum number of photos;
- configure blocking tasks.
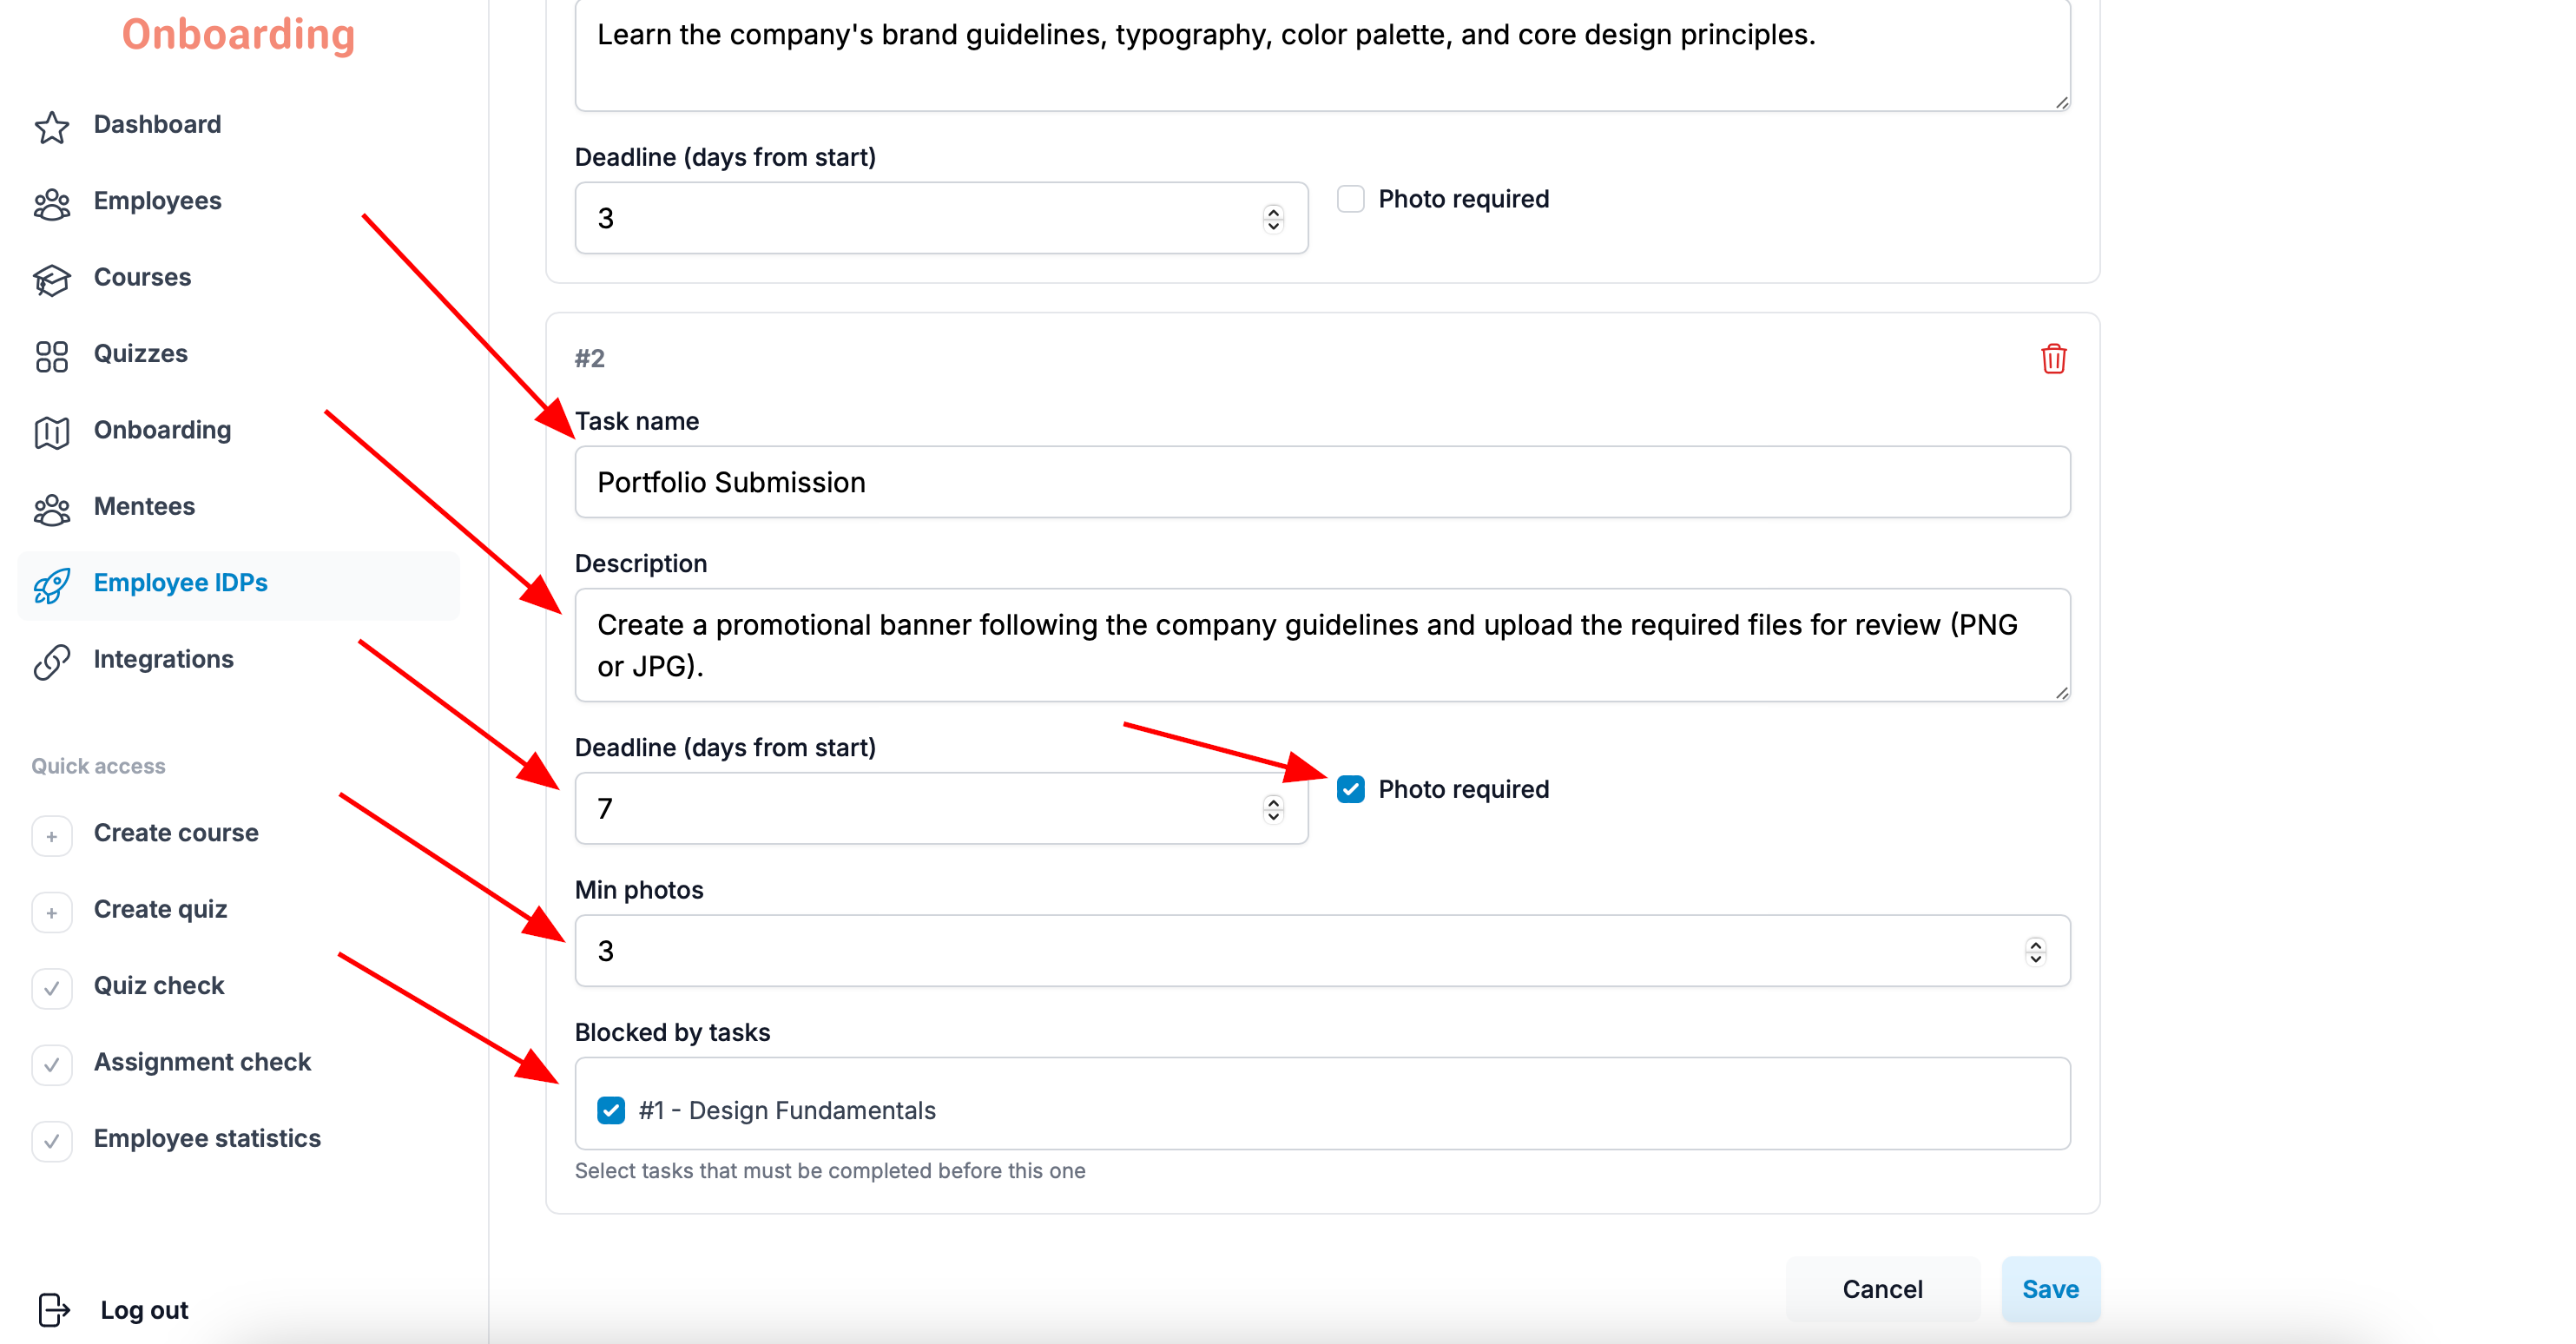
If you delete a task that another task depends on, it disappears from the list of blocking tasks automatically.
When you're done, click «Save».
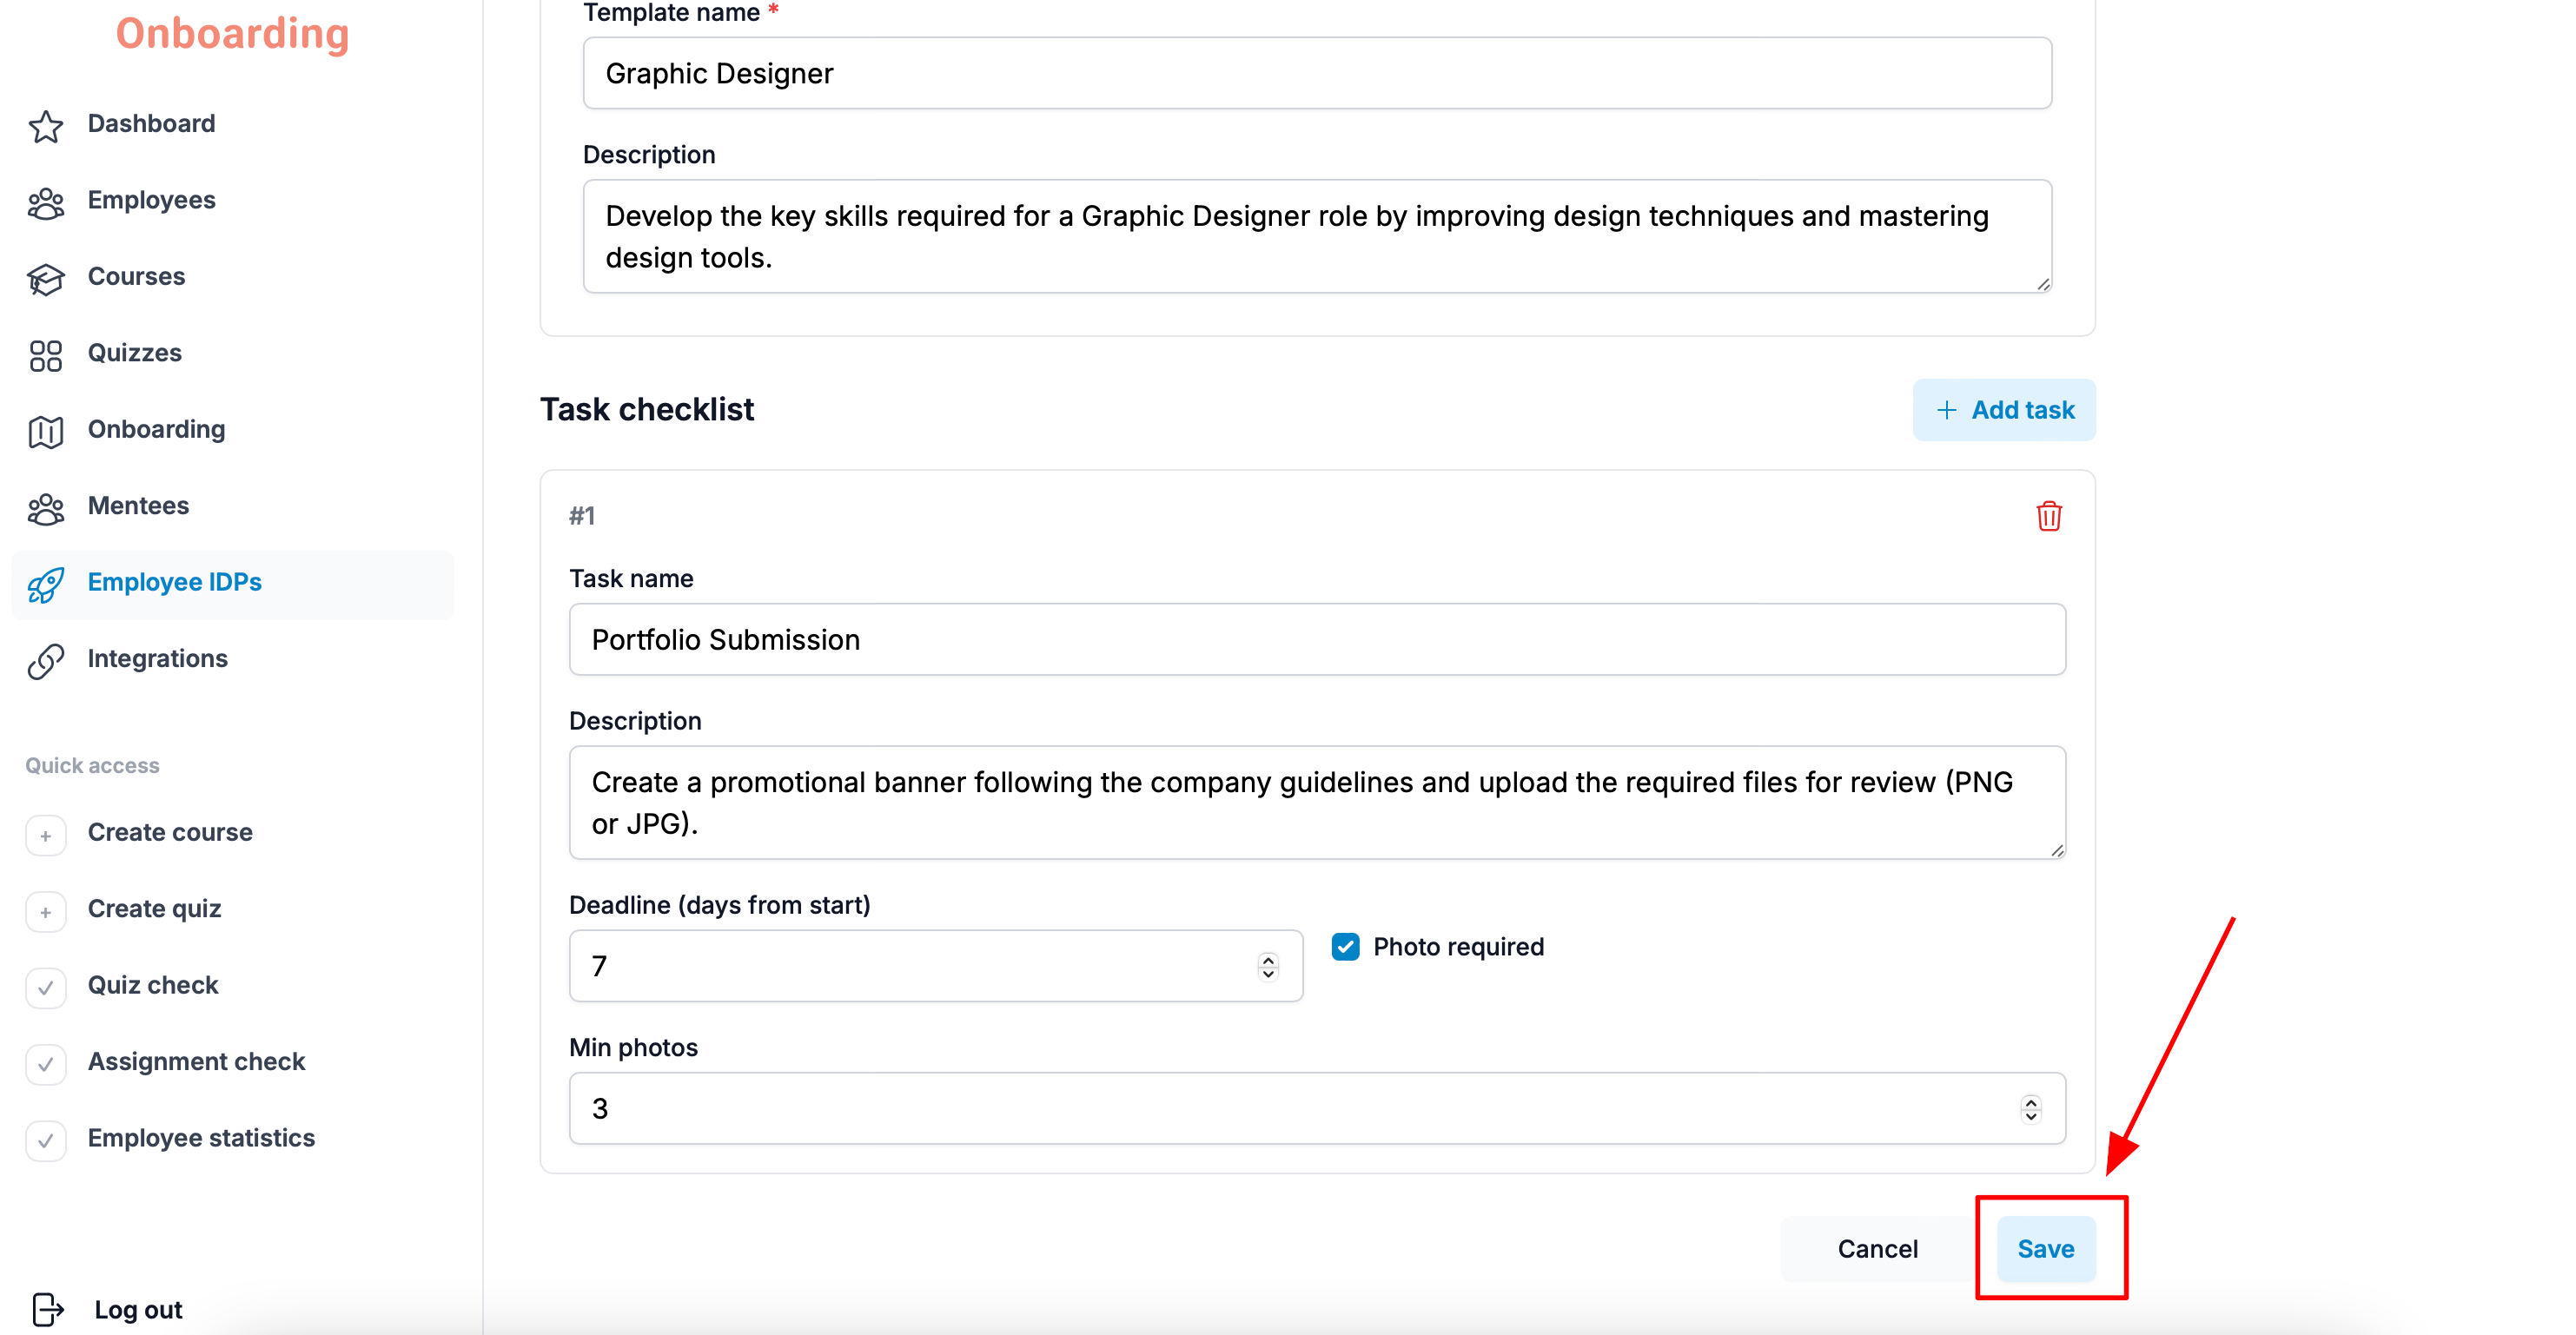
Your changes are saved and reflected in the IDP template 🎉
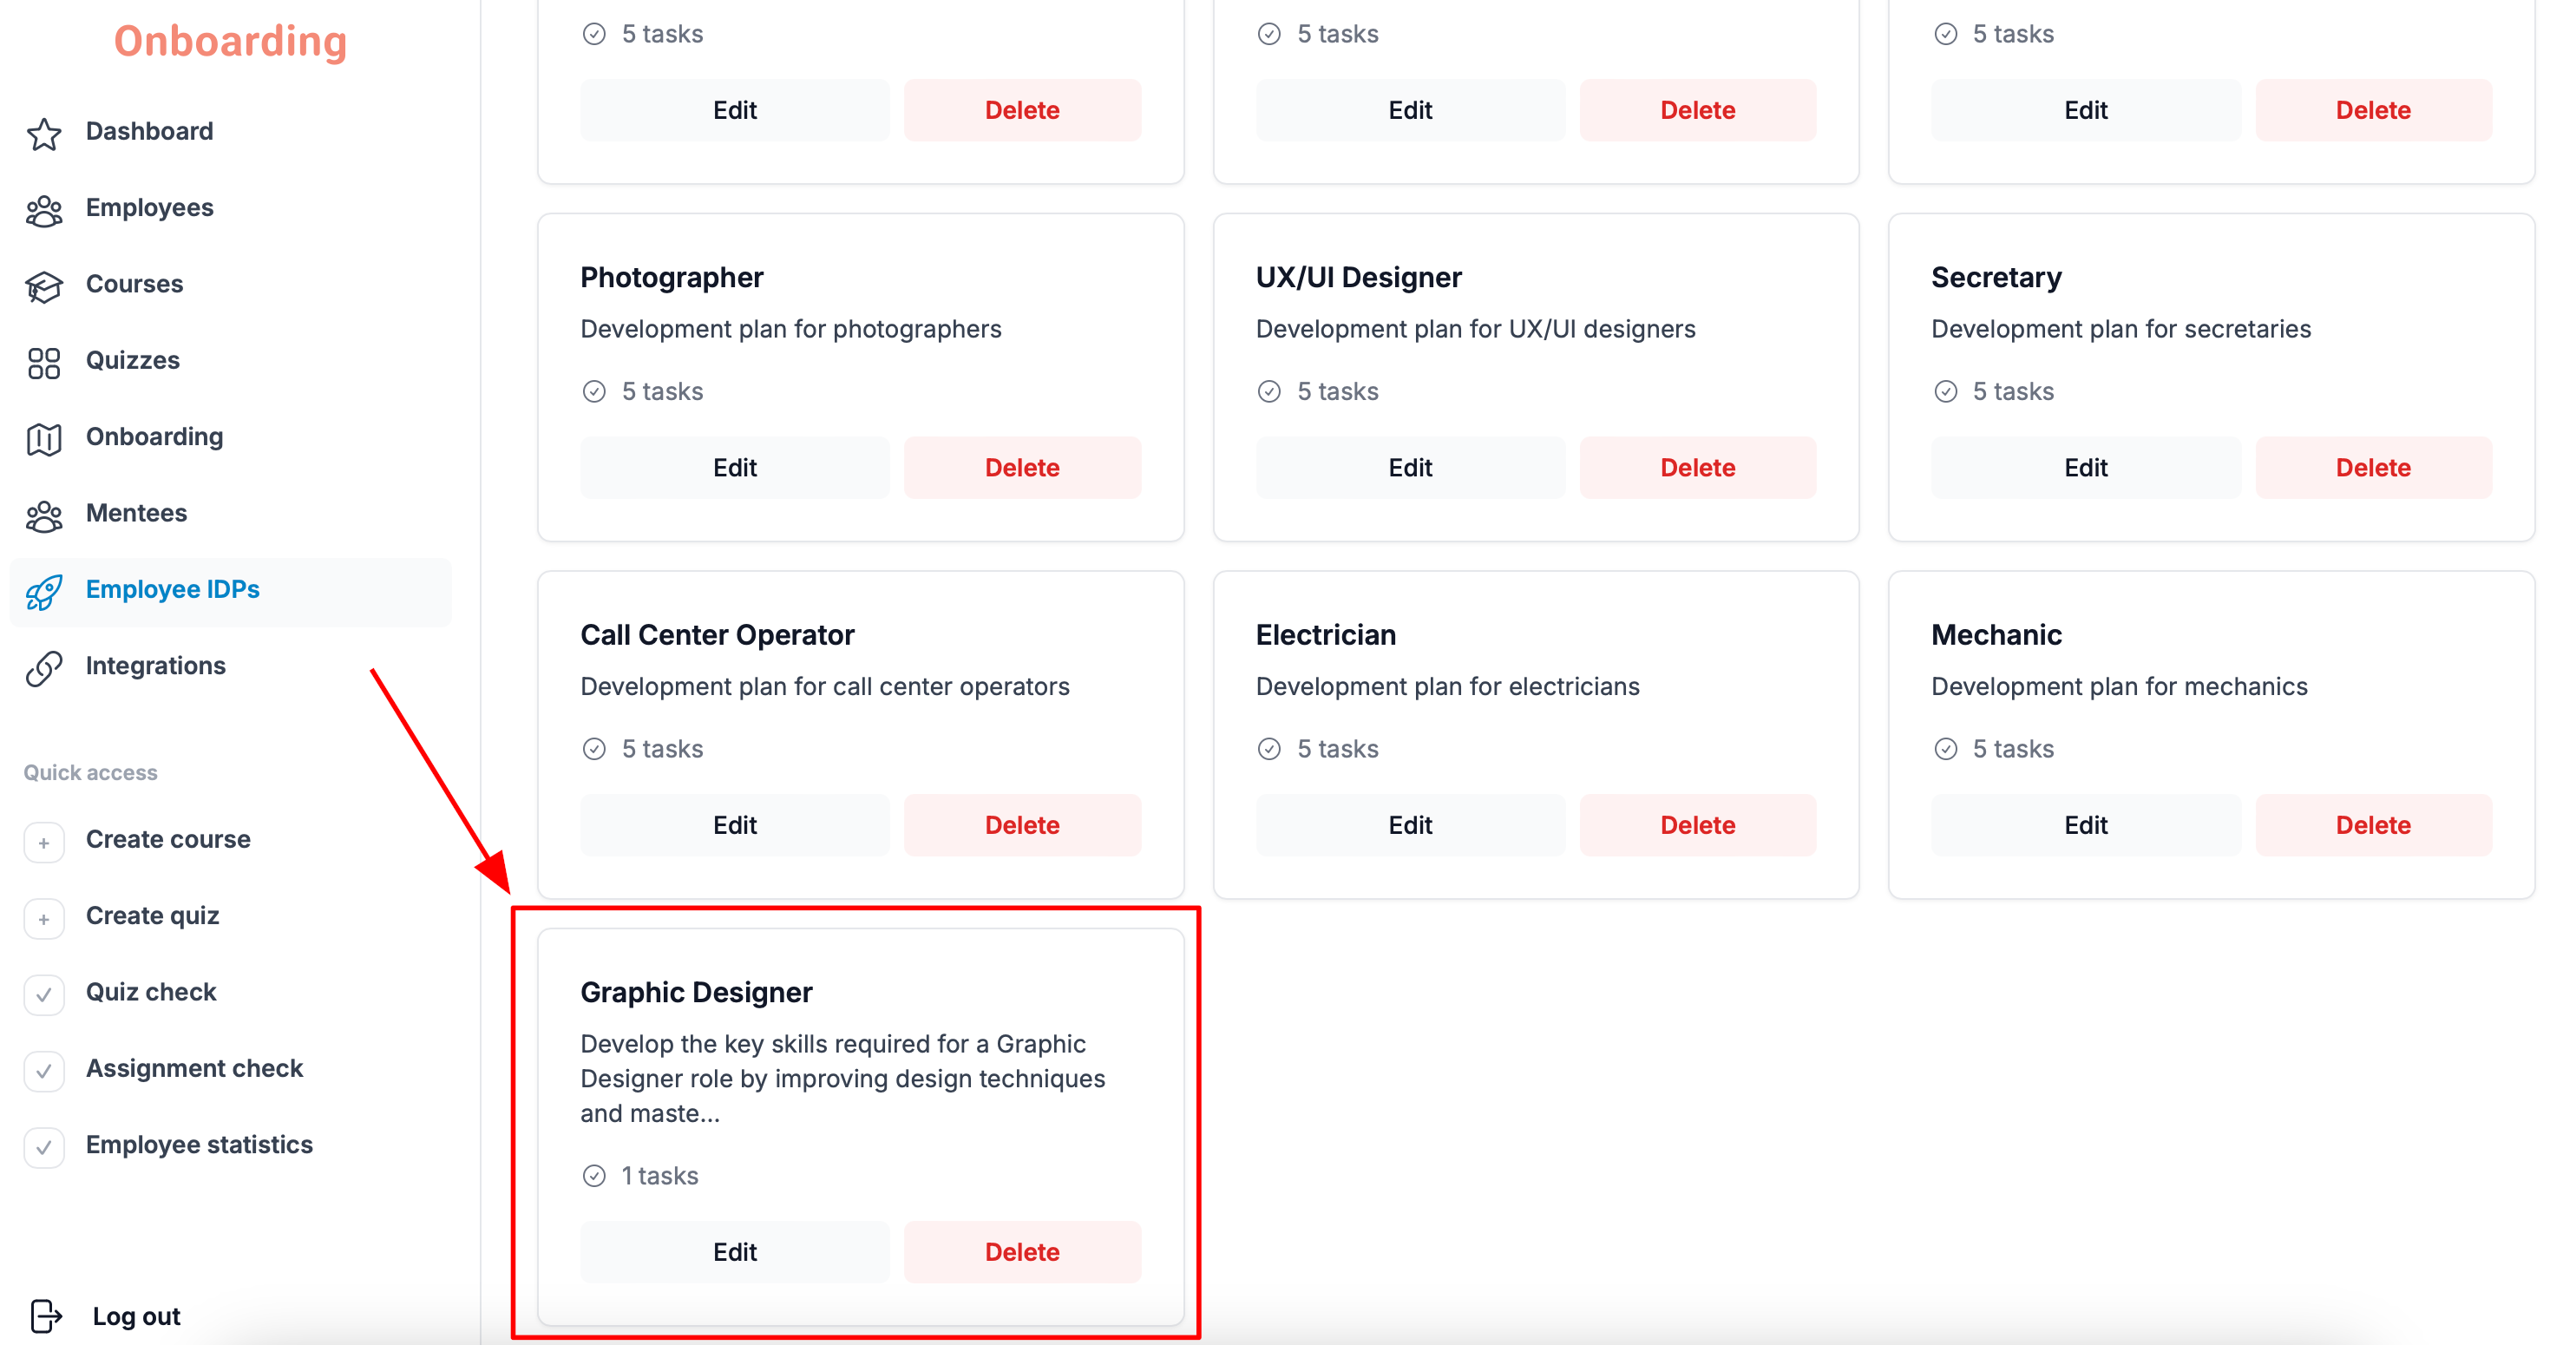
Editing a template doesn't affect IDPs that have already been created. Employees who were assigned an IDP before the changes will keep working through the original version.
The updated template applies only to new IDPs created after the changes are saved.
Deleting a template
You can delete an existing template if you no longer need it.
To do that, open the «IDP Templates» page, pick the template you need, and click «Delete» on its card.
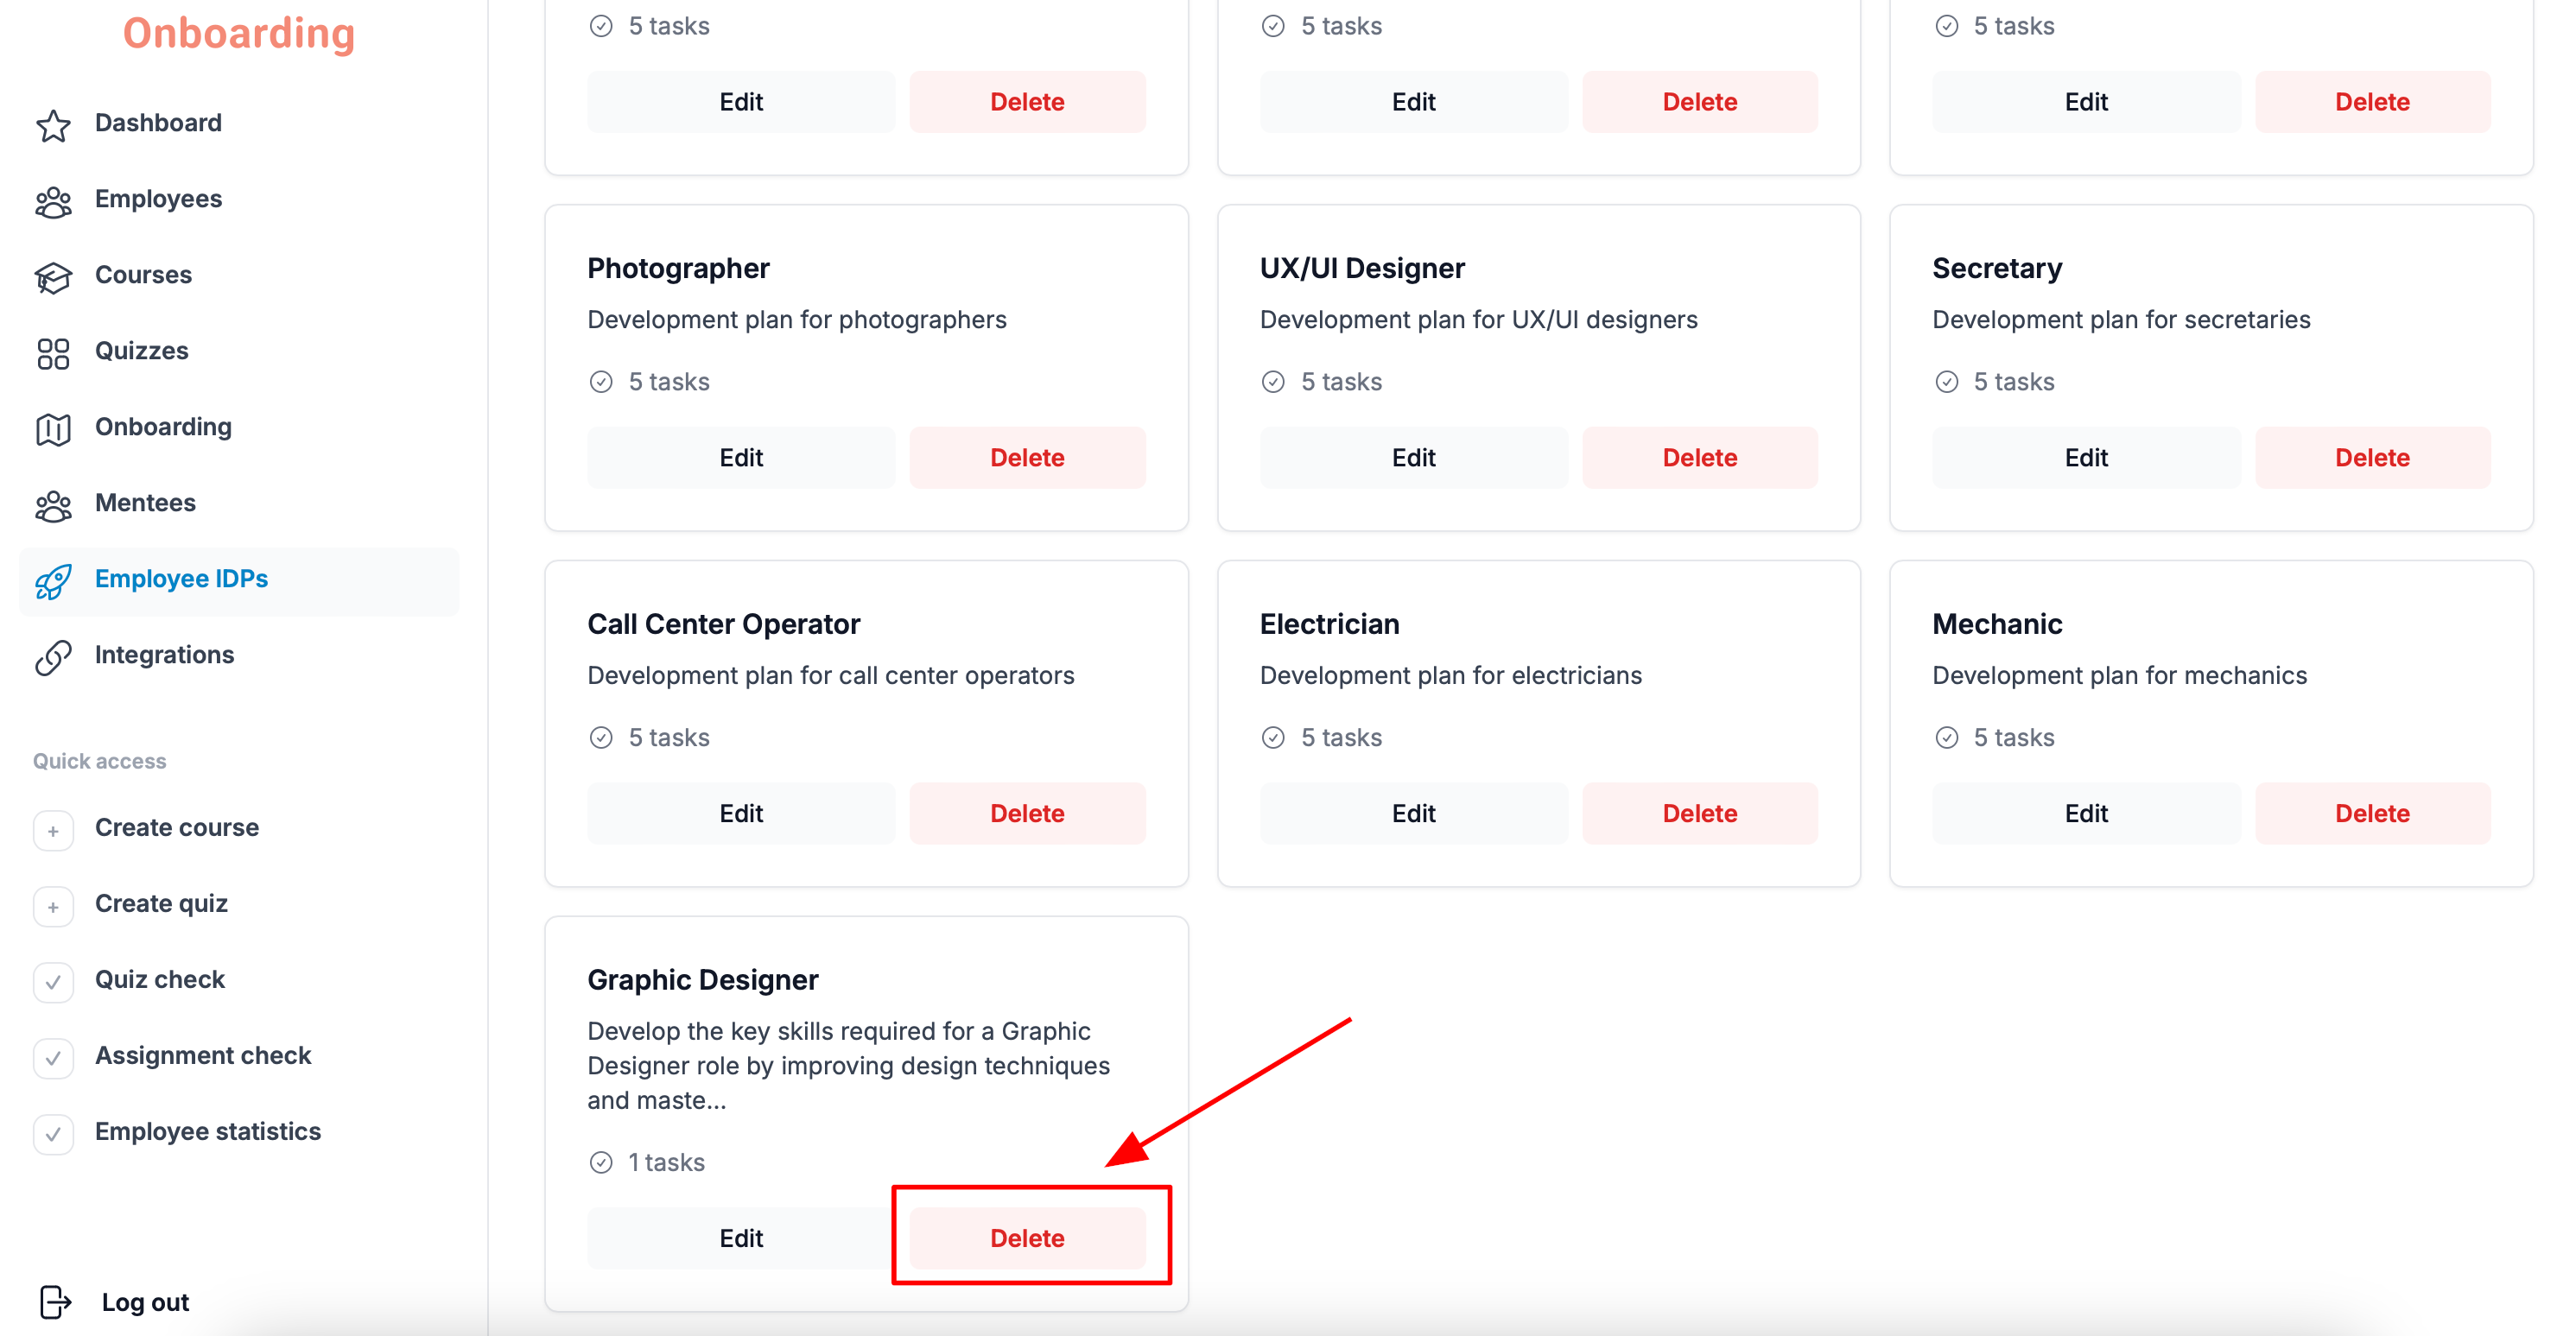
Confirm the action by clicking «Delete» again in the window that appears.
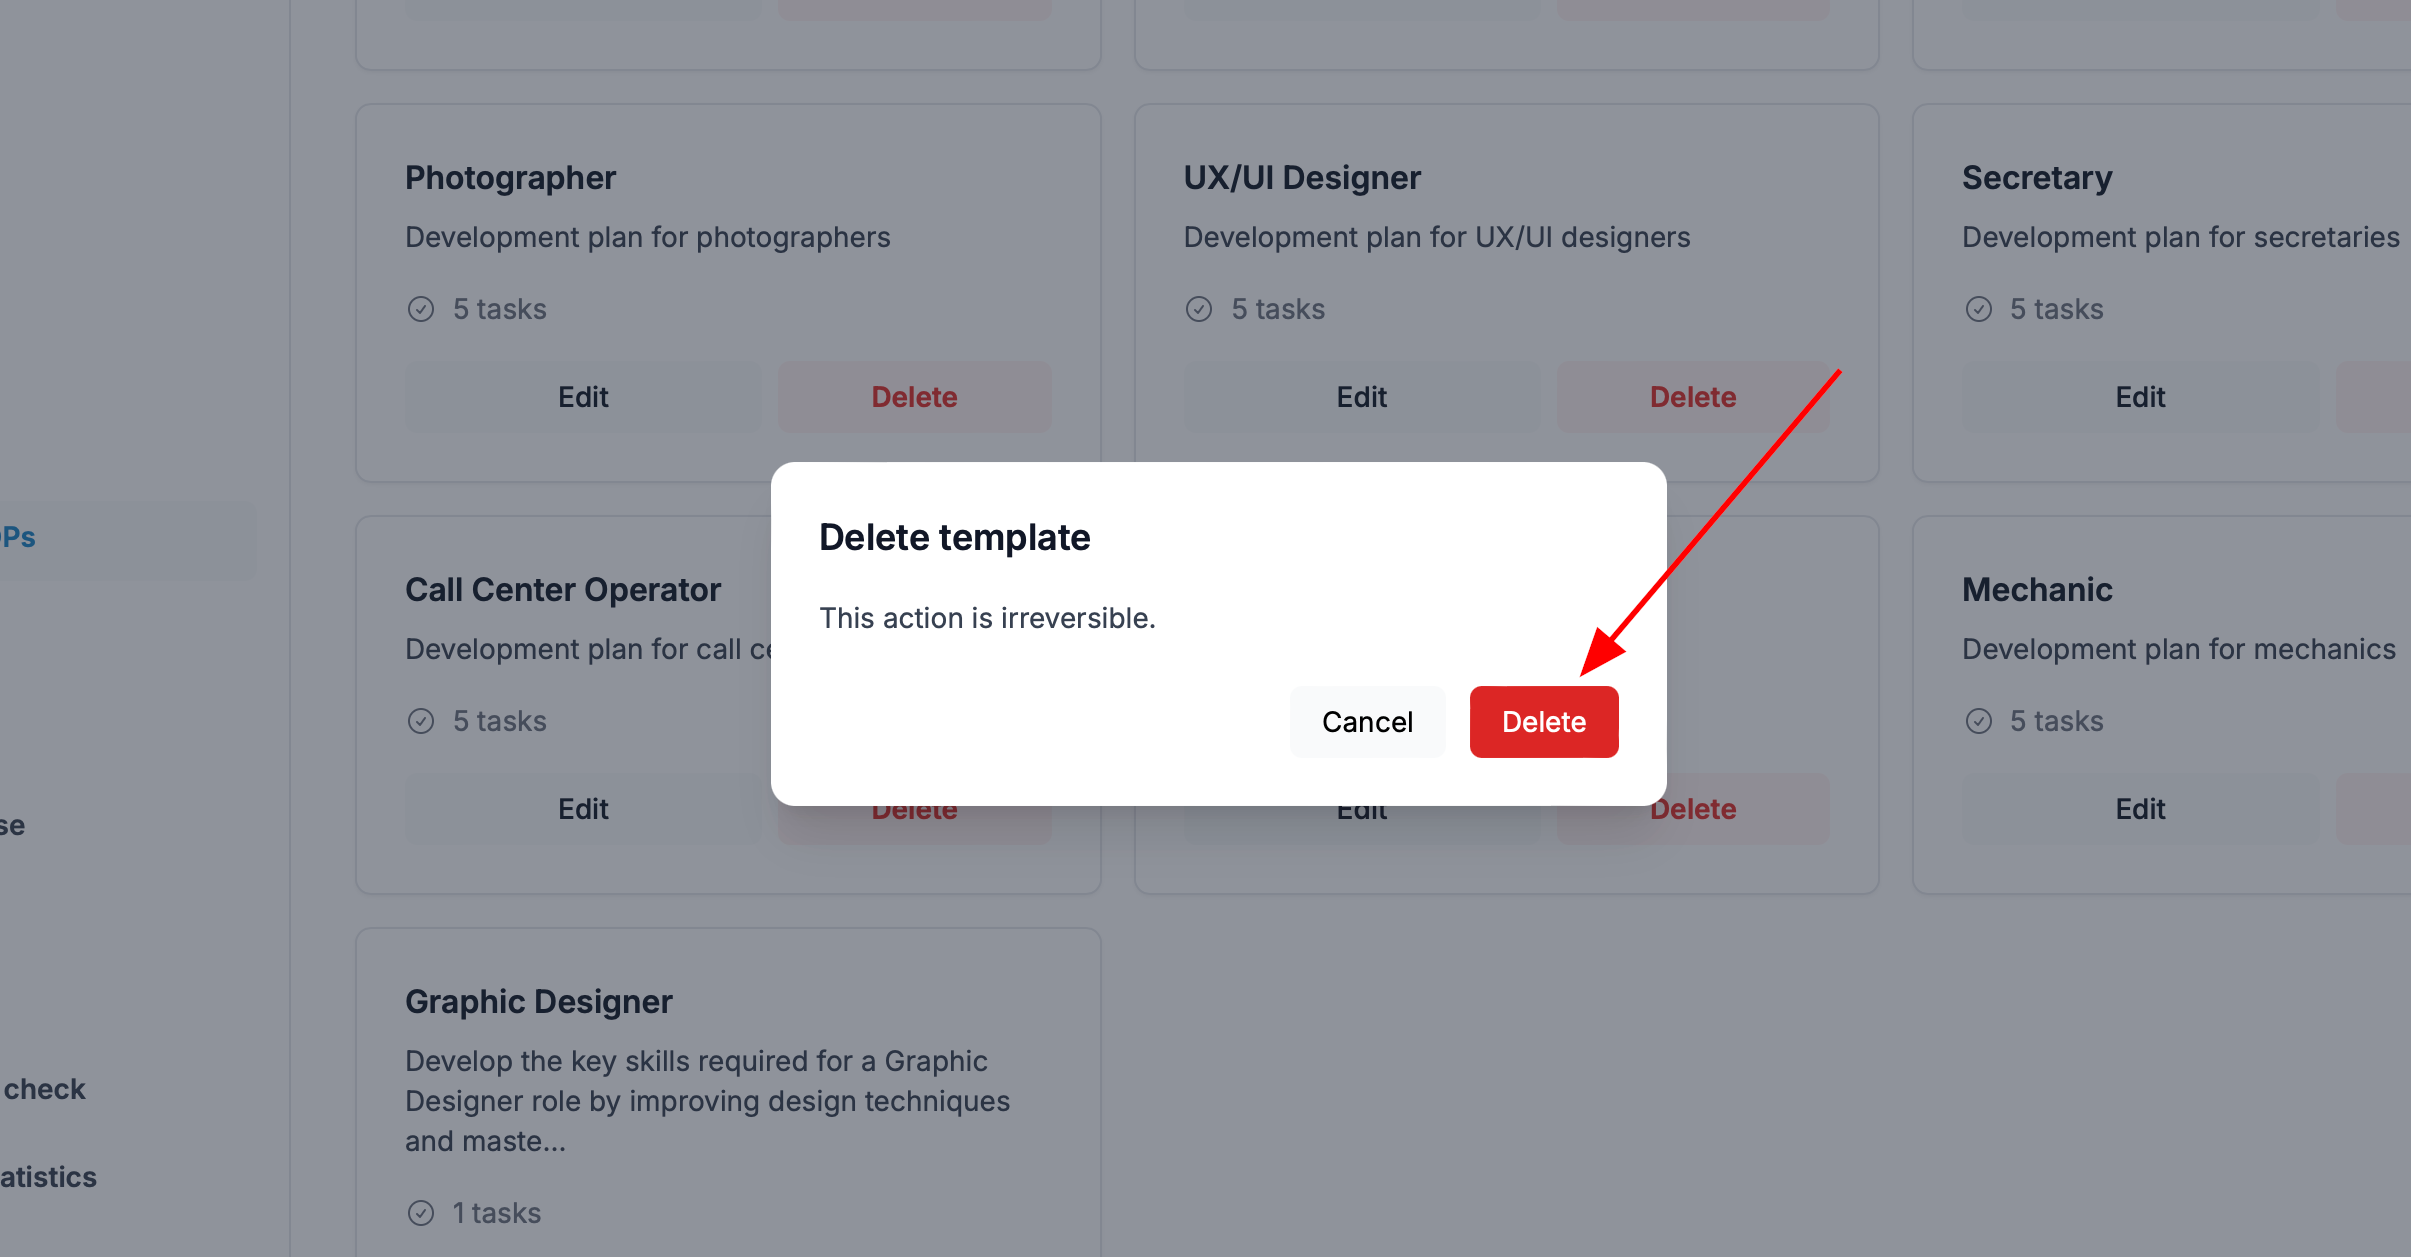
The template has been deleted and no longer appears in the list of IDP templates.
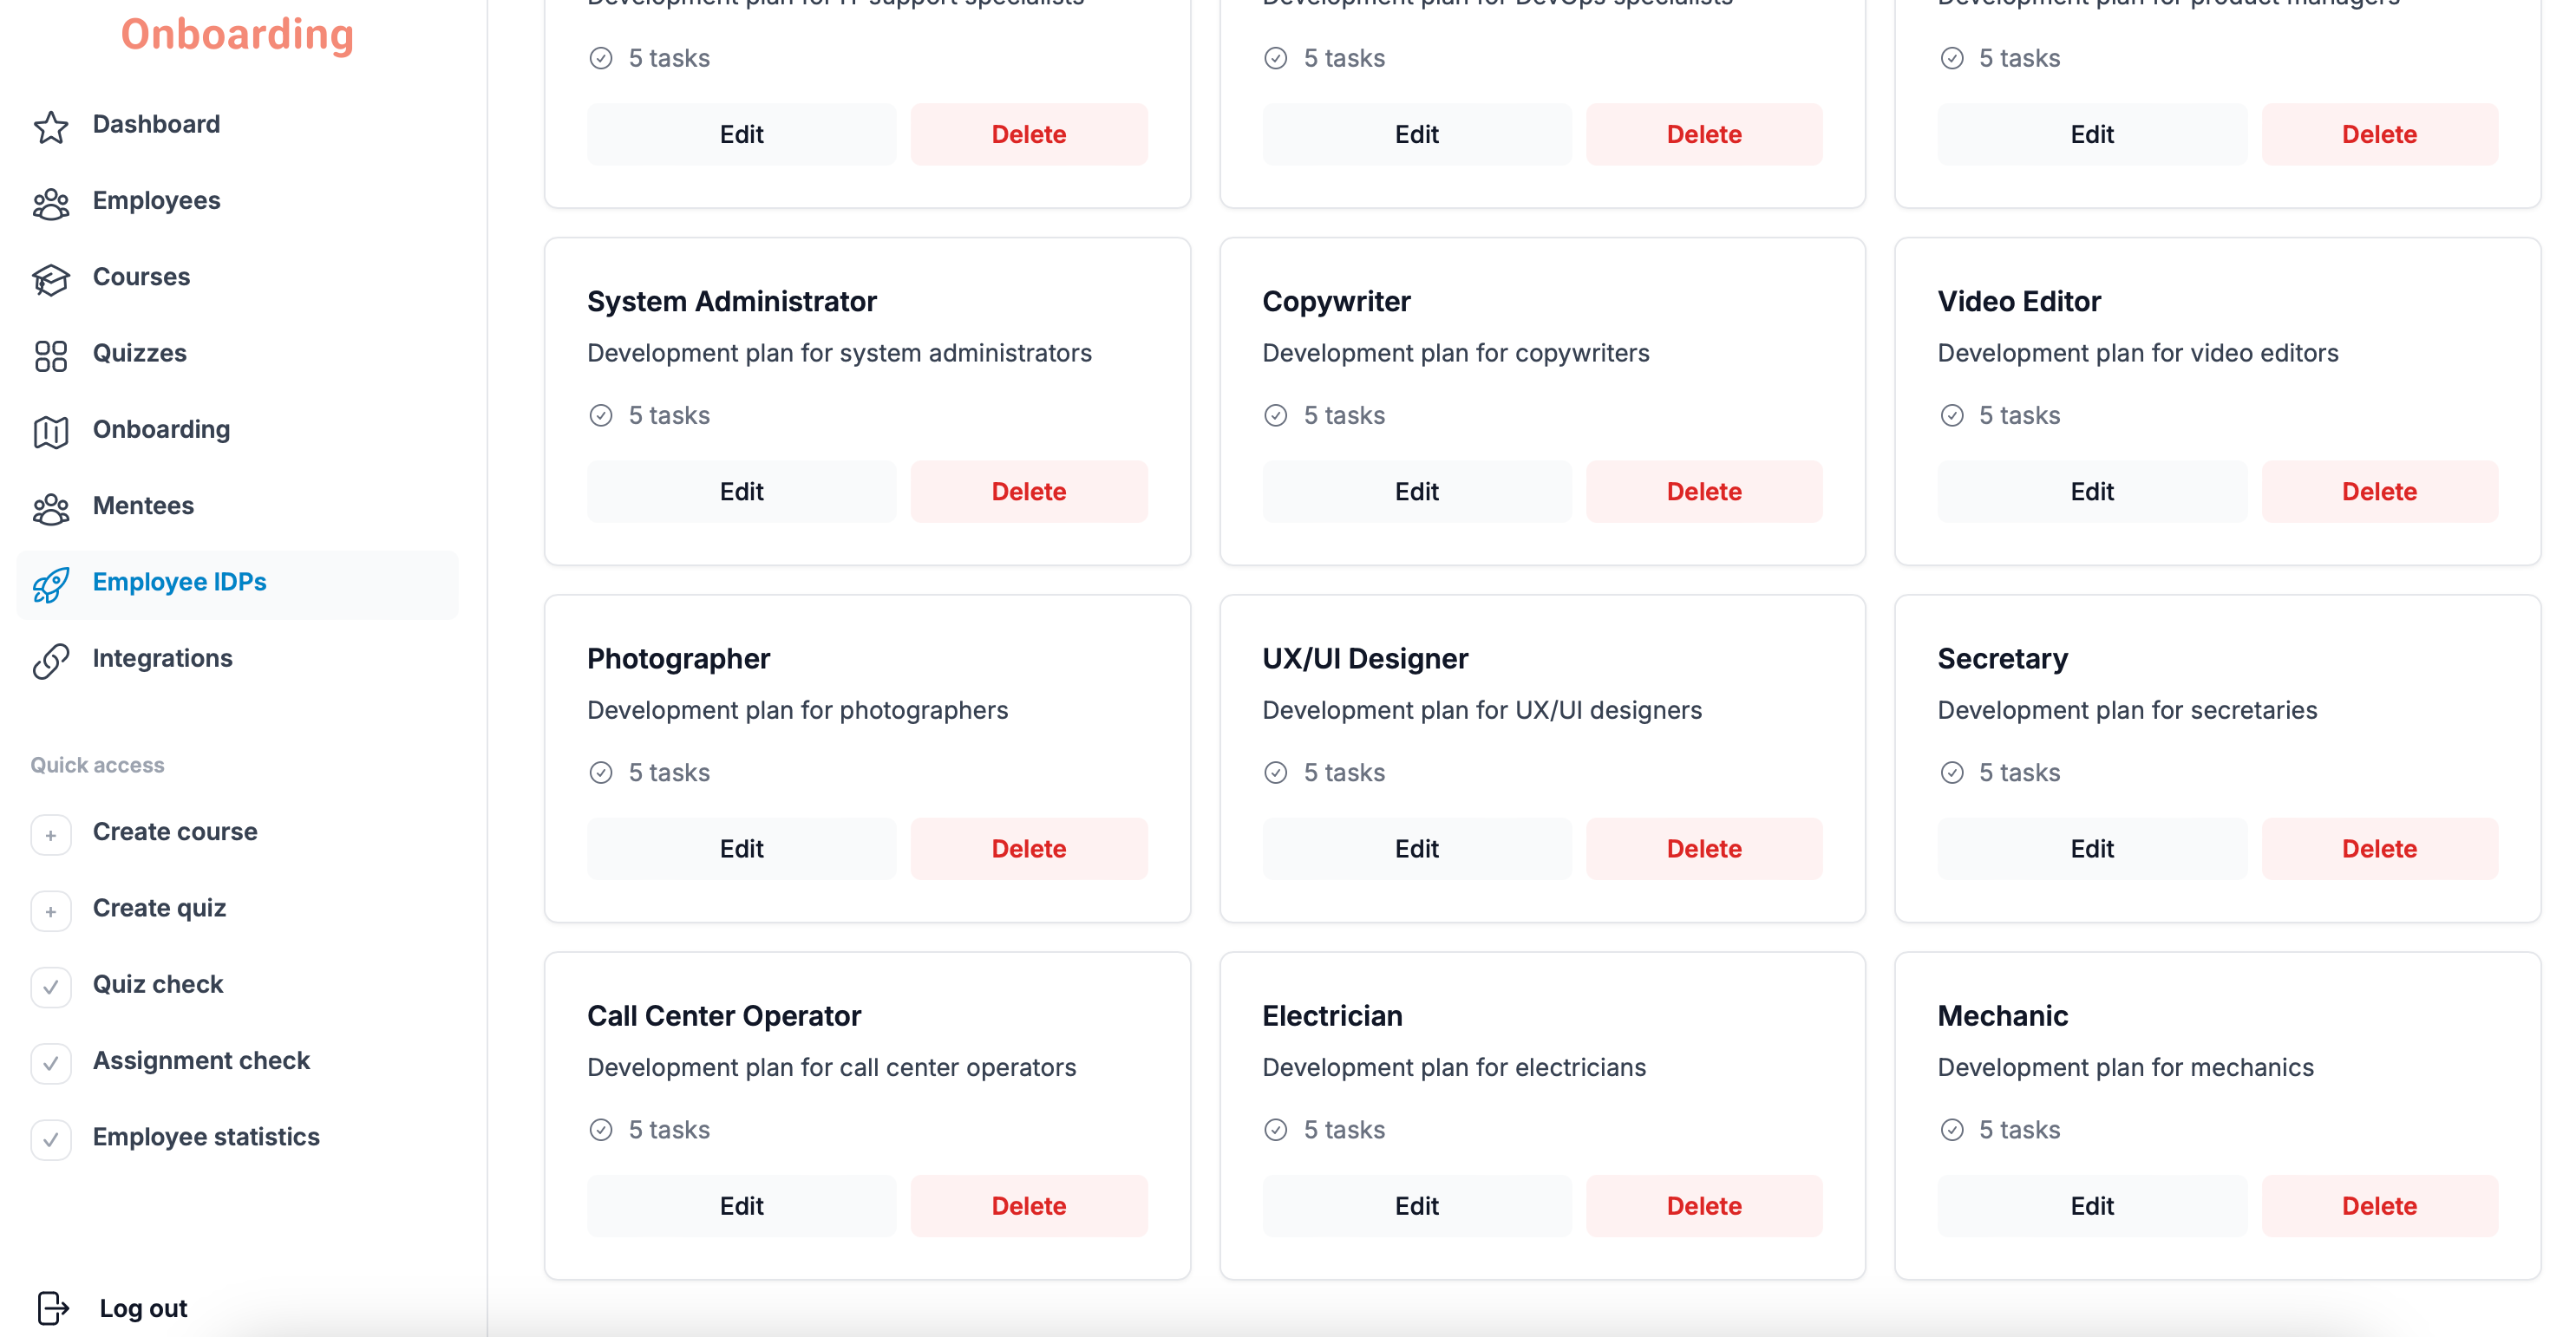
Deleting an IDP template cannot be undone. Once you confirm the deletion, the template cannot be restored.
Deleting a template doesn't affect IDPs that have already been created.
Employees who were previously assigned an IDP based on this template can finish it as usual.
After deletion, the template can no longer be used to create new IDPs.
Budget Items
Budget items are used to plan and track spending on employee development, and they're added automatically when an IDP is created.
To view and manage the existing budget items, open the «Employee IDPs» section and click the «Budget items» block on the main page.
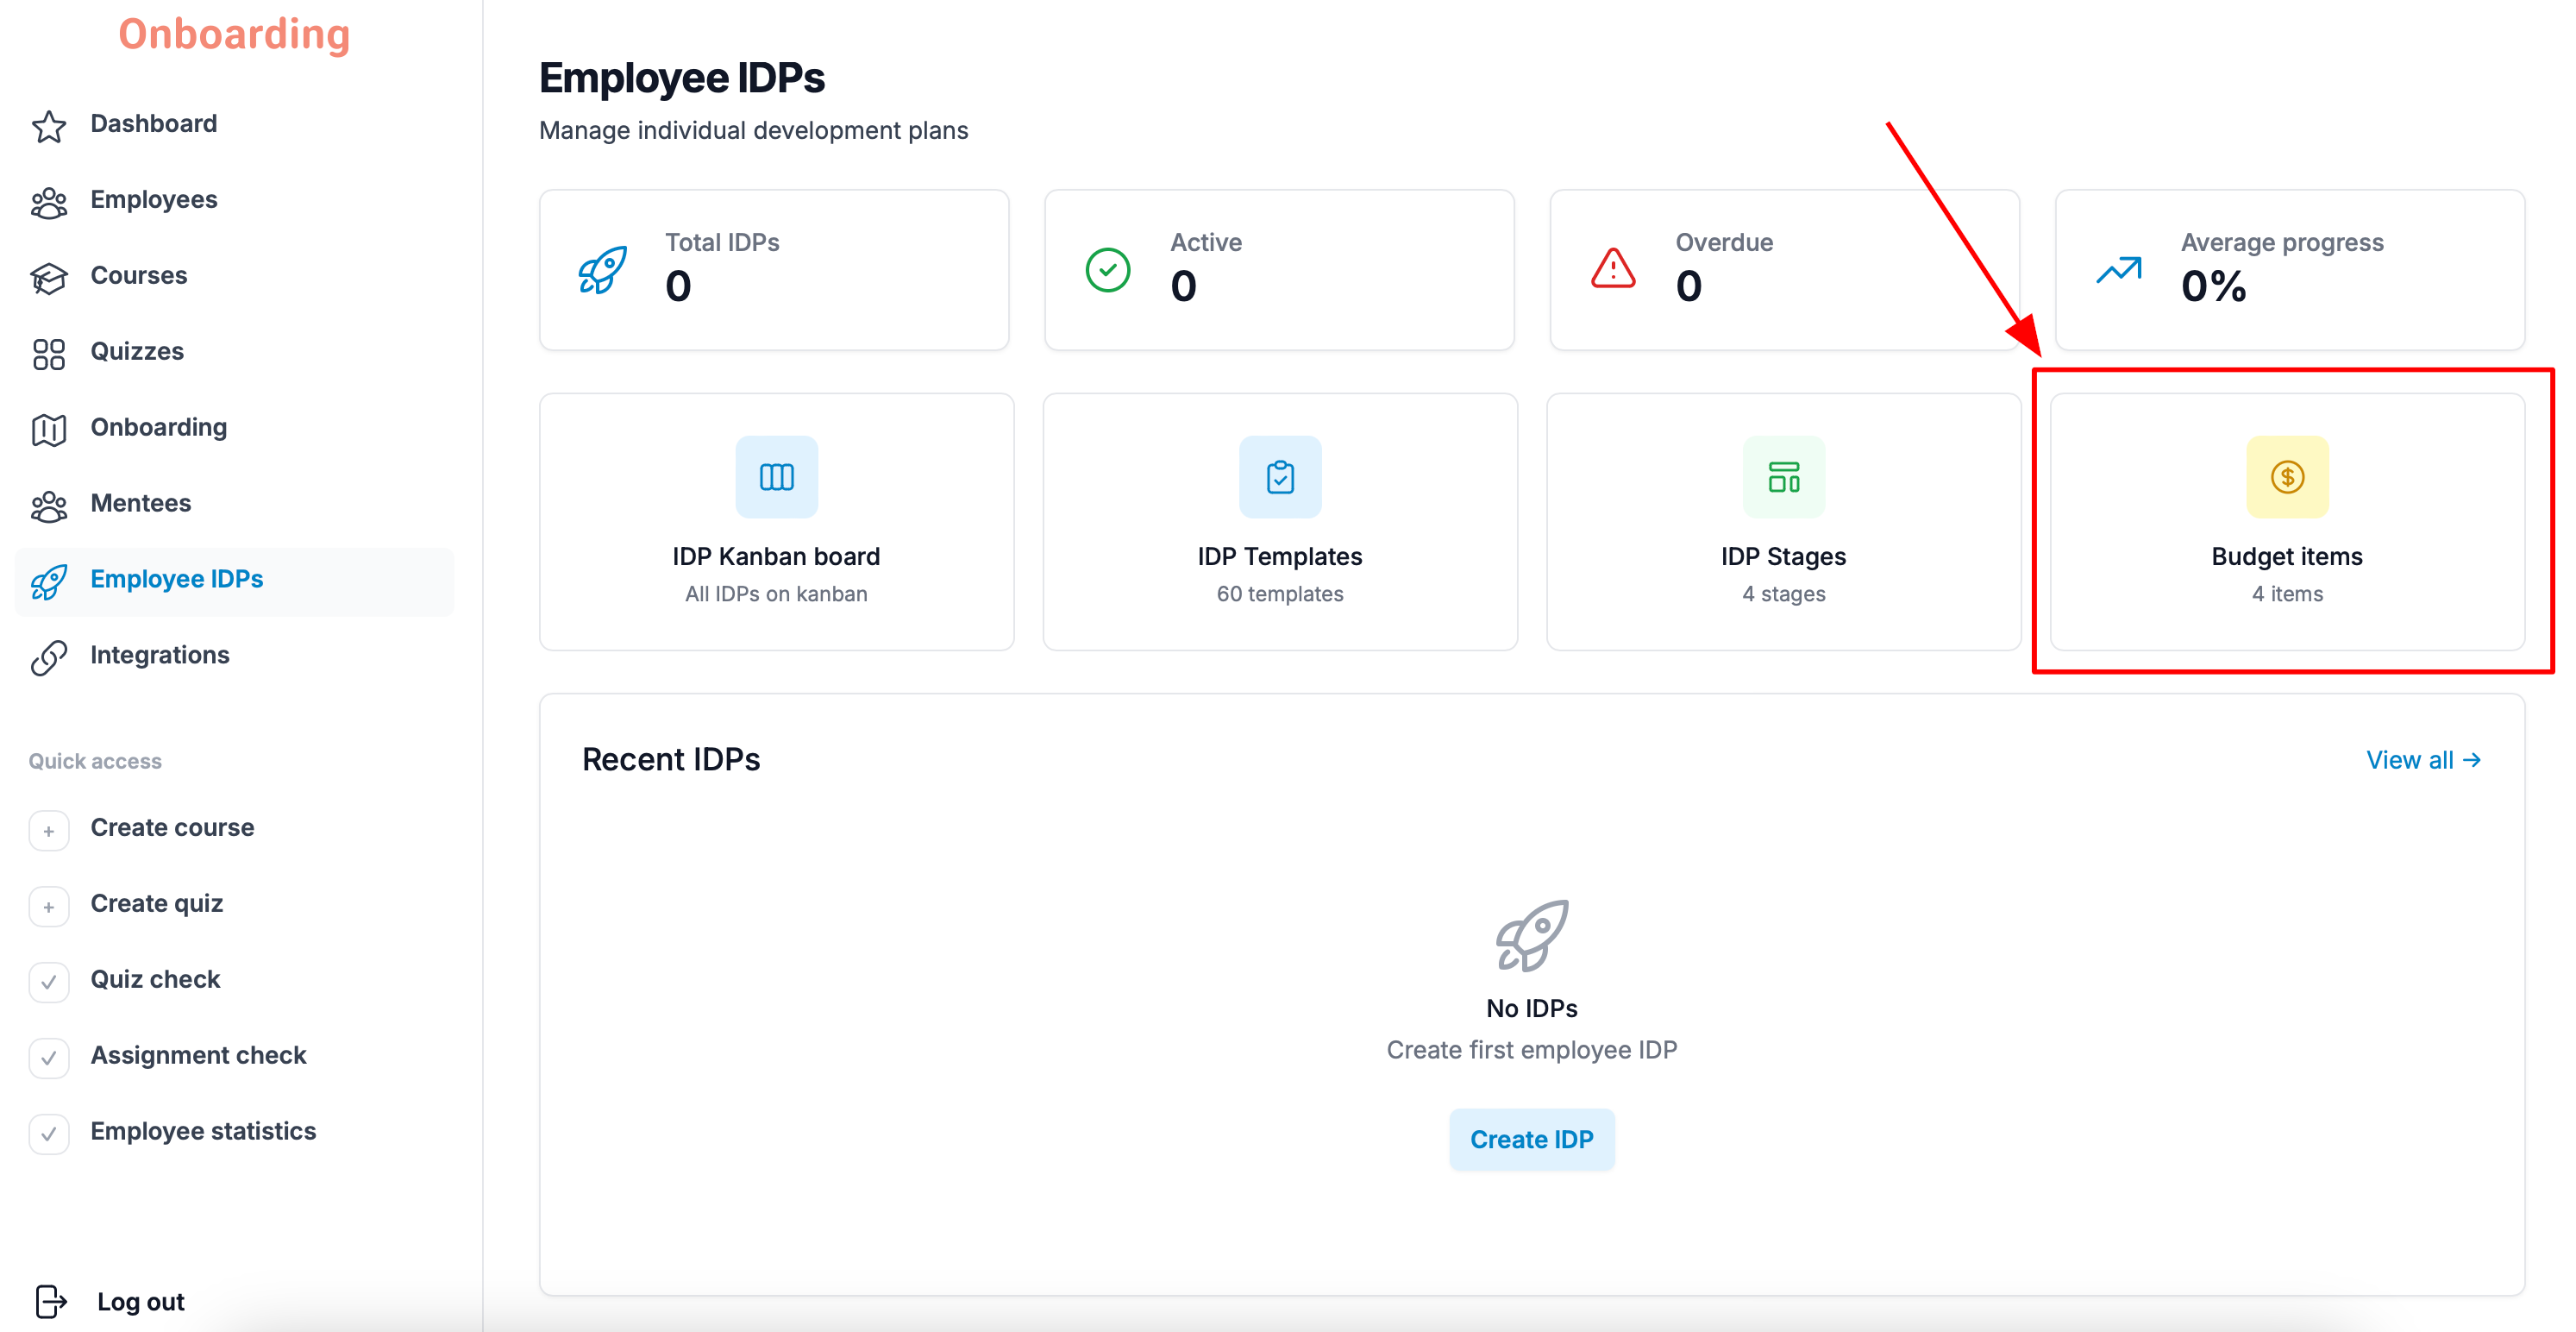
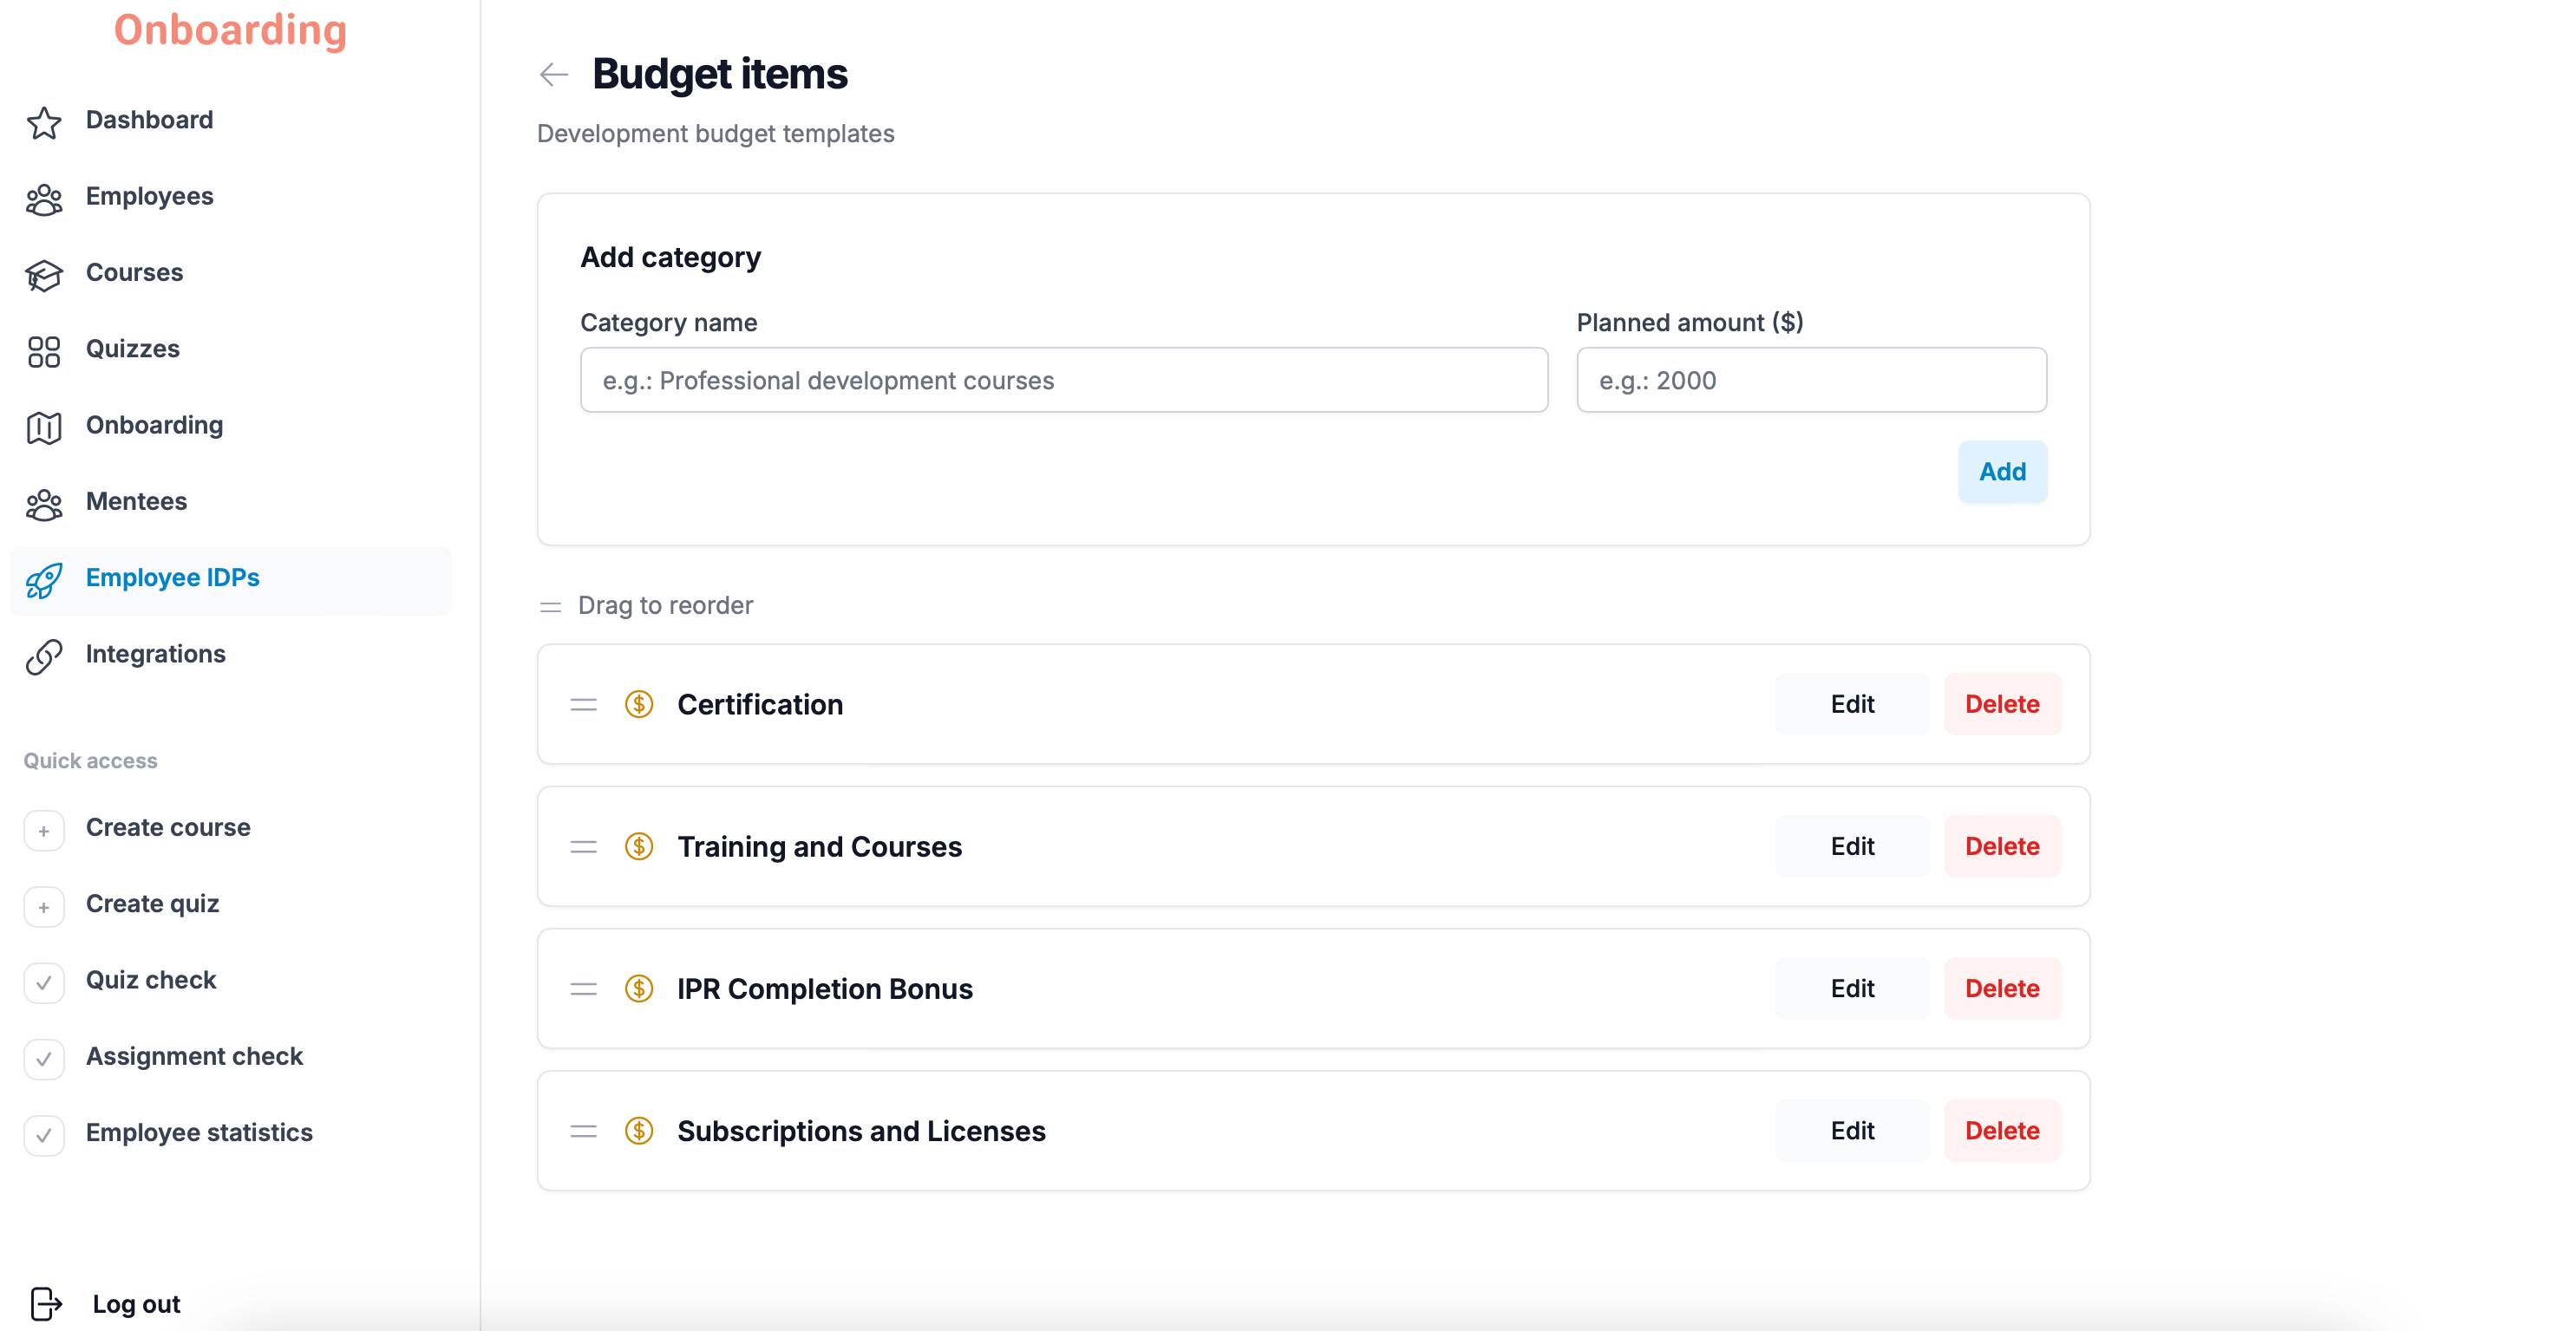
The budget items management page opens.
The platform comes with the following budget items by default:
- Certification;
- Training and Courses;
- IRP Completion Bonus;
- Subscriptions and Licenses.
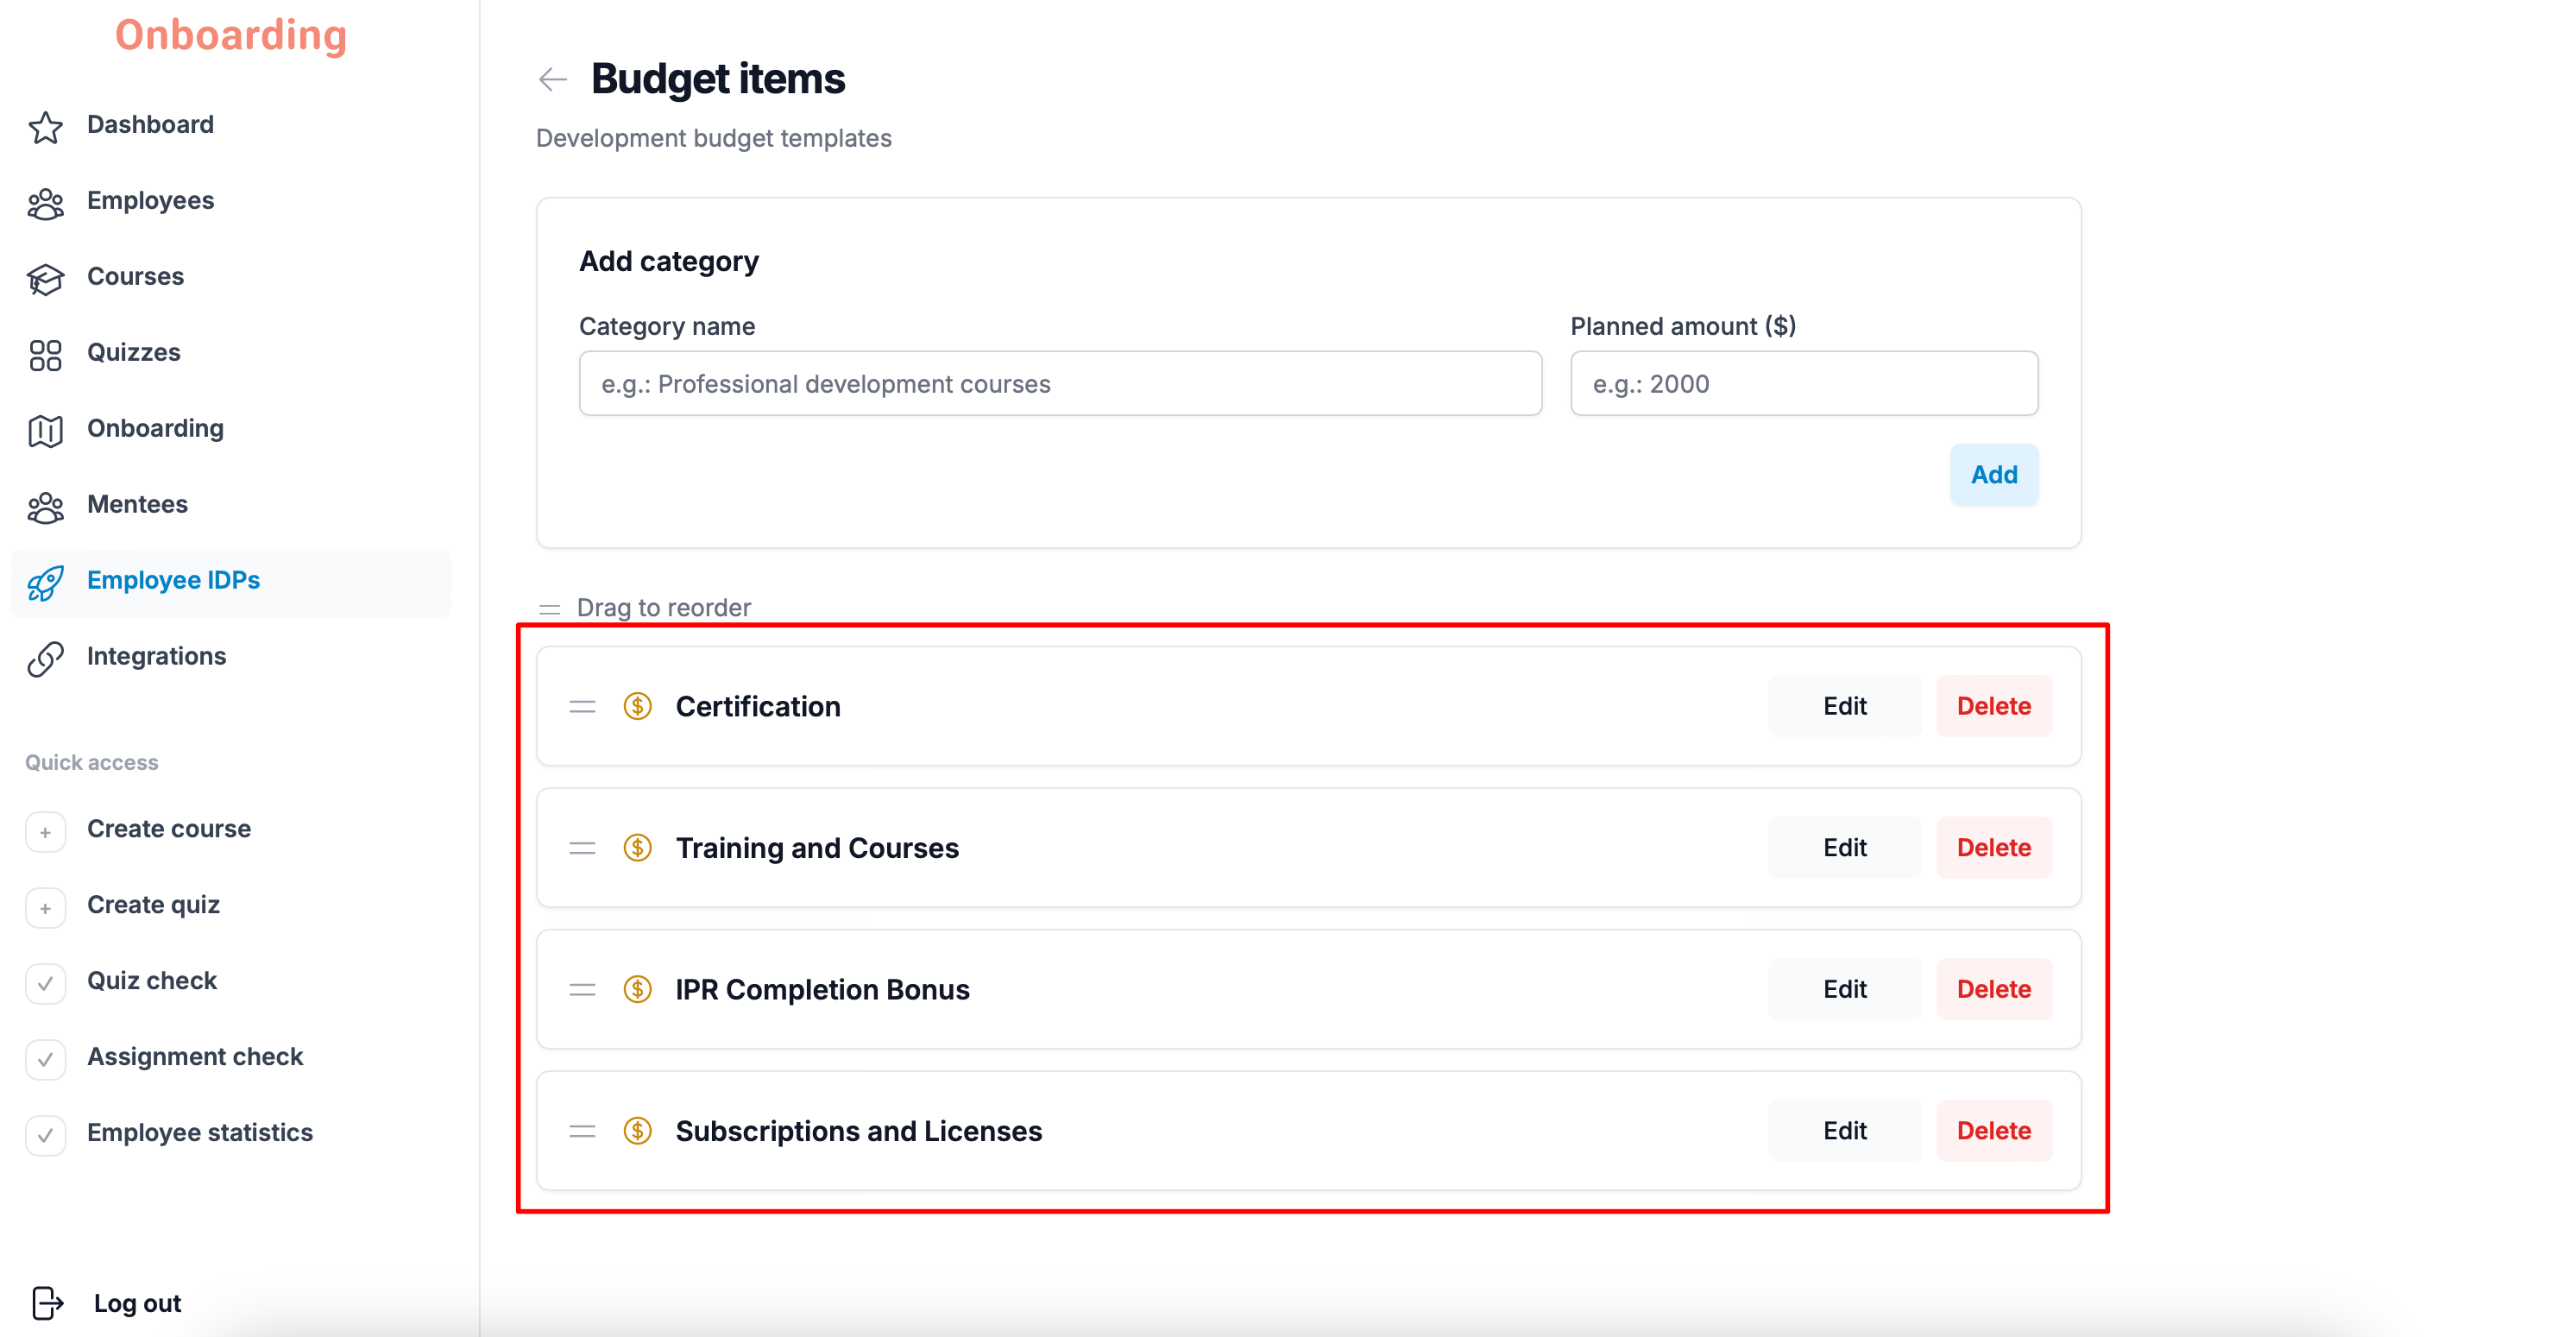
On the budget items page you can:
- add new budget items;
- edit existing items;
- reorder items;
- delete budget items.
Adding a budget item
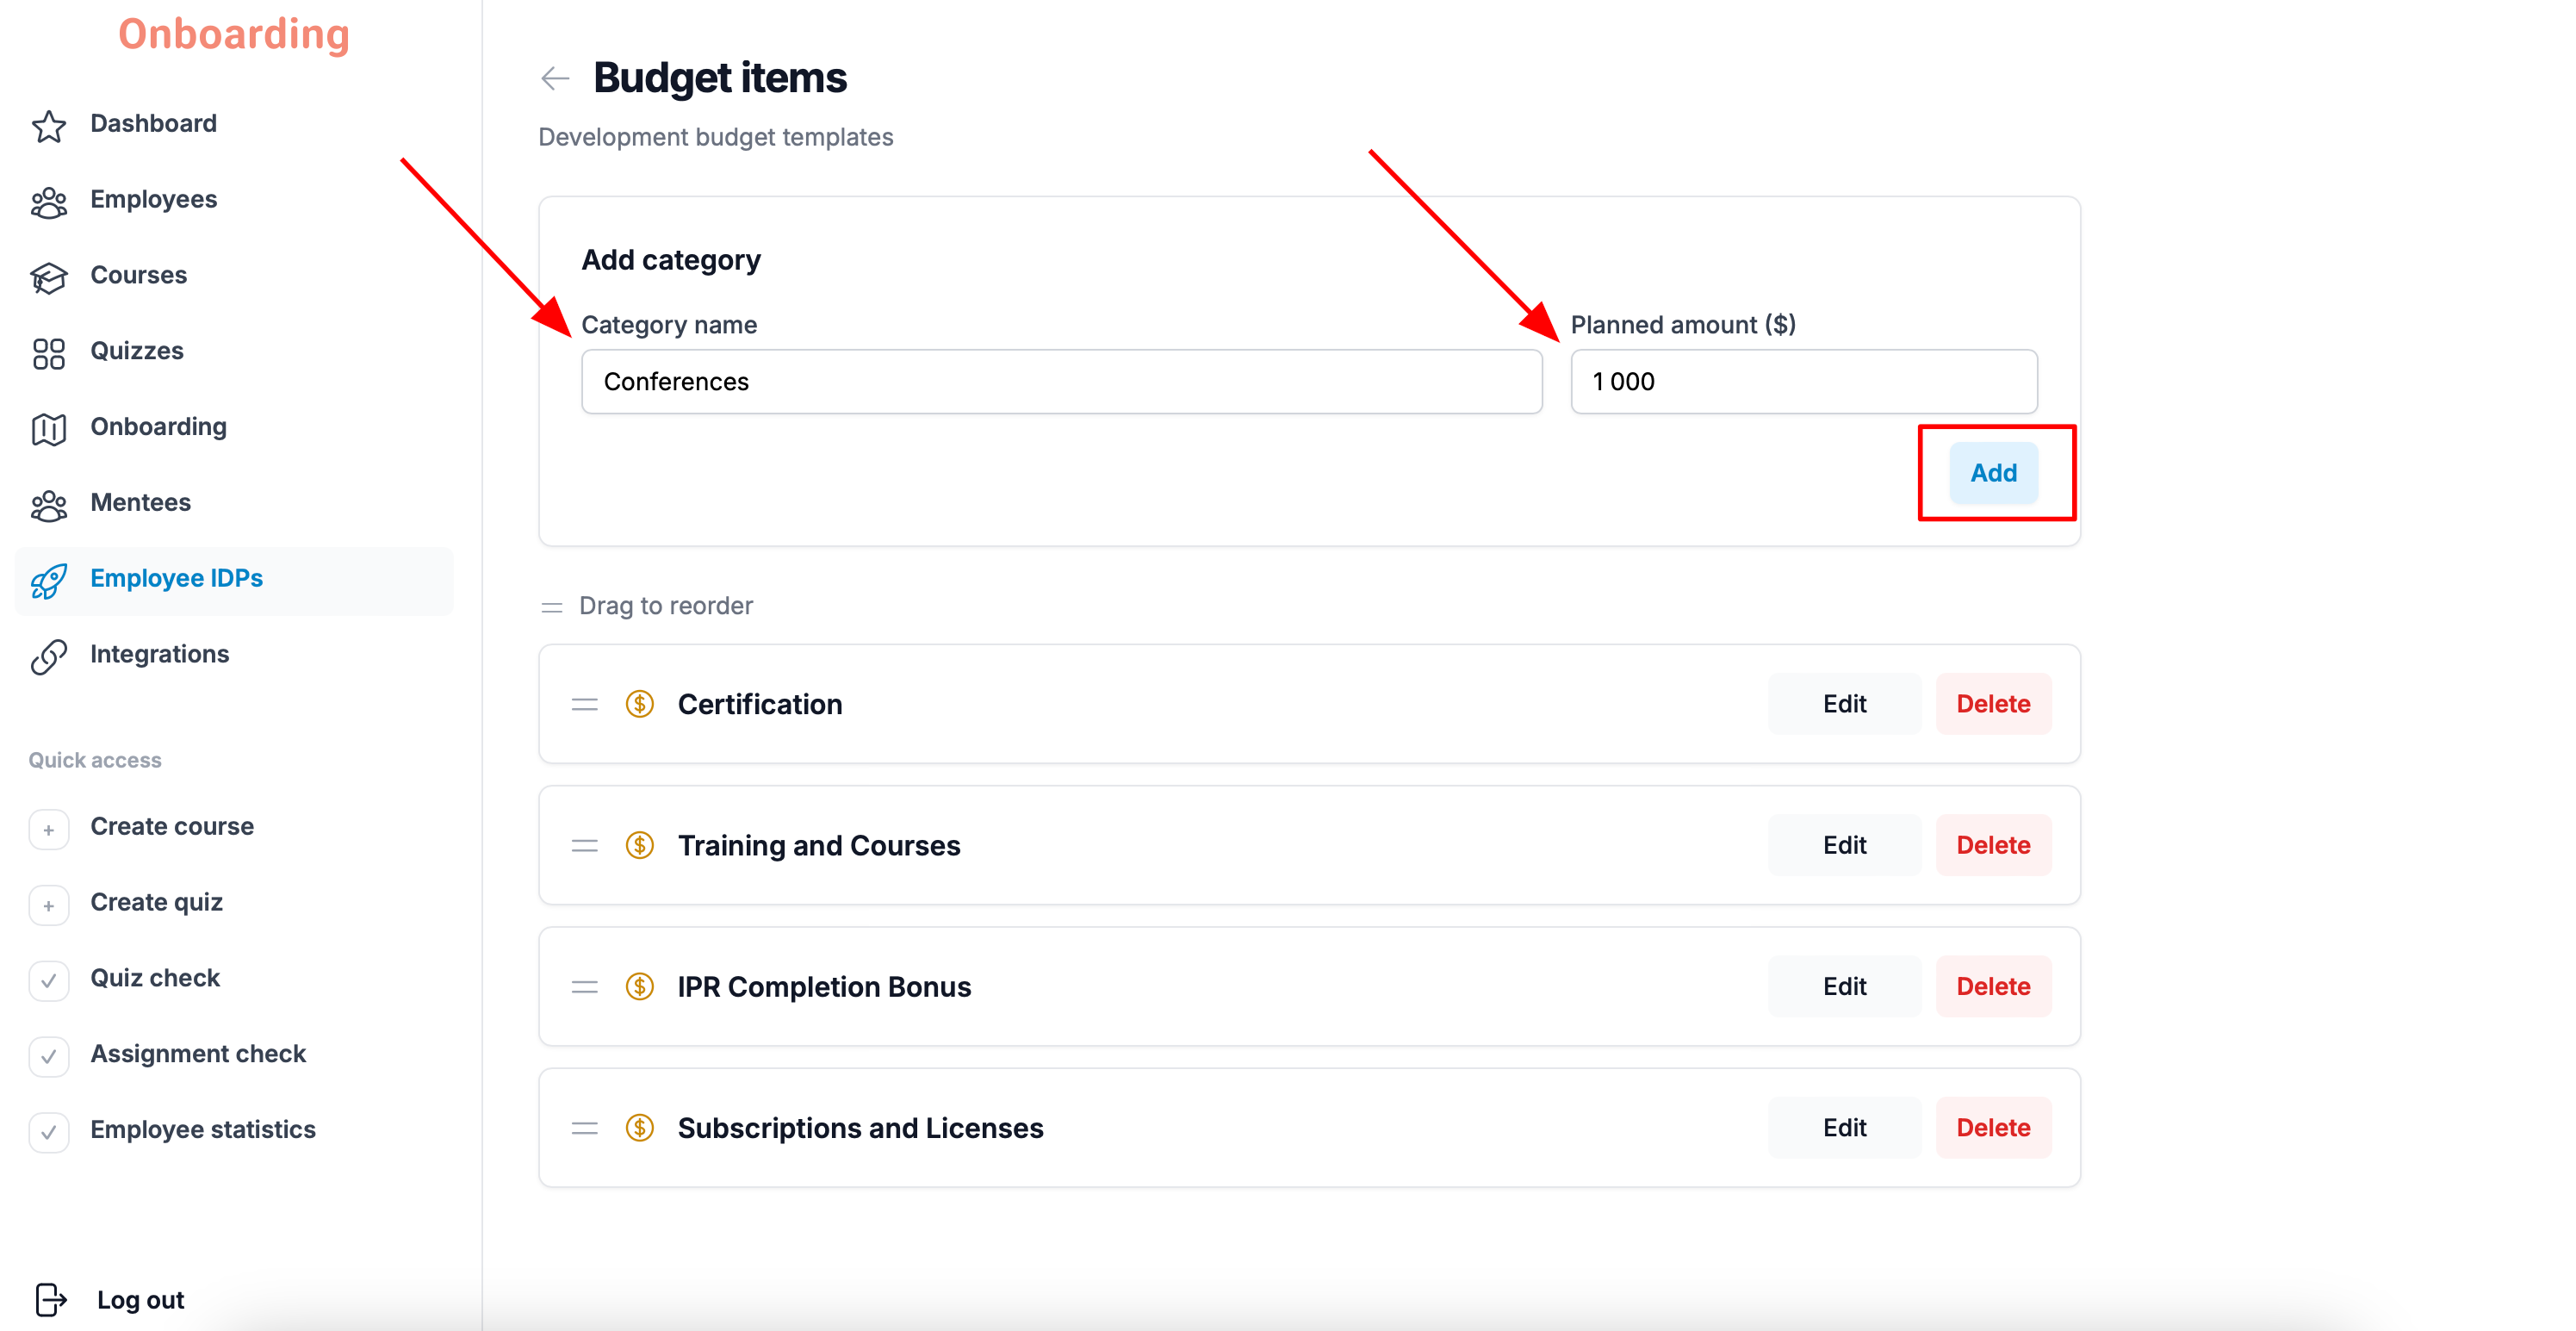
To add a new budget item, open the «Budget items» page and fill in the form at the top of the page.
Enter:
- the category name;
- the planned amount.
Then click «Add».
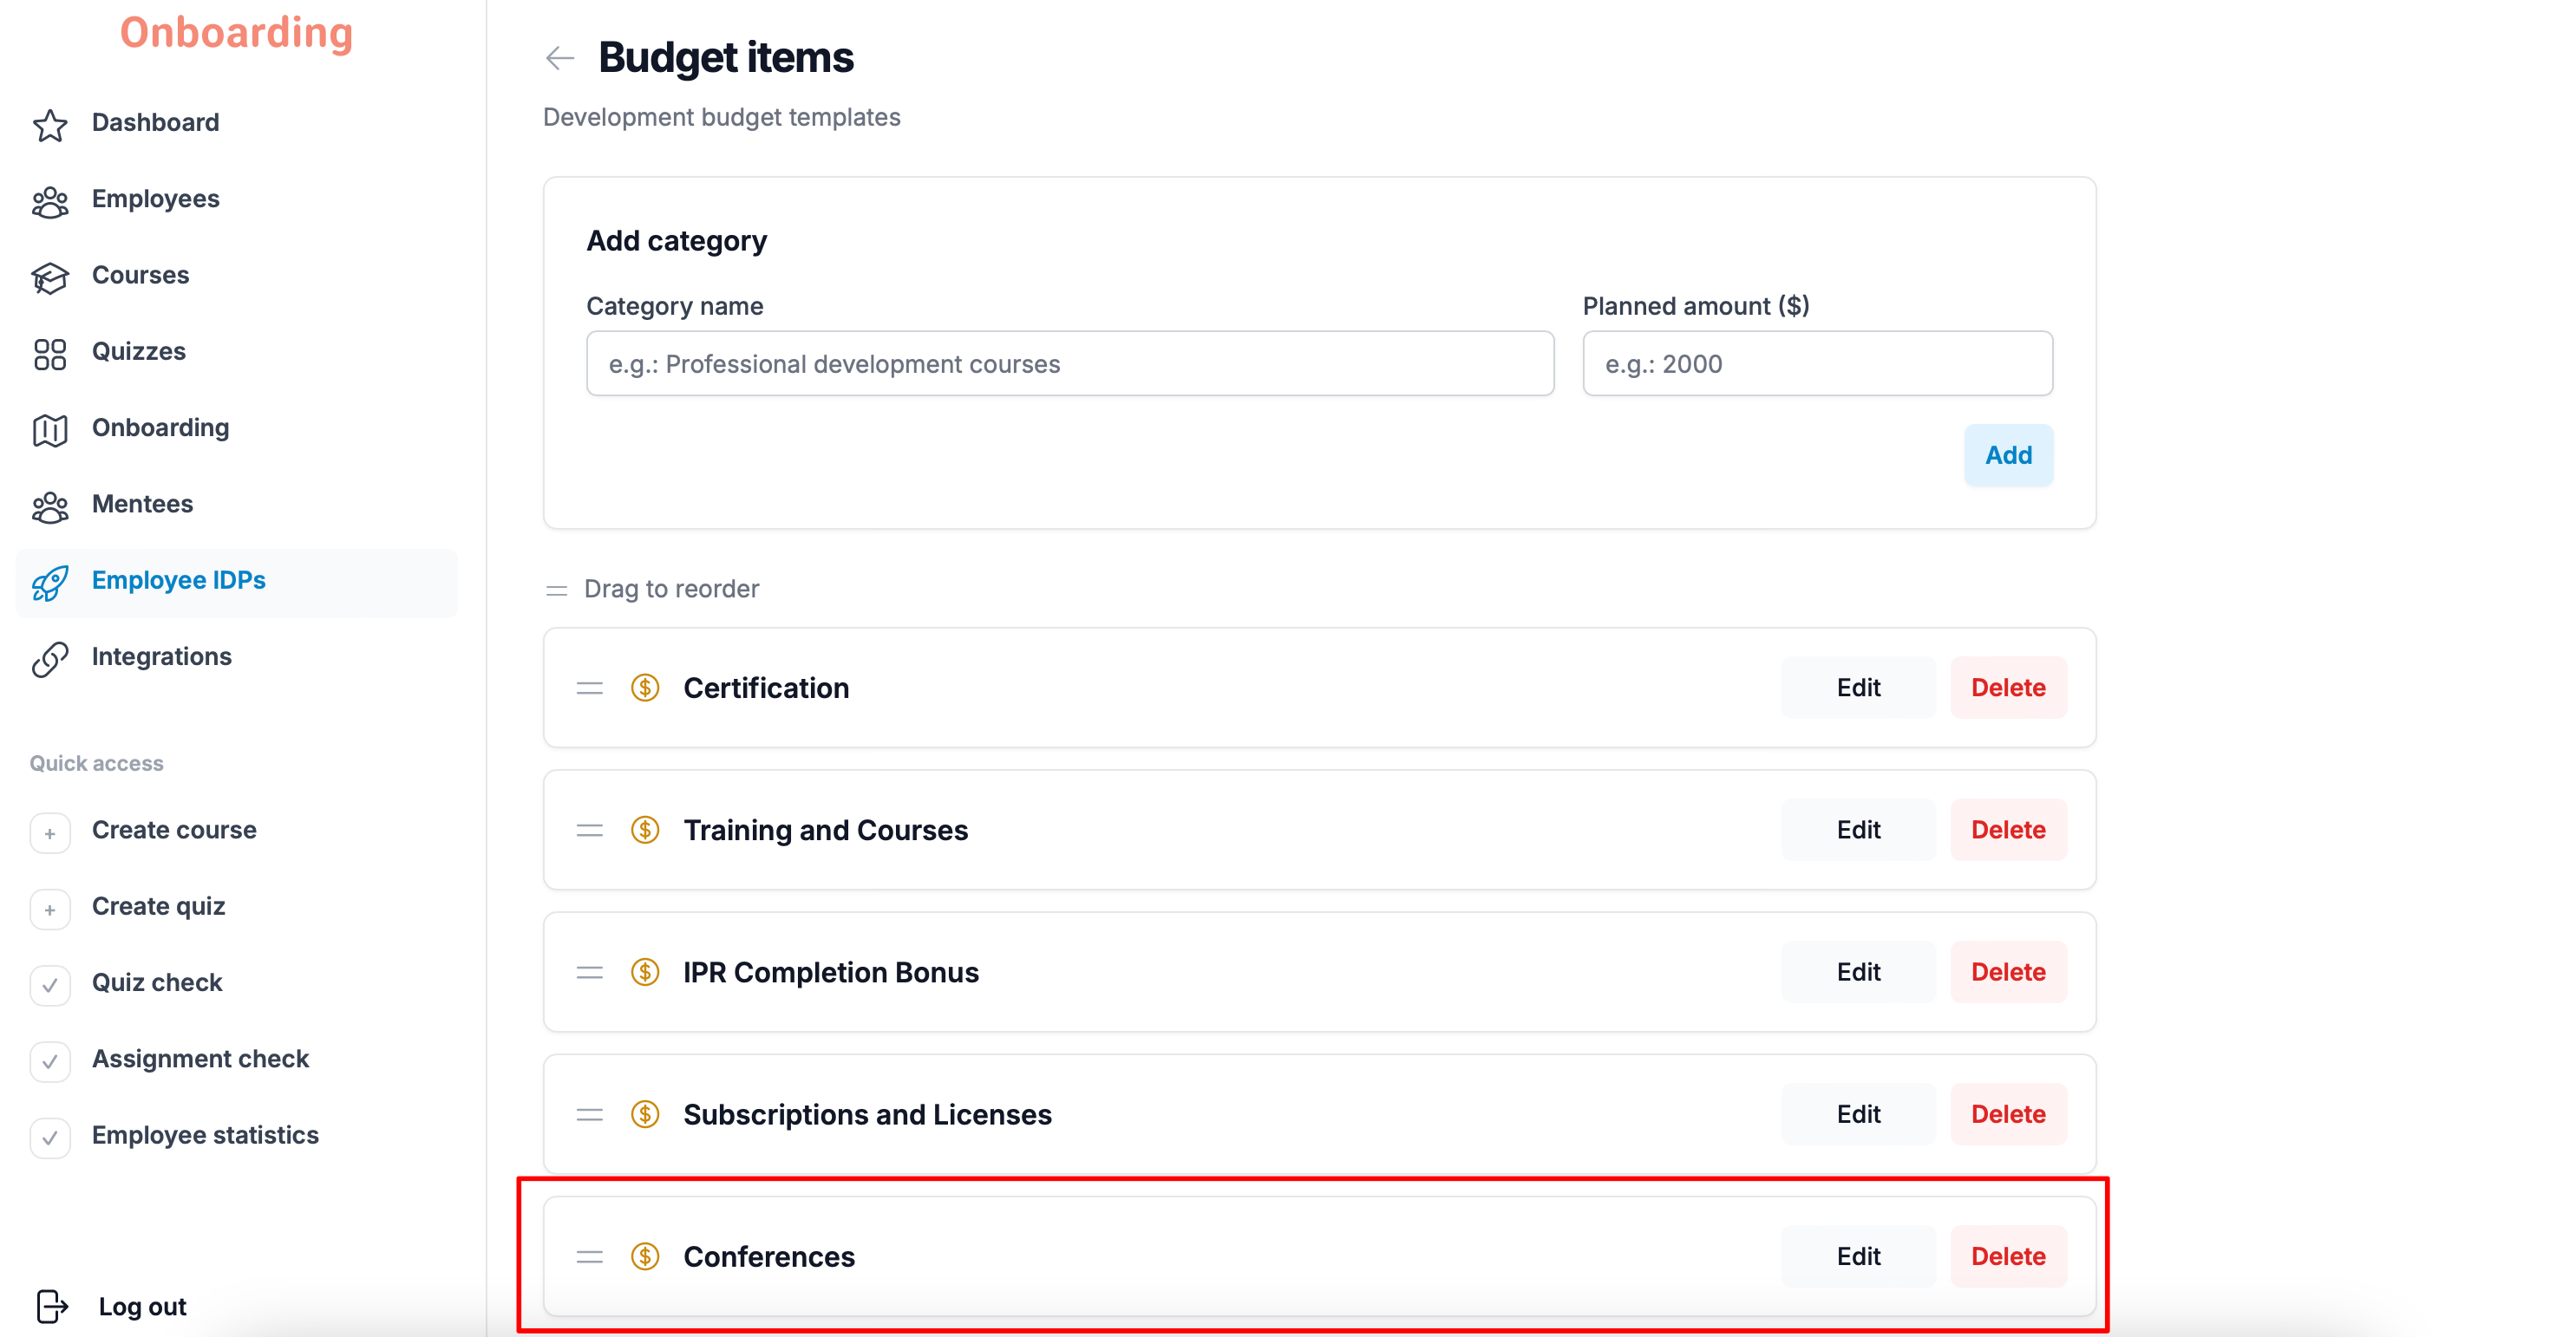
The new budget item now appears in the list 🎉
The planned amount is optional when creating a budget item. You can add it later by clicking «Edit» next to the category.
Editing a budget item
You can change the name and planned amount of an existing budget item.
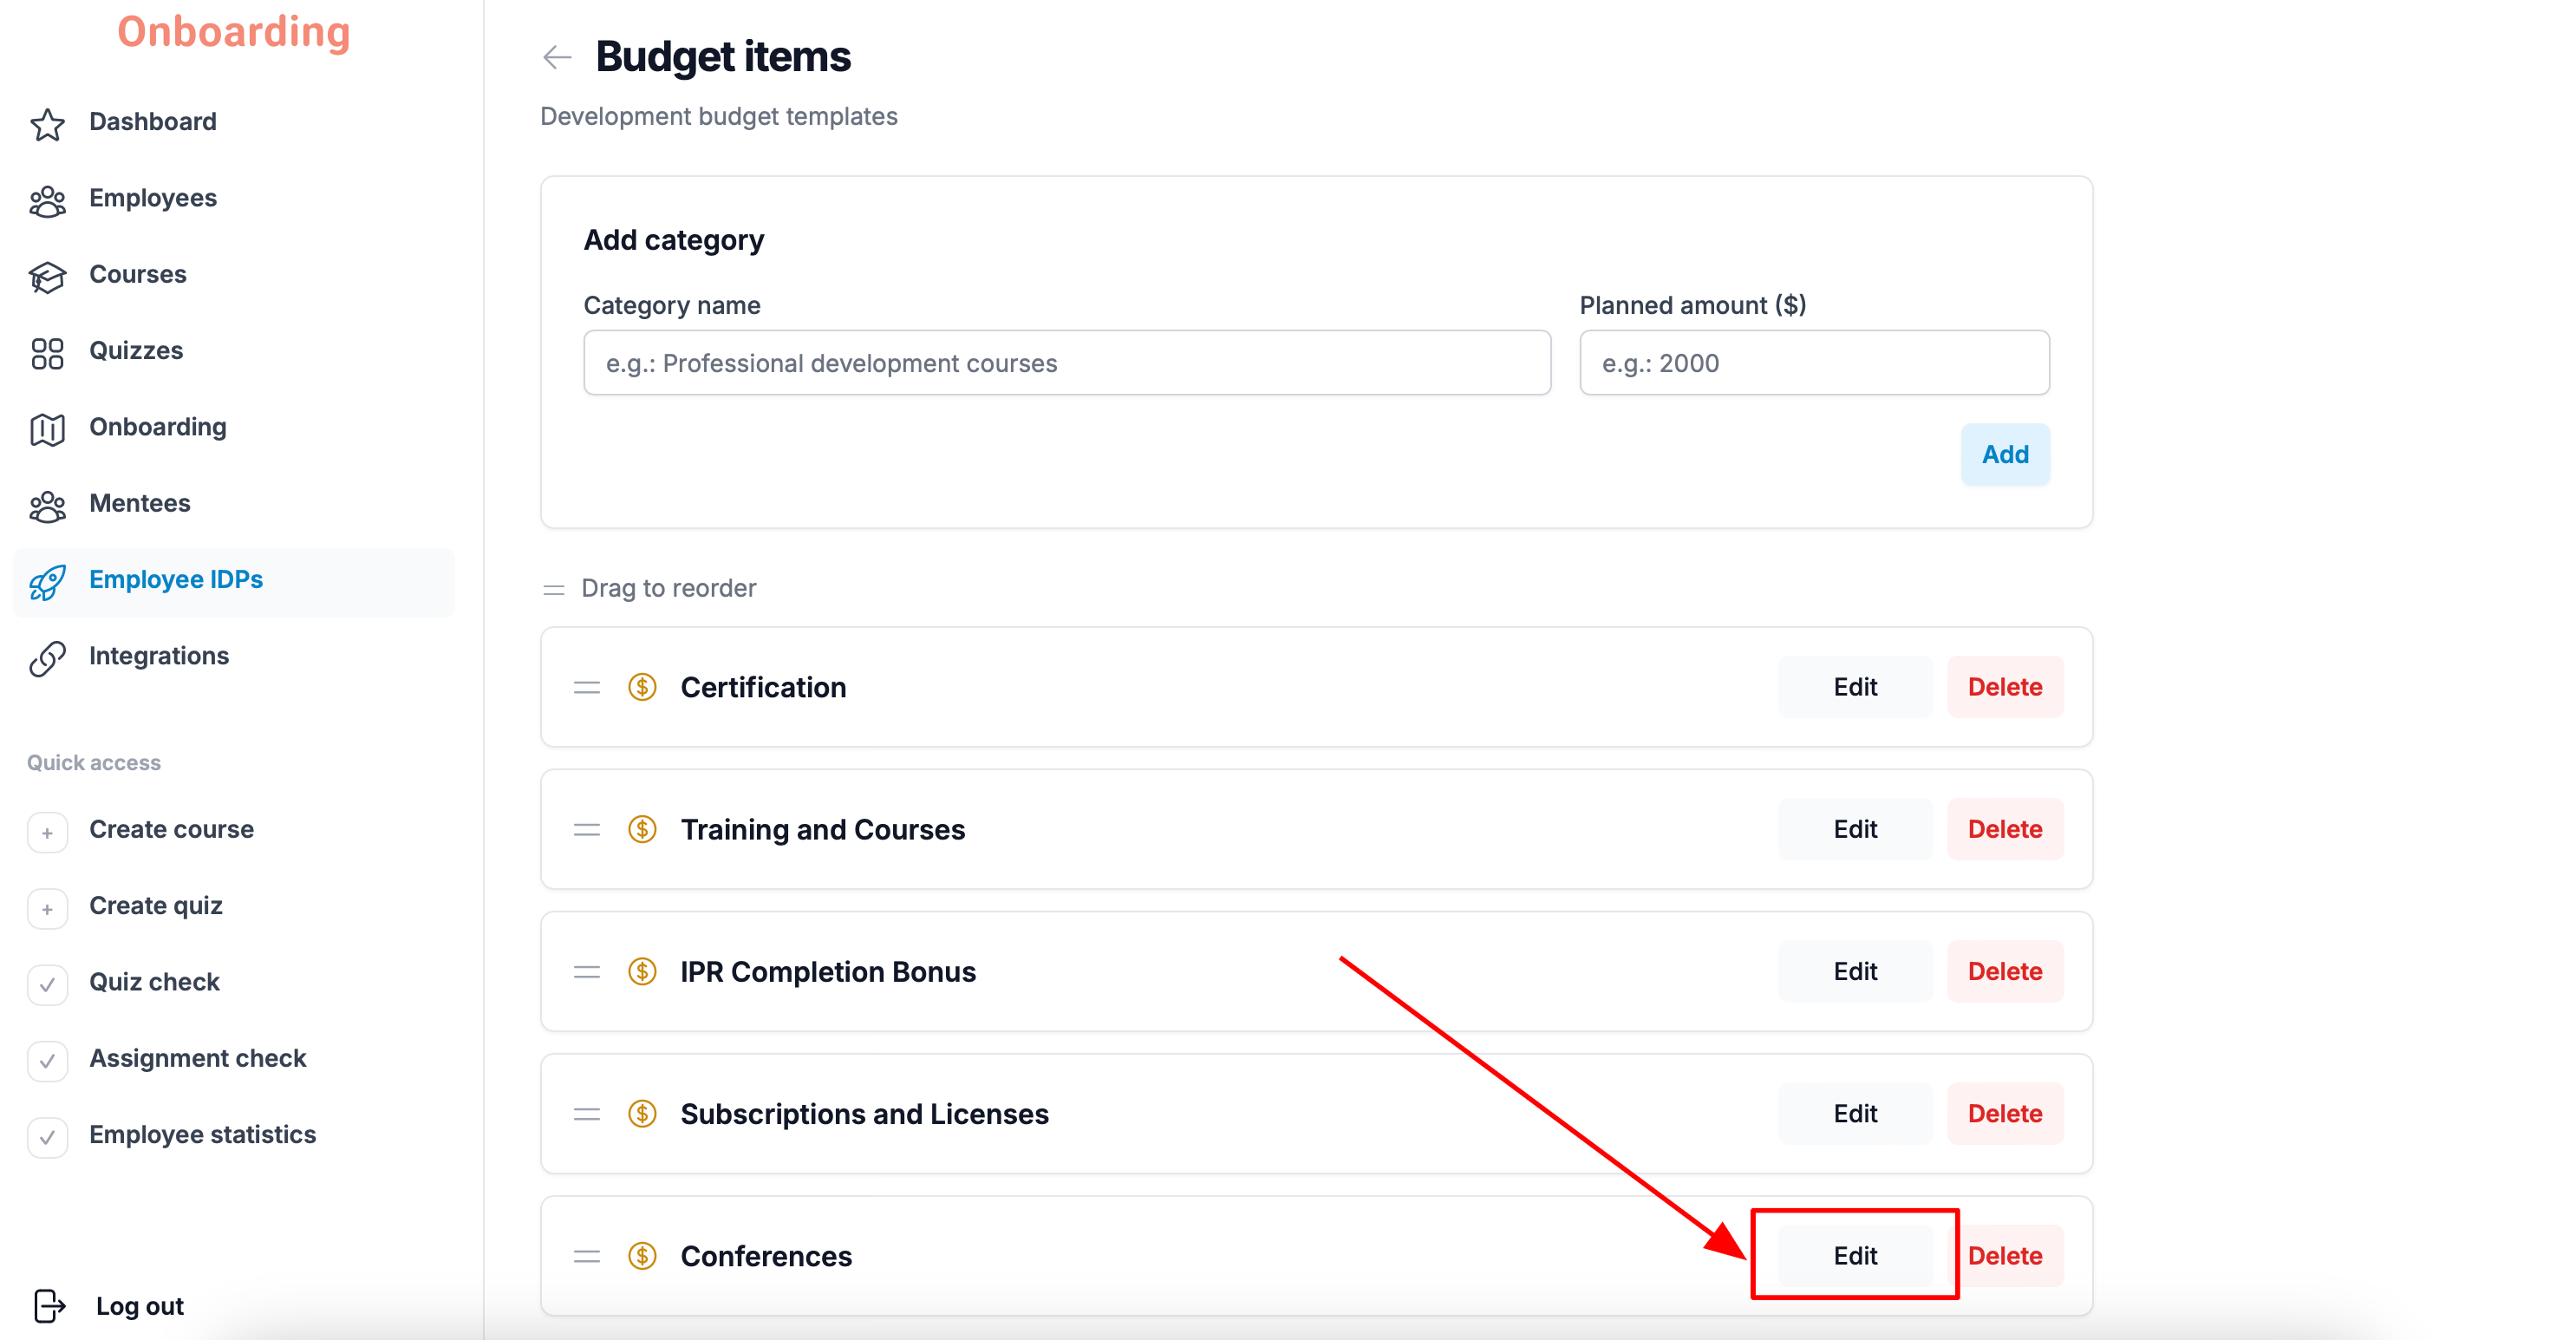
To do that, click «Edit» next to the item on the «Budget items» page.
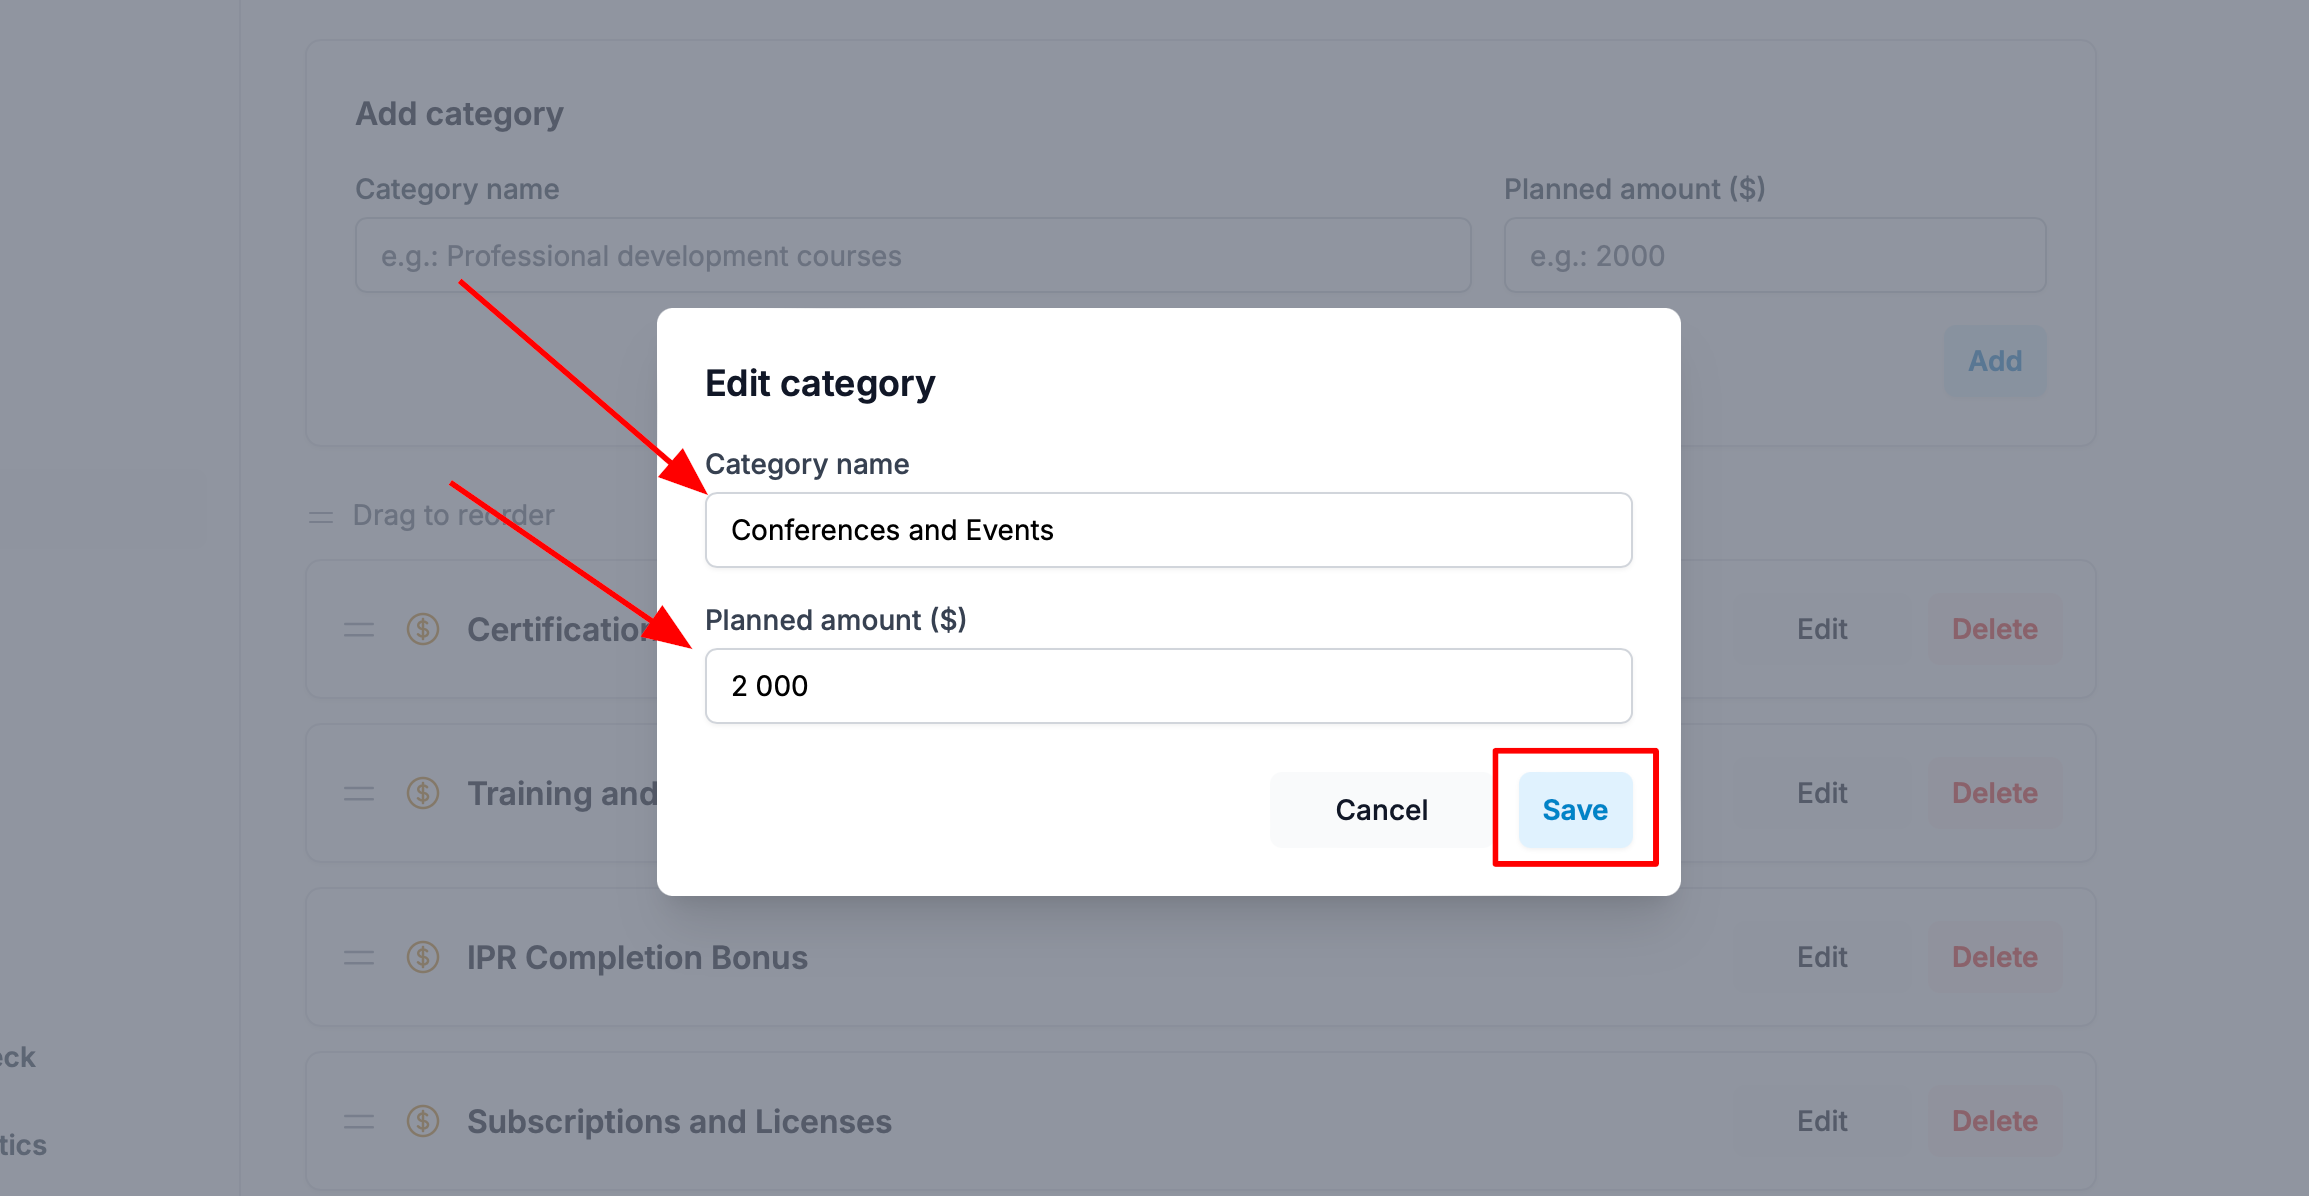
In the window that opens, you can change:
- the category name;
- the planned amount.
When you're done, click «Save».
Your changes are saved and reflected in the list of budget items 🎉
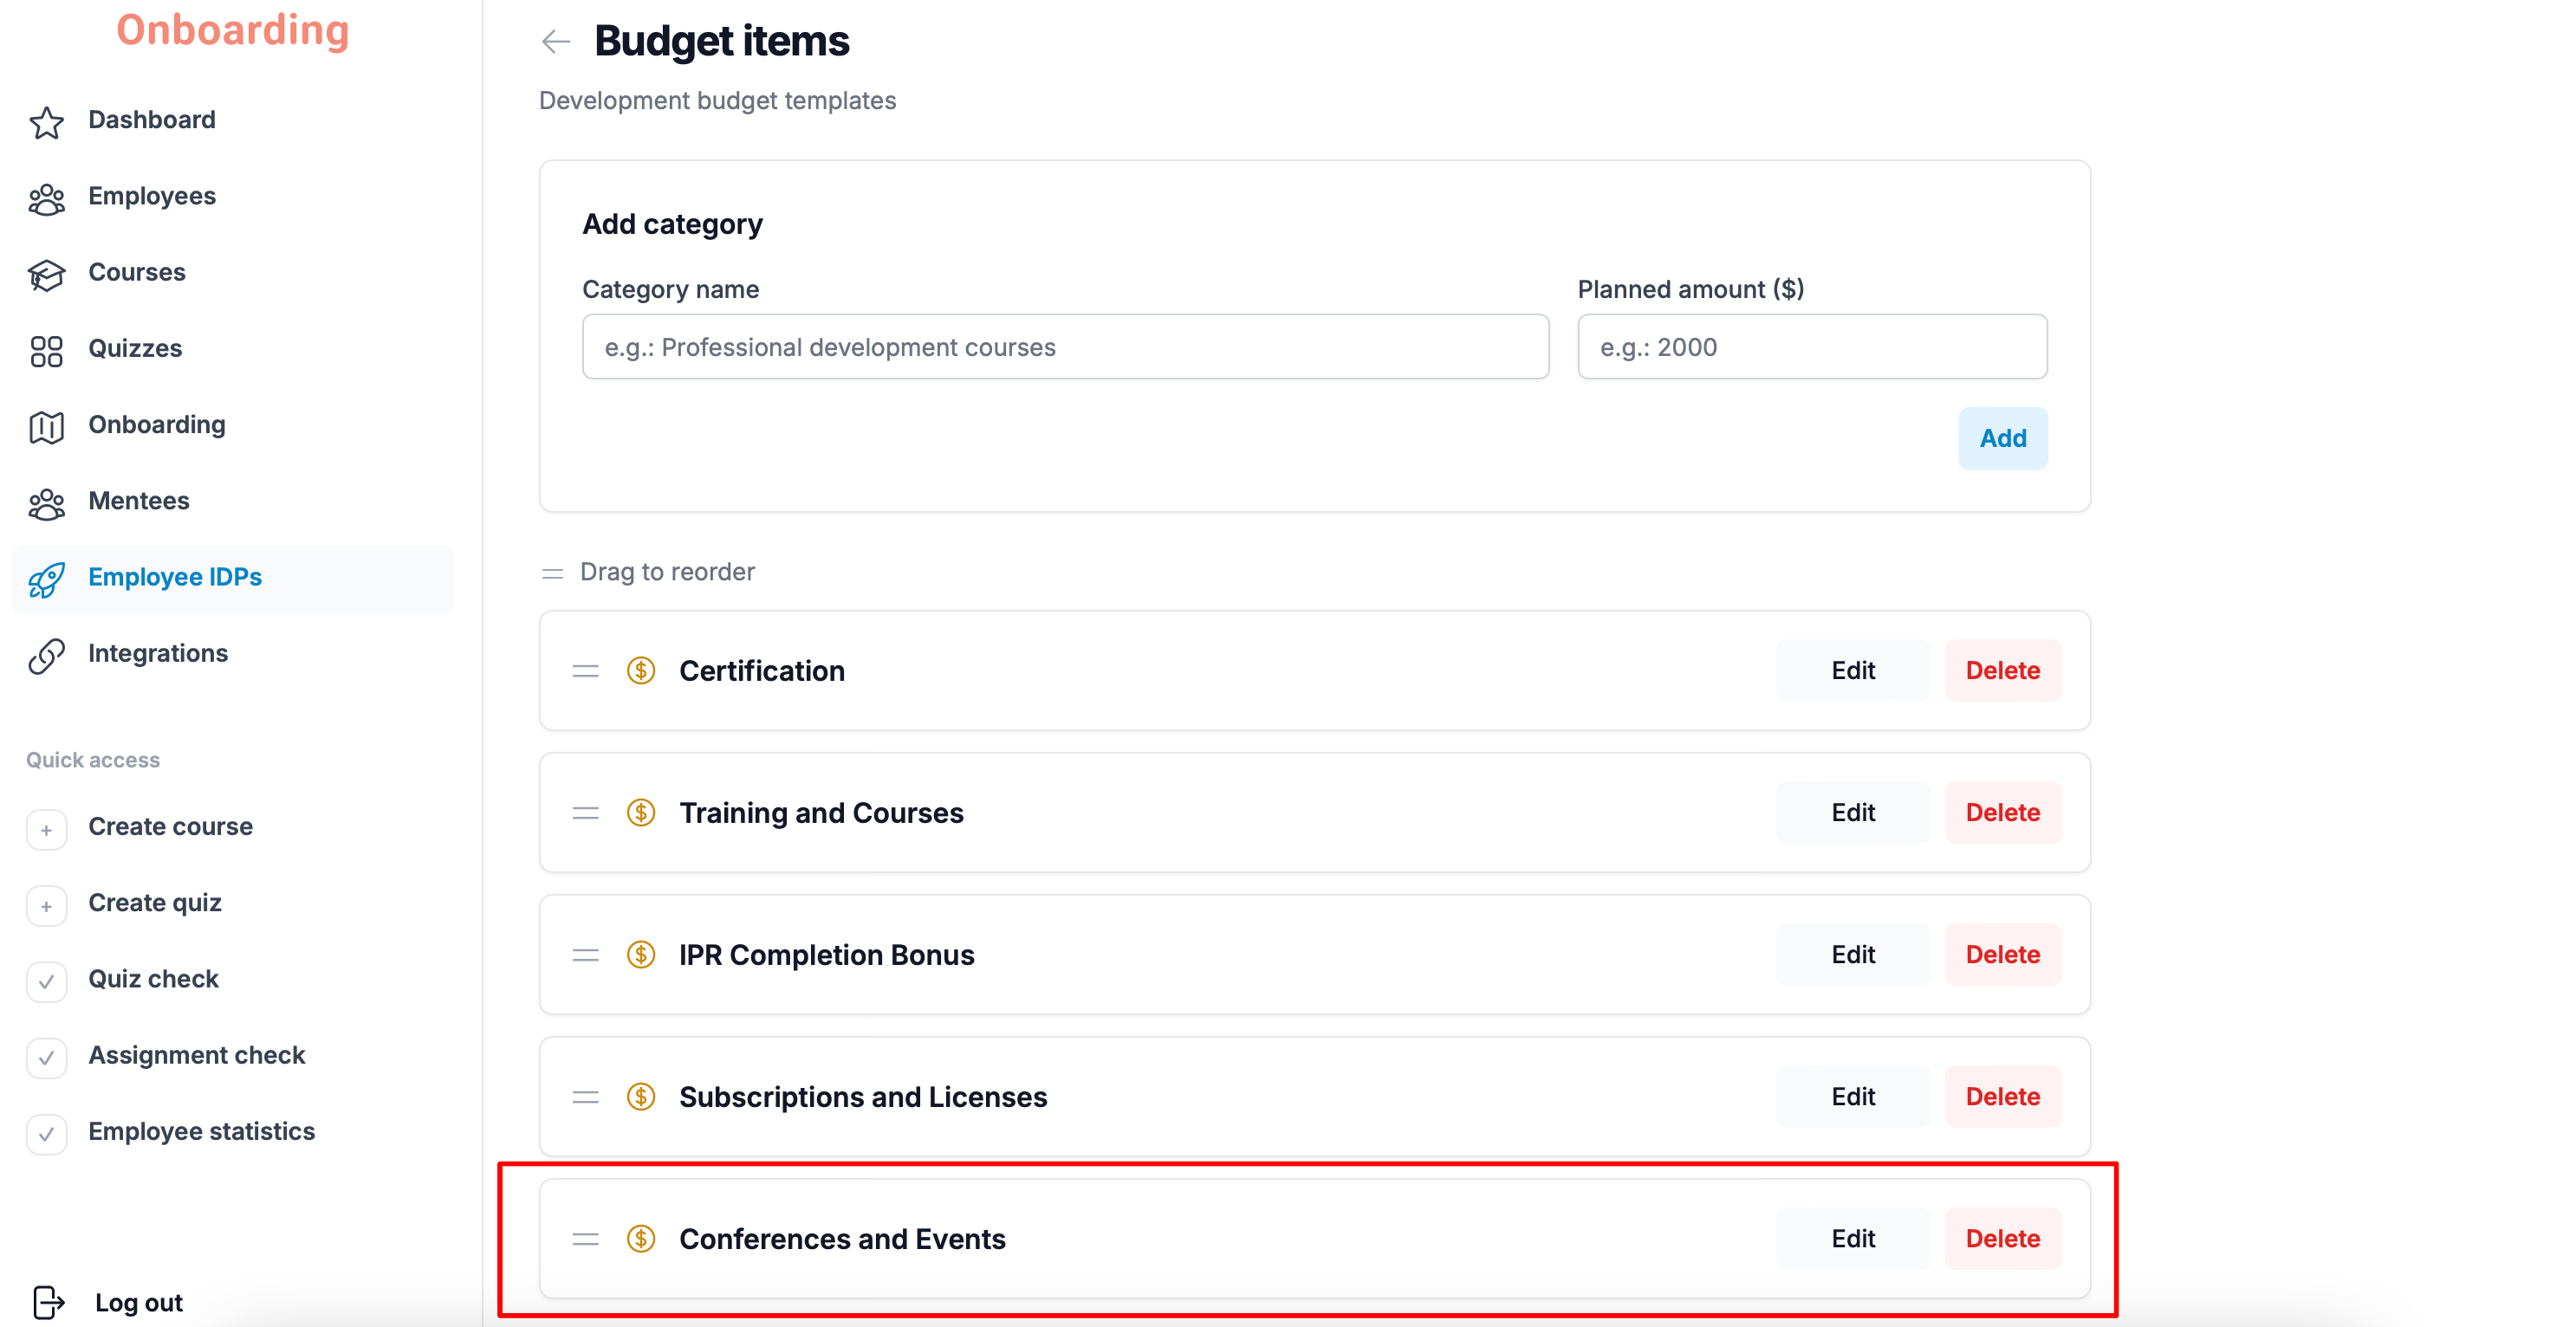
Reordering budget items
You can change the display order of the budget items if needed.
Just press and hold the category you want to move, then drag it to its new place in the list.
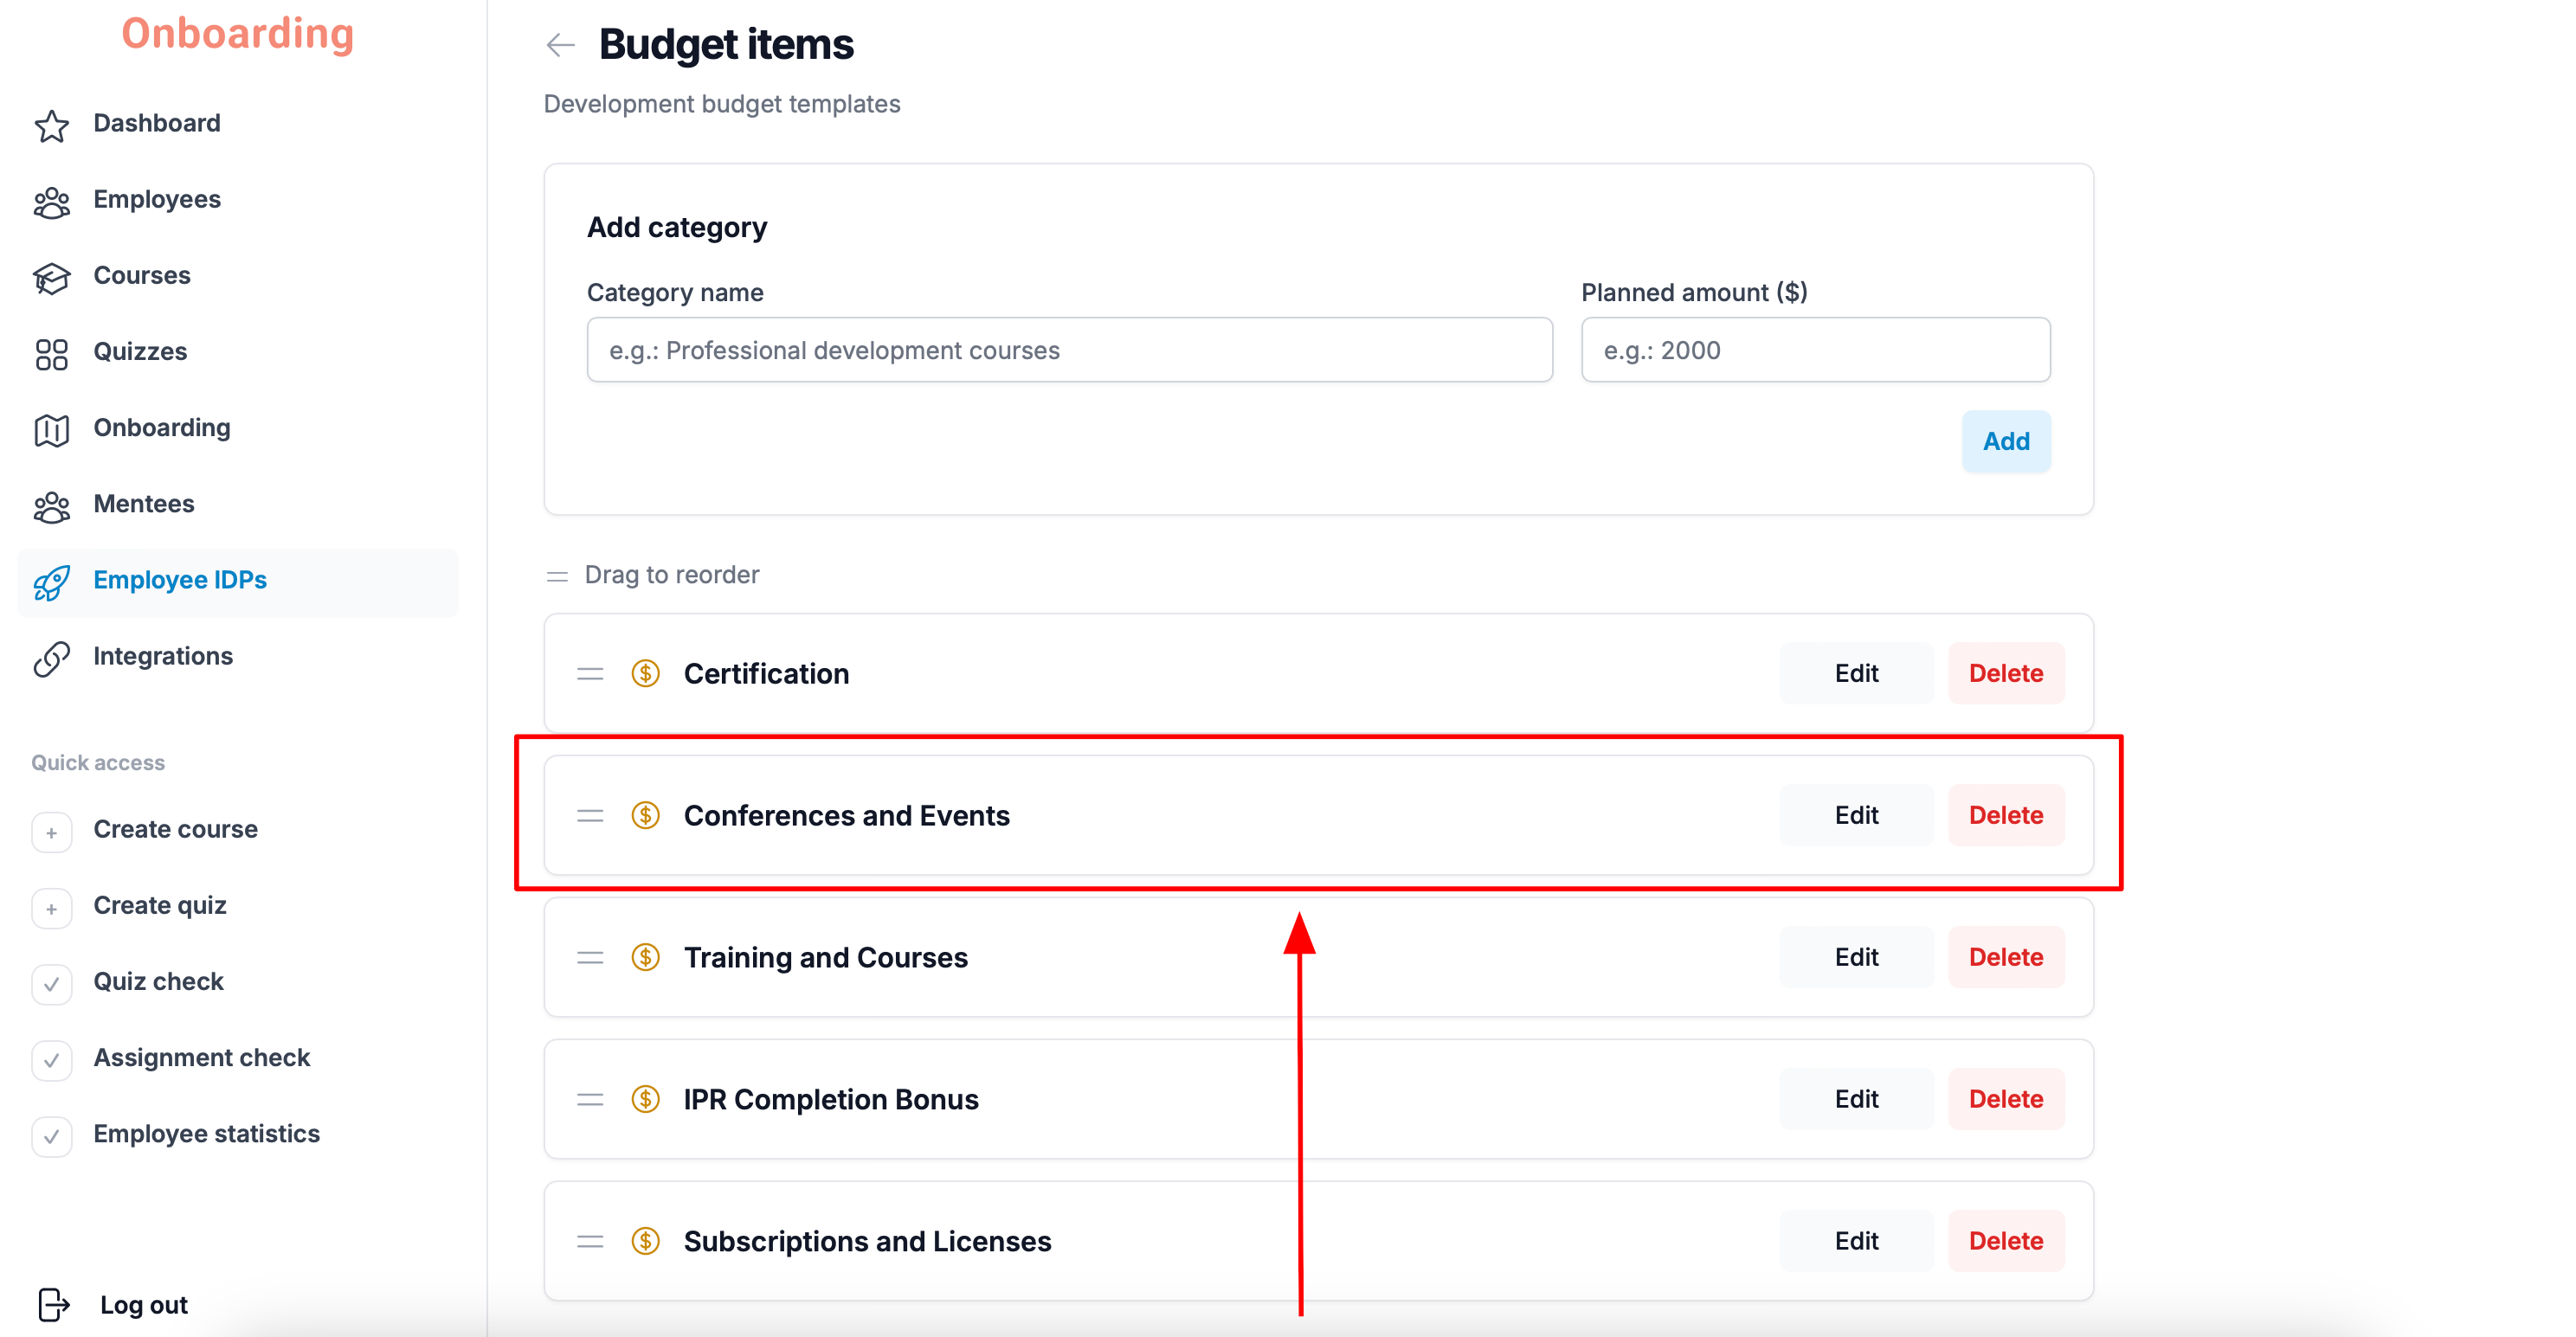
Changing a budget item's name, planned amount, or display order doesn't affect IDPs that have already been created.
All changes apply only to new IDPs created after the changes are saved.
Deleting a budget item
To delete a budget item, open the «Budget items» page and click «Delete» next to the category.
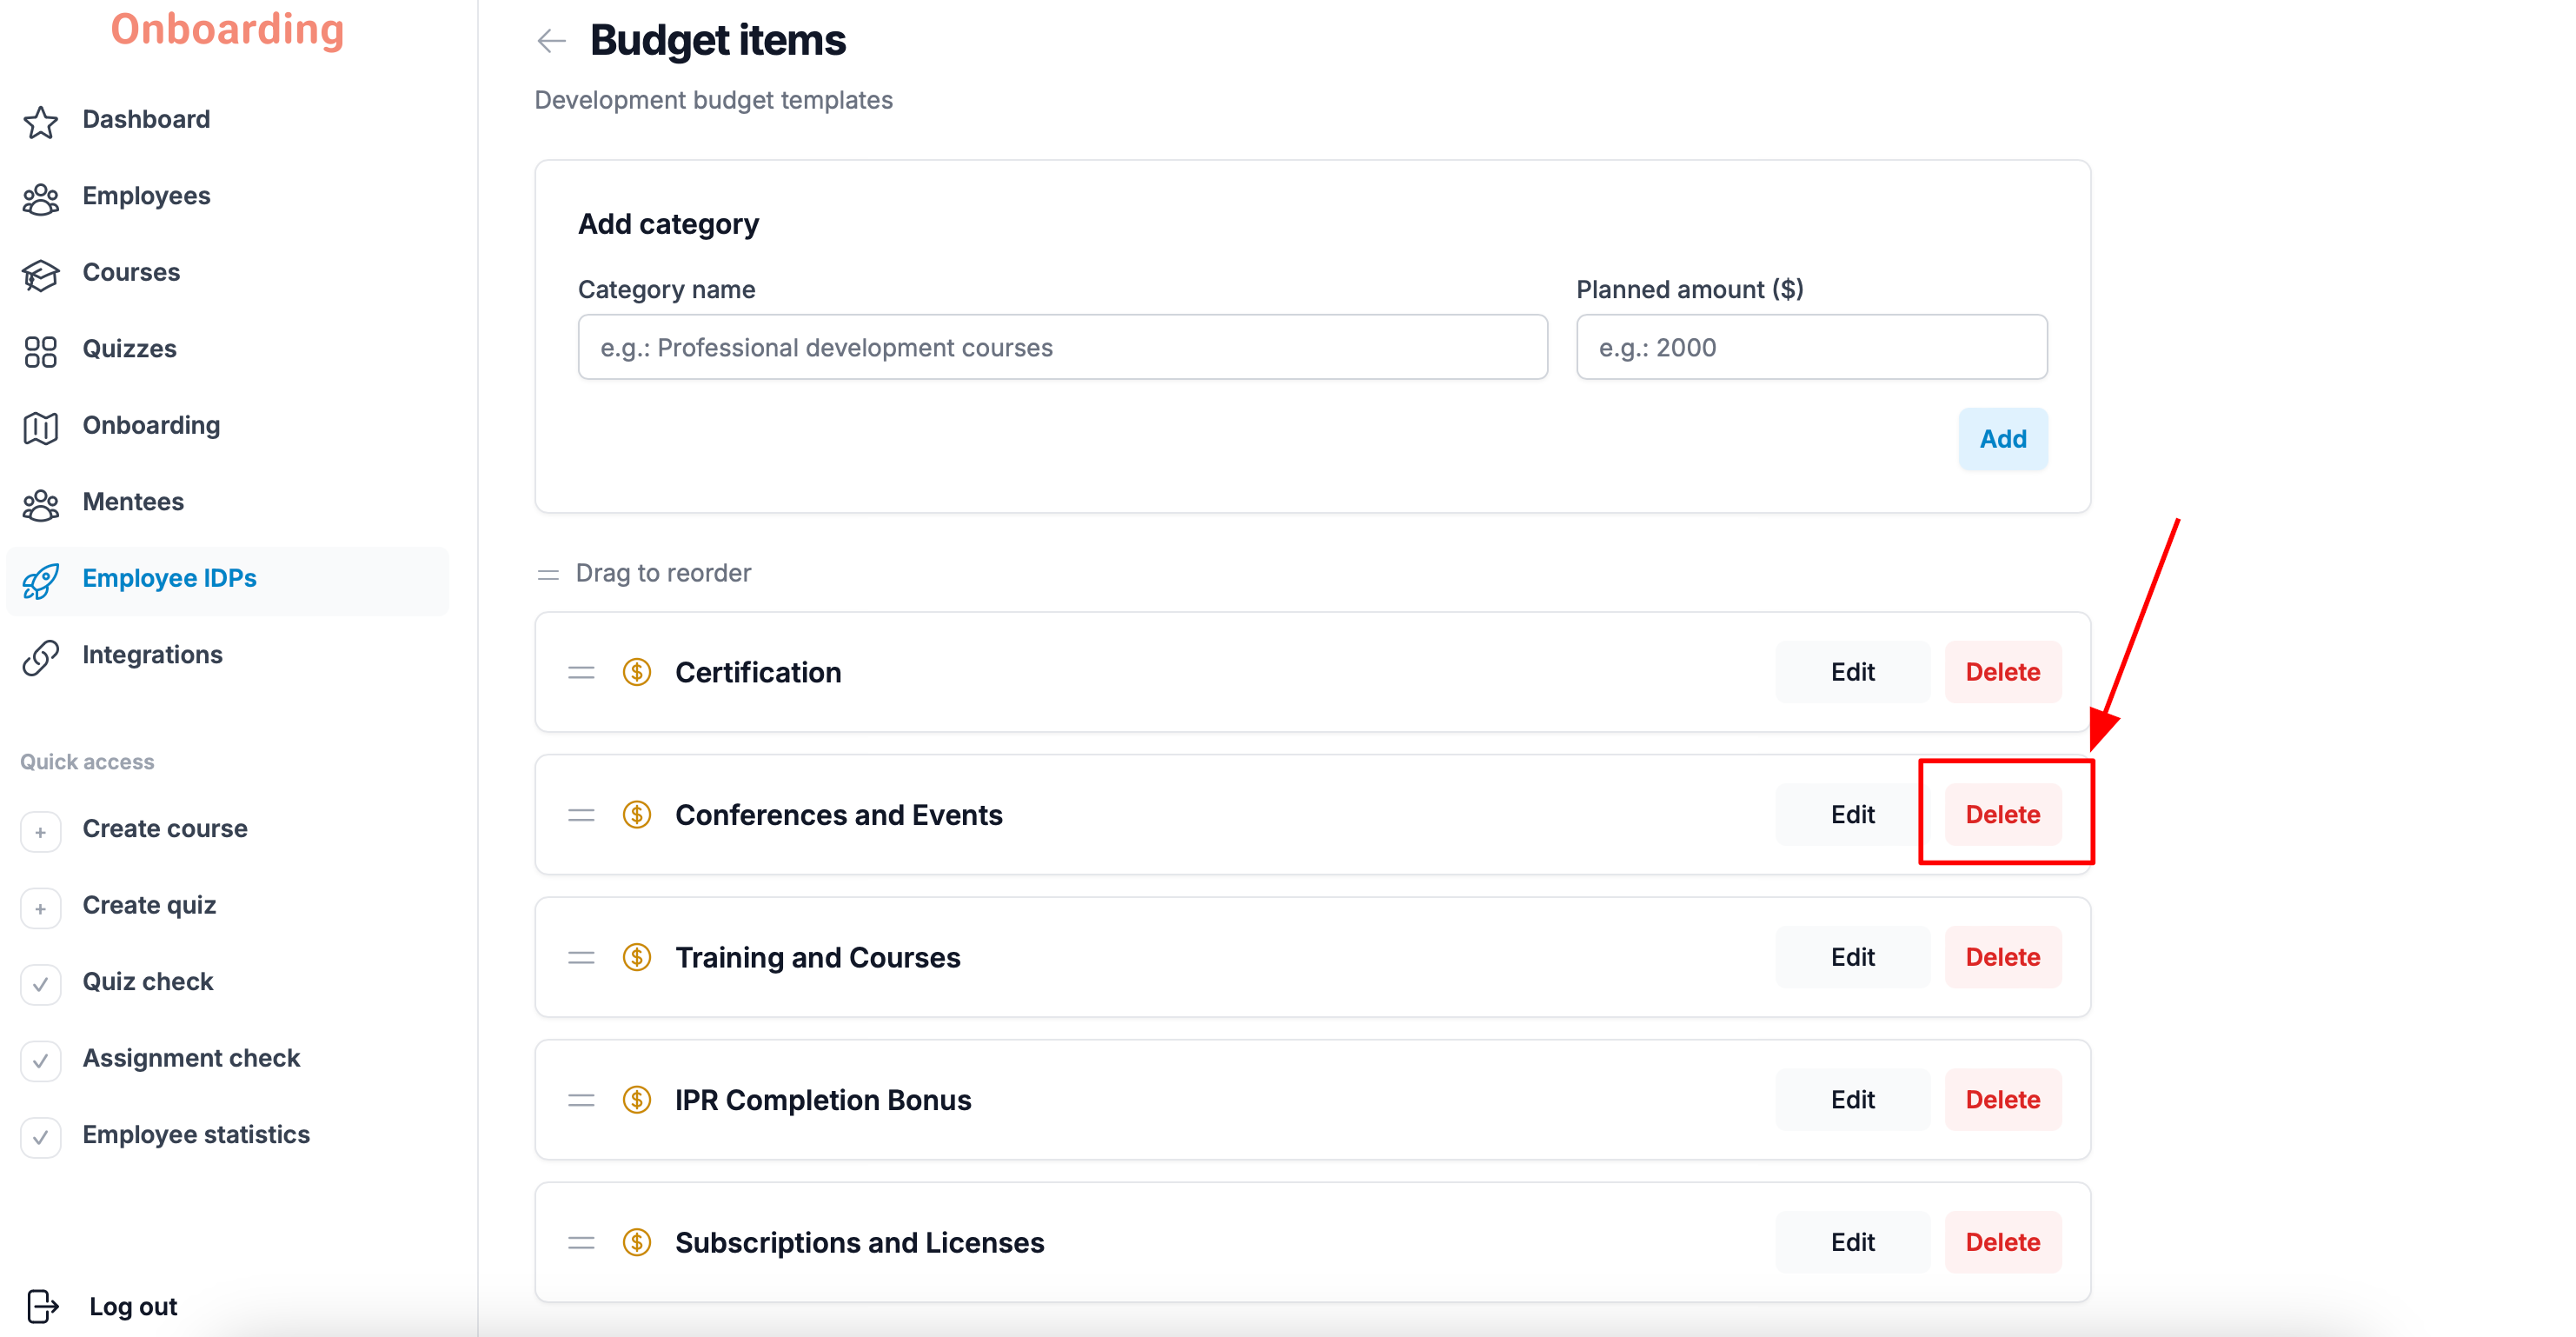
Confirm the action by clicking «Delete» again in the window that appears.
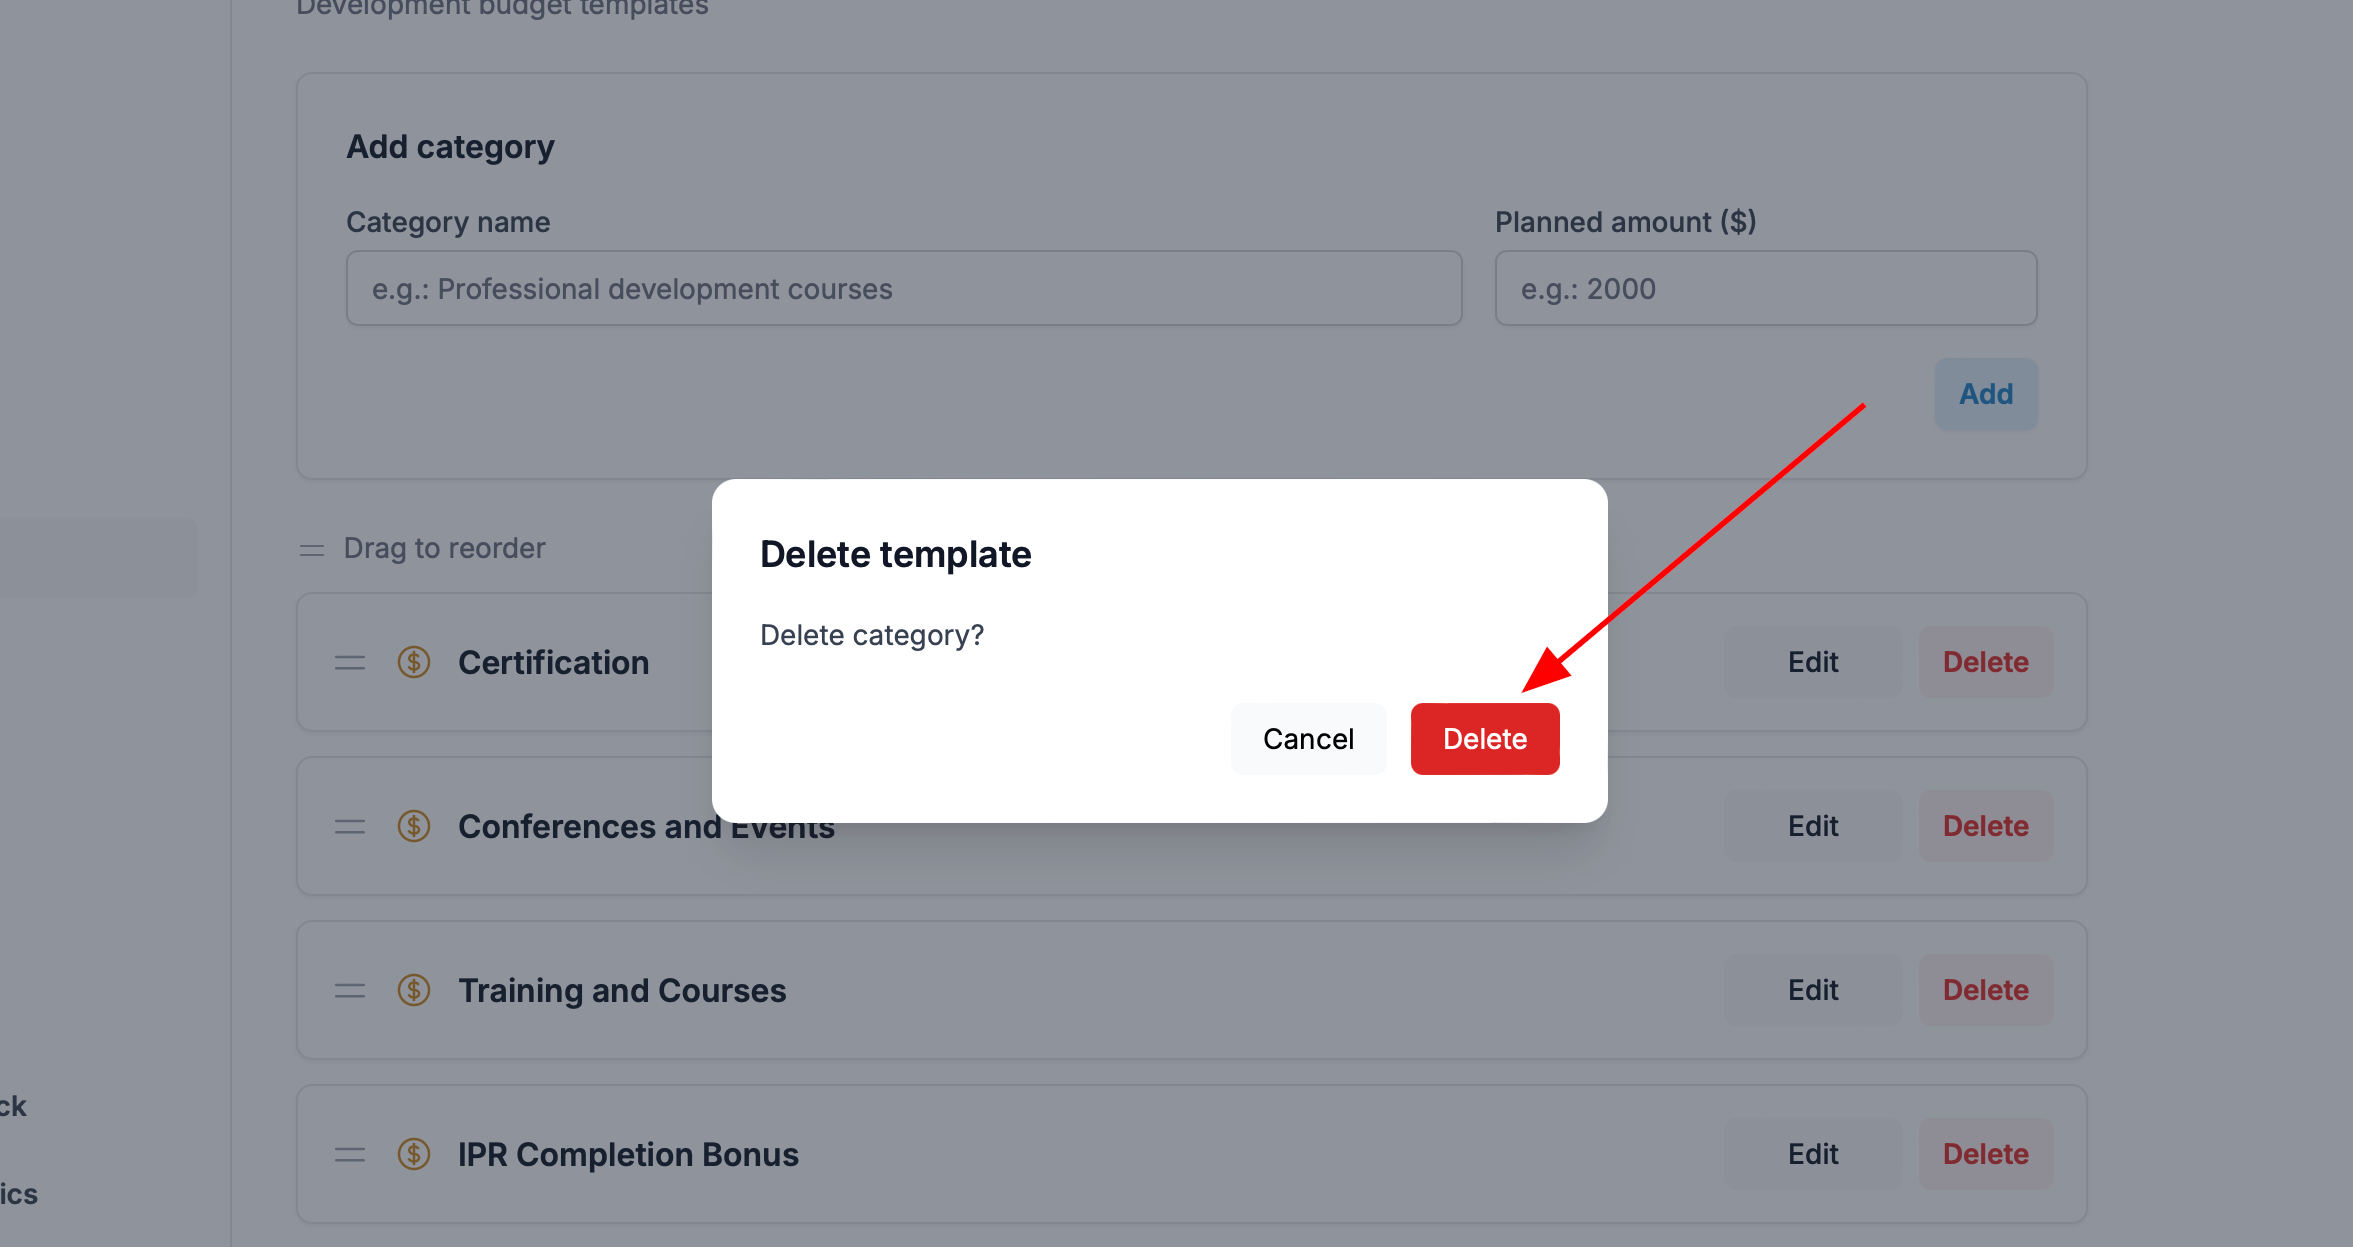
The budget item has been deleted and no longer appears in the list.
Deleting a budget item cannot be undone. Once you confirm the deletion, the item cannot be restored.
Deleting a budget item doesn't affect IDPs that have already been created. If the item was used in employees' active IDPs, it stays available in those IDPs until they're finished.
The deleted item simply stops appearing in new IDPs created after the deletion.