What is a quiz
A quiz lets you check employees' knowledge after training and see how well they have absorbed the material of a course or an individual lesson.
Every quiz is attached to a specific course and can be used for either mid-course or final knowledge checks.
When creating a quiz, you configure its settings: the number of attempts, the time limit, the passing score, and the question types.
A few things to keep in mind when working with quizzes:
- a quiz can't exist without a course;
- a quiz can be attached to only one course;
- a quiz can go anywhere in the course: after a specific lesson, after a group of lessons, or at the end.
How a quiz works
When creating a quiz, you set its passing score — the minimum number of points an employee must earn to pass.
As you fill the quiz with questions, each one is worth a set number of points. When an employee finishes the quiz, they earn points for correct answers, and the system tallies the final result automatically.
The total points across all questions must be greater than or equal to the passing score set in the quiz settings. If the total is lower than the passing score, the quiz can't be published.
A quiz counts as passed when the employee scores at or above the passing score.
Creating a quiz
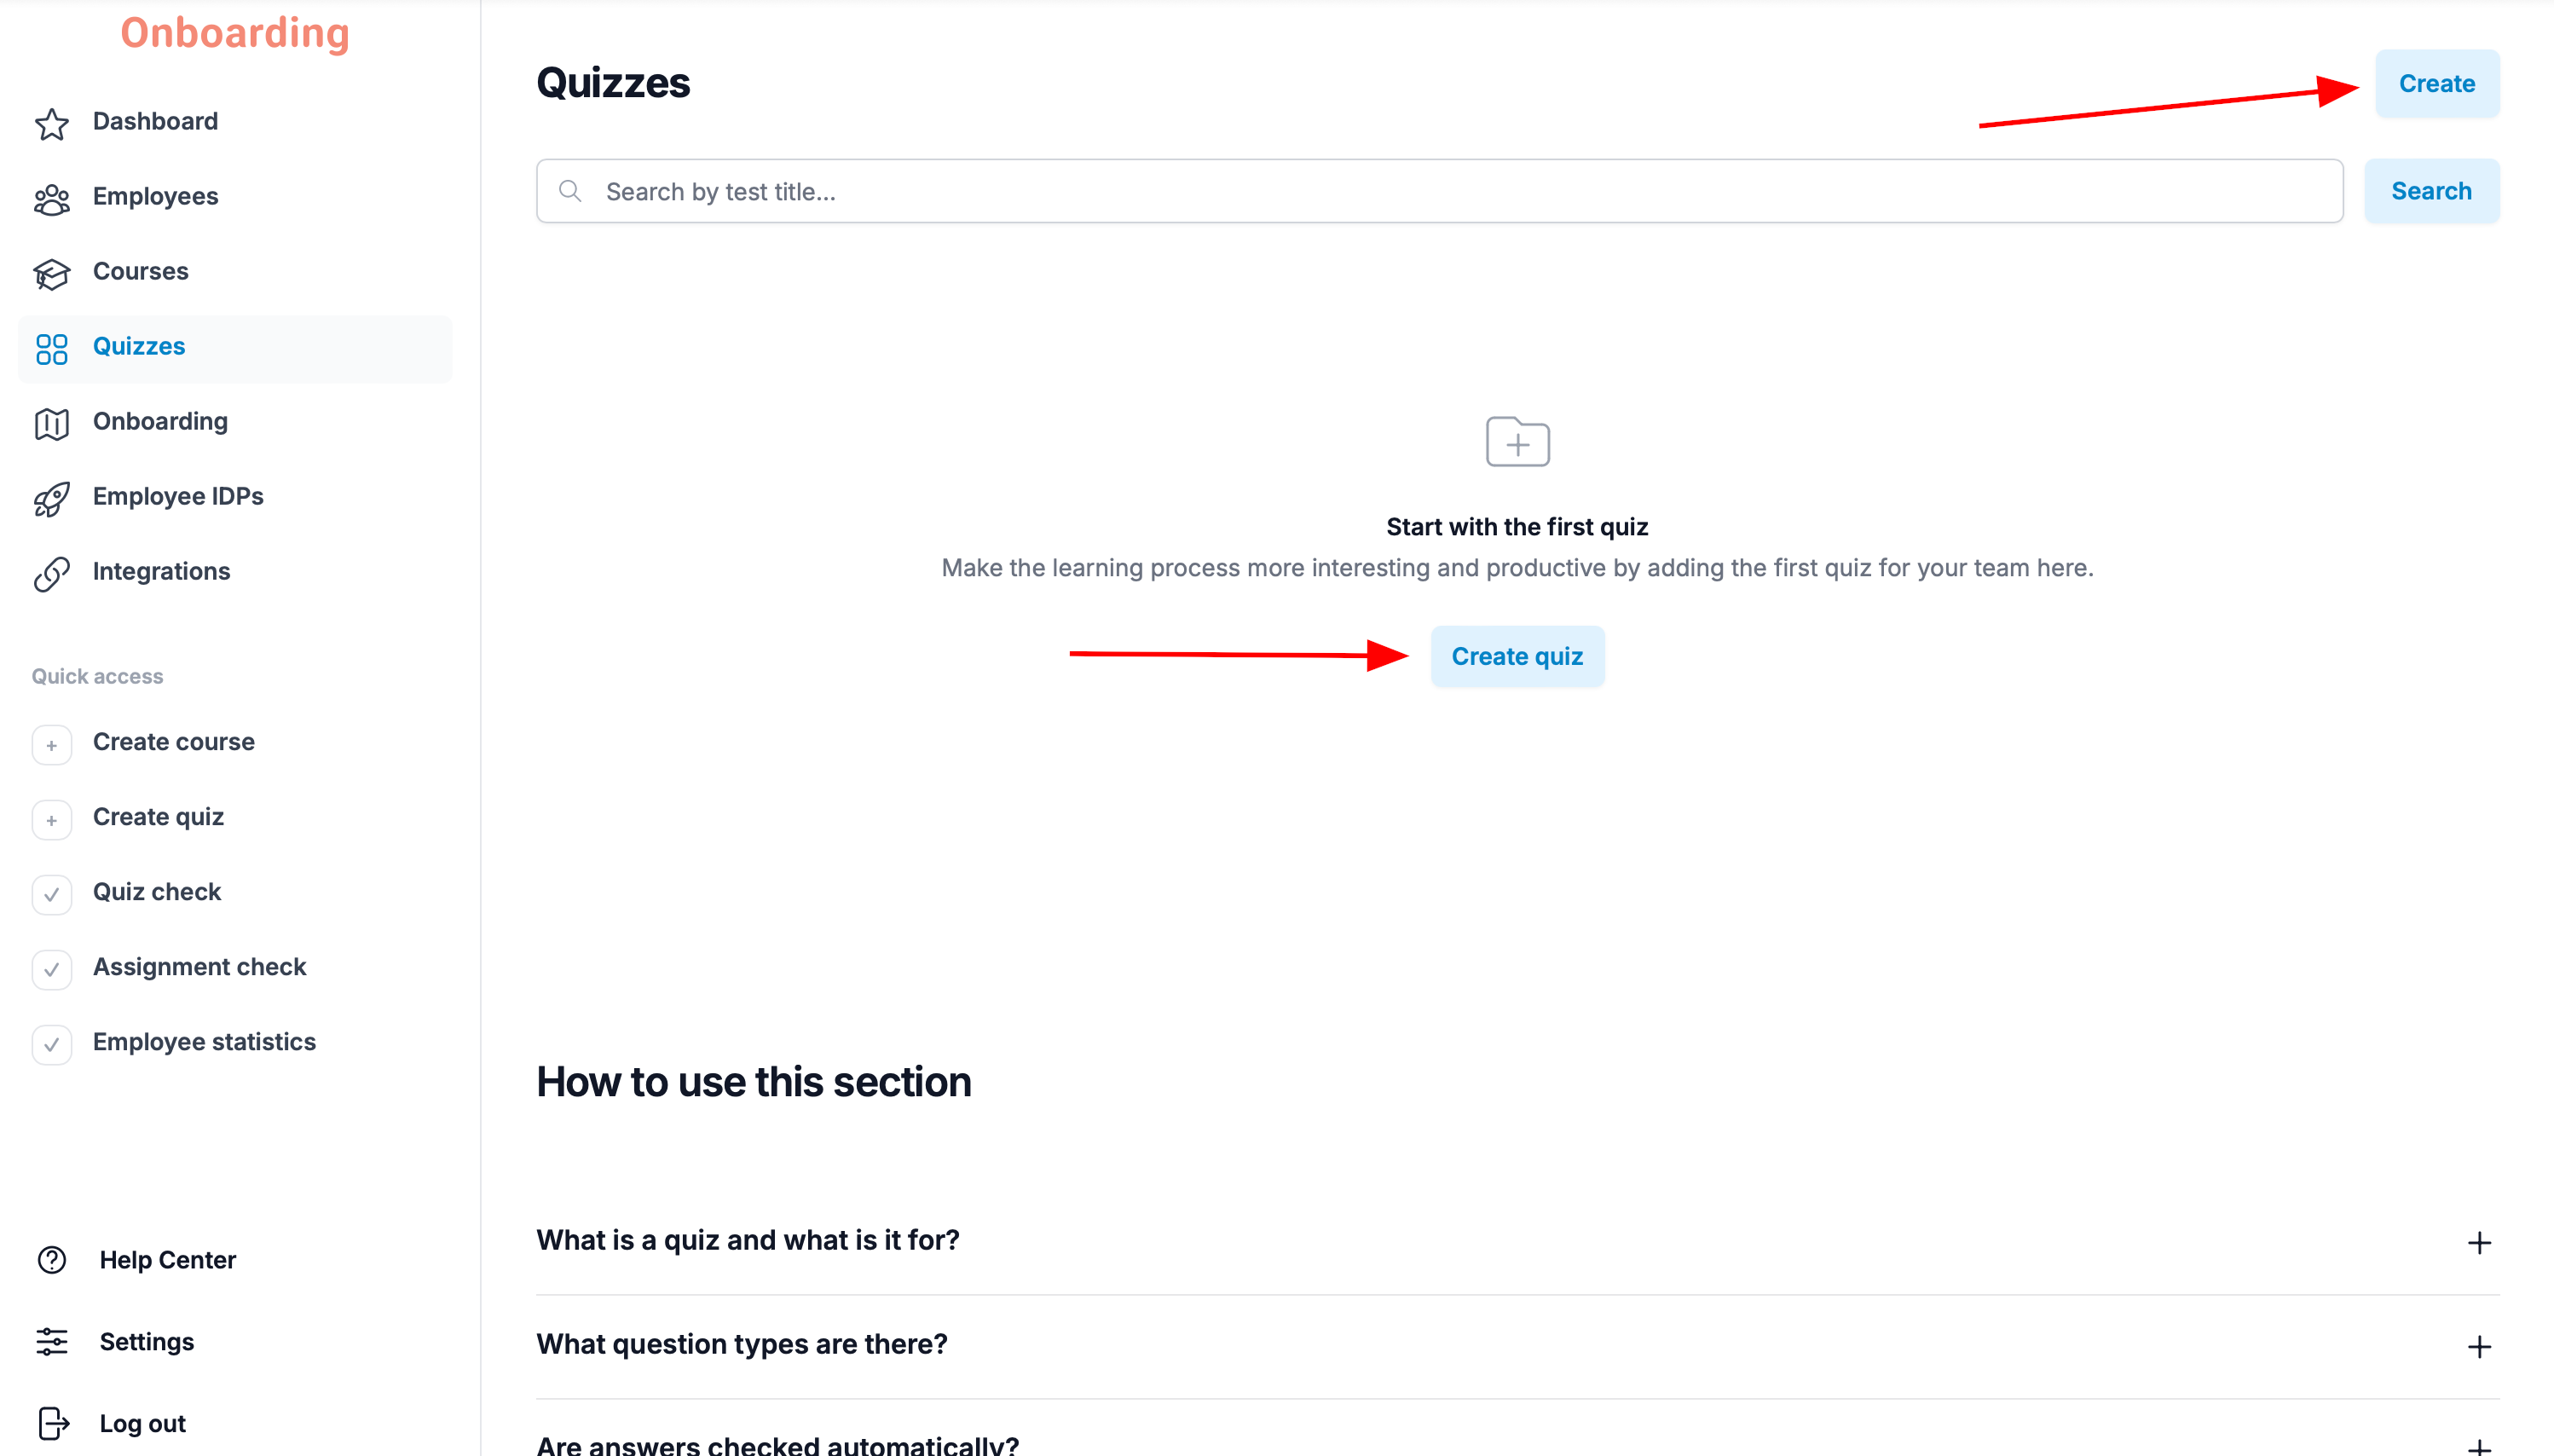
To create a new quiz, open the «Quizzes» section and click «Create quiz» in the middle of the page, or click «Create» in the top-right corner.
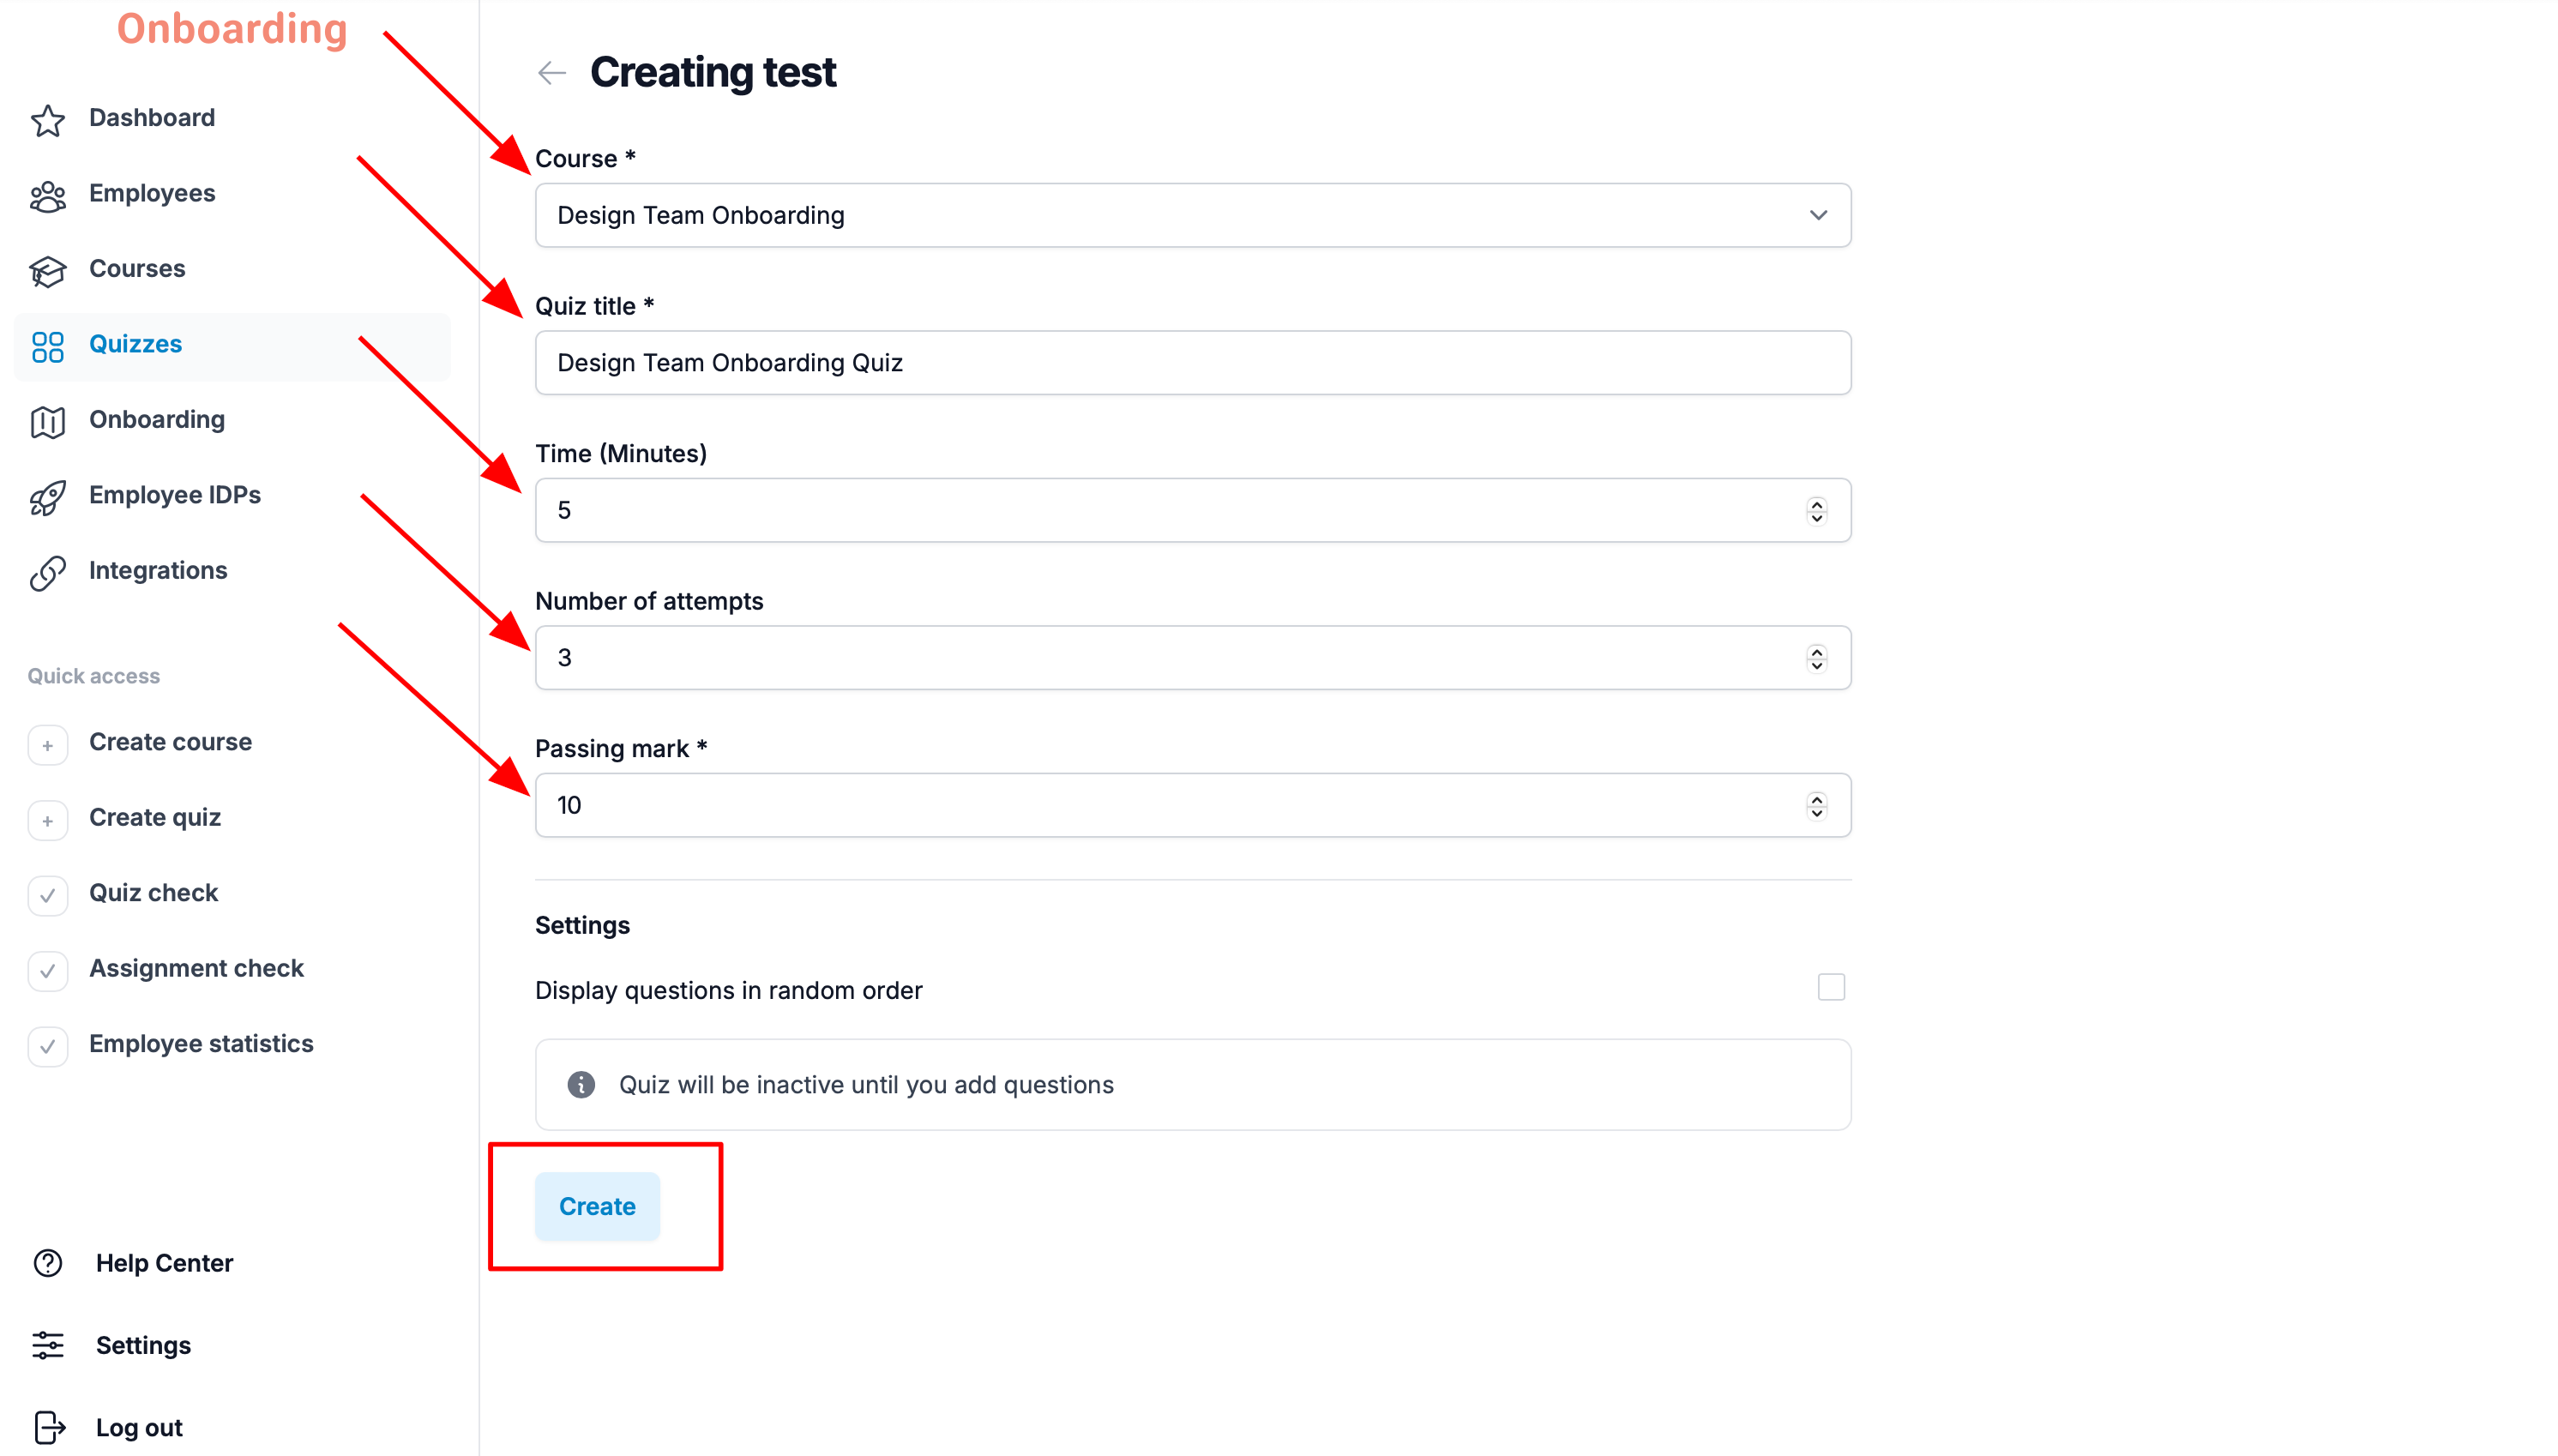
On the quiz creation page, fill in the following fields:
- Course – pick the course you want to attach the quiz to from the list.
- Quiz title – the title employees will see.
- Time (minutes) – how long the employee has to complete the quiz. The timer starts as soon as the quiz begins. When time runs out, the quiz ends automatically, even if the employee hasn't answered every question. Optional.
- Number of attempts – how many attempts the employee gets. Optional.
- Passing mark – the minimum number of points needed to pass the quiz.
Once all the fields are filled in, click «Create».
The quiz has been created 🎉
After you click «Create», the quiz editor opens, where you can start adding questions.
A freshly created quiz can't be taken until you've added questions and published it.
Unpublished quizzes are hidden from employees and visible only to platform administrators.
Creating quiz questions
After creating a quiz, you land in its editor. This is where you fill the quiz with questions.
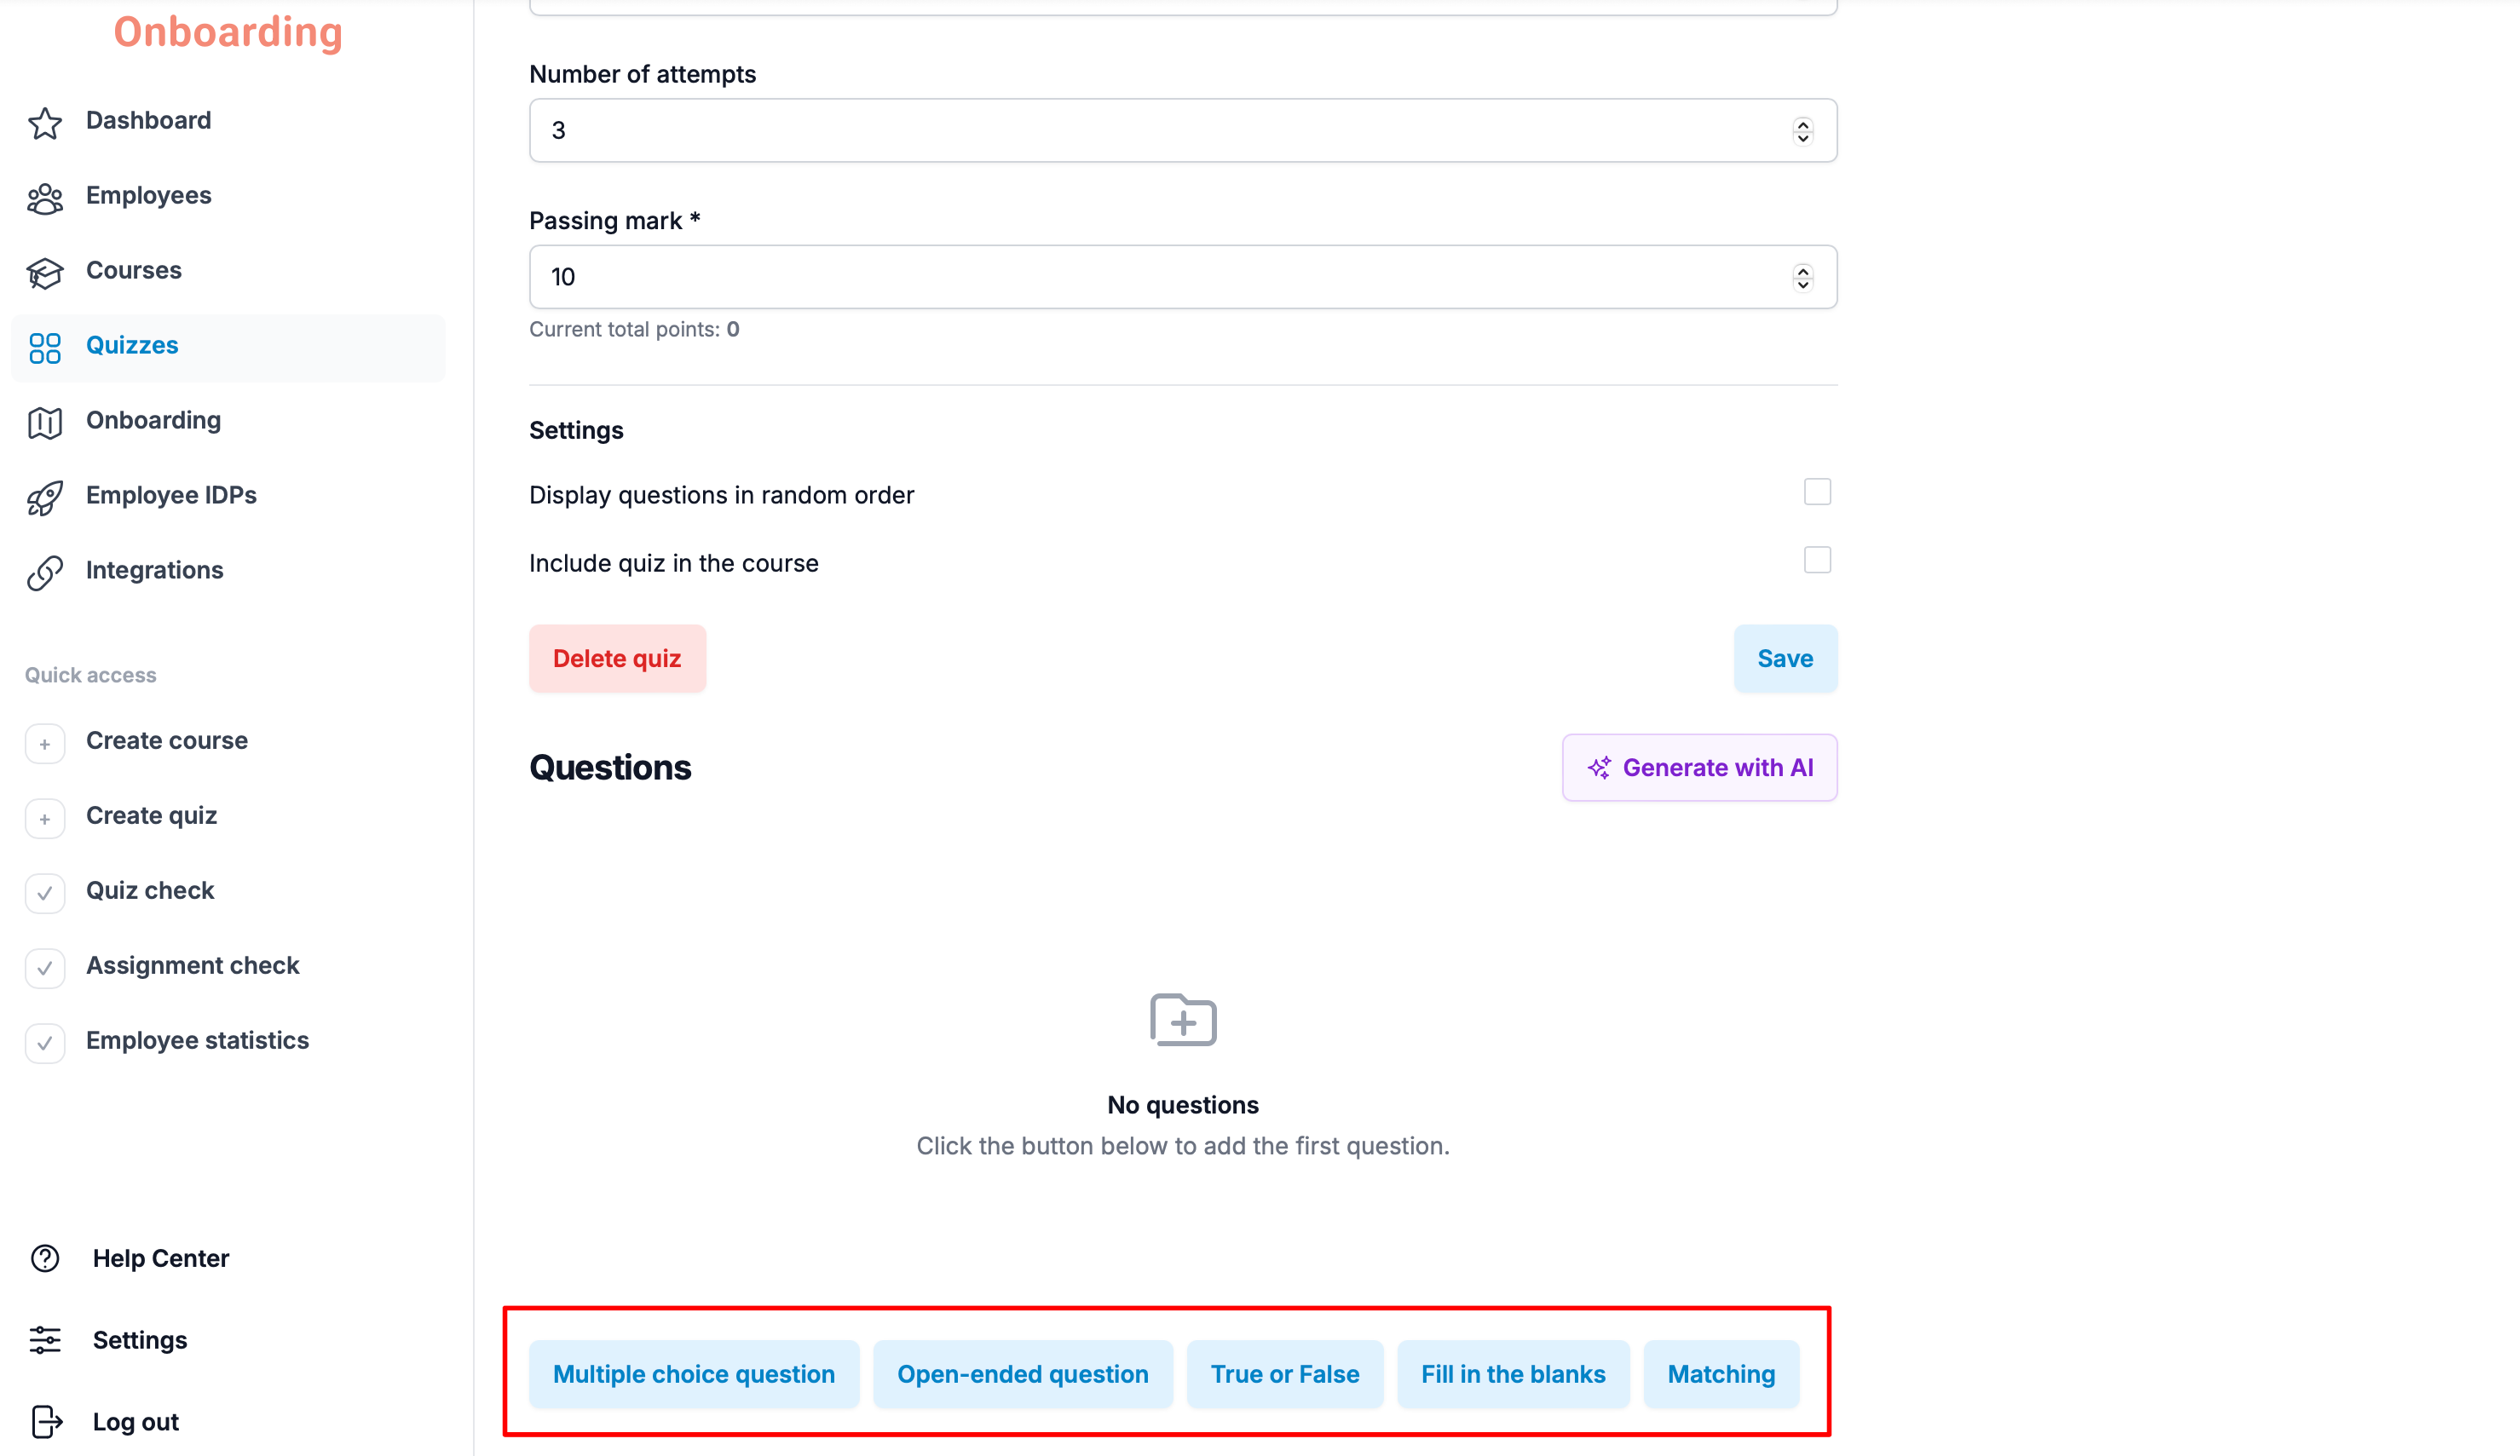
The platform supports the following question types:
- Multiple choice question – a question with several answer options. Depending on the setup, the employee picks one or several correct answers.
- Open-ended question – a question the employee answers in free form. Once submitted, the answer goes to an administrator, who reviews it manually and awards points.
- True or False – a statement the employee has to mark as either true or false.
- Fill in the blanks – a question or statement with a gap the employee fills by choosing the right answer option.
- Matching – a question where the employee has to correctly pair items from the left column with items from the right one.
Creating a Multiple choice question
A single or multiple choice question is a good way to check knowledge of a specific fact, rule, or procedure.
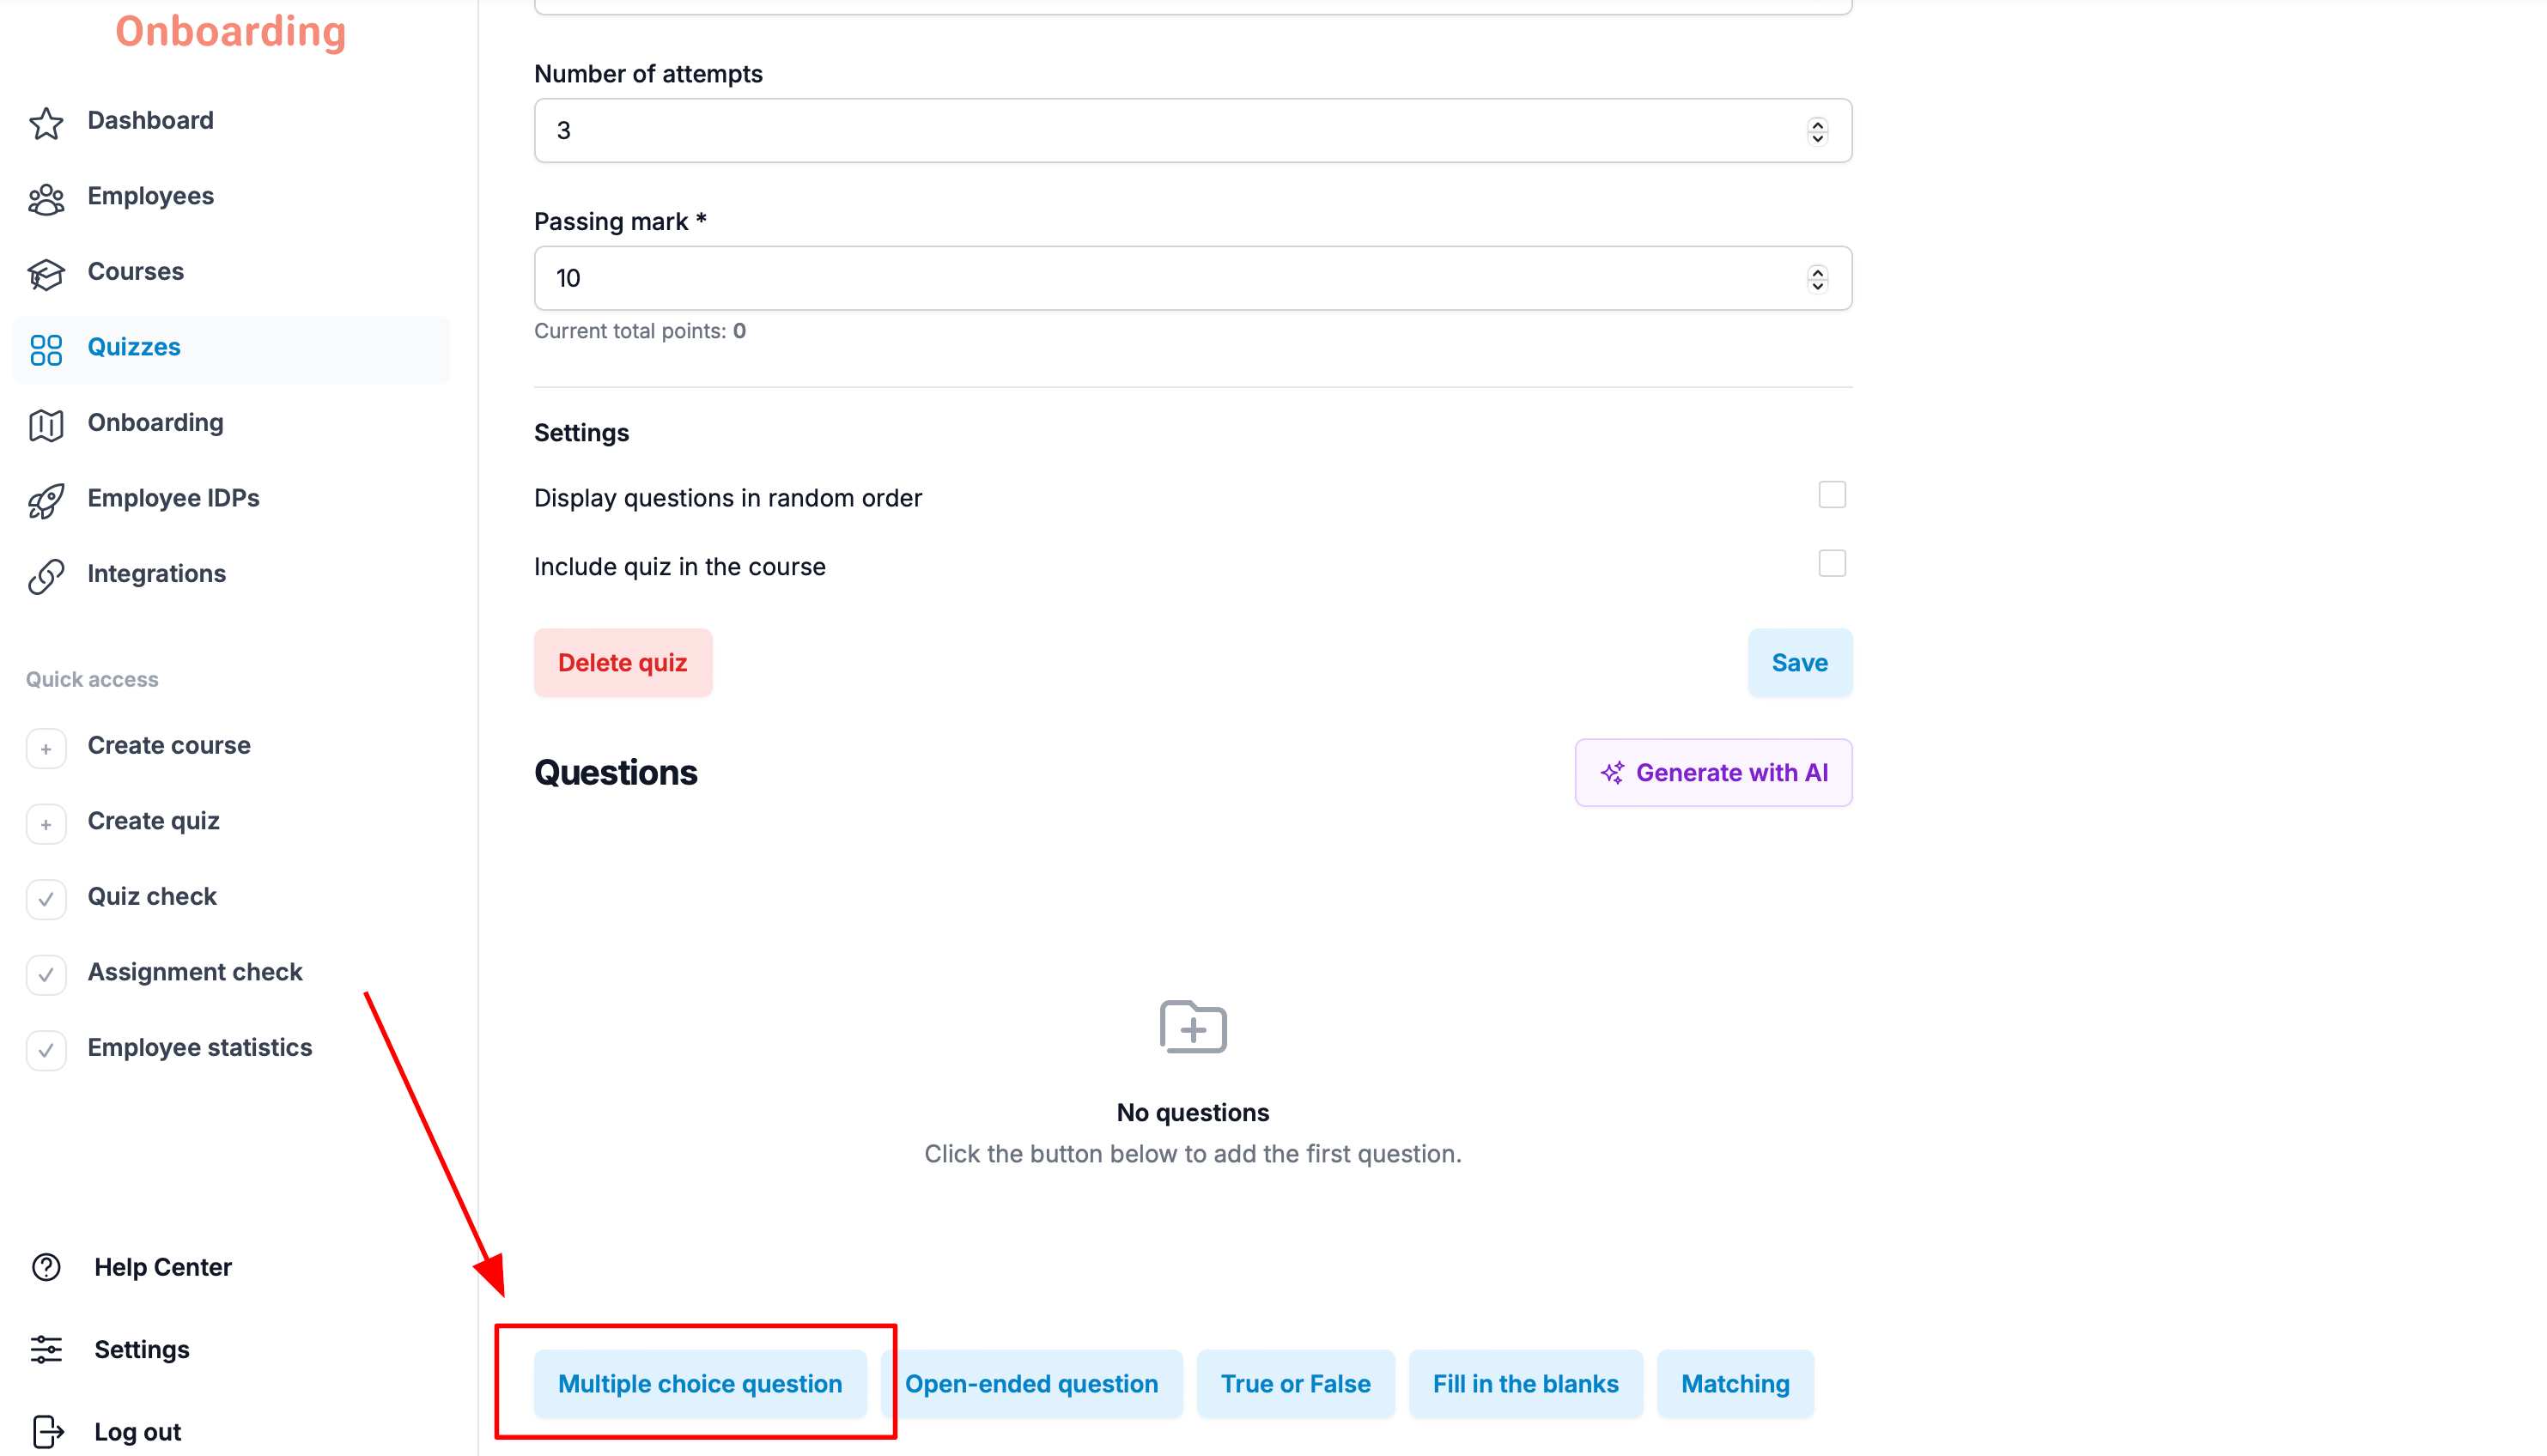
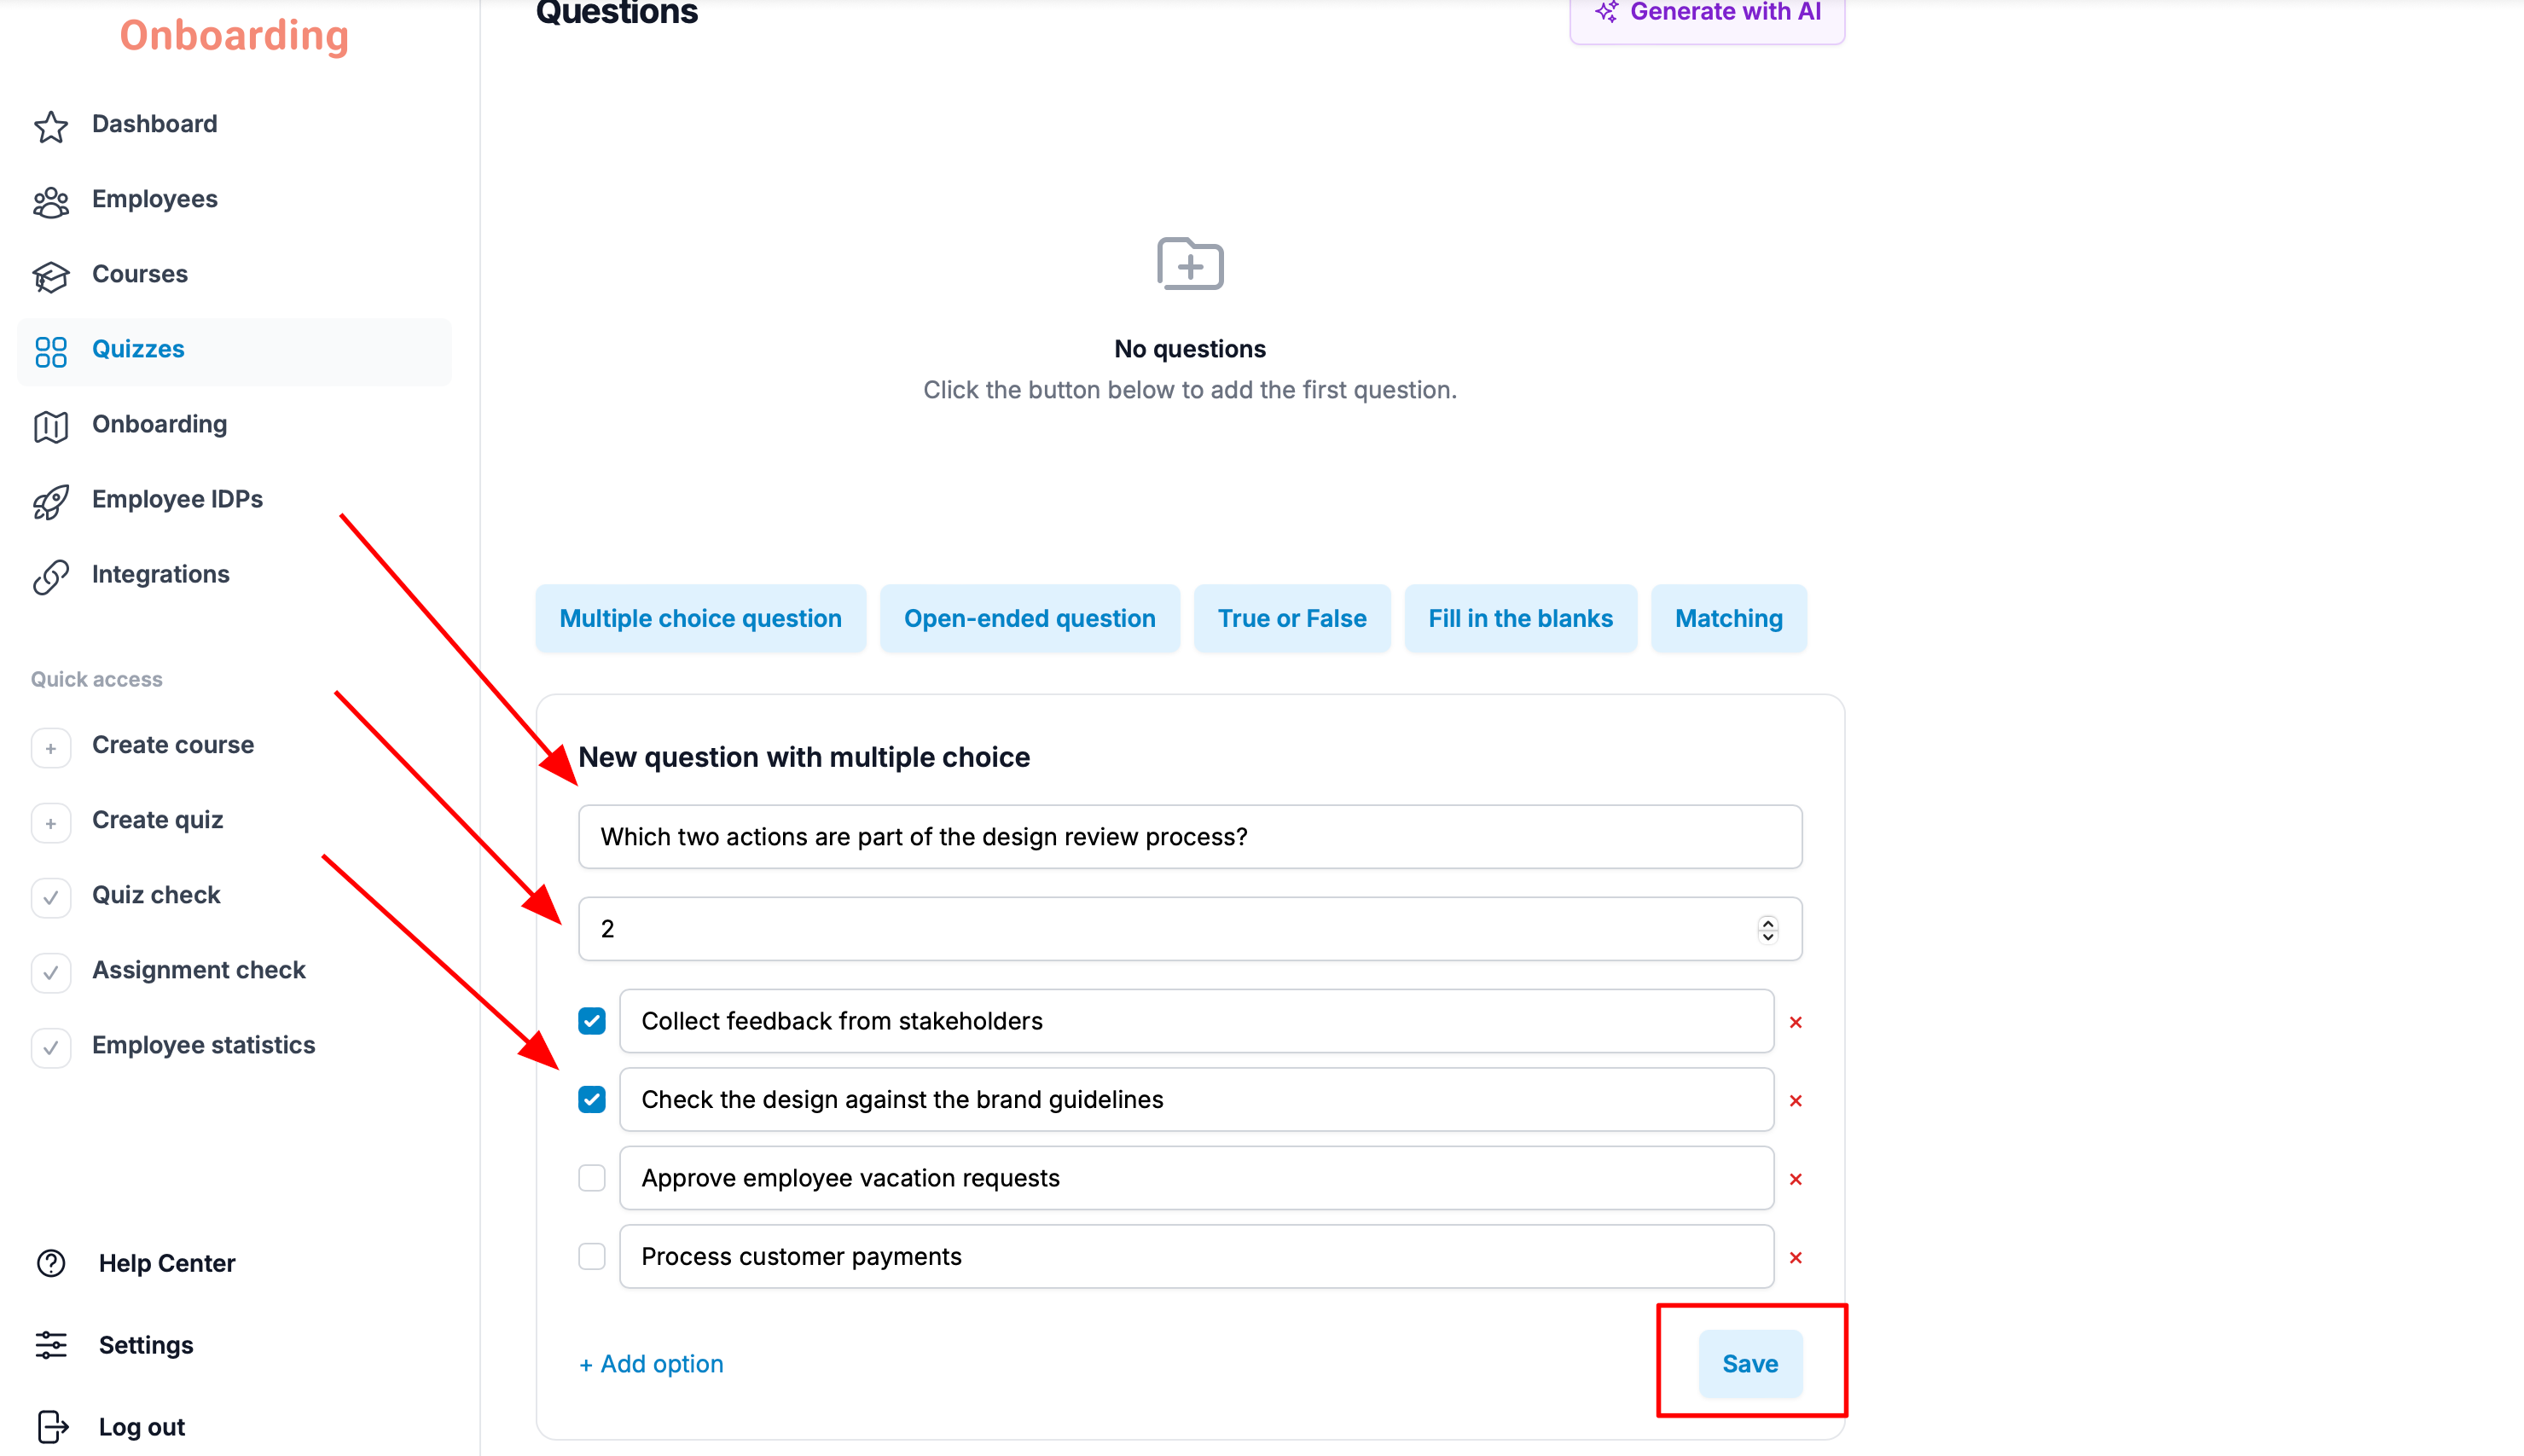
To add one, click the «Multiple choice question» button in the «Questions» block on the quiz editing page.
A question creation form opens below, with the following fields:
- Question title – the question text employees will see.
- Assessment (points) – how many points the employee earns for answering correctly.
- Answer options – the options the employee will choose from. There's no limit on the number of options.
If the question has one correct answer, mark one option. If it has several correct answers, mark all of them.
Once you've filled in all the required fields, click «Save».
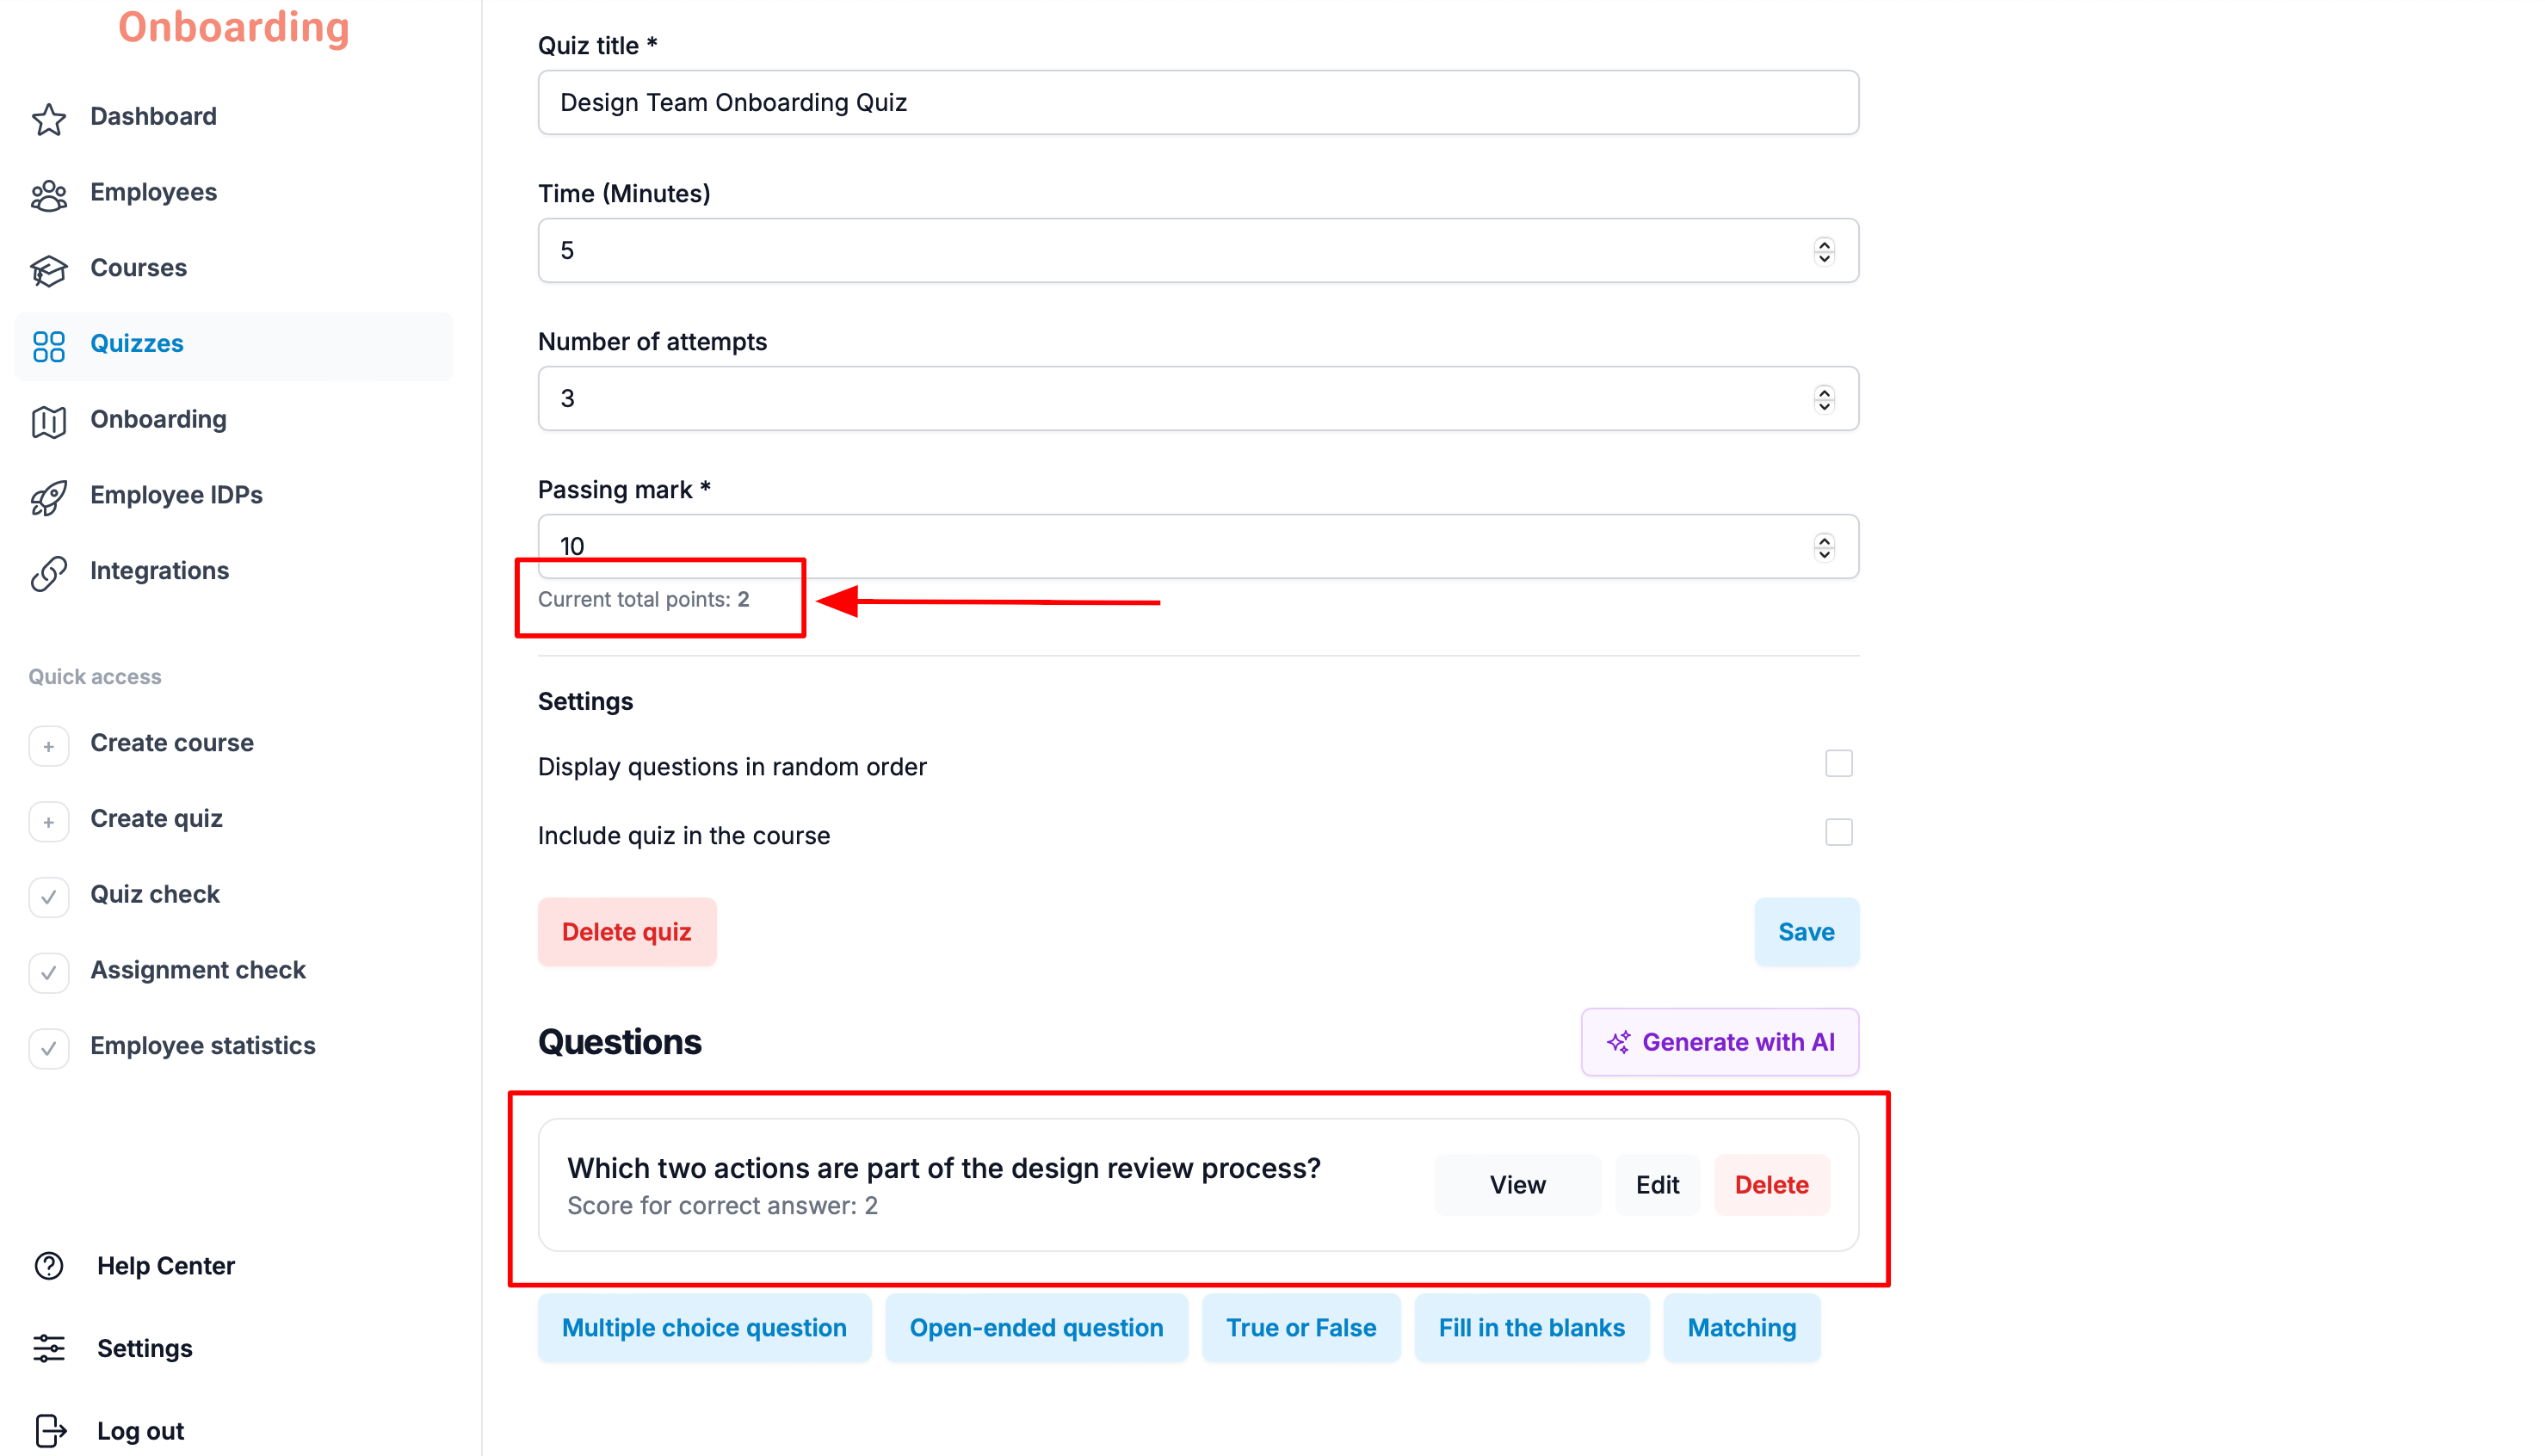
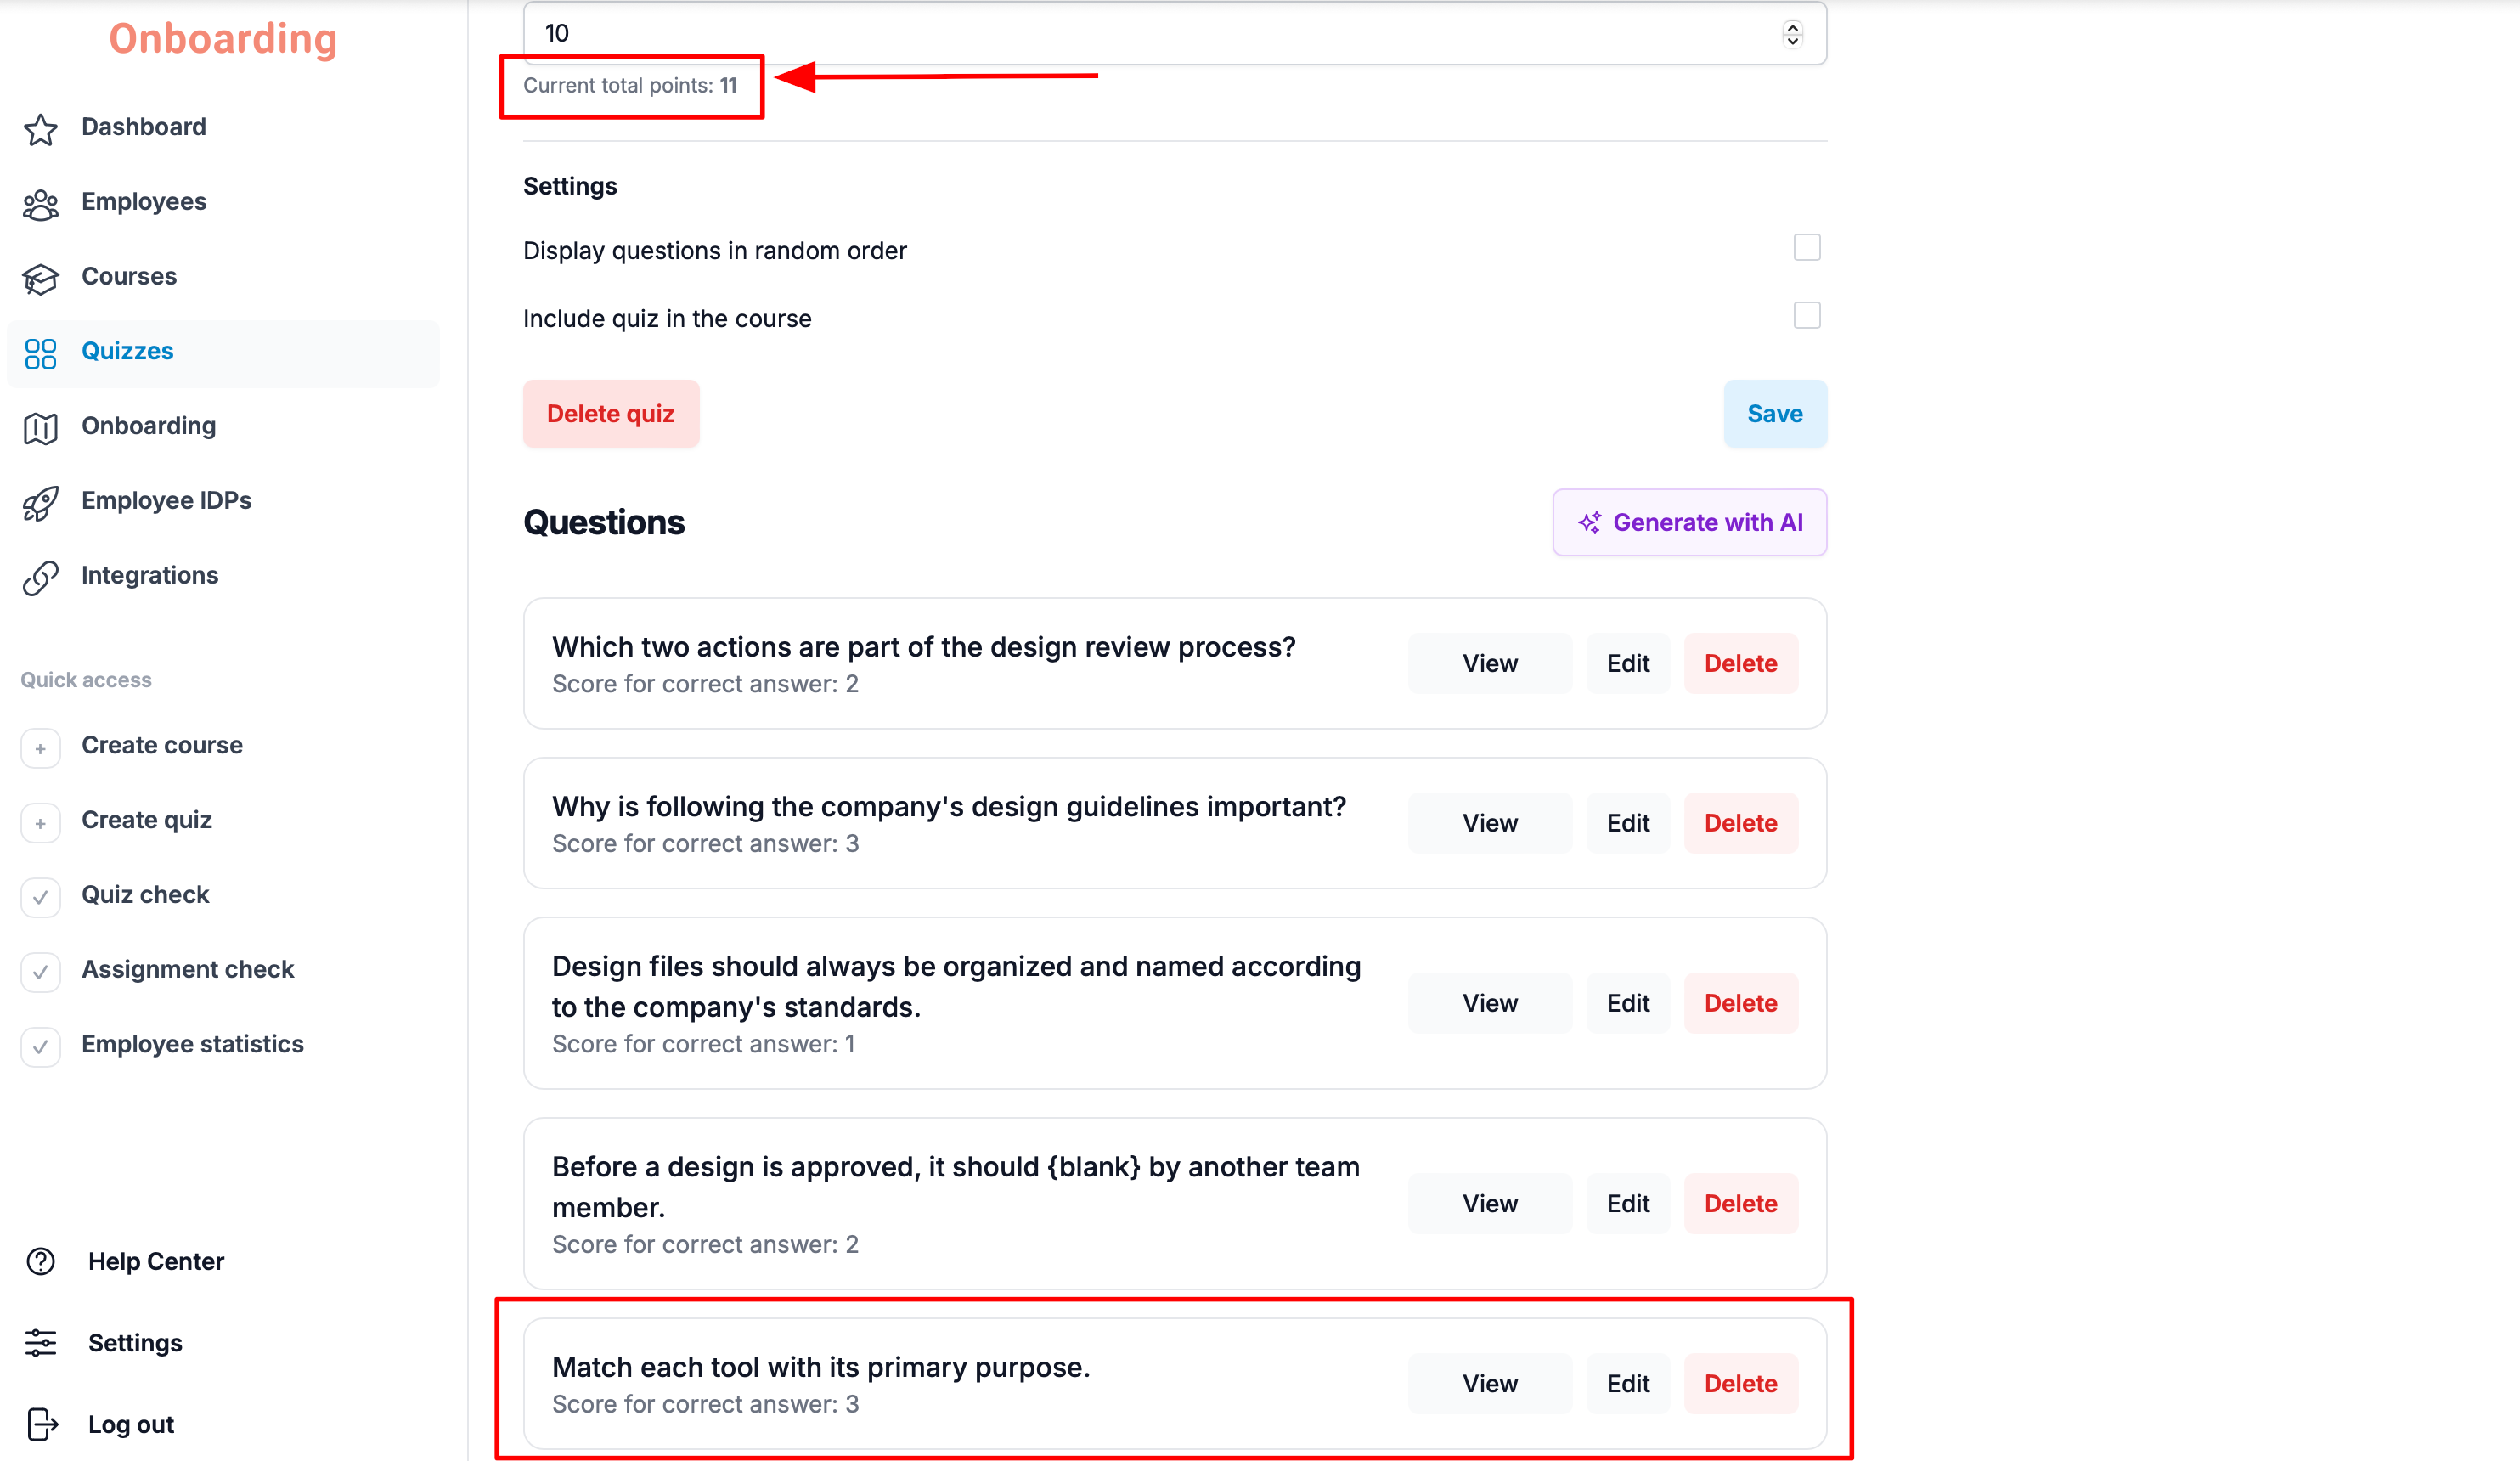
The new question now appears in the «Questions» block, and its points have been automatically added to the quiz's total, shown under the «Passing mark» field 🎉
If a question has several correct answers, the employee must select all of them.
If they select only some of the correct options, the question counts as answered incorrectly and the employee gets 0 points.
Creating an open-ended question
An open-ended question checks employees' knowledge through a free-form answer.
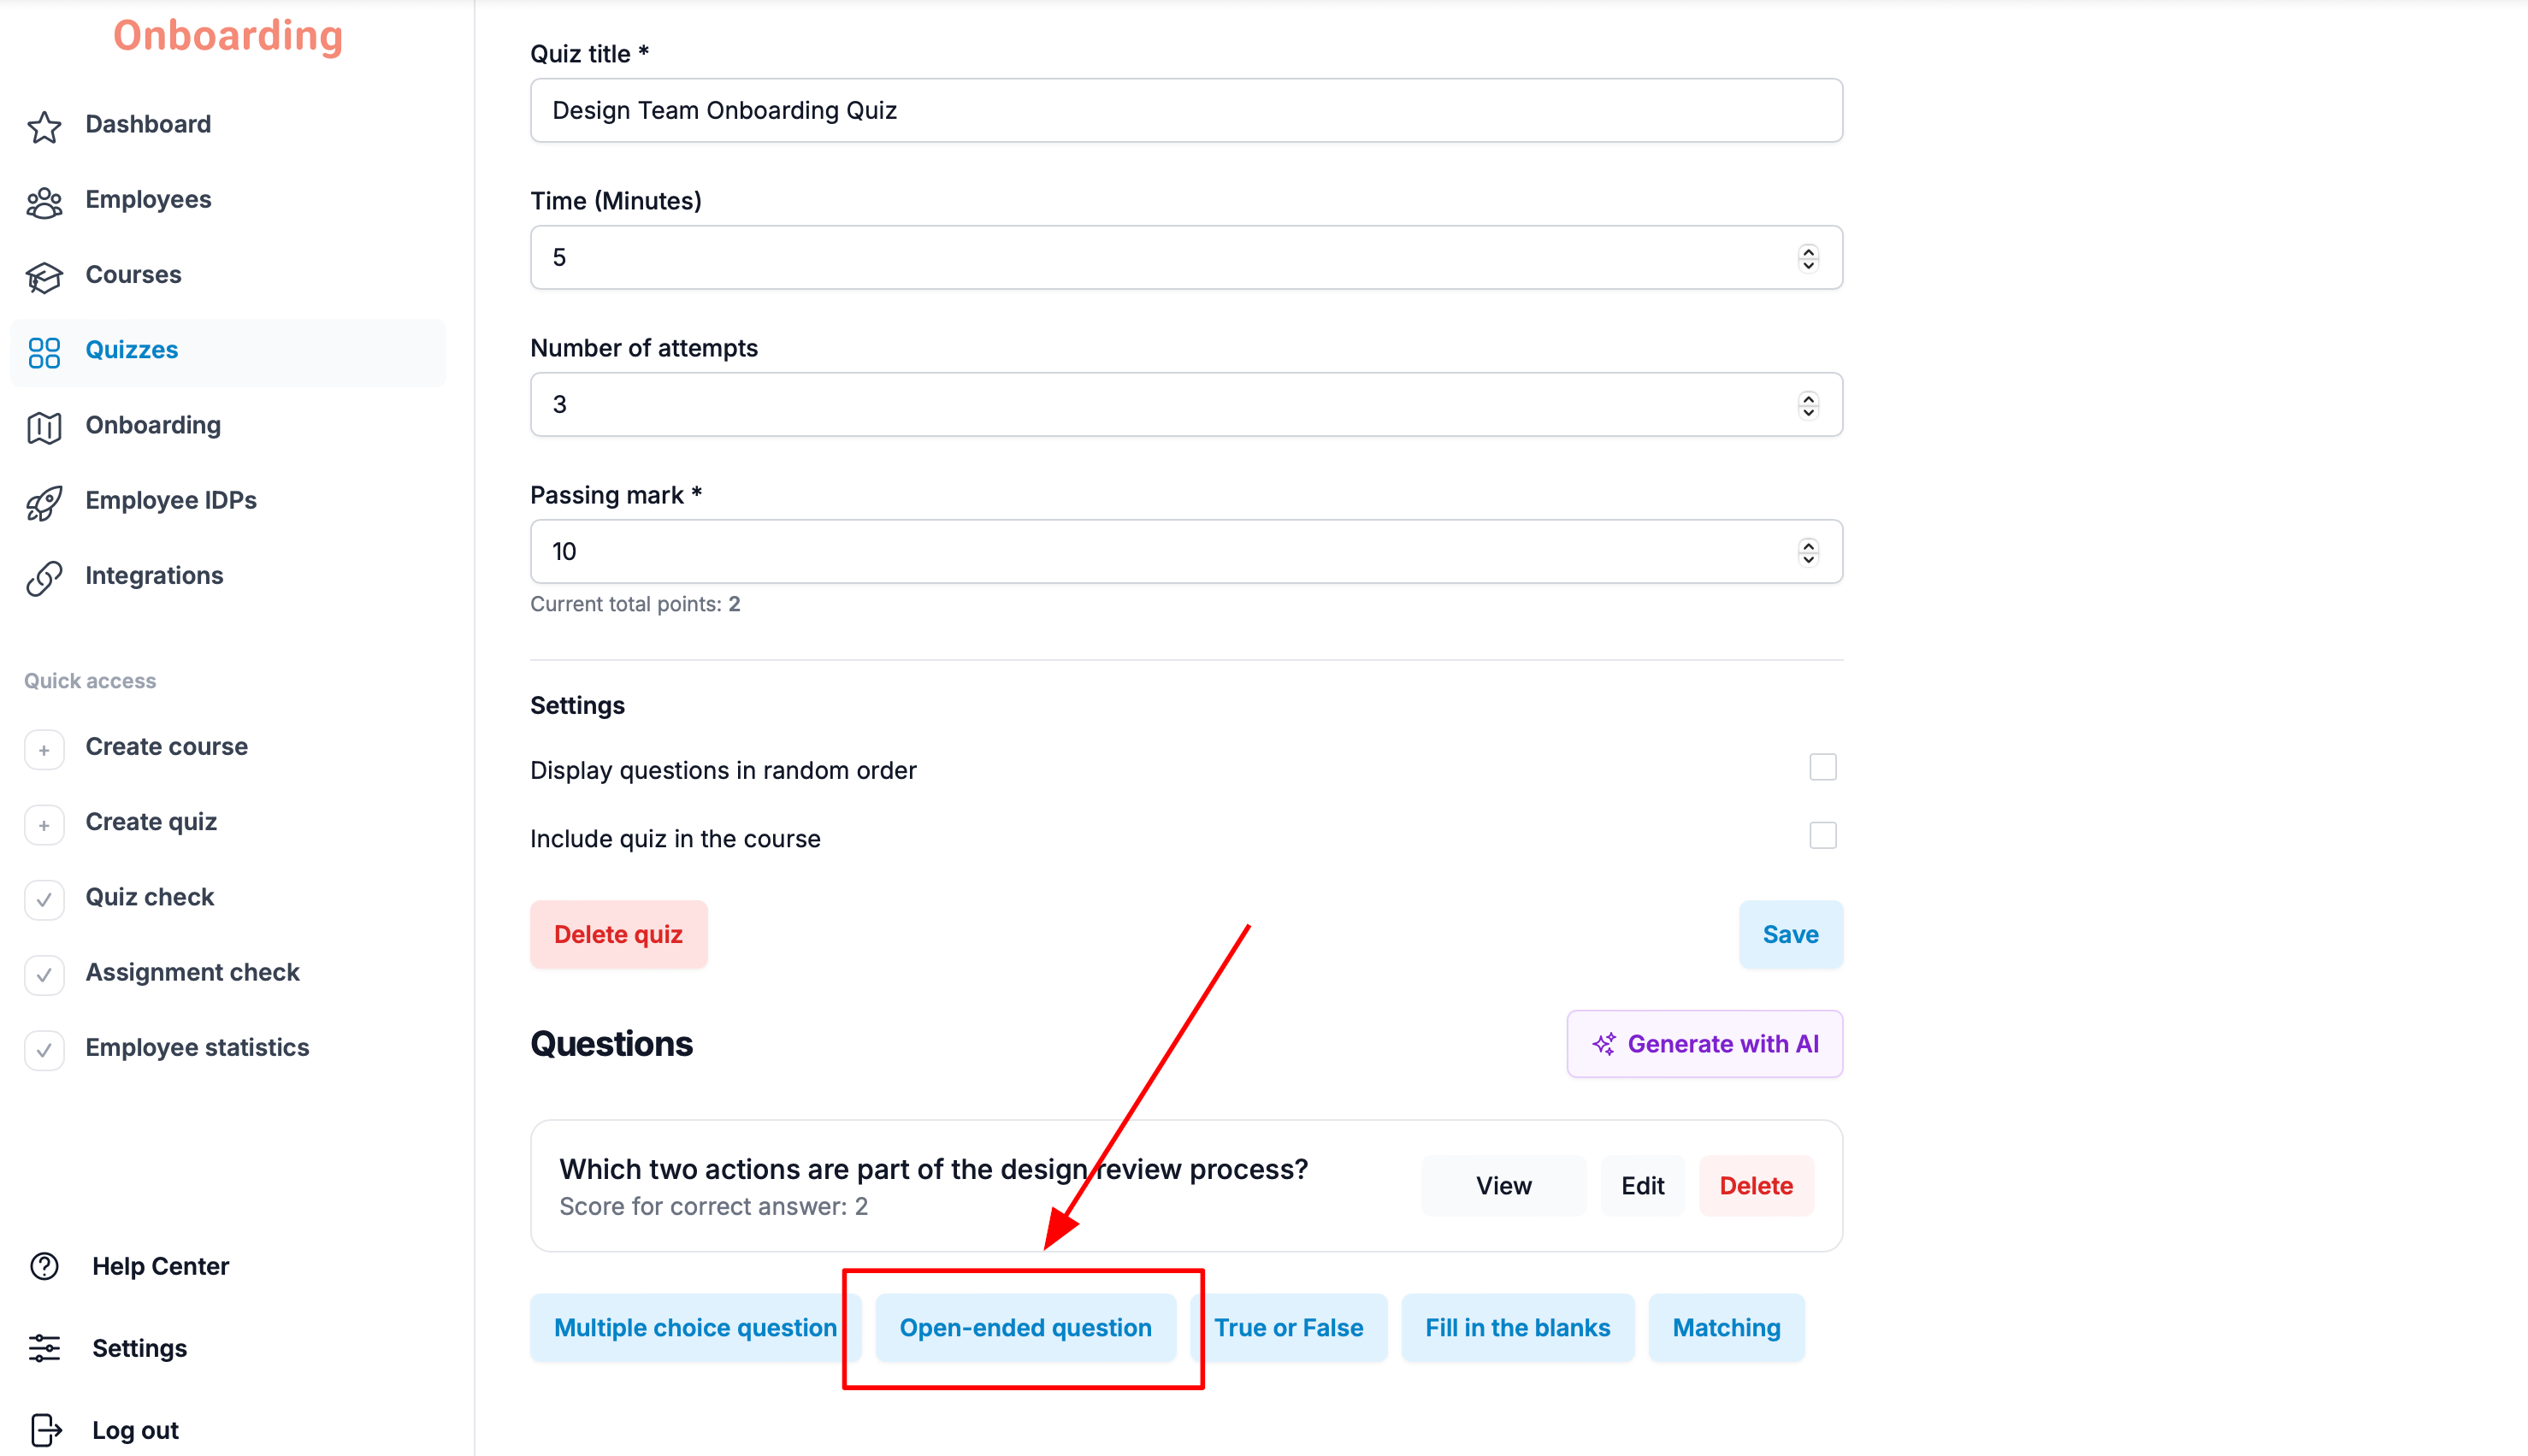
To add one, click the «Open-ended question» button in the «Questions» block on the quiz editing page.
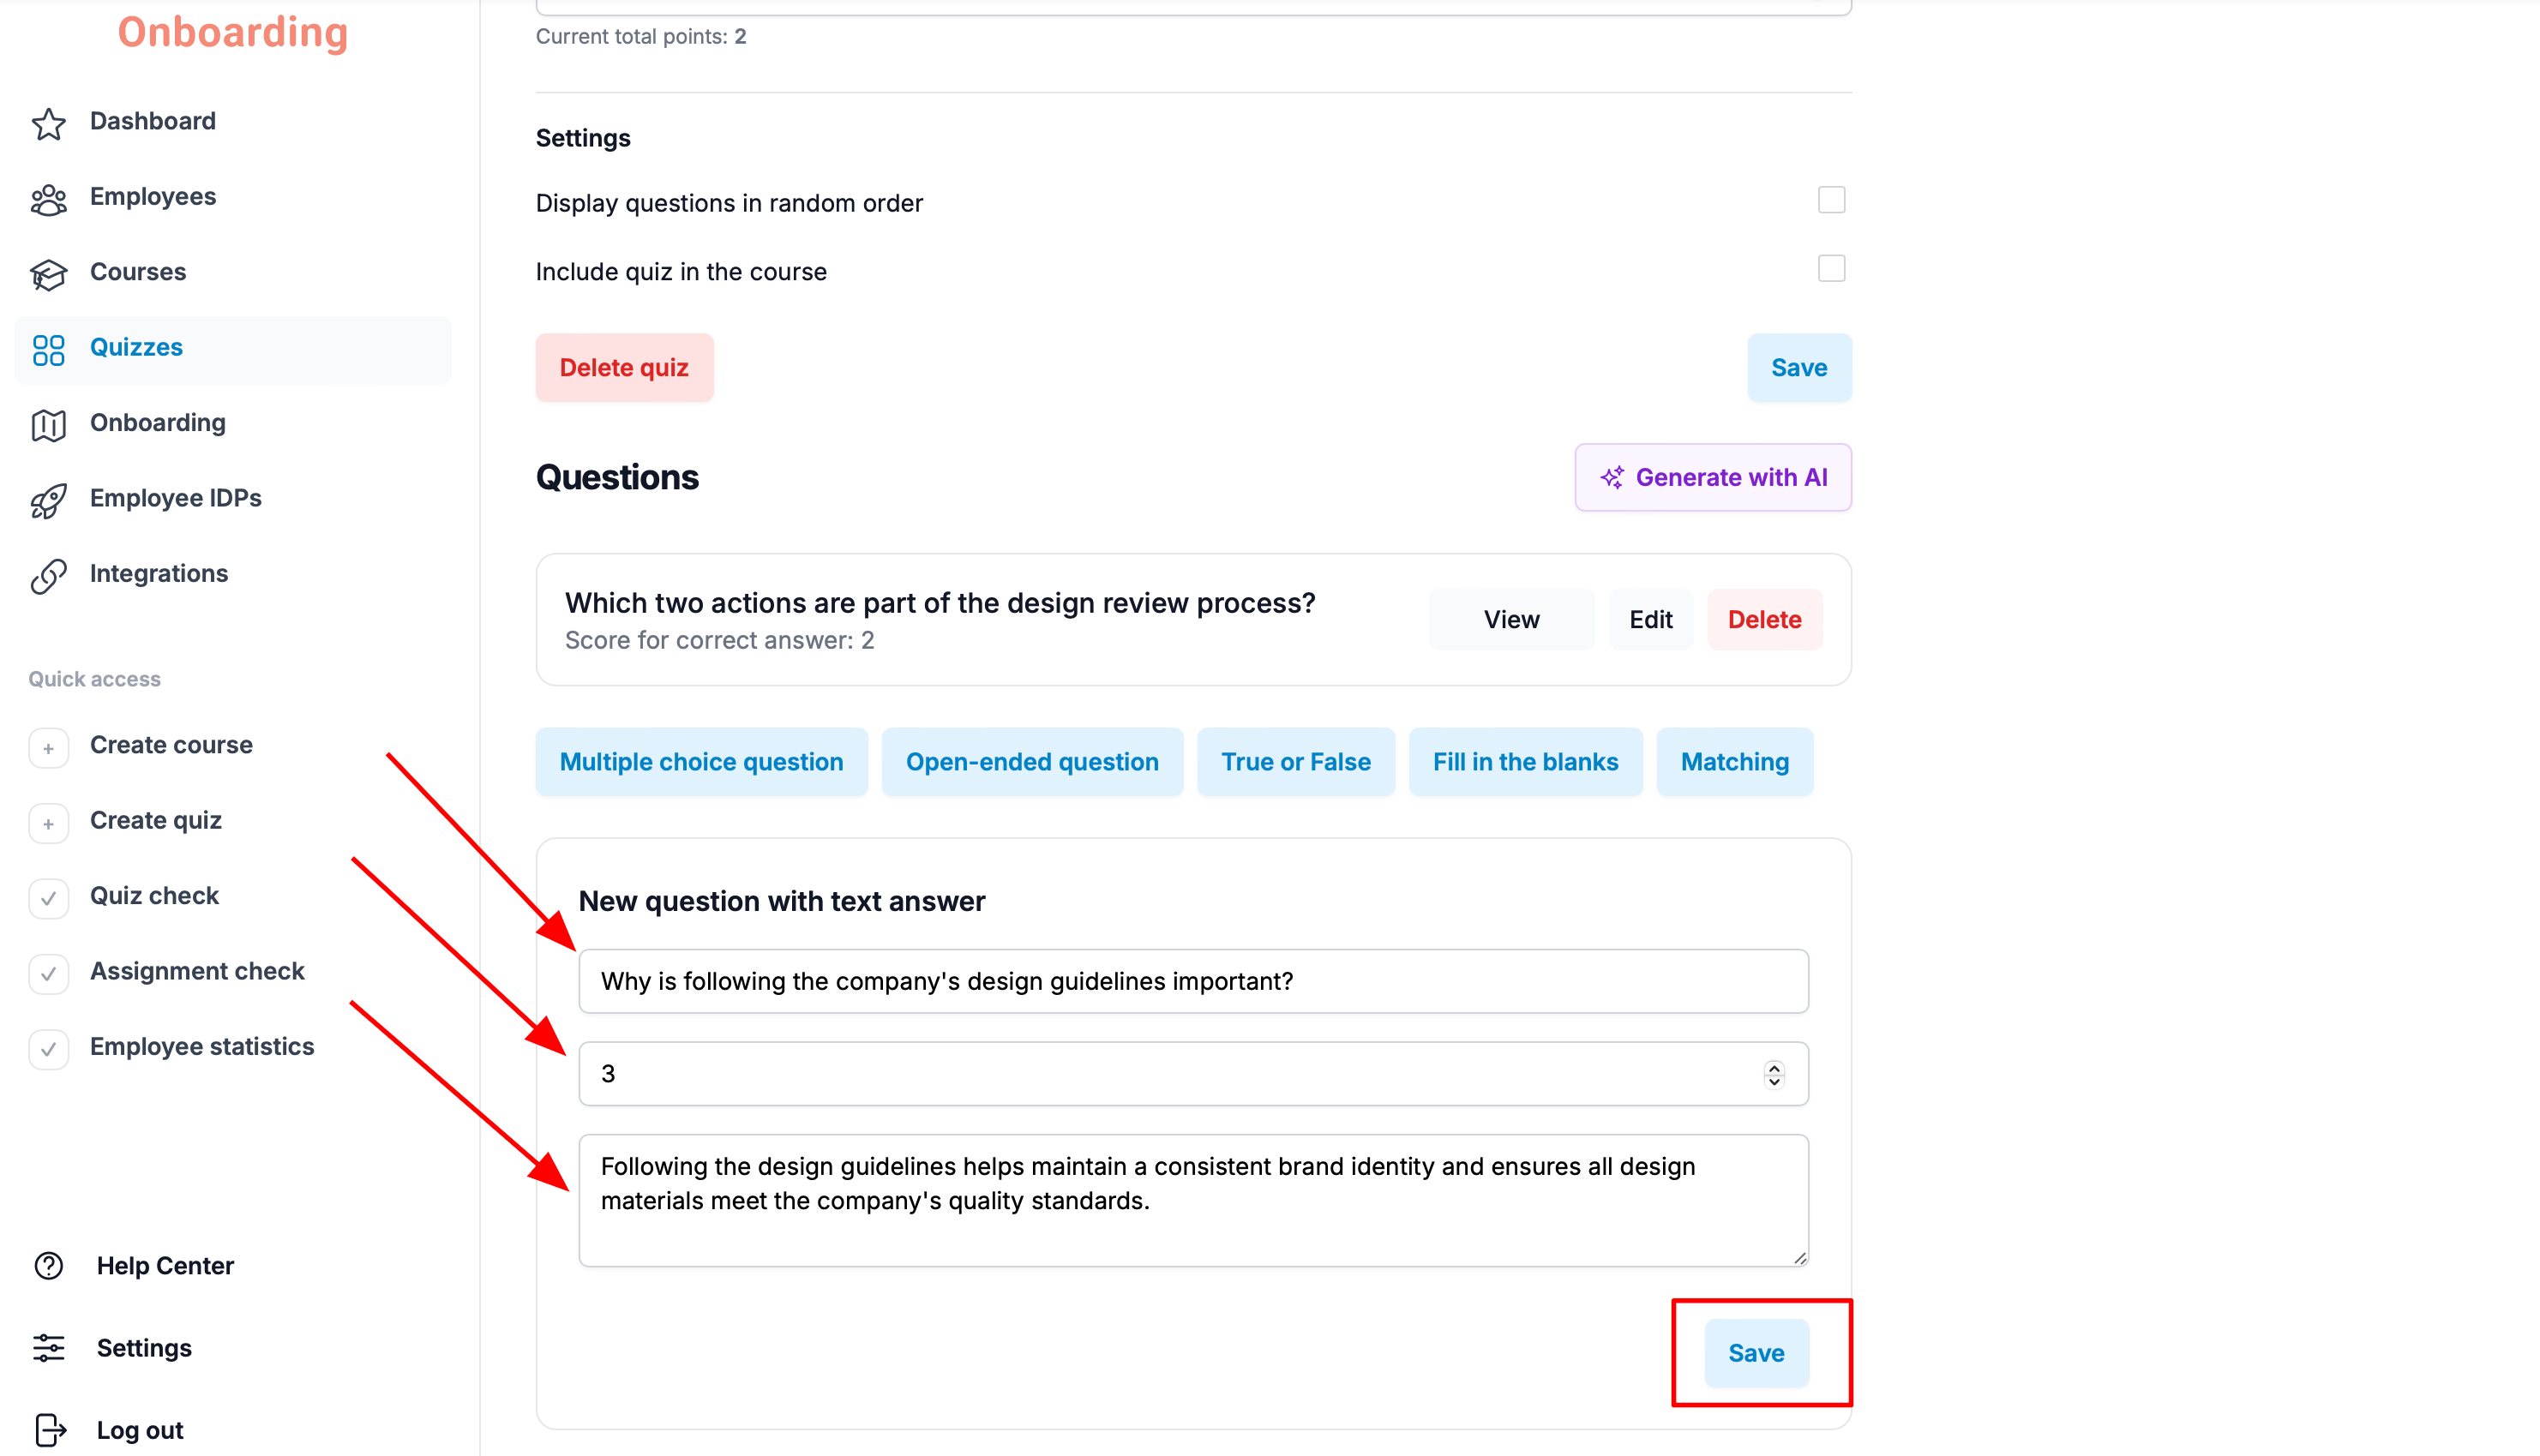
A question creation form opens below, with the following fields:
- Question title – the question text employees will see.
- Assessment (points) – the suggested number of points the employee can earn for a correct answer.
- Correct answer – the reference answer shown to the reviewer during grading. Employees don't see this field while taking the quiz.
Once all the fields are filled in, click «Save».
The new question now appears in the «Questions» block, and its points have been automatically added to the quiz's total, shown under the «Passing mark» field 🎉
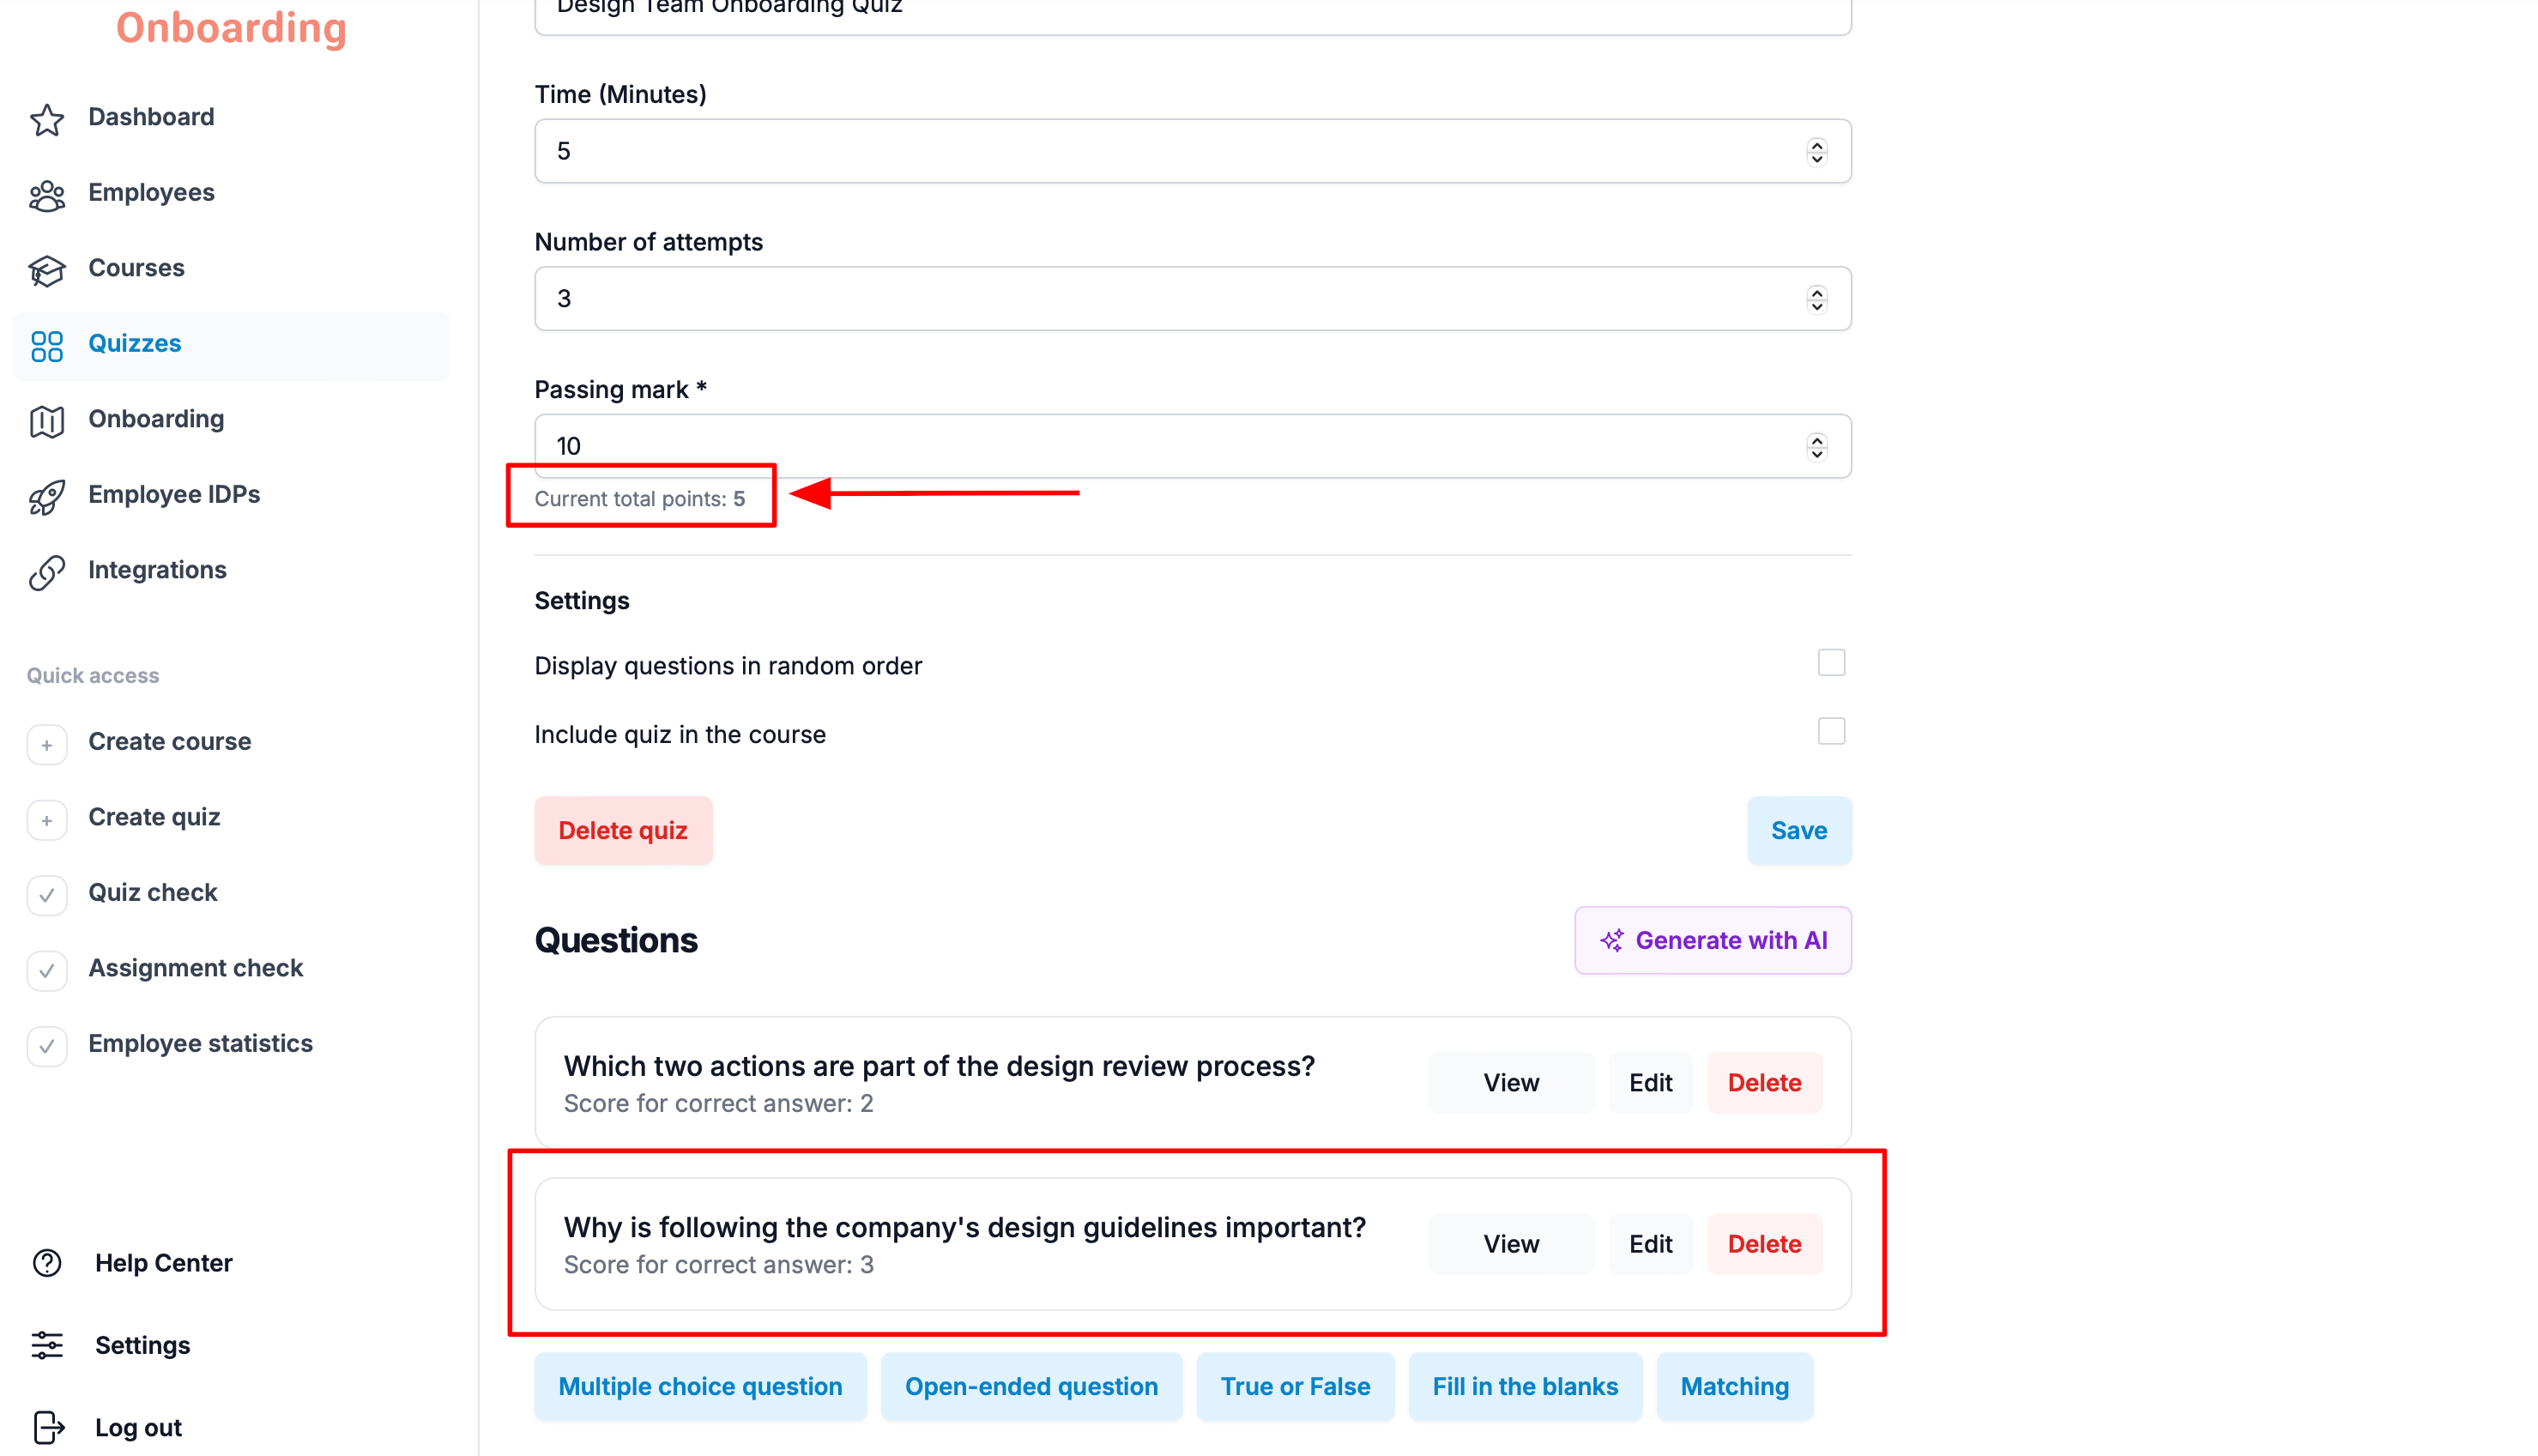
Open-ended questions aren't graded automatically. Once the employee submits their answer, it goes to an administrator for review.
The reviewer compares the employee's answer with the reference answer and awards points at their own discretion.
The reviewer can award fewer or more points than the value in the «Assessment» field. The points awarded count toward the quiz's final result.
Creating a «True or False» question
A True or False question consists of a statement the employee has to mark as either true or false.
To add one, click the «True or False» button in the «Questions» block on the quiz editing page.
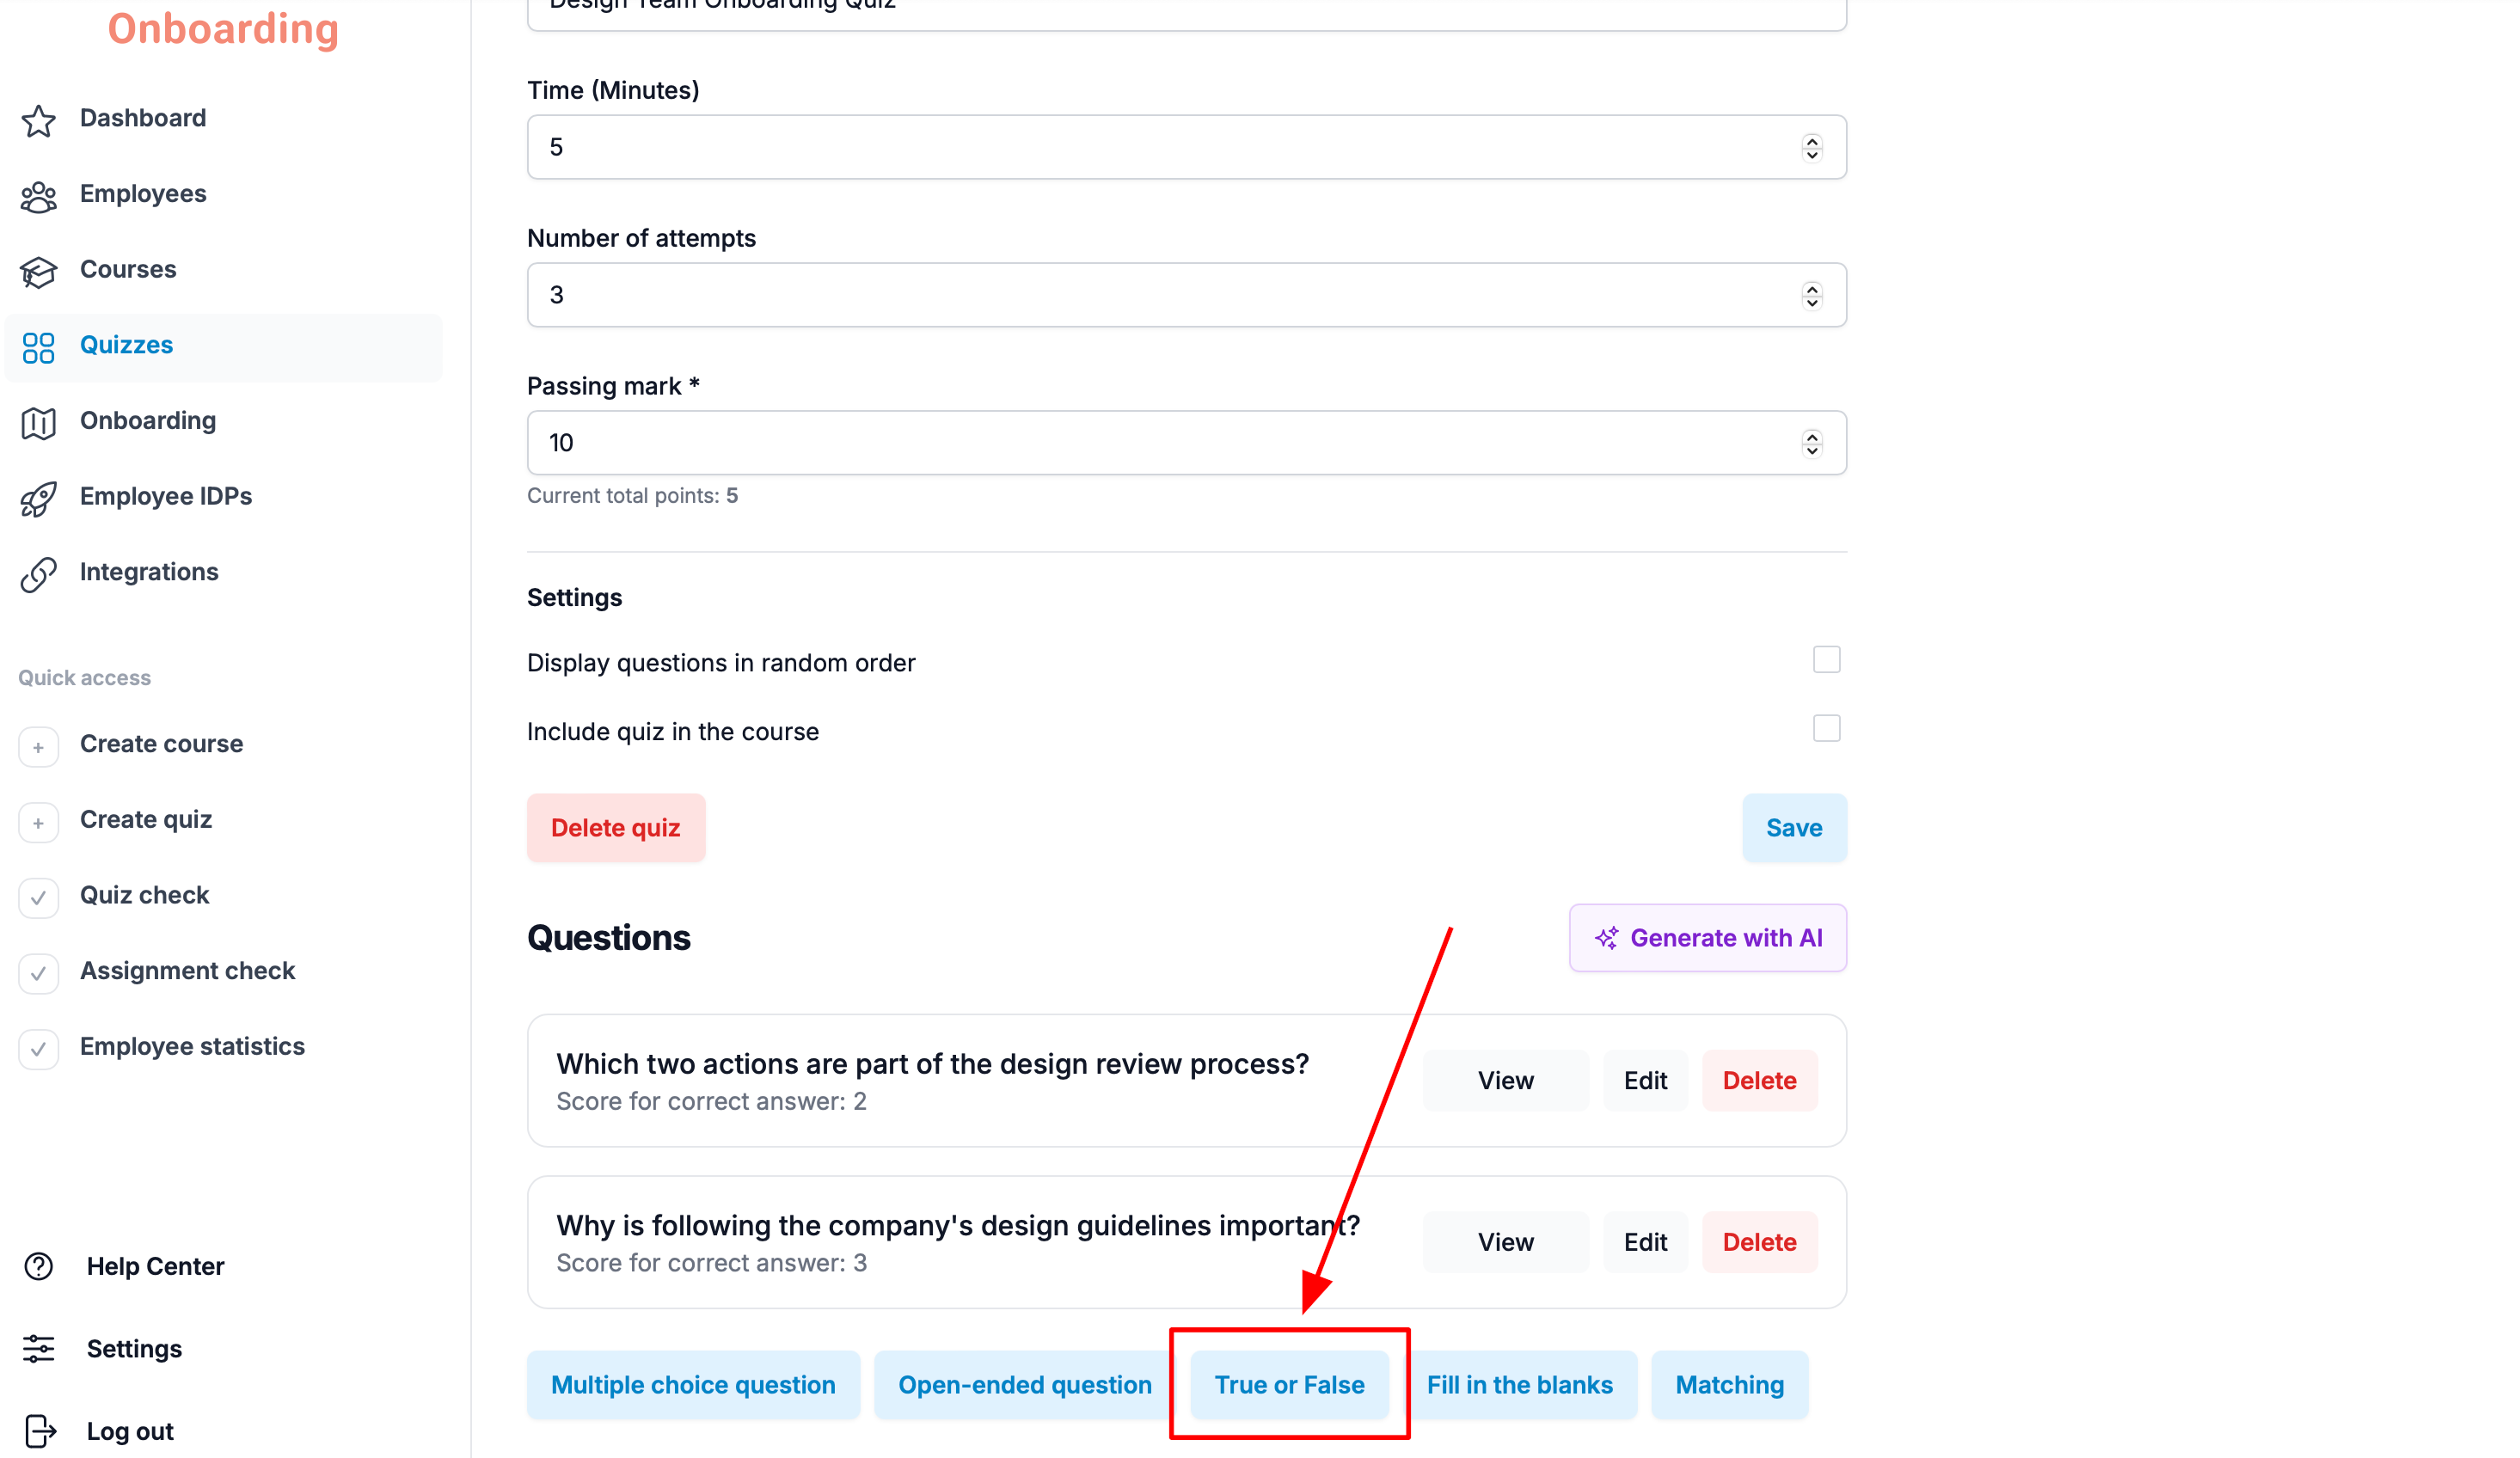
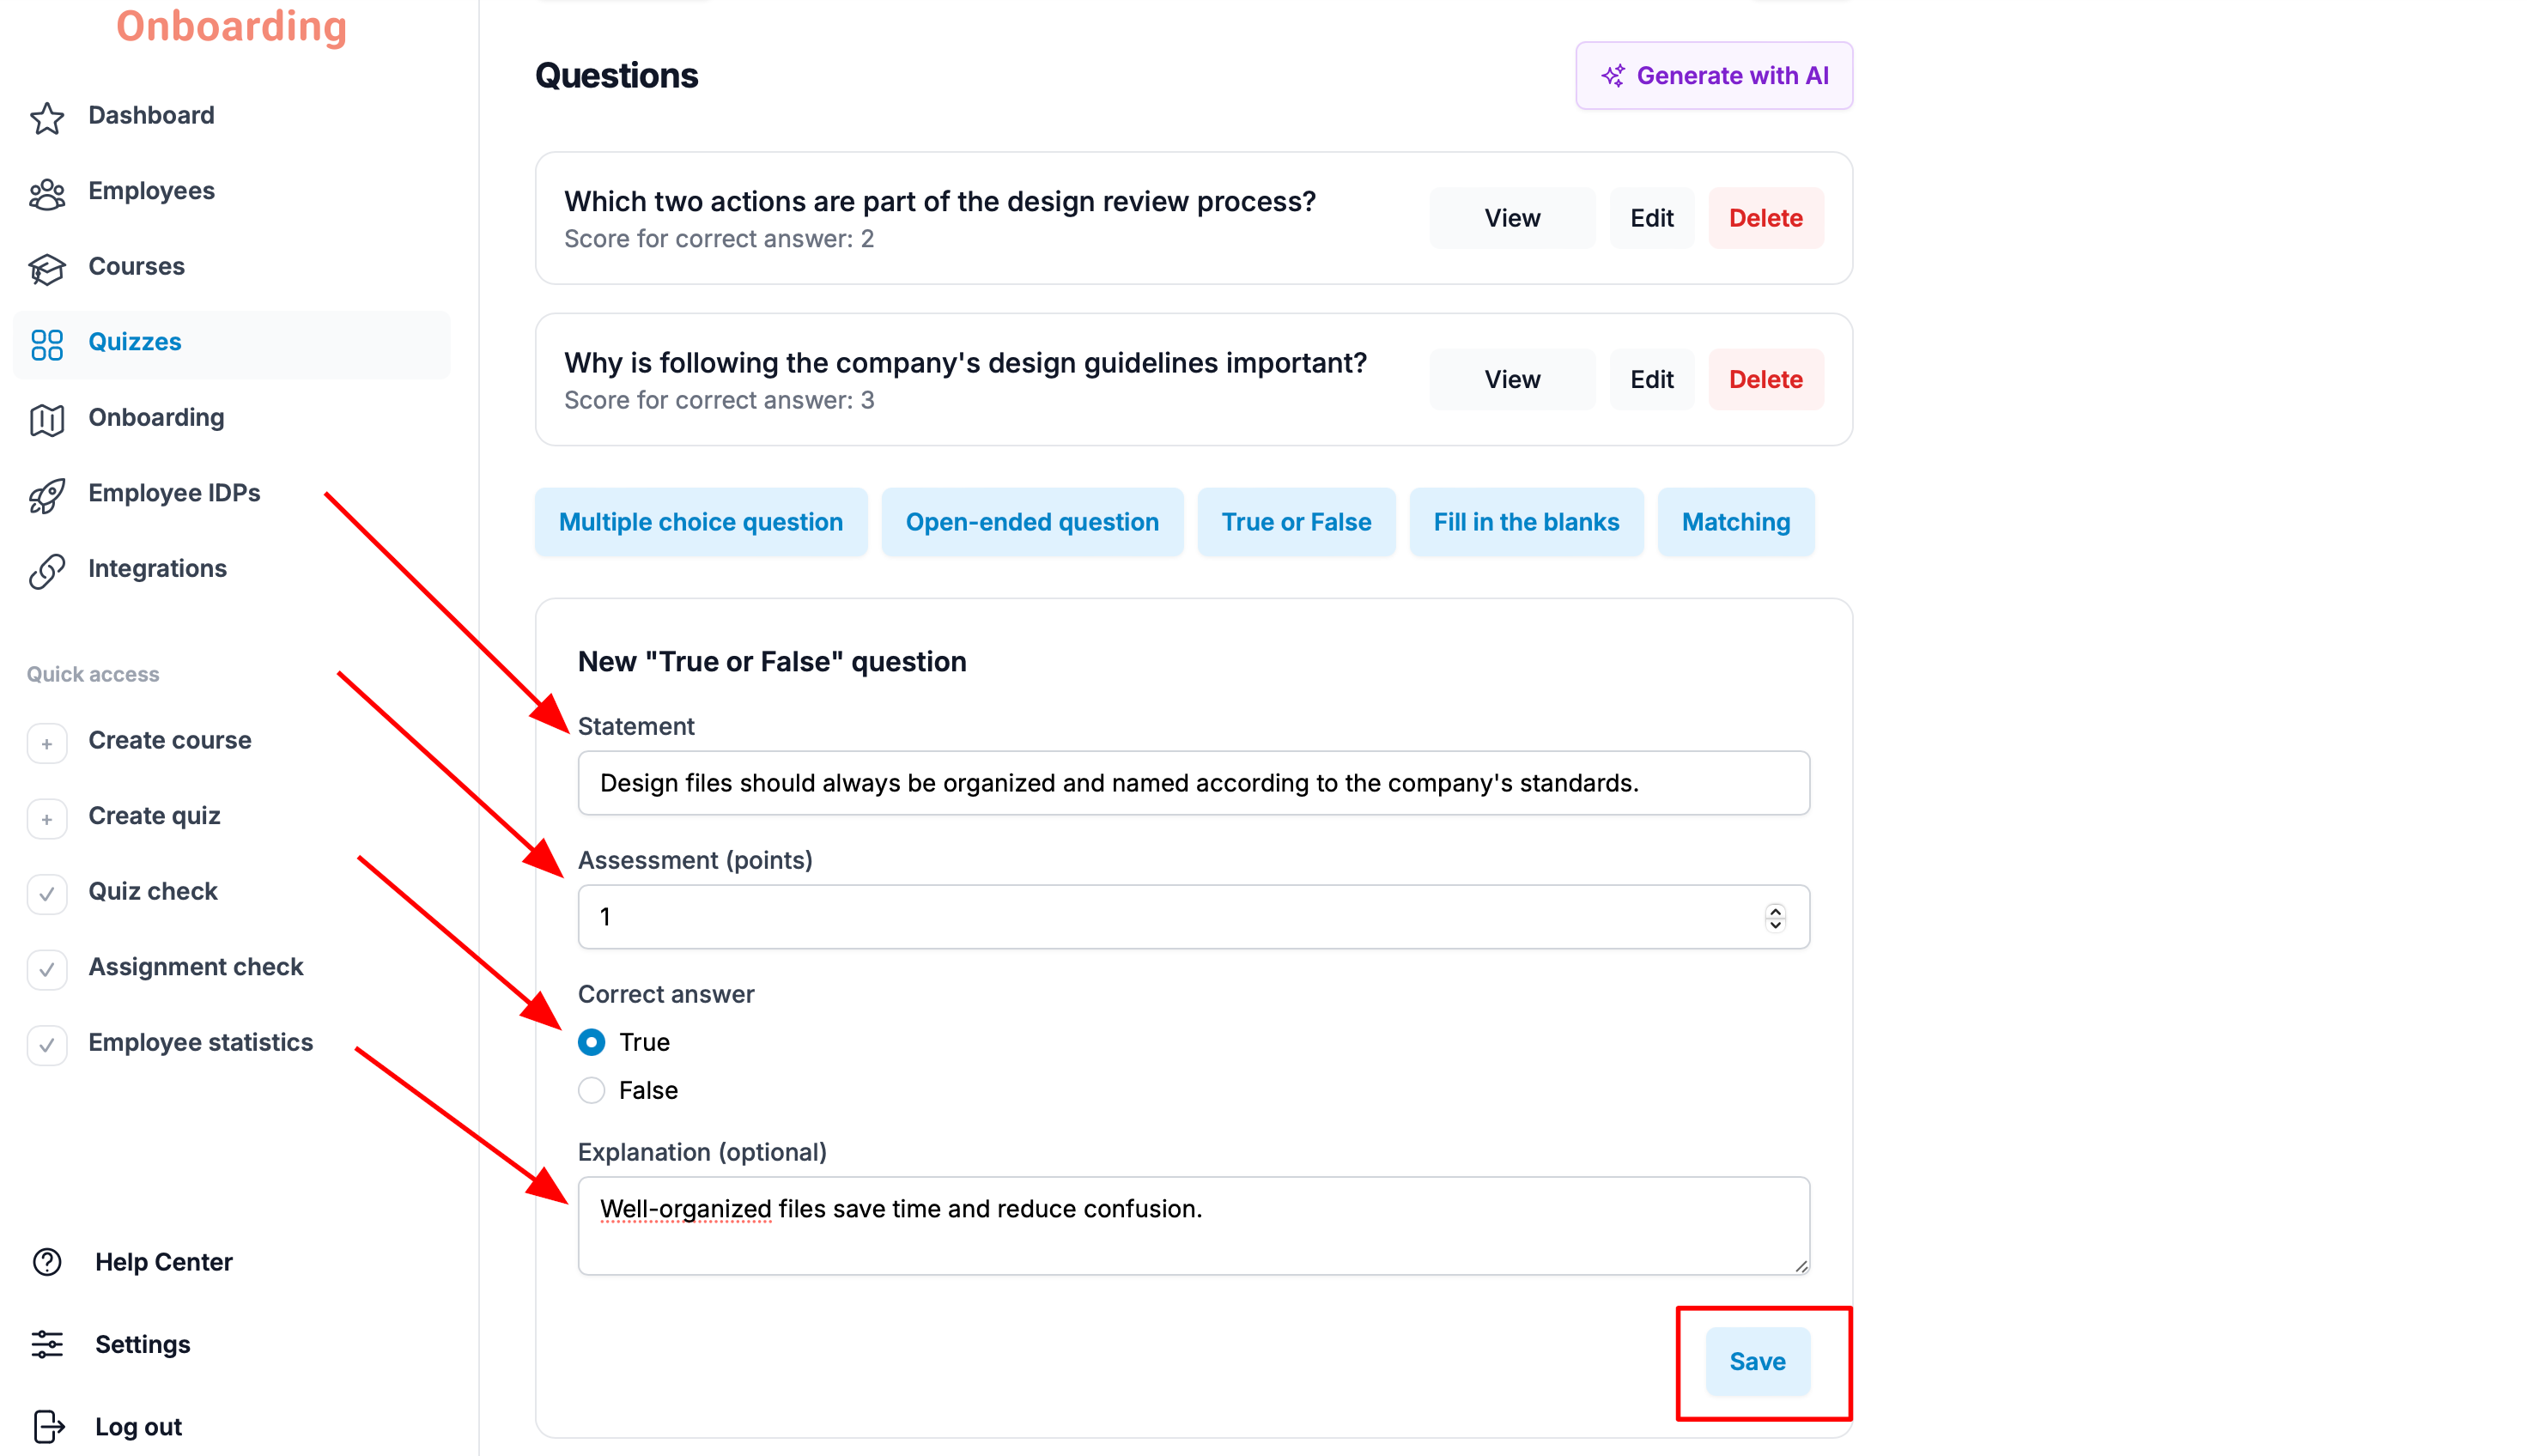
A question creation form opens below, with the following fields:
- Statement – the phrase the employee will judge as true or false.
- Assessment (points) – how many points the employee earns for answering correctly.
- Correct answer – choose whether the statement is true or false.
- Explanation – optional. A note explaining the correct answer — for example, why the statement is true or false.
Once all the fields are filled in, click «Save».
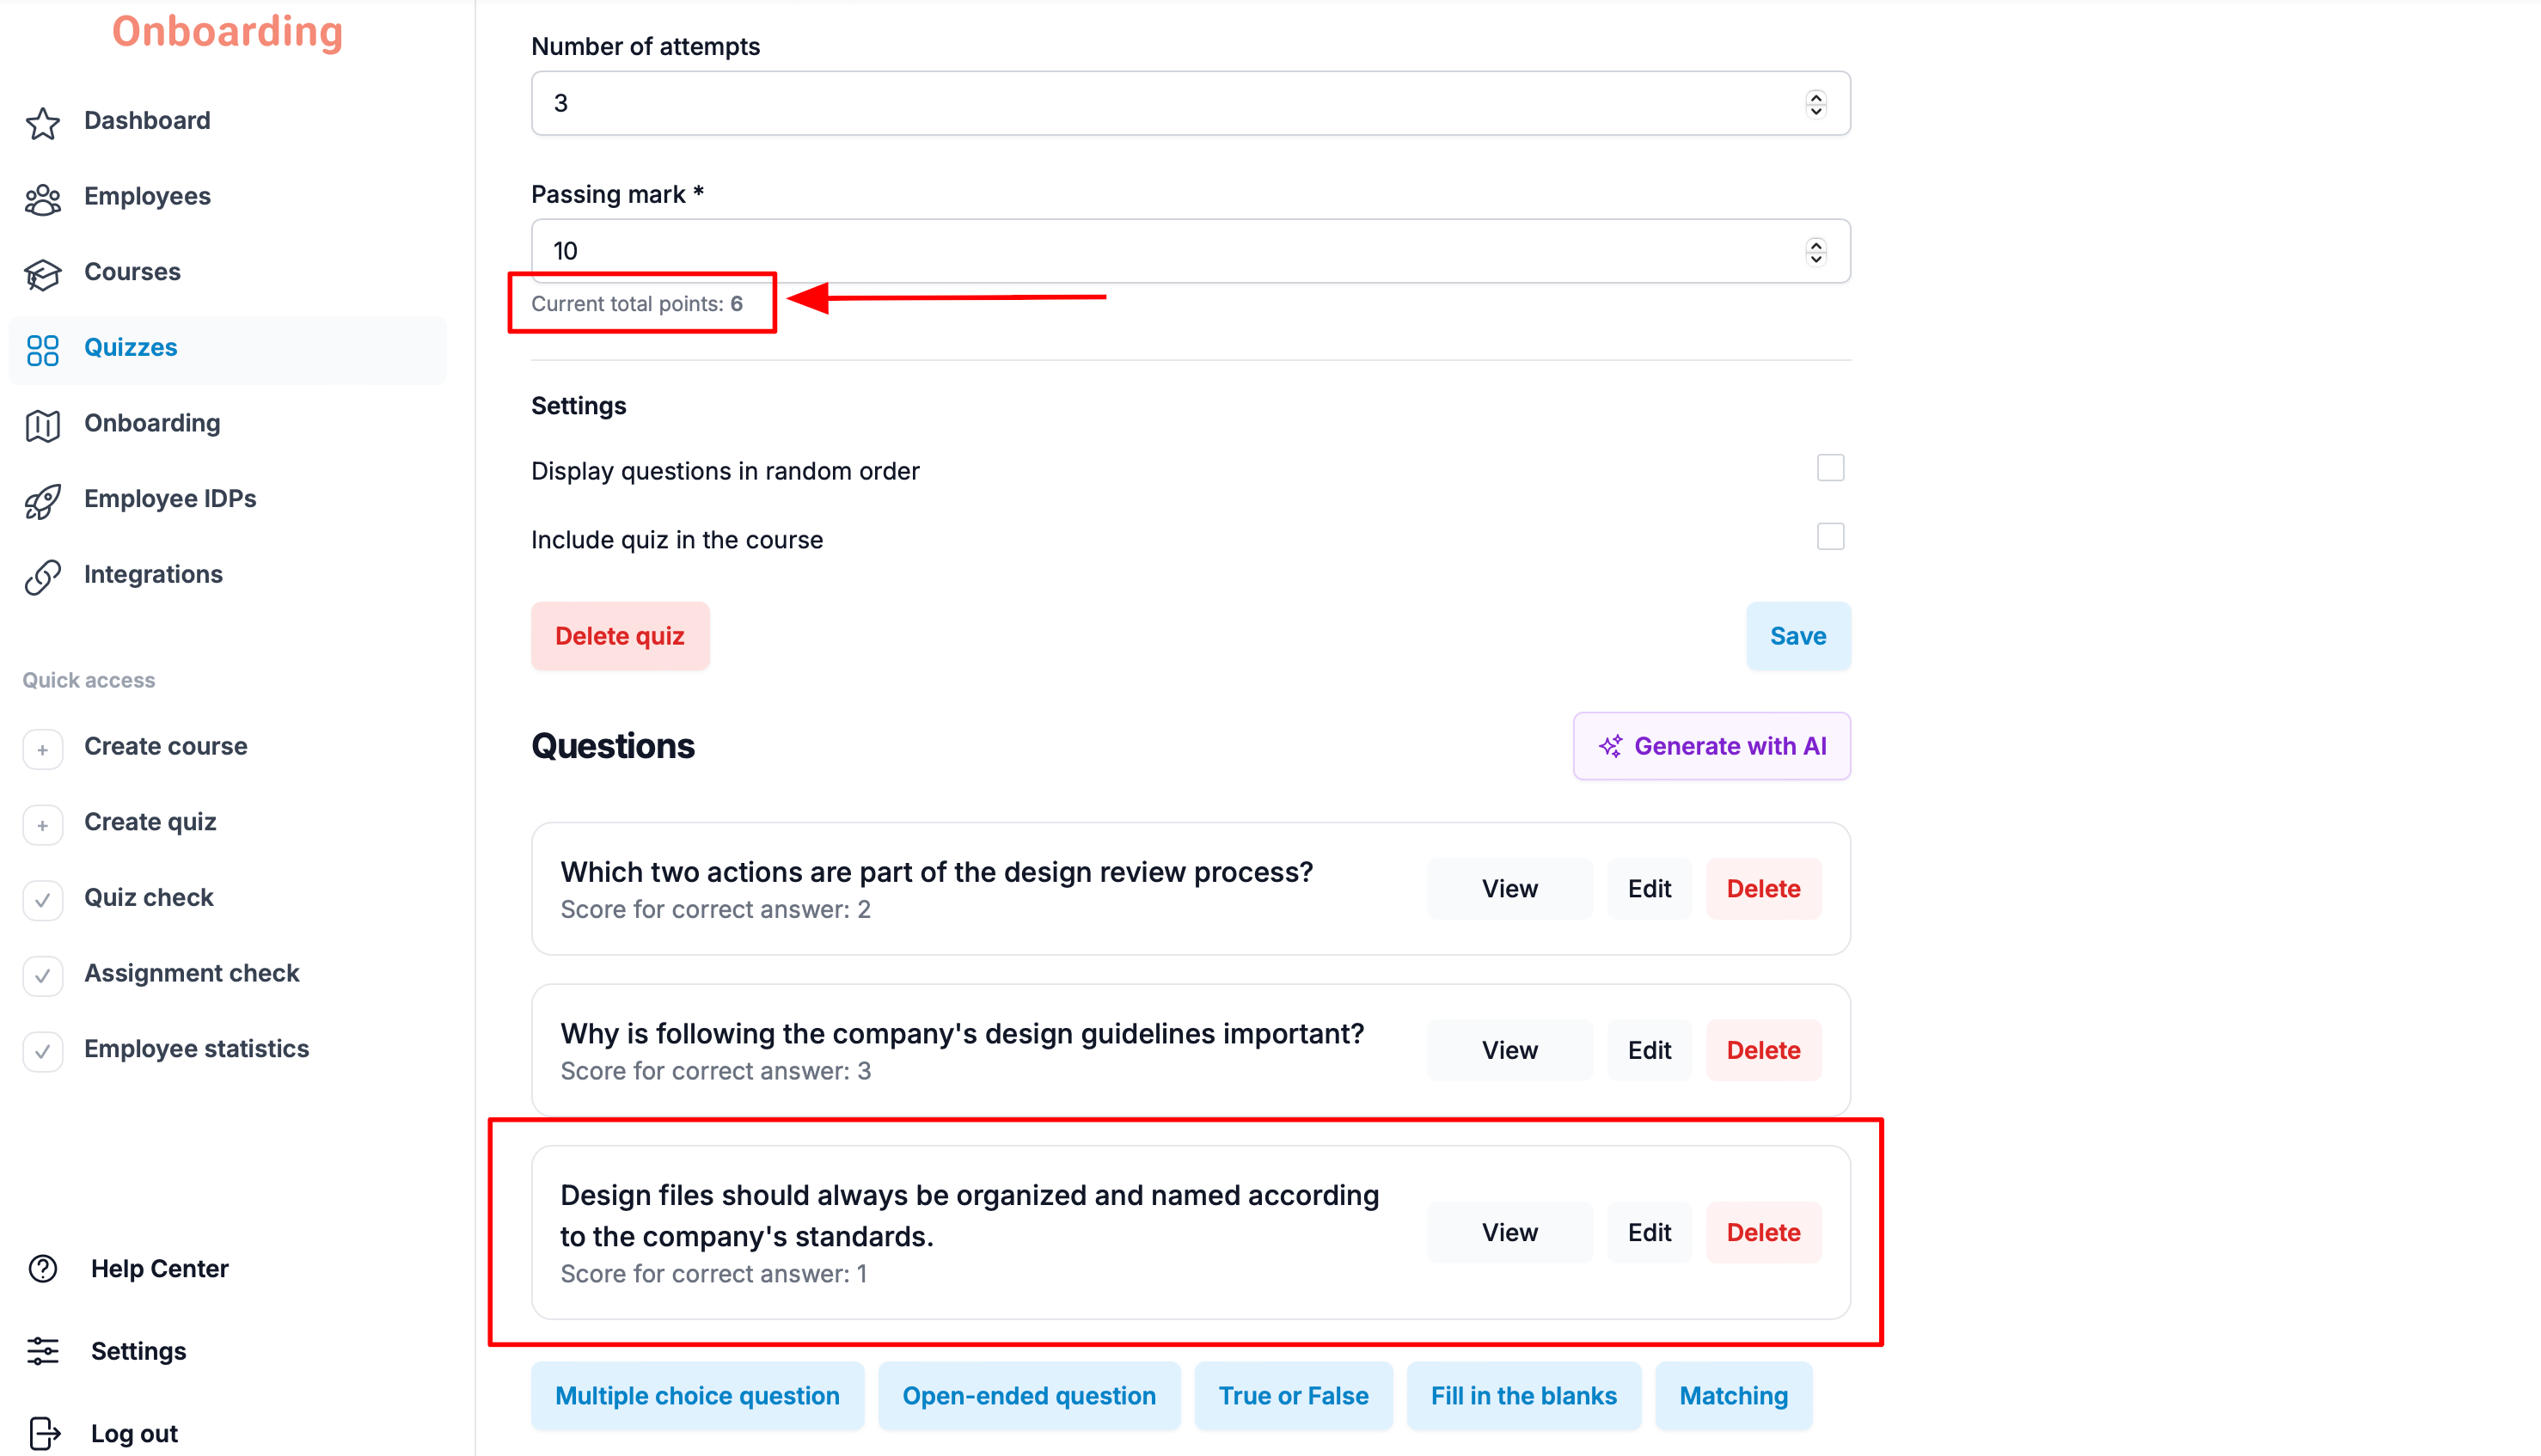
The new question now appears in the «Questions» block, and its points have been automatically added to the quiz's total, shown under the «Passing mark» field 🎉
Creating a «Fill in the blanks» question
A Fill in the blanks question checks knowledge of terms, definitions, processes, and other material where the employee has to pick the right answer for a missing piece of text.
To add one, click the «Fill in the blanks» button in the «Questions» block on the quiz editing page.
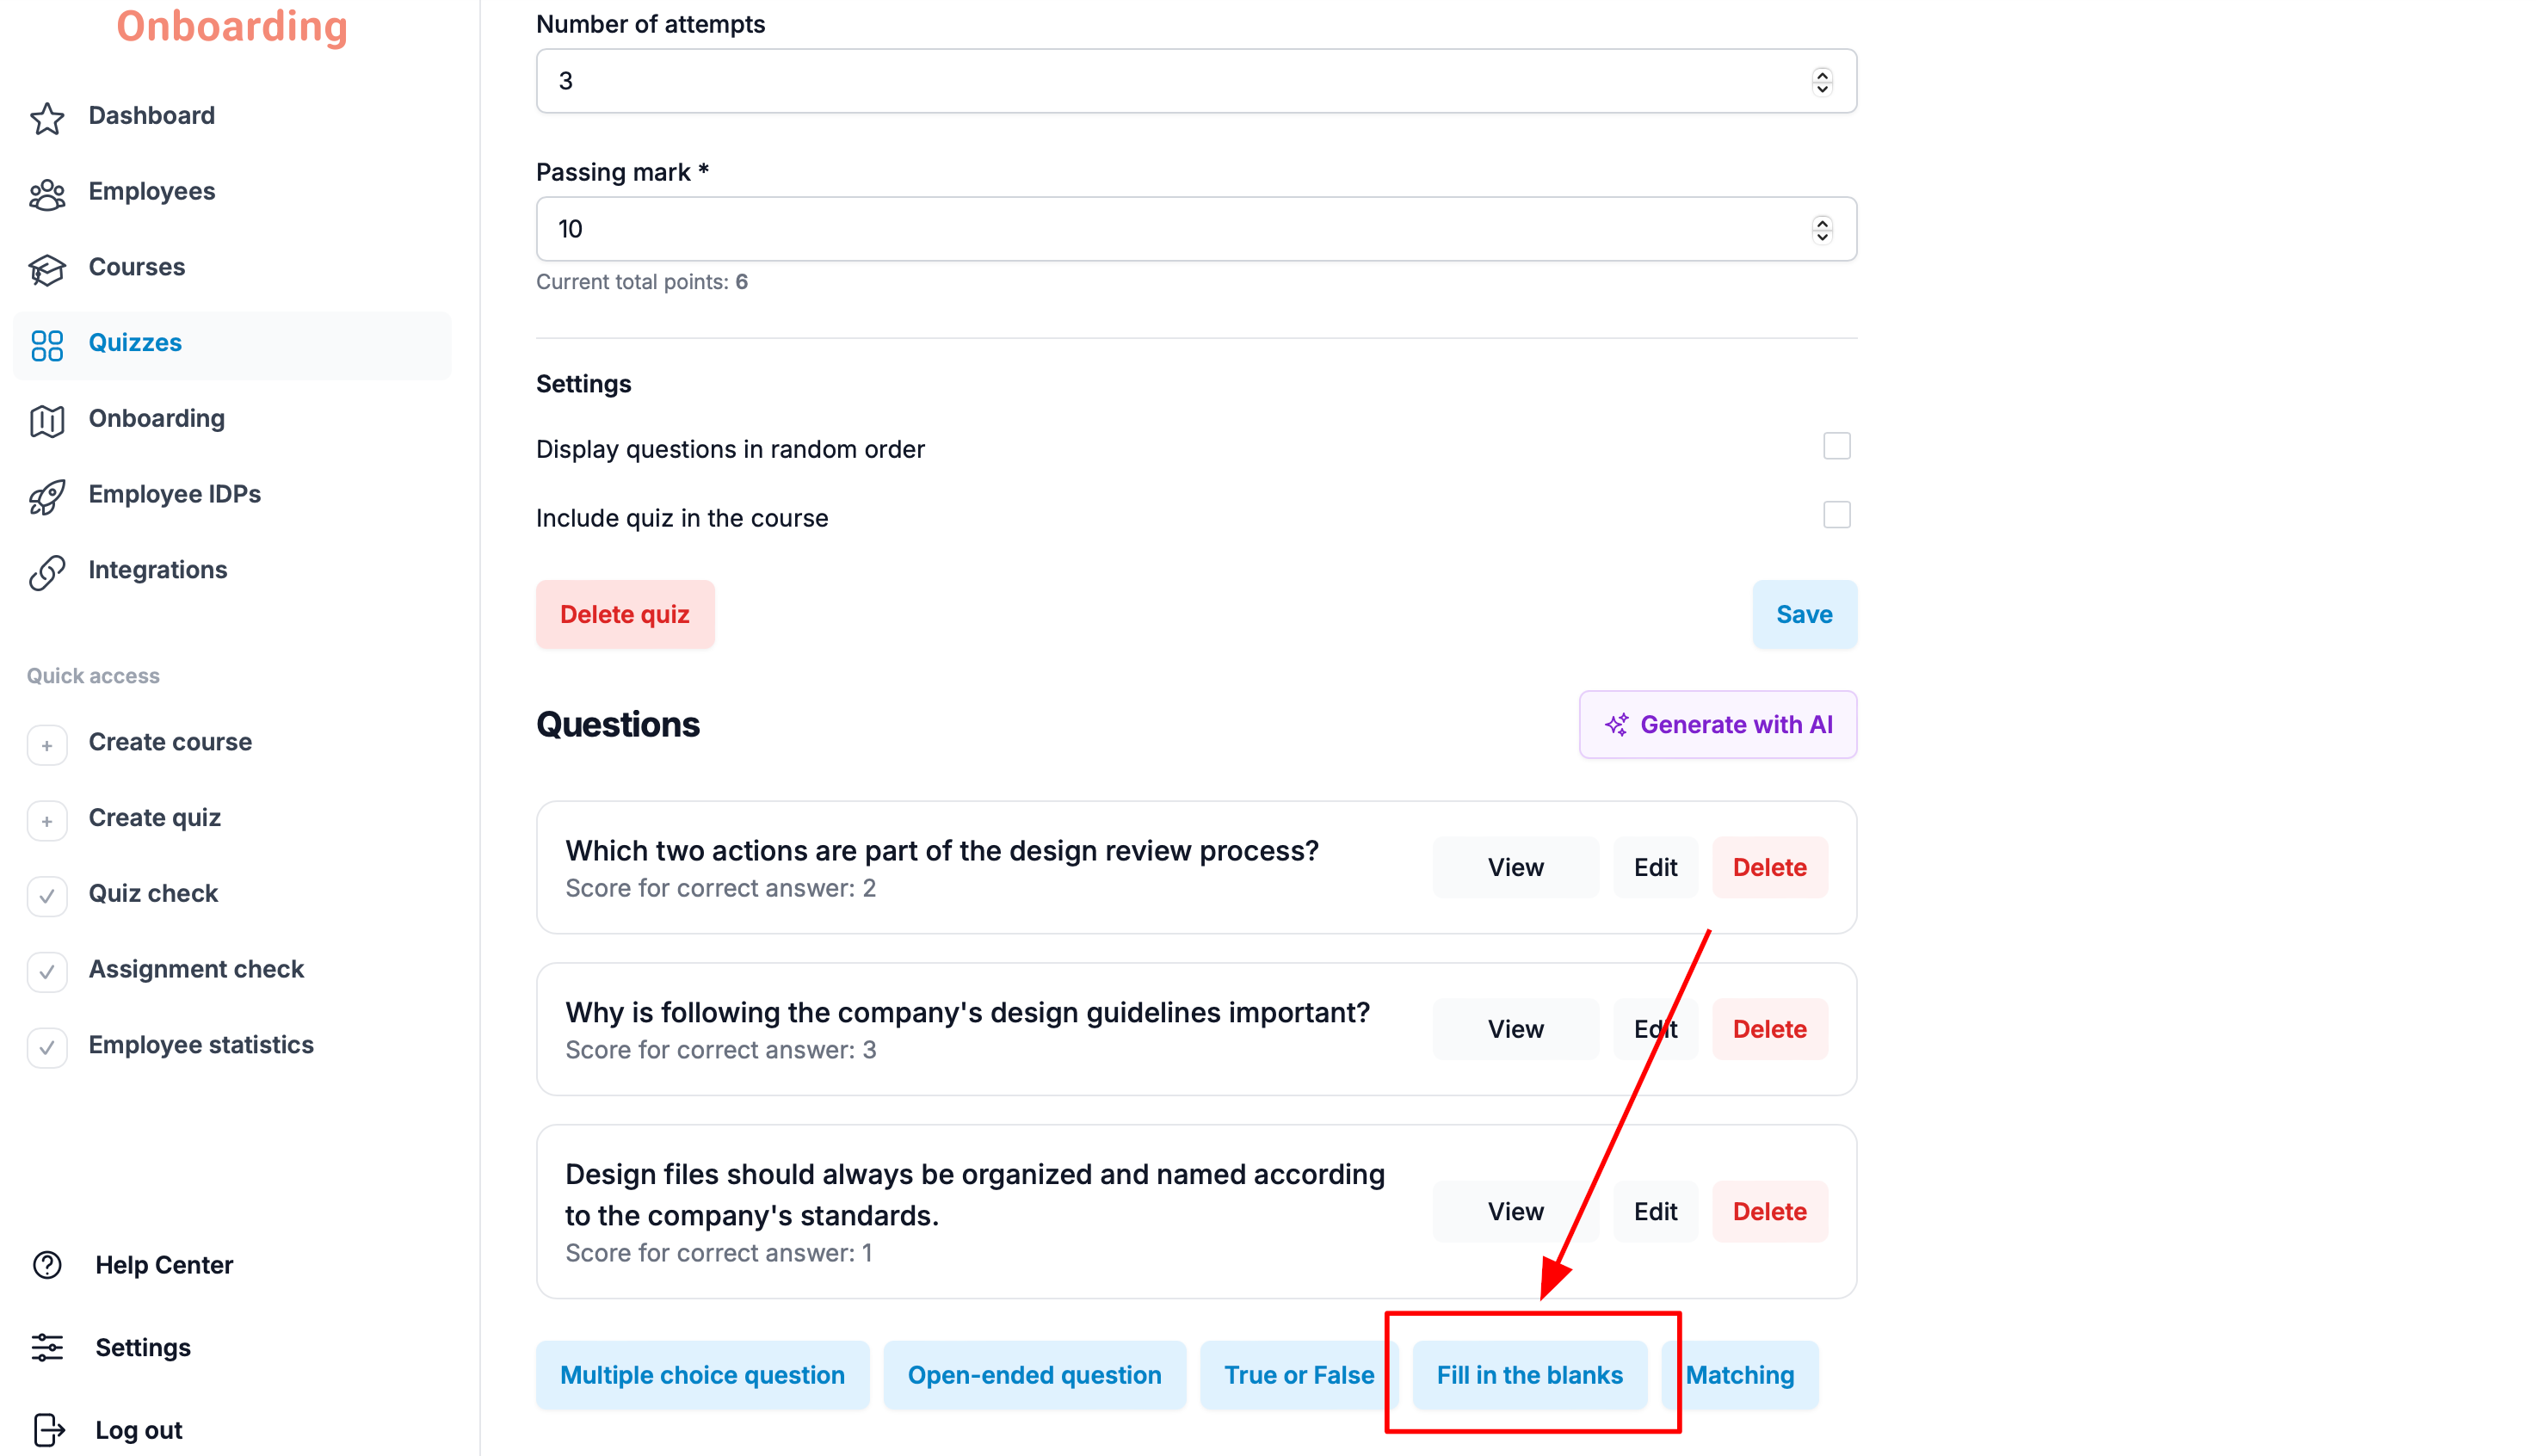
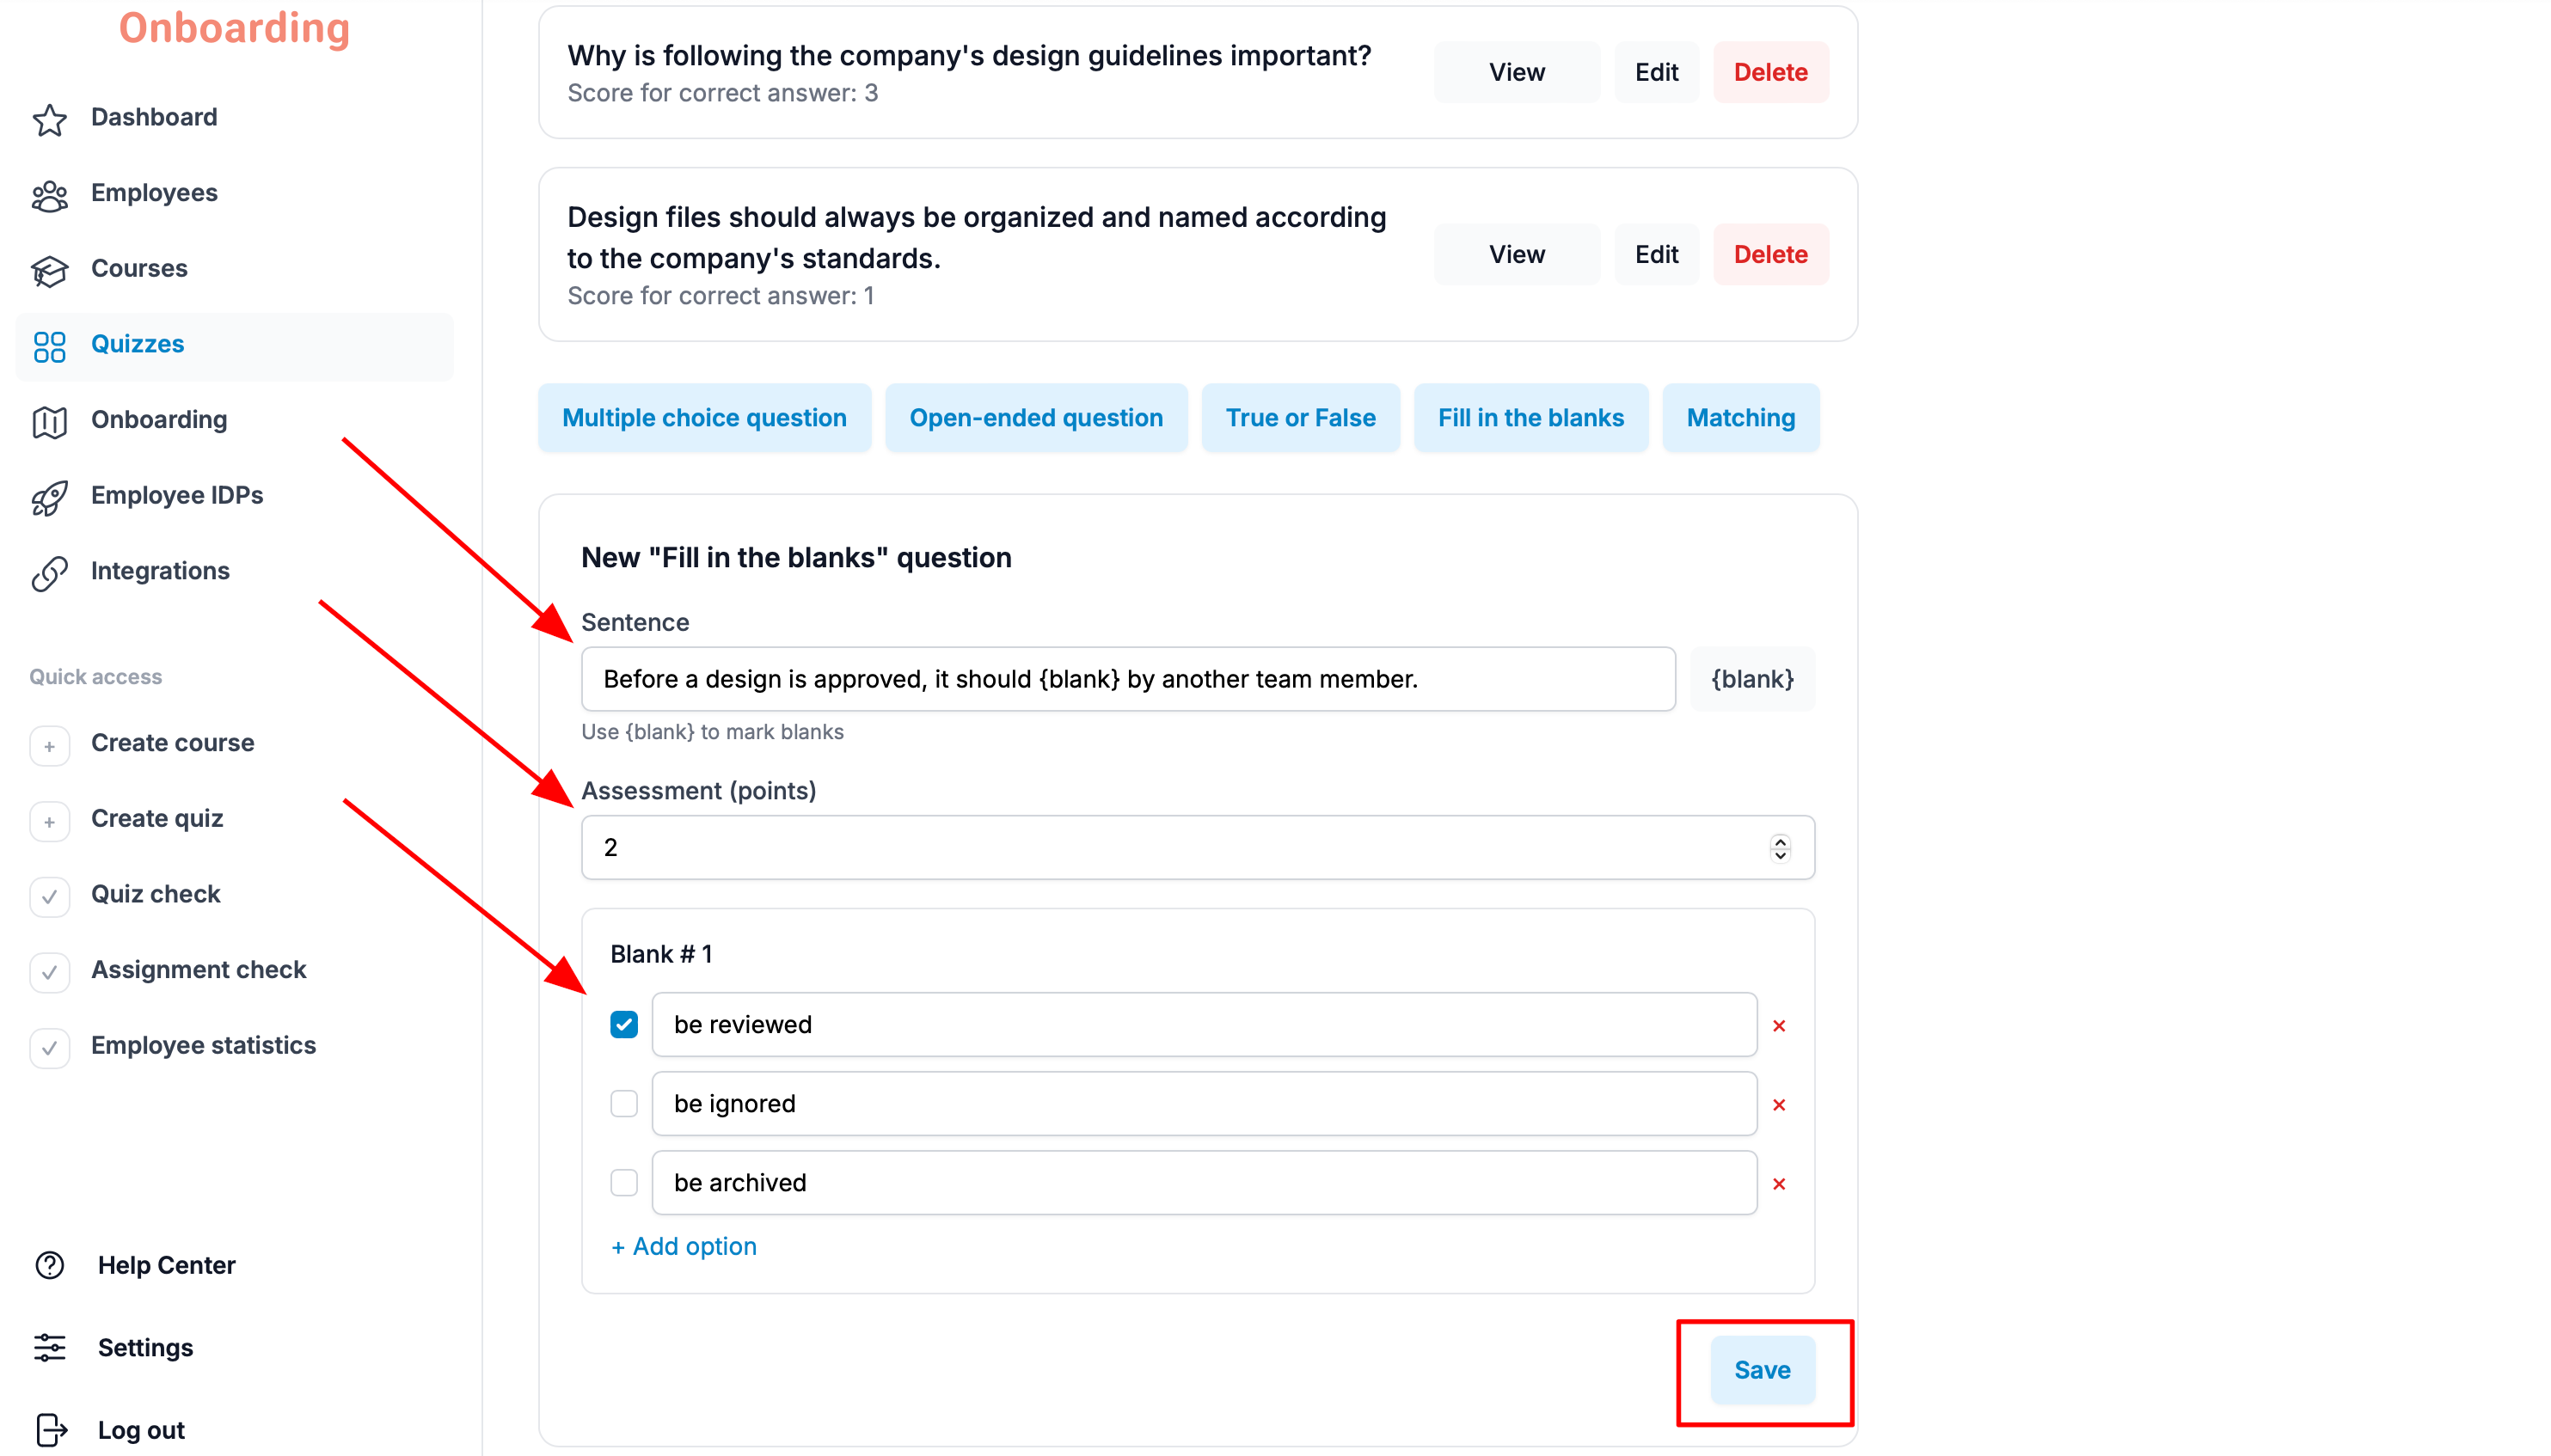
A question creation form opens below, with the following fields:
- Sentence – the question or statement text with gaps. Mark each gap with the {blank} placeholder — you'll find it to the right of the «Sentence» field.
- Assessment (points) – how many points the employee earns for answering correctly.
- Blank #1 – the answer options for the first gap in the text. Mark the correct option.
A sentence can contain several gaps. For each one, the system automatically creates a separate answer-options block (Blank #2, Blank #3, and so on).
Once all the fields are filled in, click «Save».
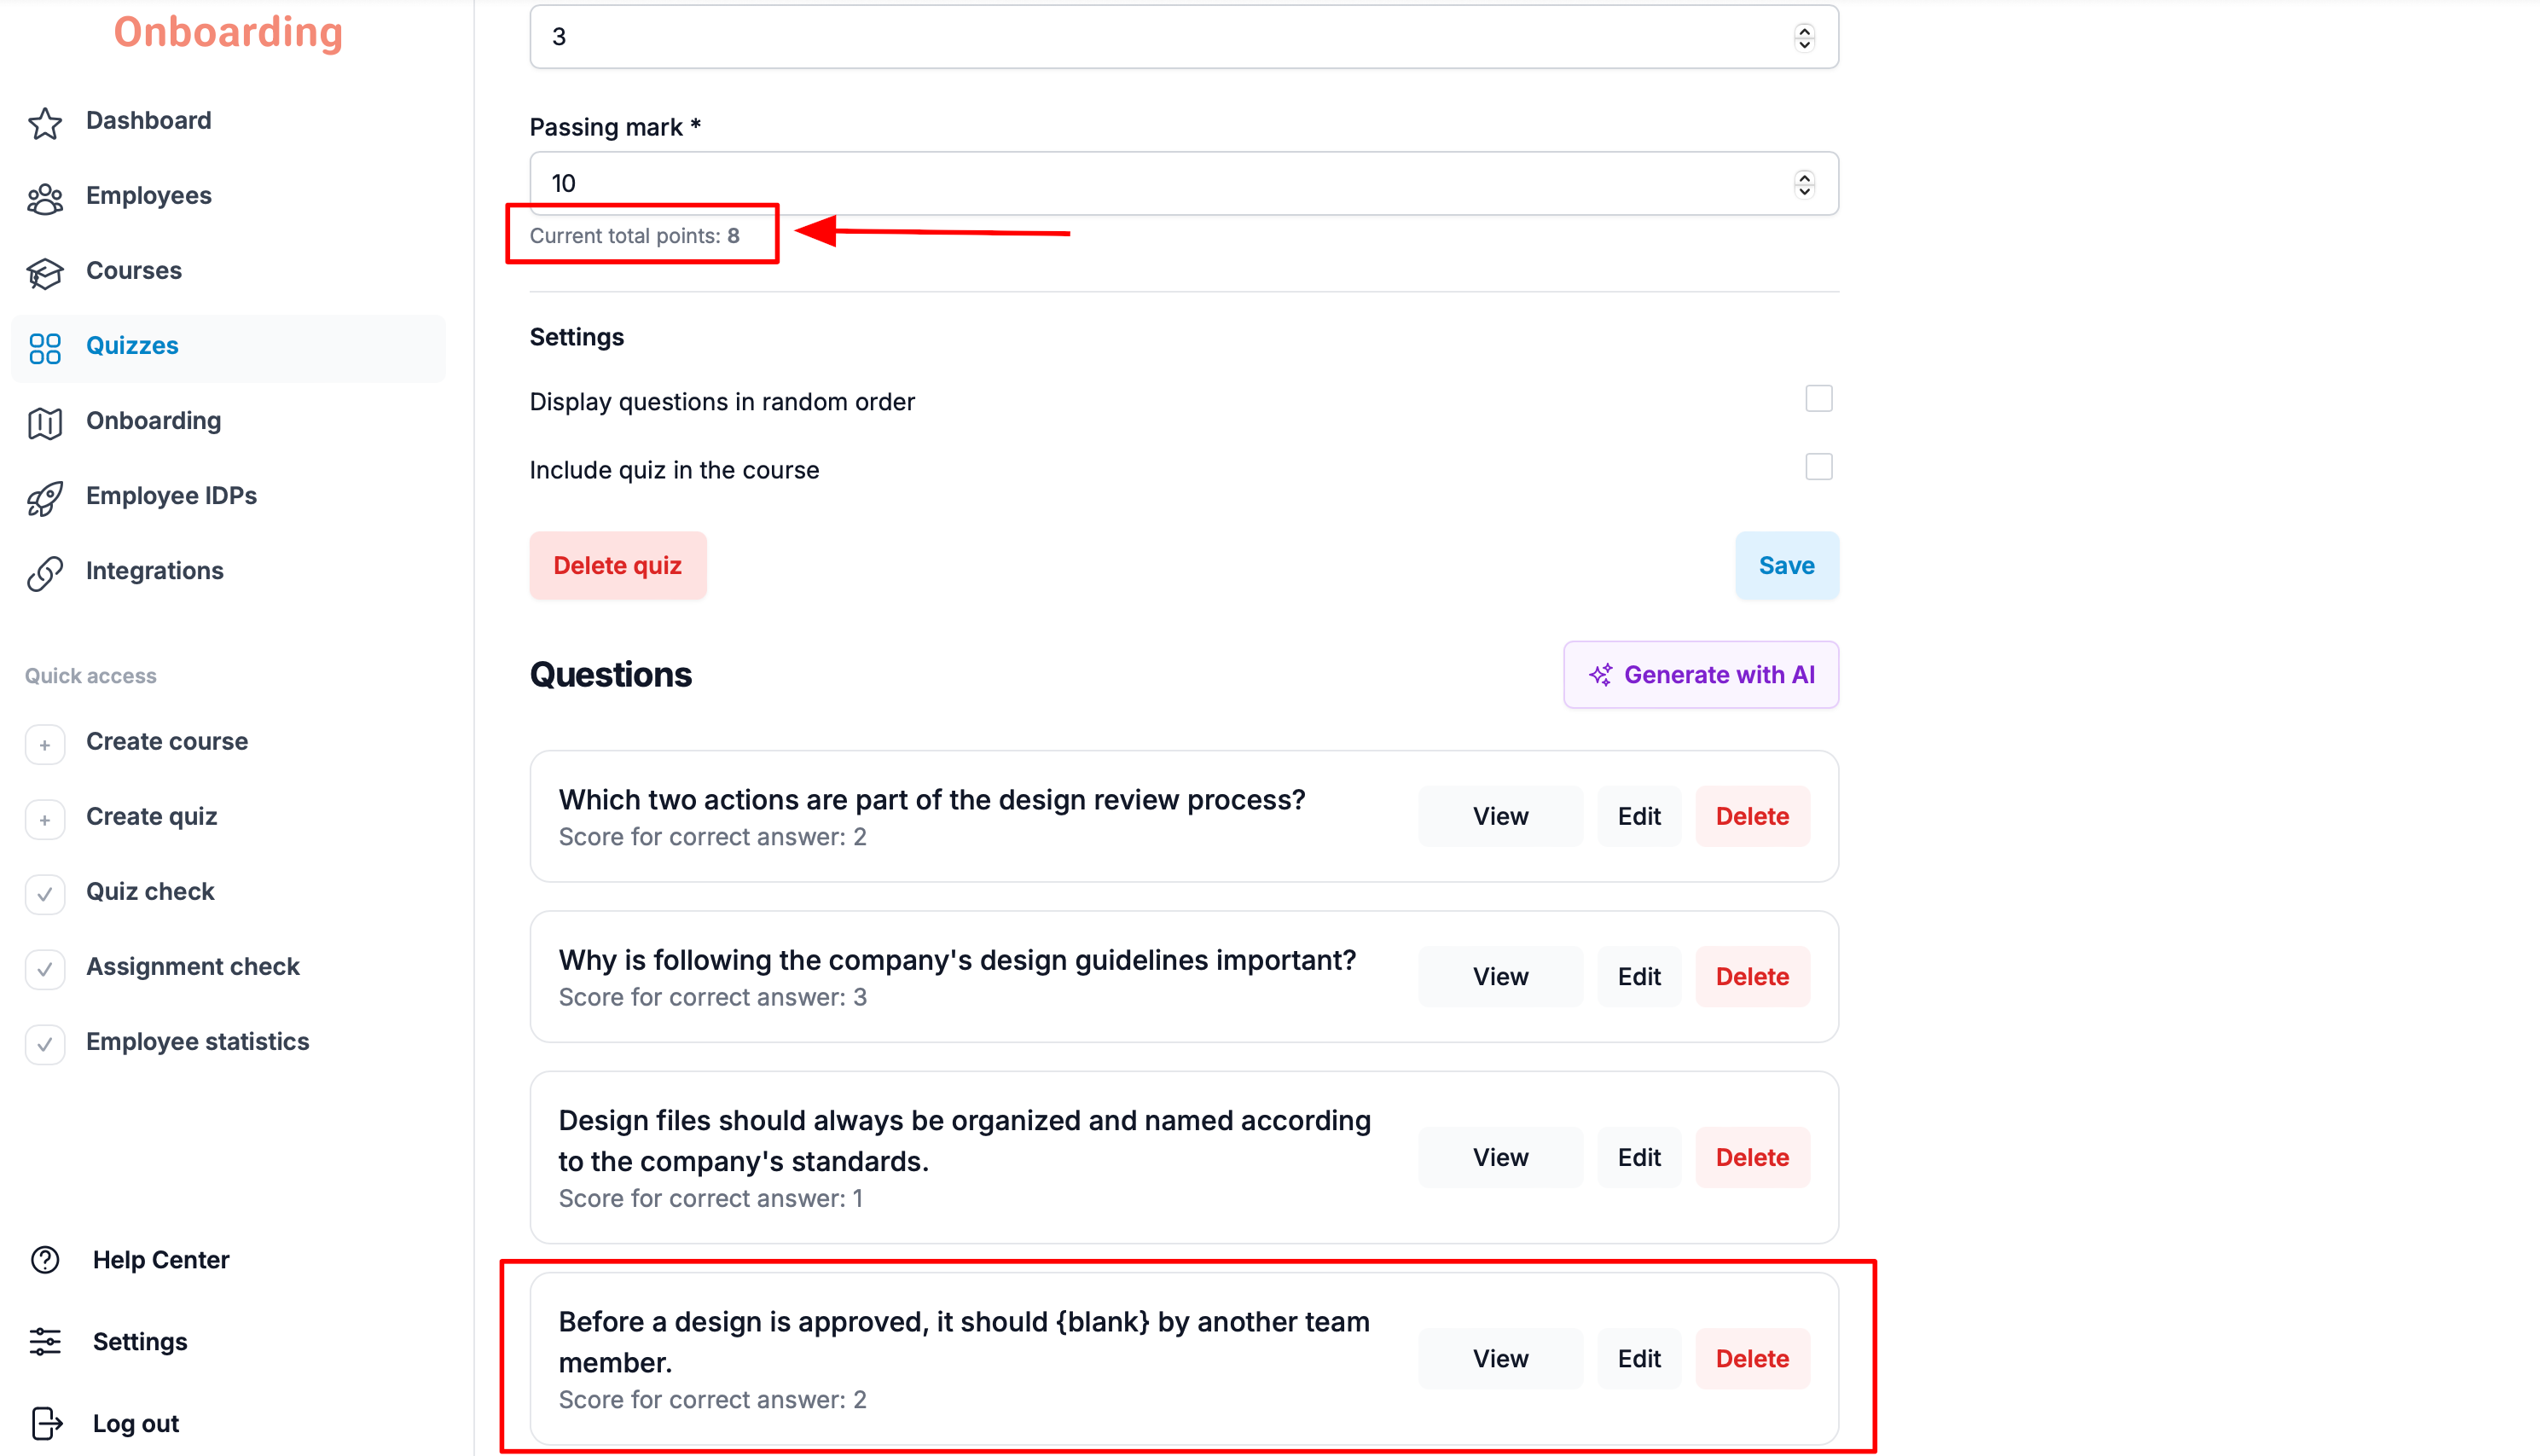
The new question now appears in the «Questions» block, and its points have been automatically added to the quiz's total, shown under the «Passing mark» field 🎉
Use Fill in the blanks questions to check knowledge of terms, standards, process steps, and anything else where exact wording matters.
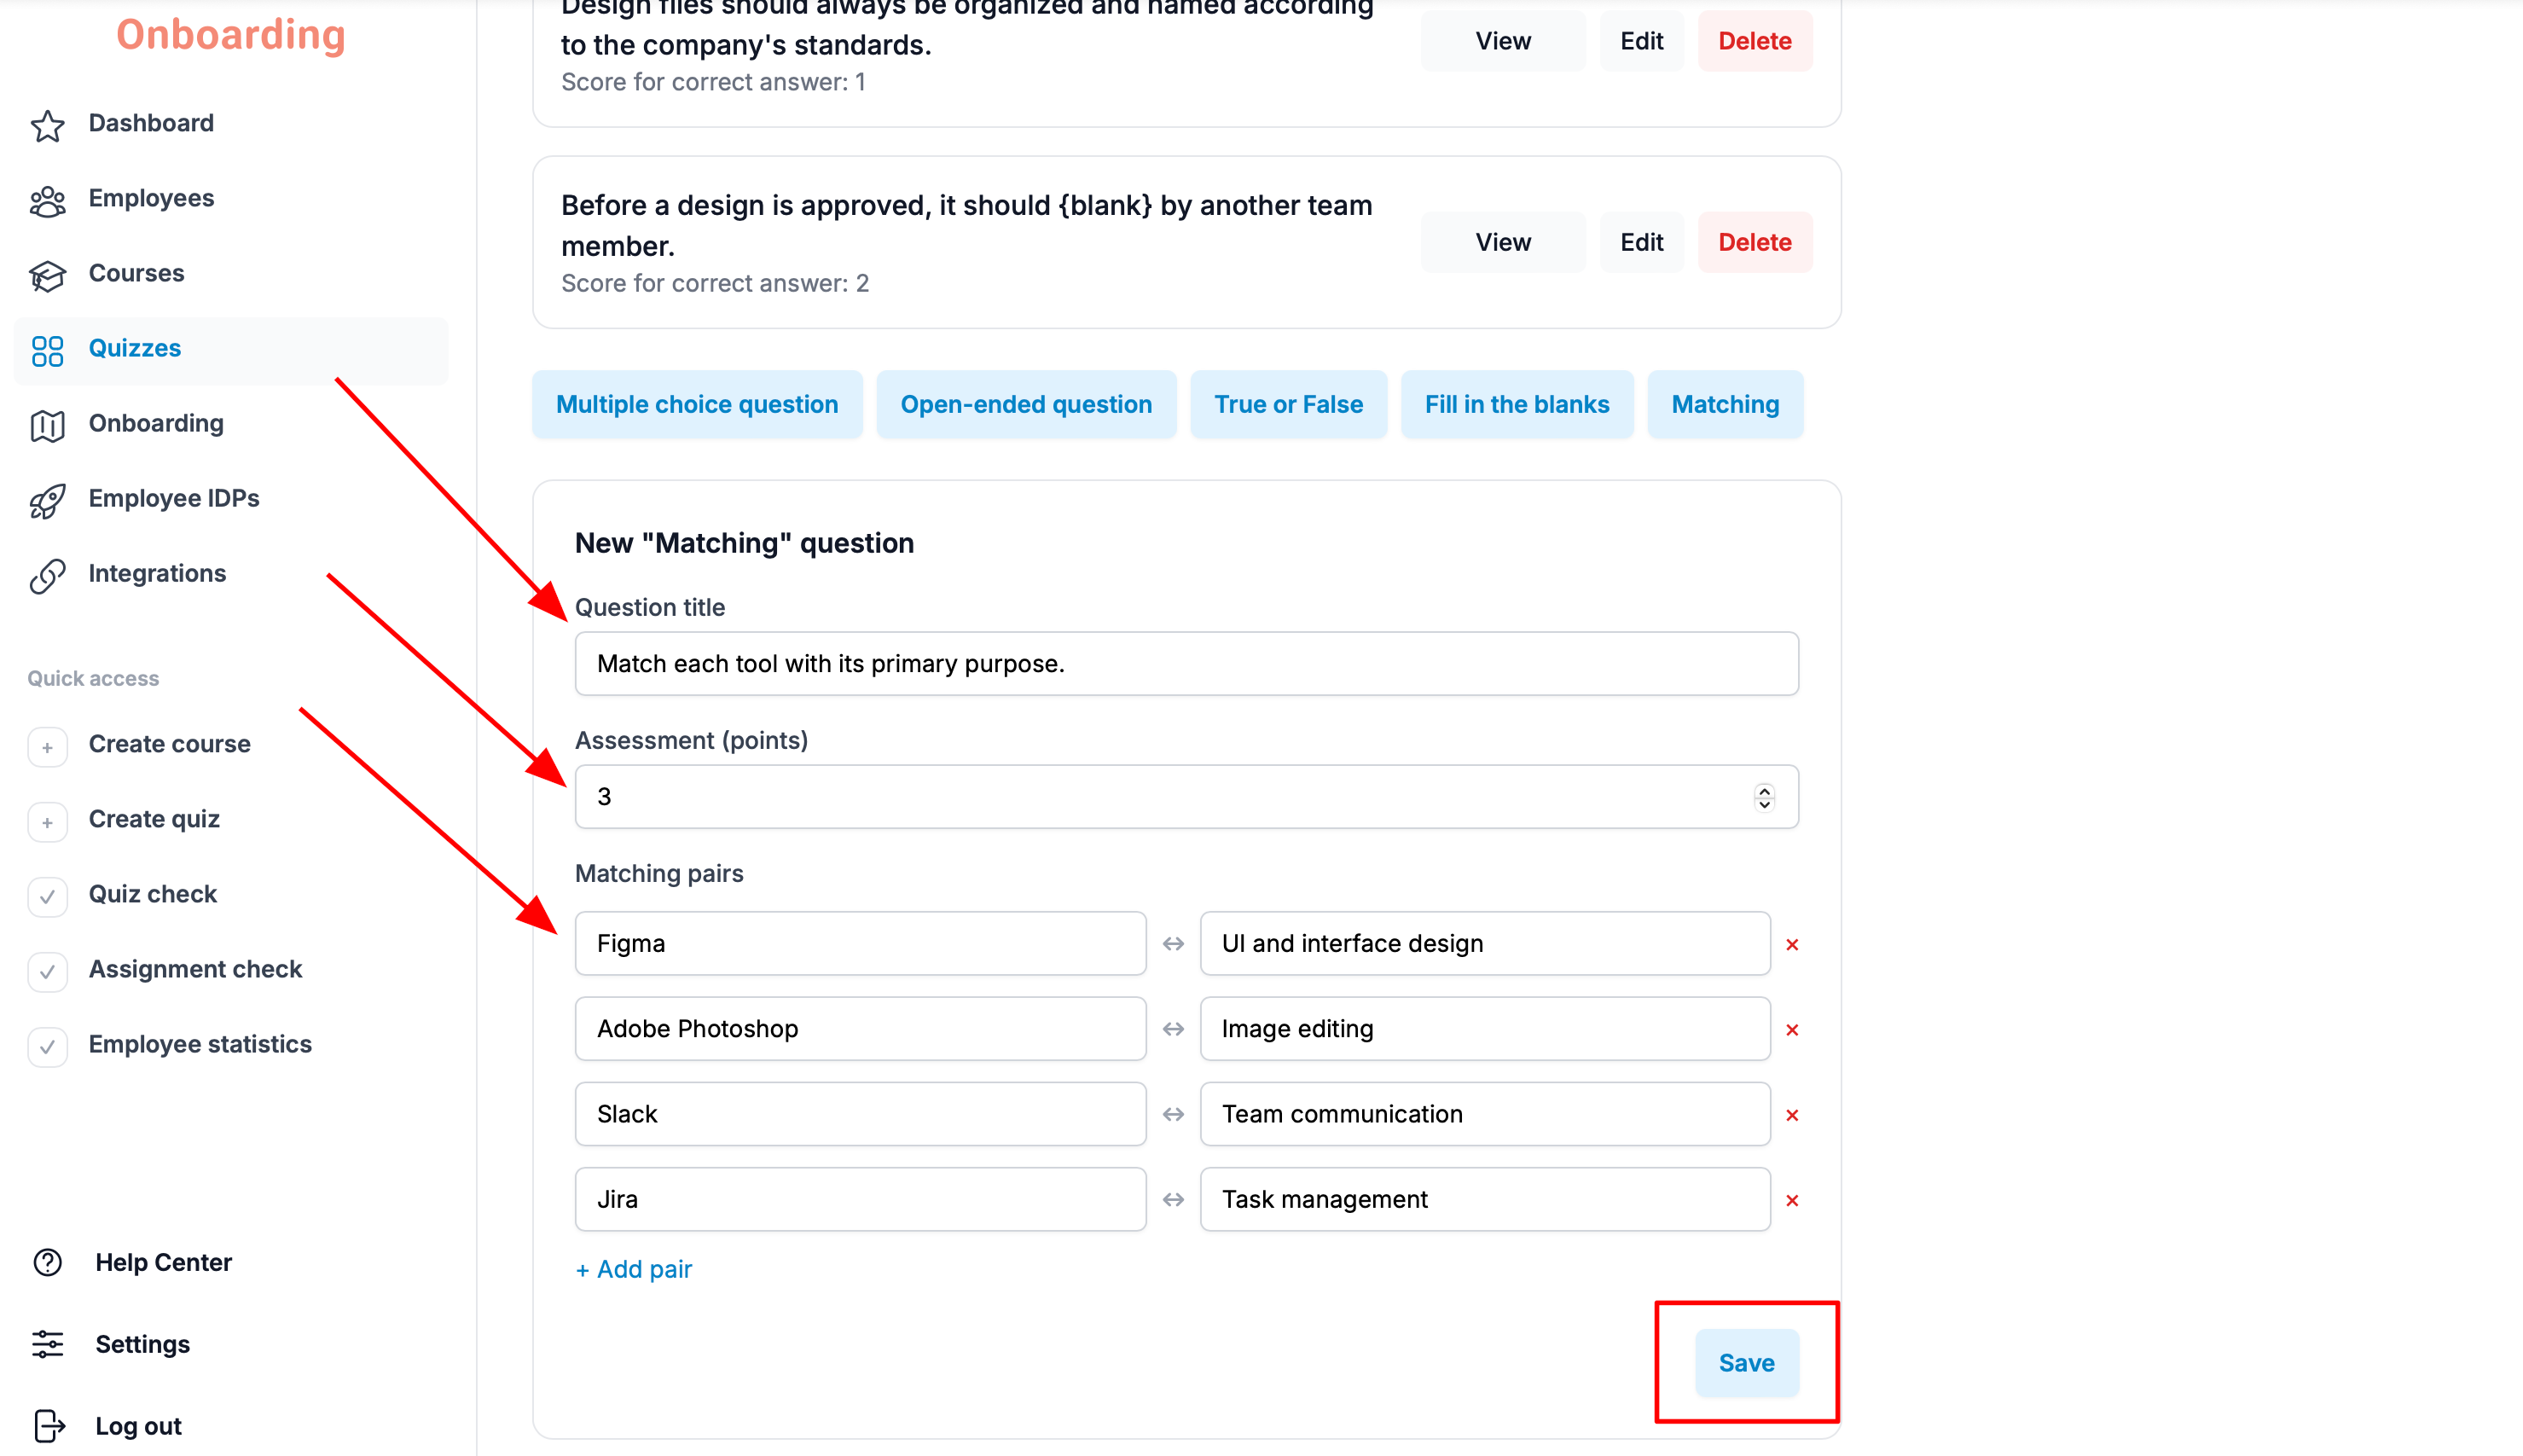
Creating a «Matching» question
A Matching question checks understanding of relationships between concepts, terms, definitions, process steps, and other elements that need to be correctly paired with each other.
To add one, click the «Matching» button in the «Questions» block on the quiz editing page.
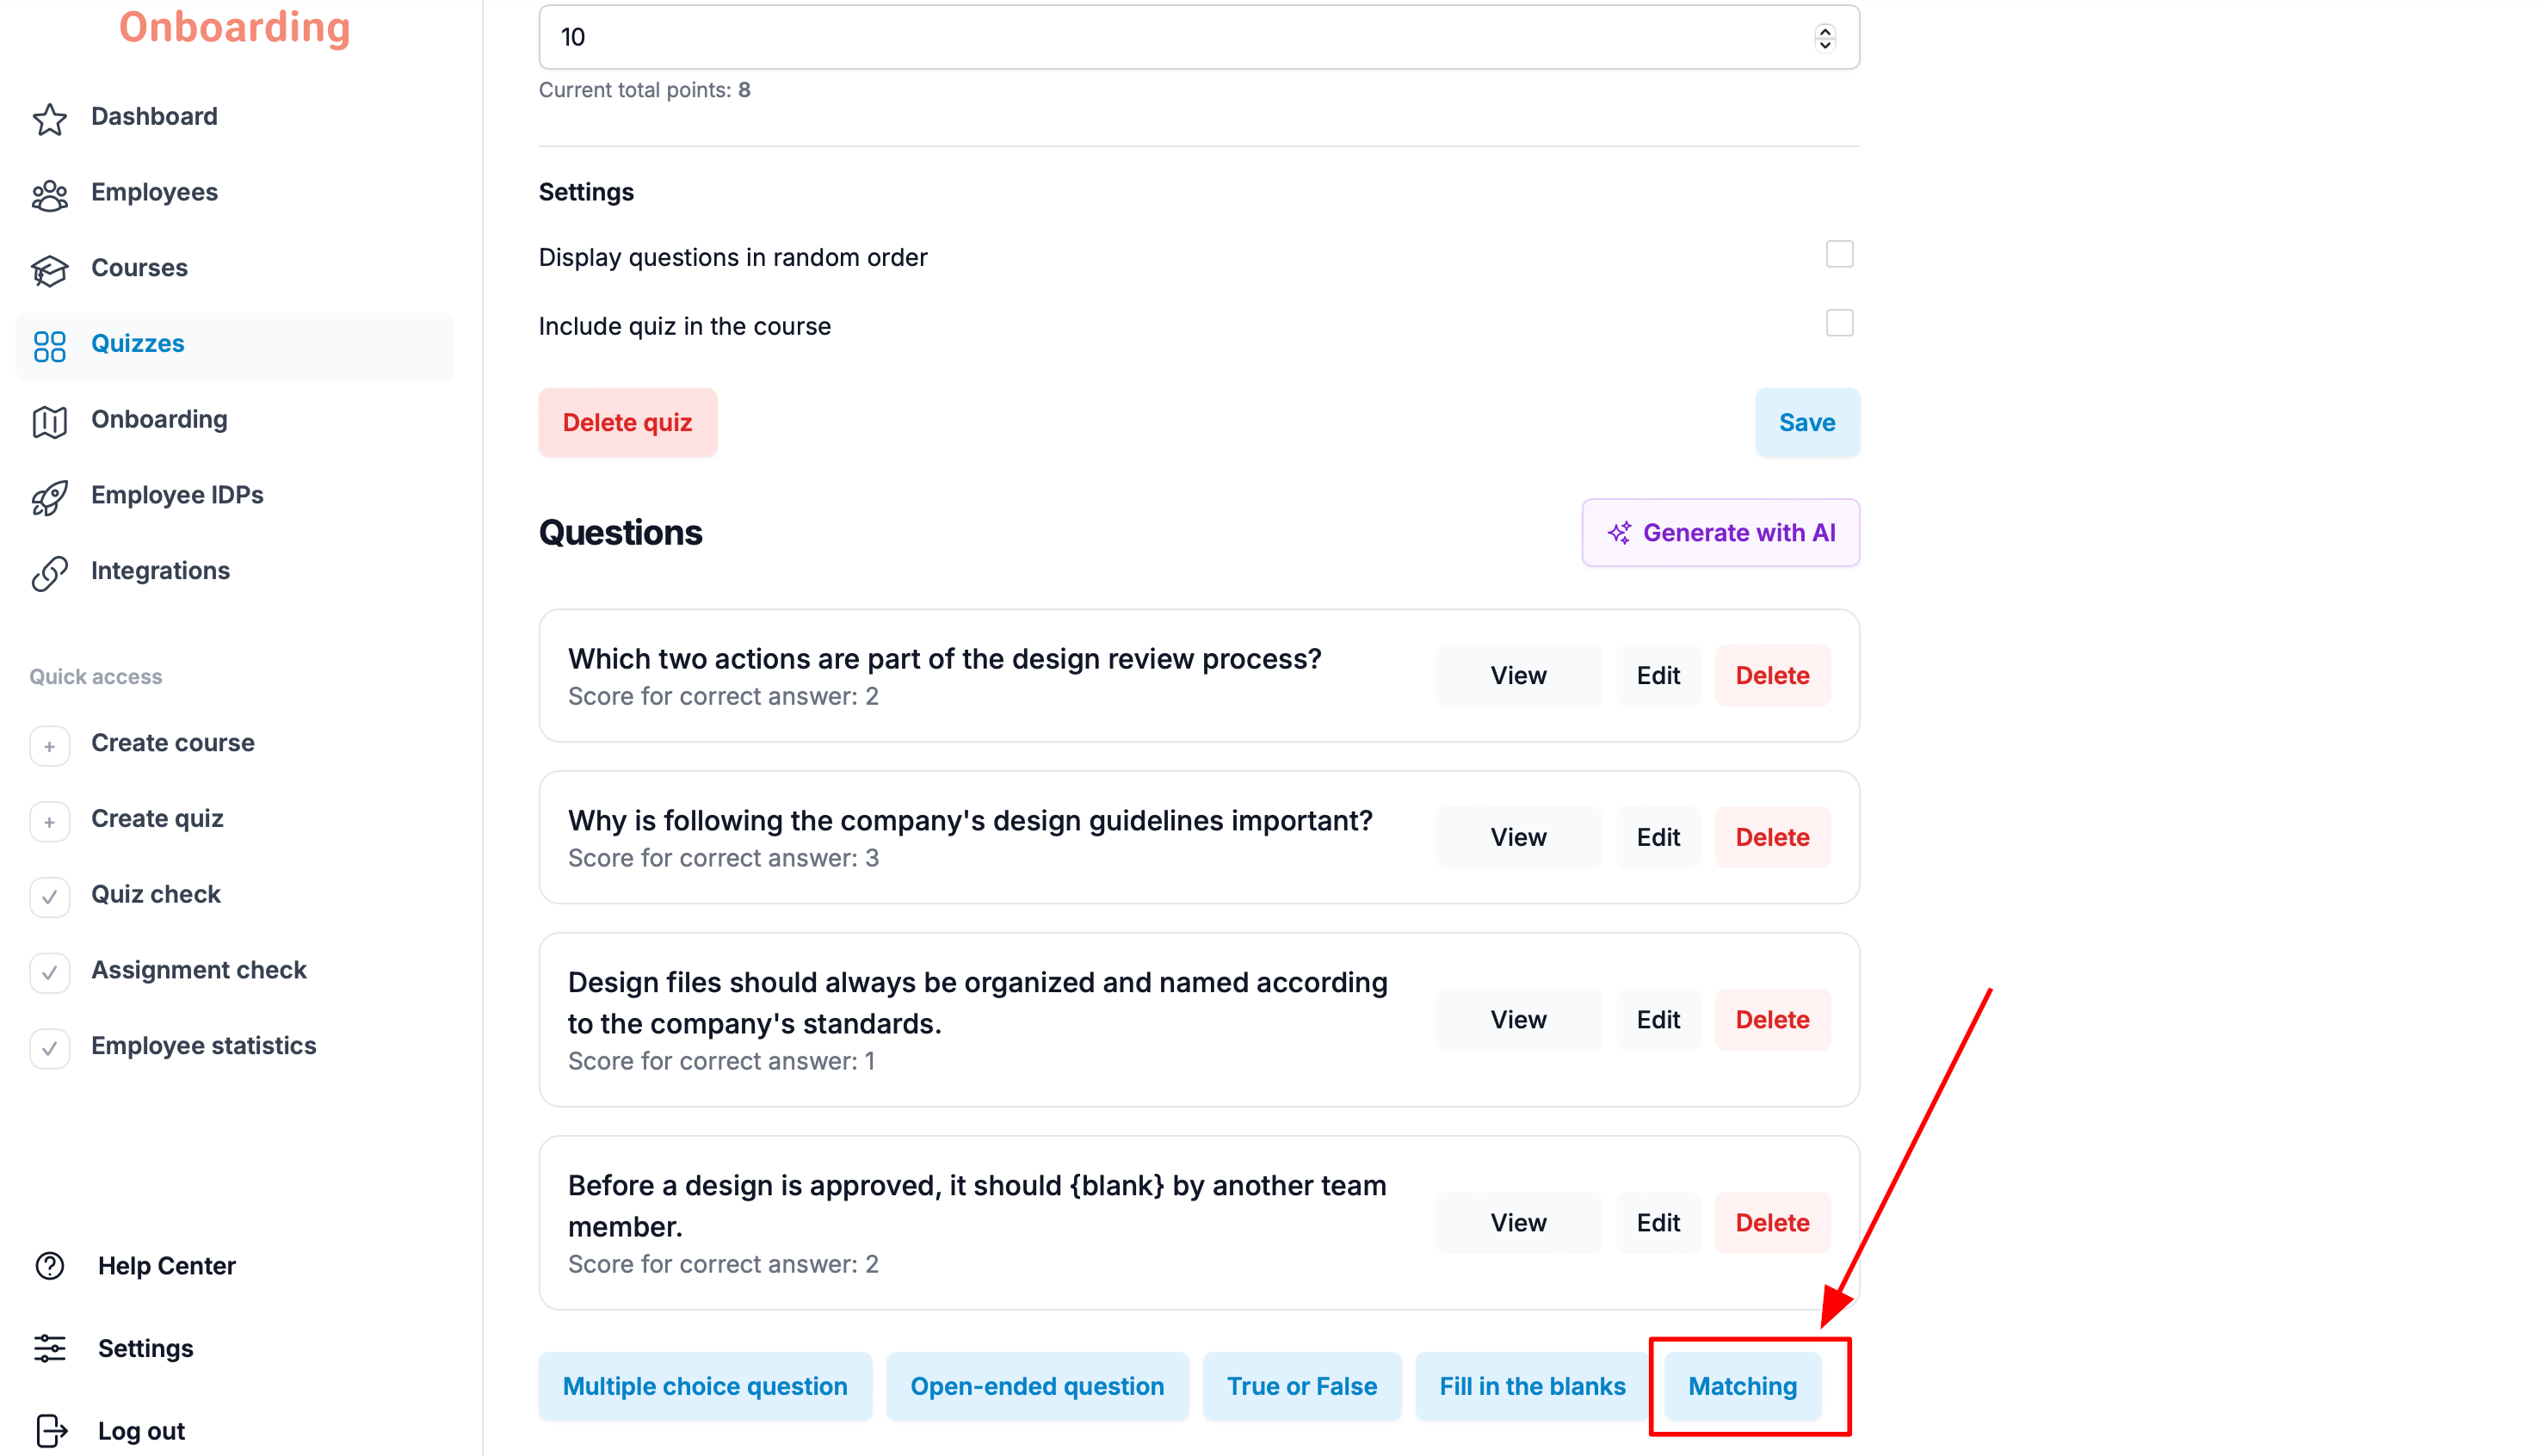
A question creation form opens below, with the following fields:
- Question title – the question text employees will see.
- Assessment (points) – how many points the employee earns for answering correctly.
- Matching pairs – the elements that need to be correctly paired with each other.
For each pair, enter an item in the left column and its match in the right column.
You can add more pairs with the «+Add pair» button.
Once all the fields are filled in, click «Save».
The new question now appears in the «Questions» block, and its points have been automatically added to the quiz's total, shown under the «Passing mark» field 🎉
Use matching questions to check knowledge of terms, job roles, process steps, products, and other data that needs to be paired up correctly.
Saving and publishing a quiz
Once you've added all the questions and finished setting up the quiz, it's worth reviewing it one more time before publishing.
Before publishing, make sure that:
- the quiz is attached to the right course;
- the quiz name is correct;
- the time limit and number of attempts are set correctly;
- the passing score is less than or equal to the total points across all questions;
- every question you need has been added;
- every question has a correct answer selected.
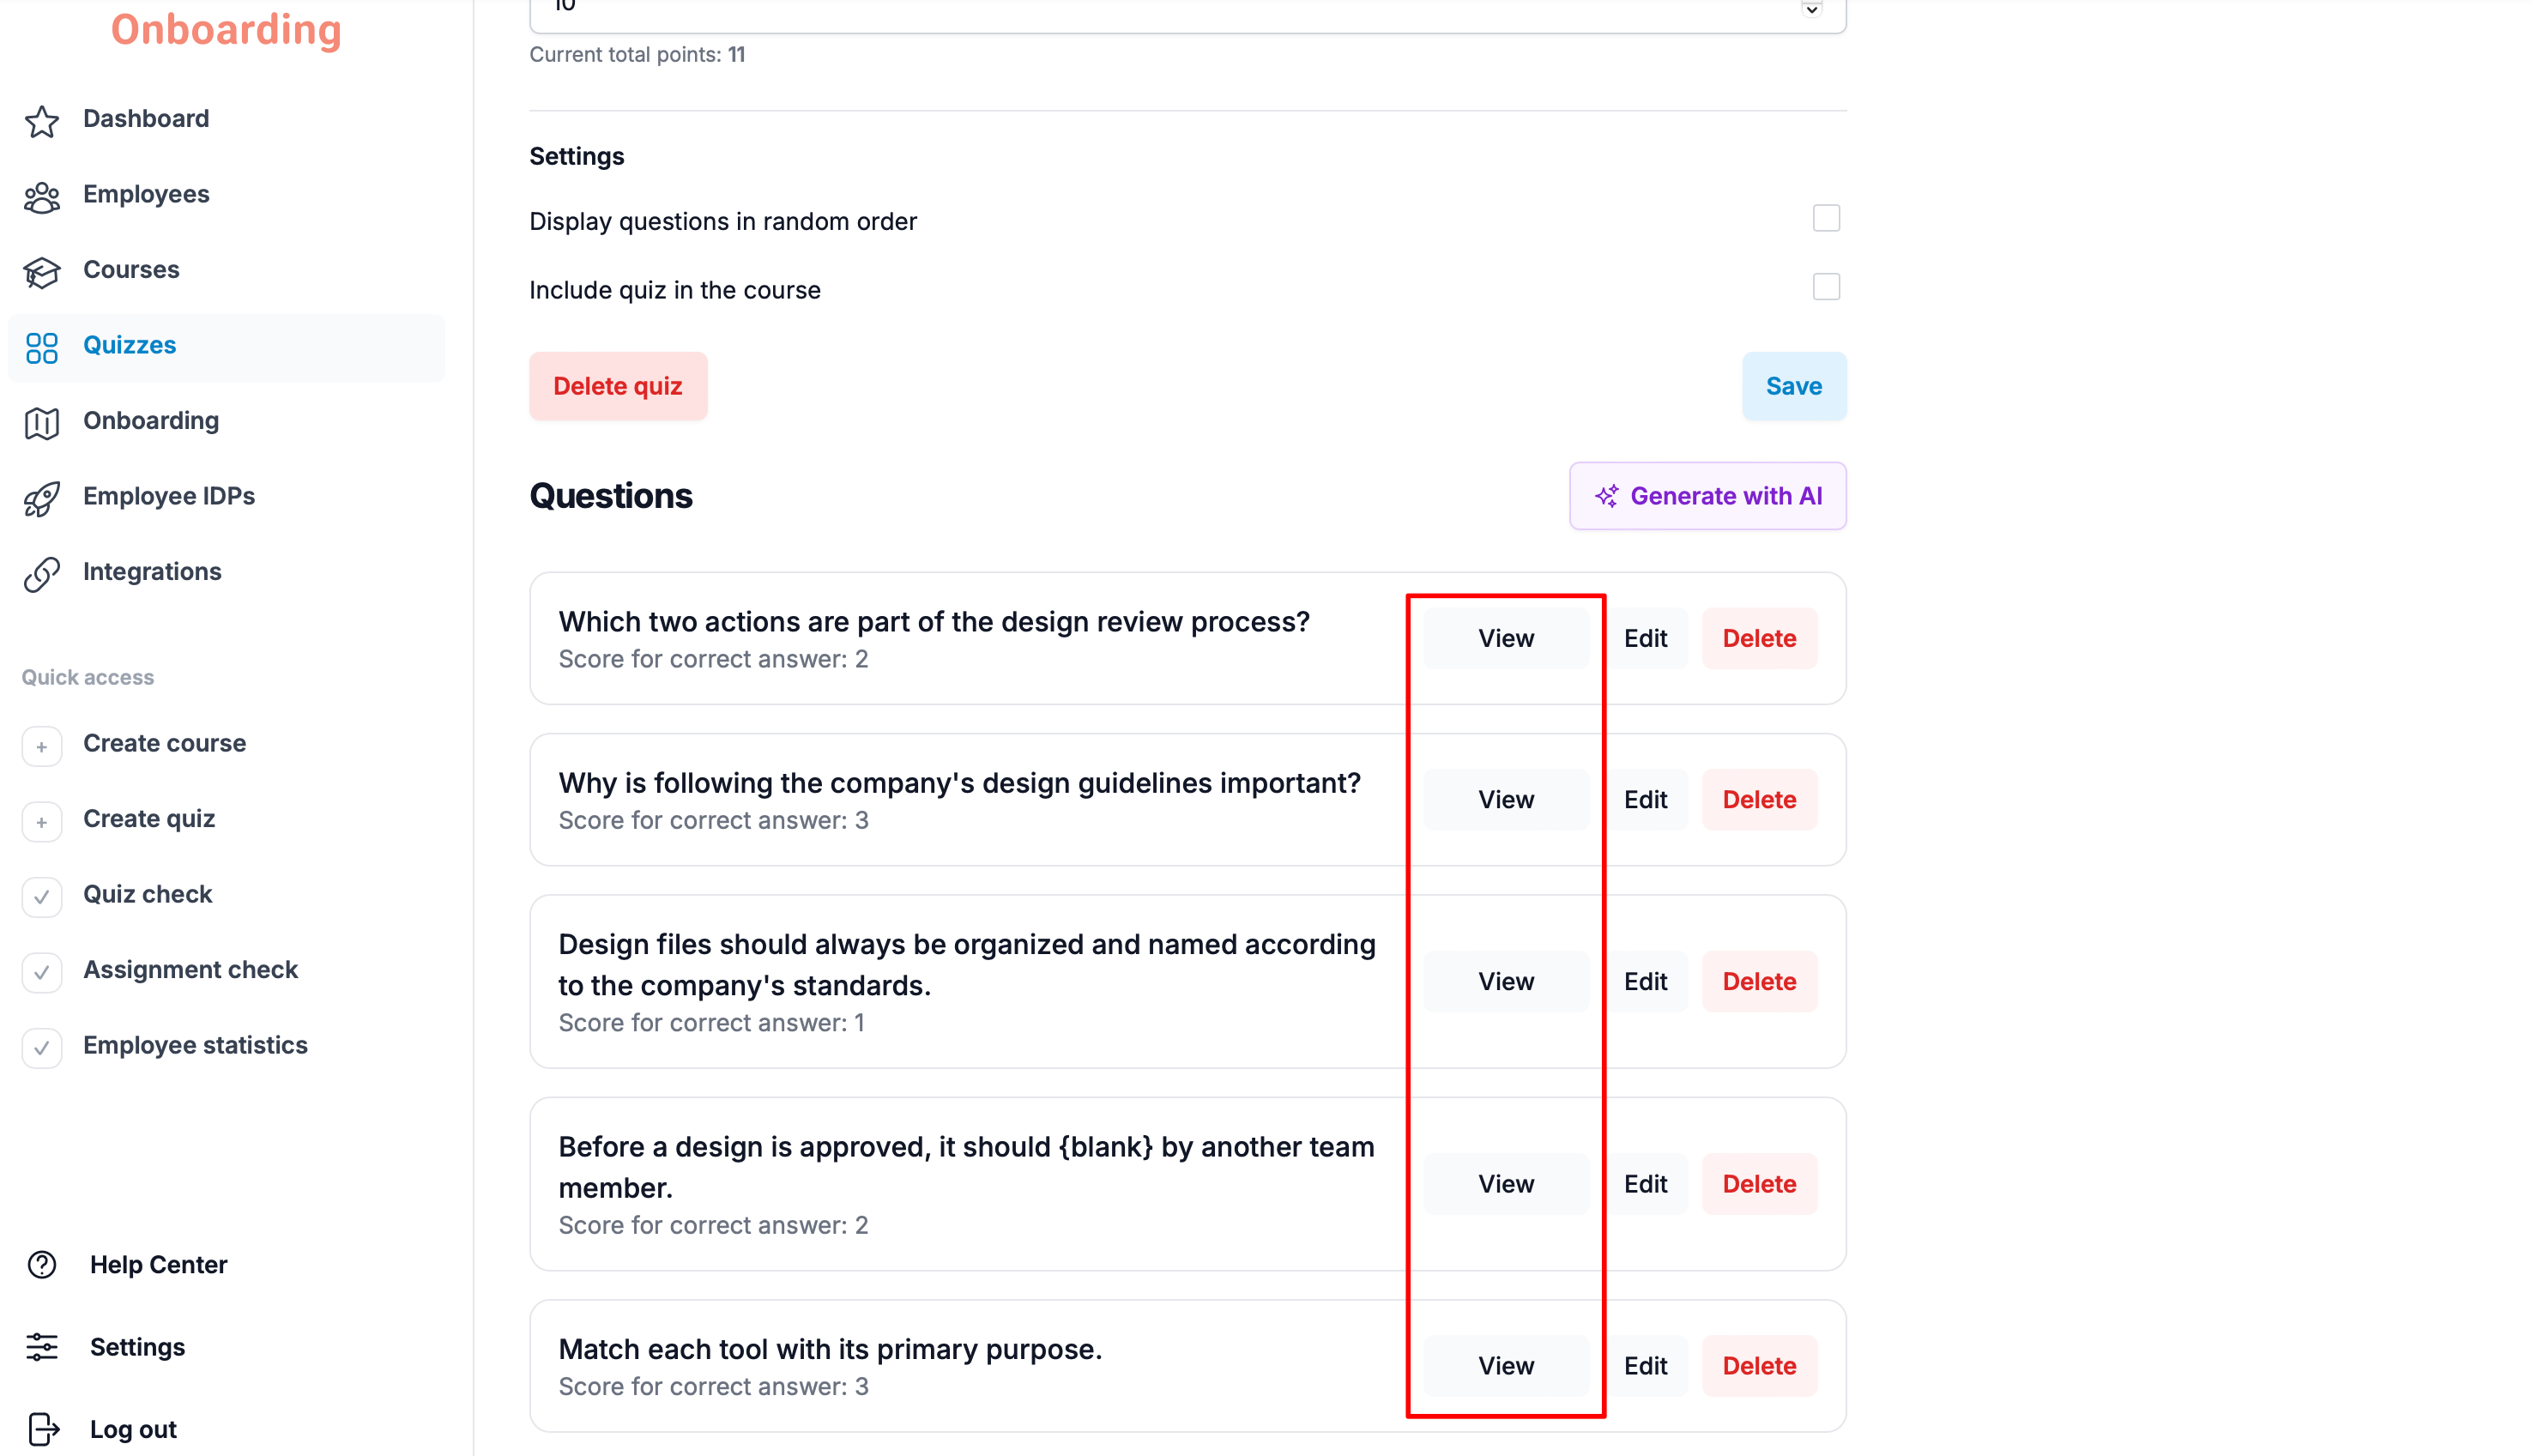
You can view any question if you like — click the «View» button next to it.
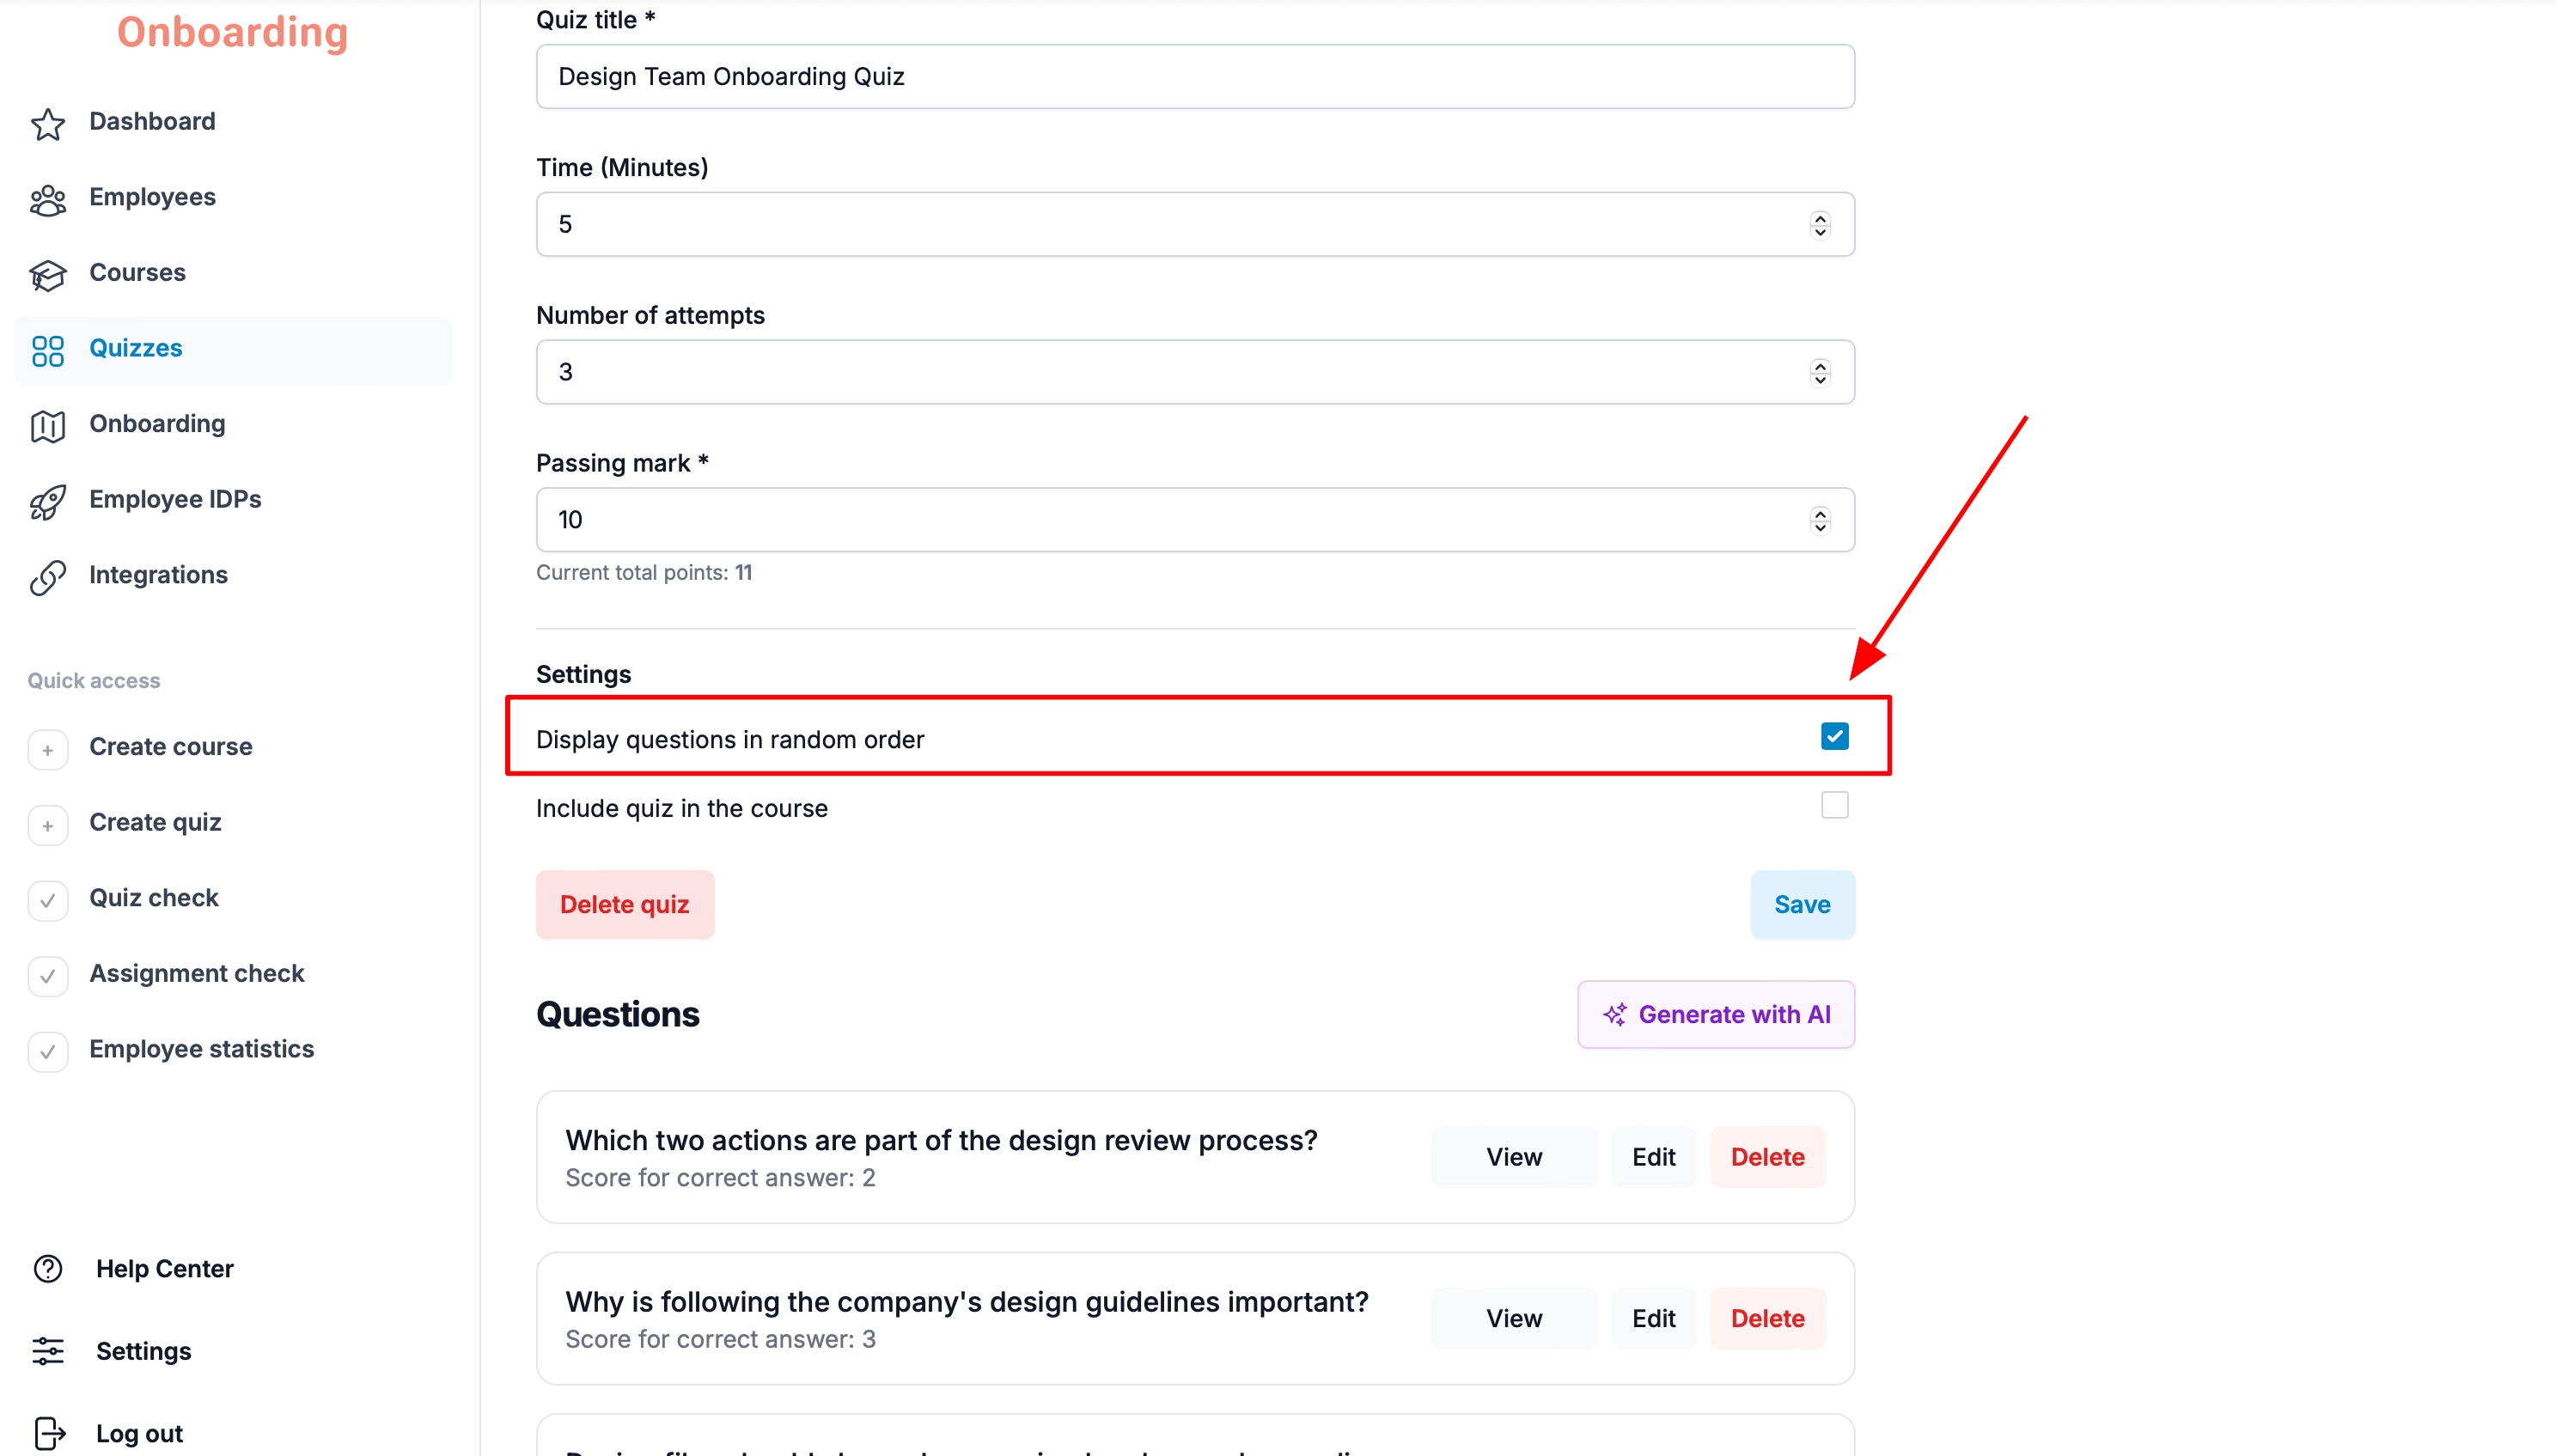
You can also enable the «Display questions in random order» option. With it on, employees see the questions in a random sequence each time, rather than in the order they were created.
To turn it on, tick the corresponding checkbox in the «Settings» block.
How to save a quiz without publishing it?
If you just want to save your changes and keep the quiz as a draft, click «Save» above the «Questions» block.
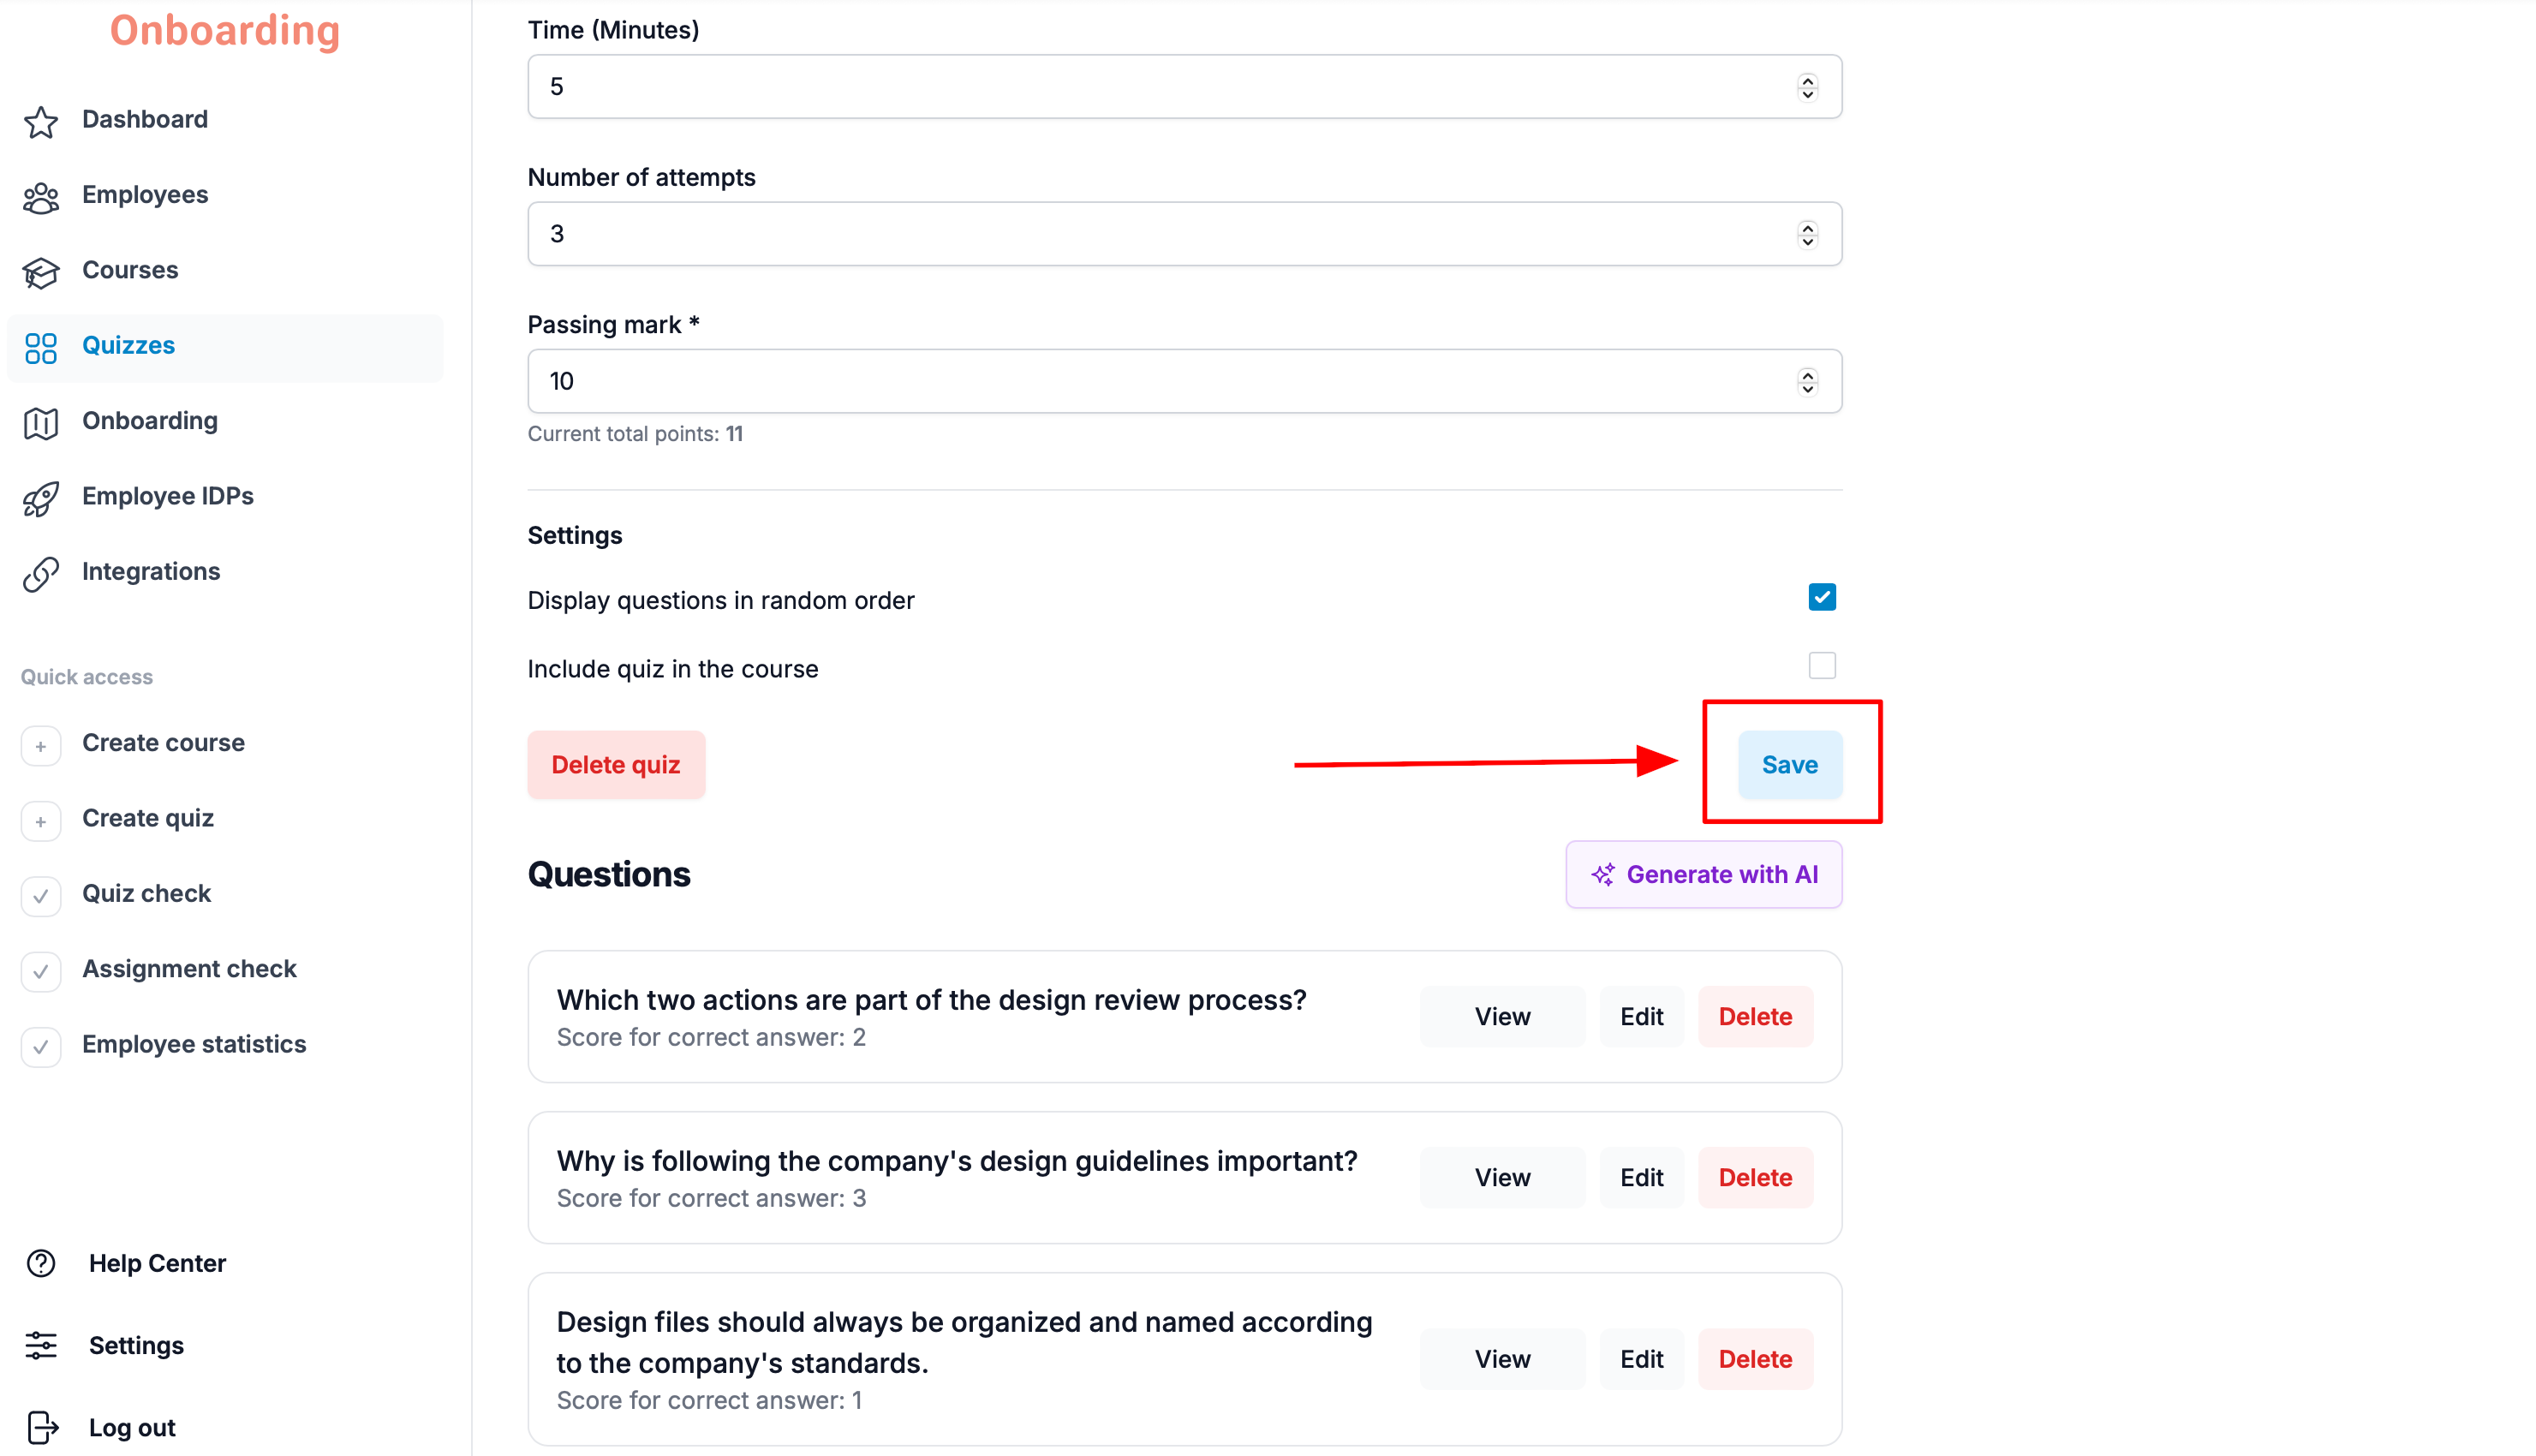
Unpublished quizzes are hidden from employees. This lets you prepare and review a quiz at your own pace before launching the training.
How to save and publish a quiz?
To publish the quiz, tick the «Include quiz in the course» checkbox in the settings block, then click «Save» above the «Questions» block.
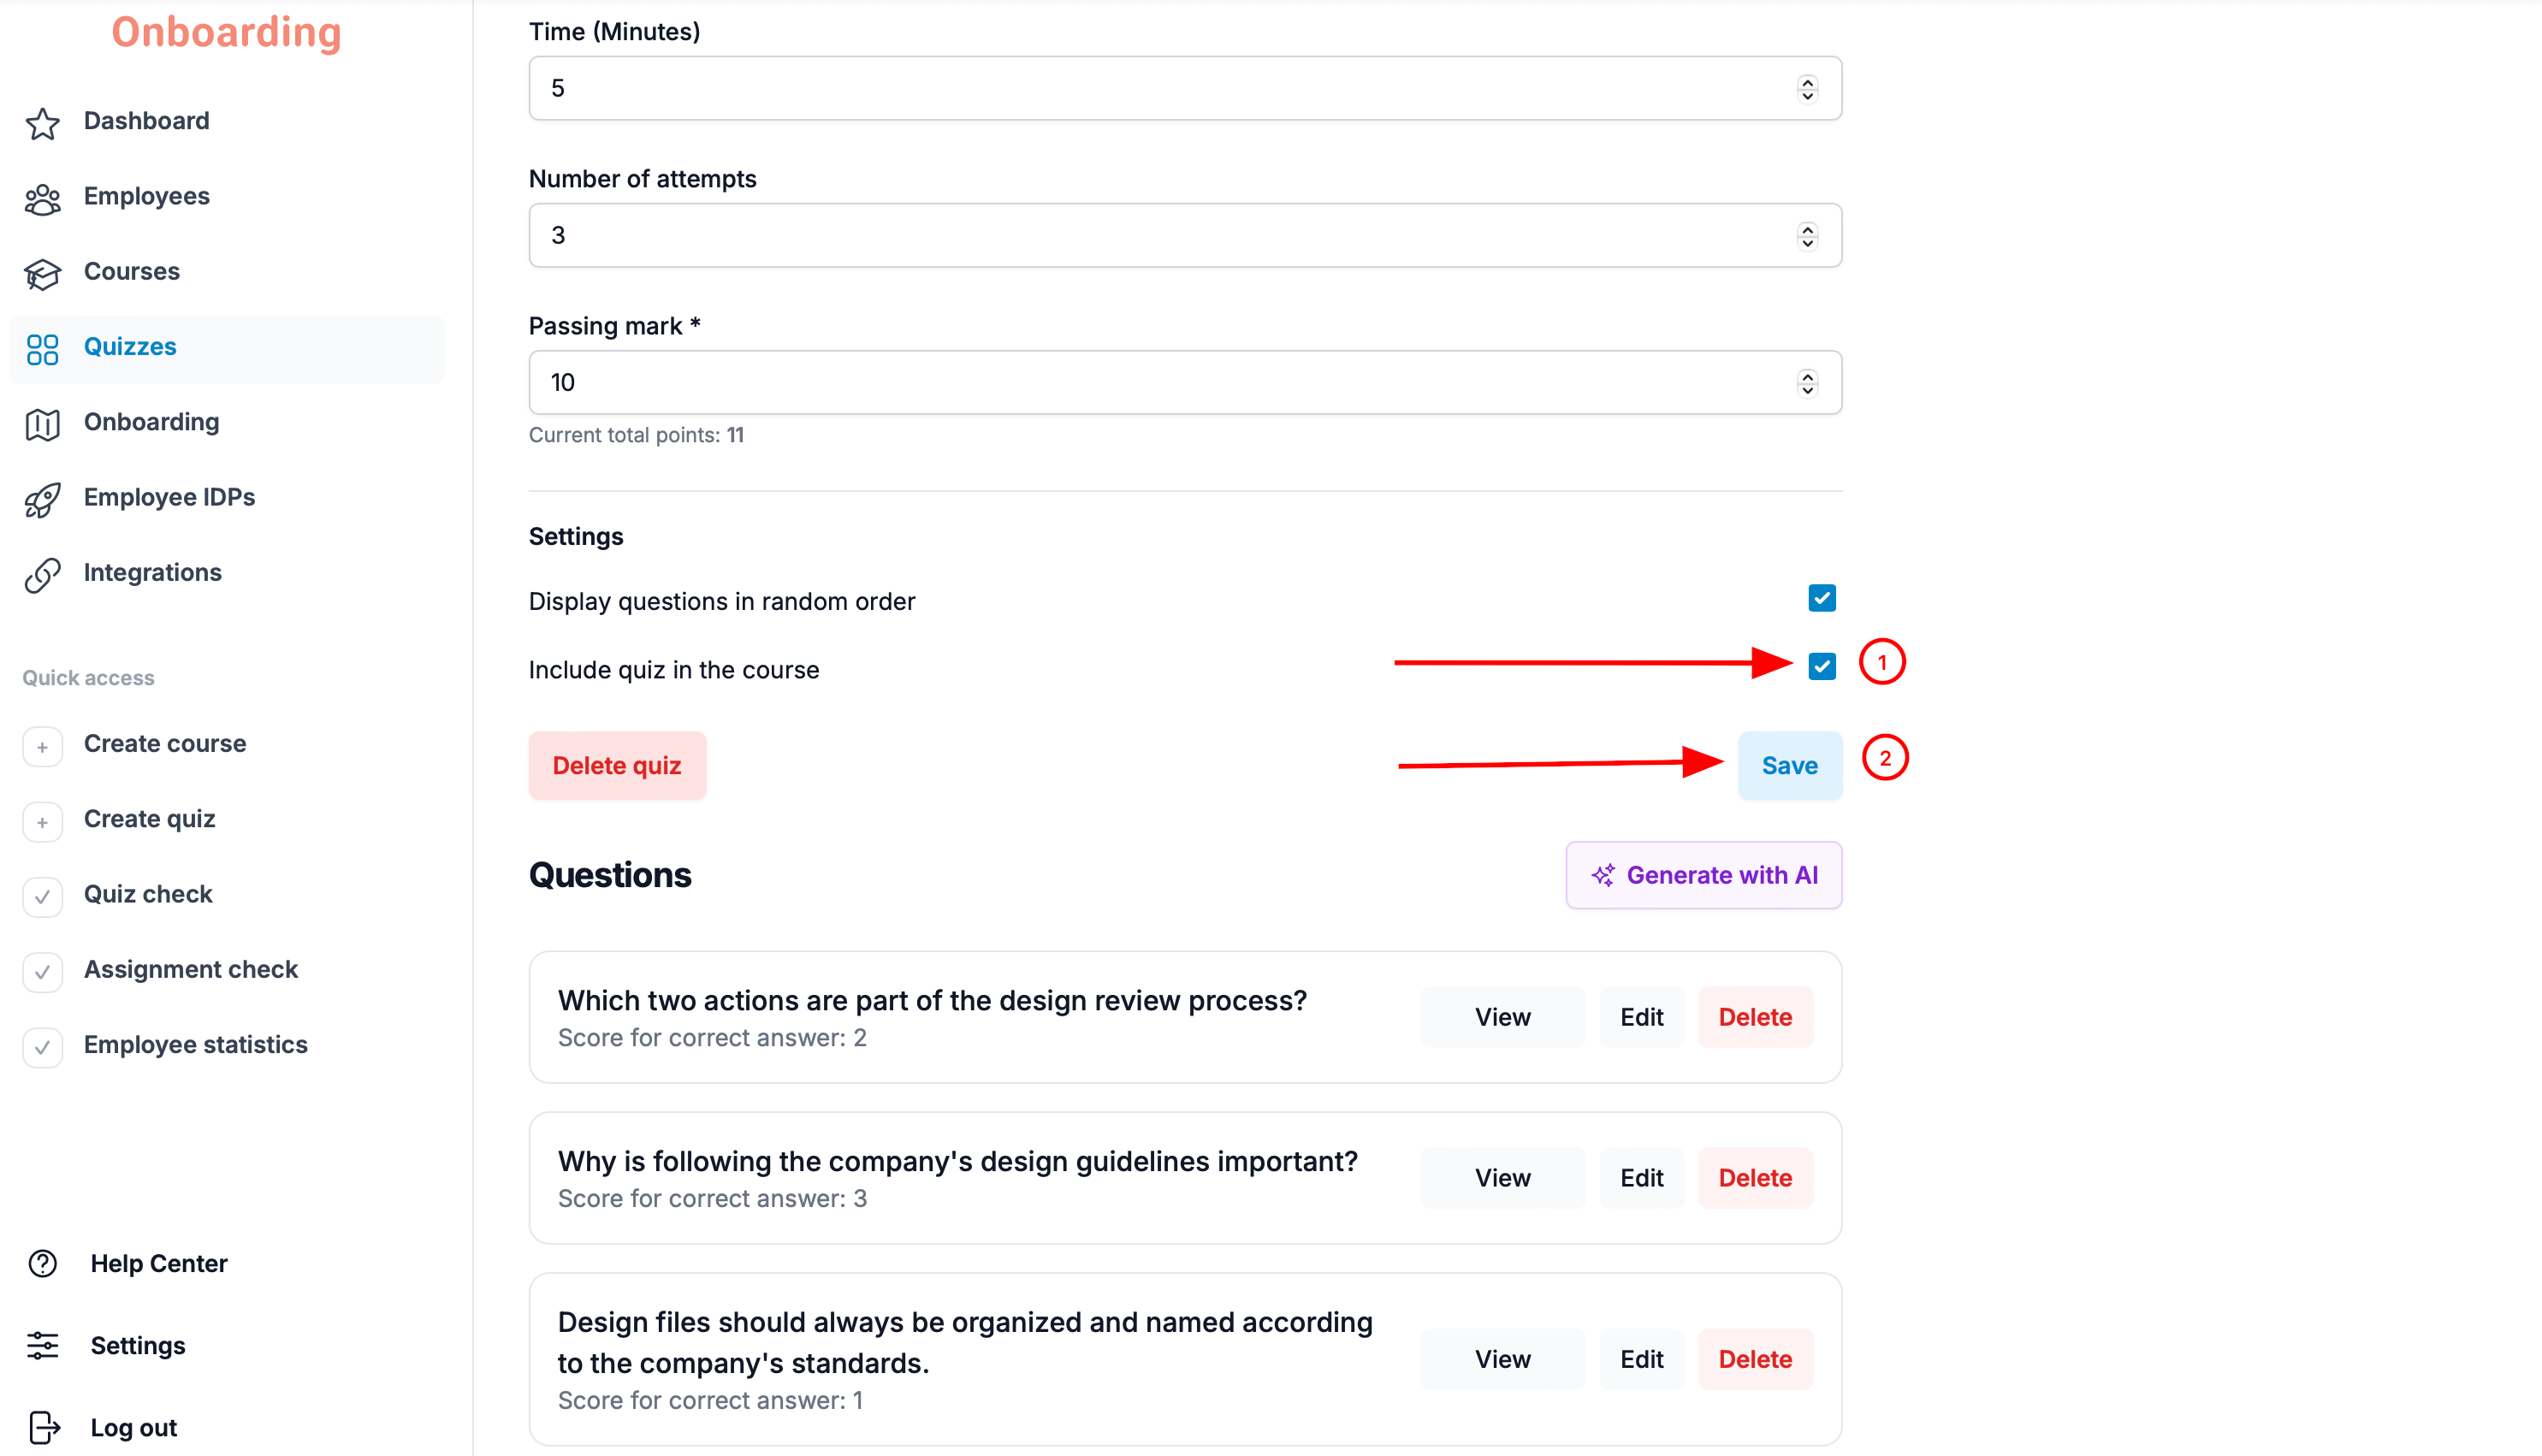
The quiz has been saved and attached to the course 🎉
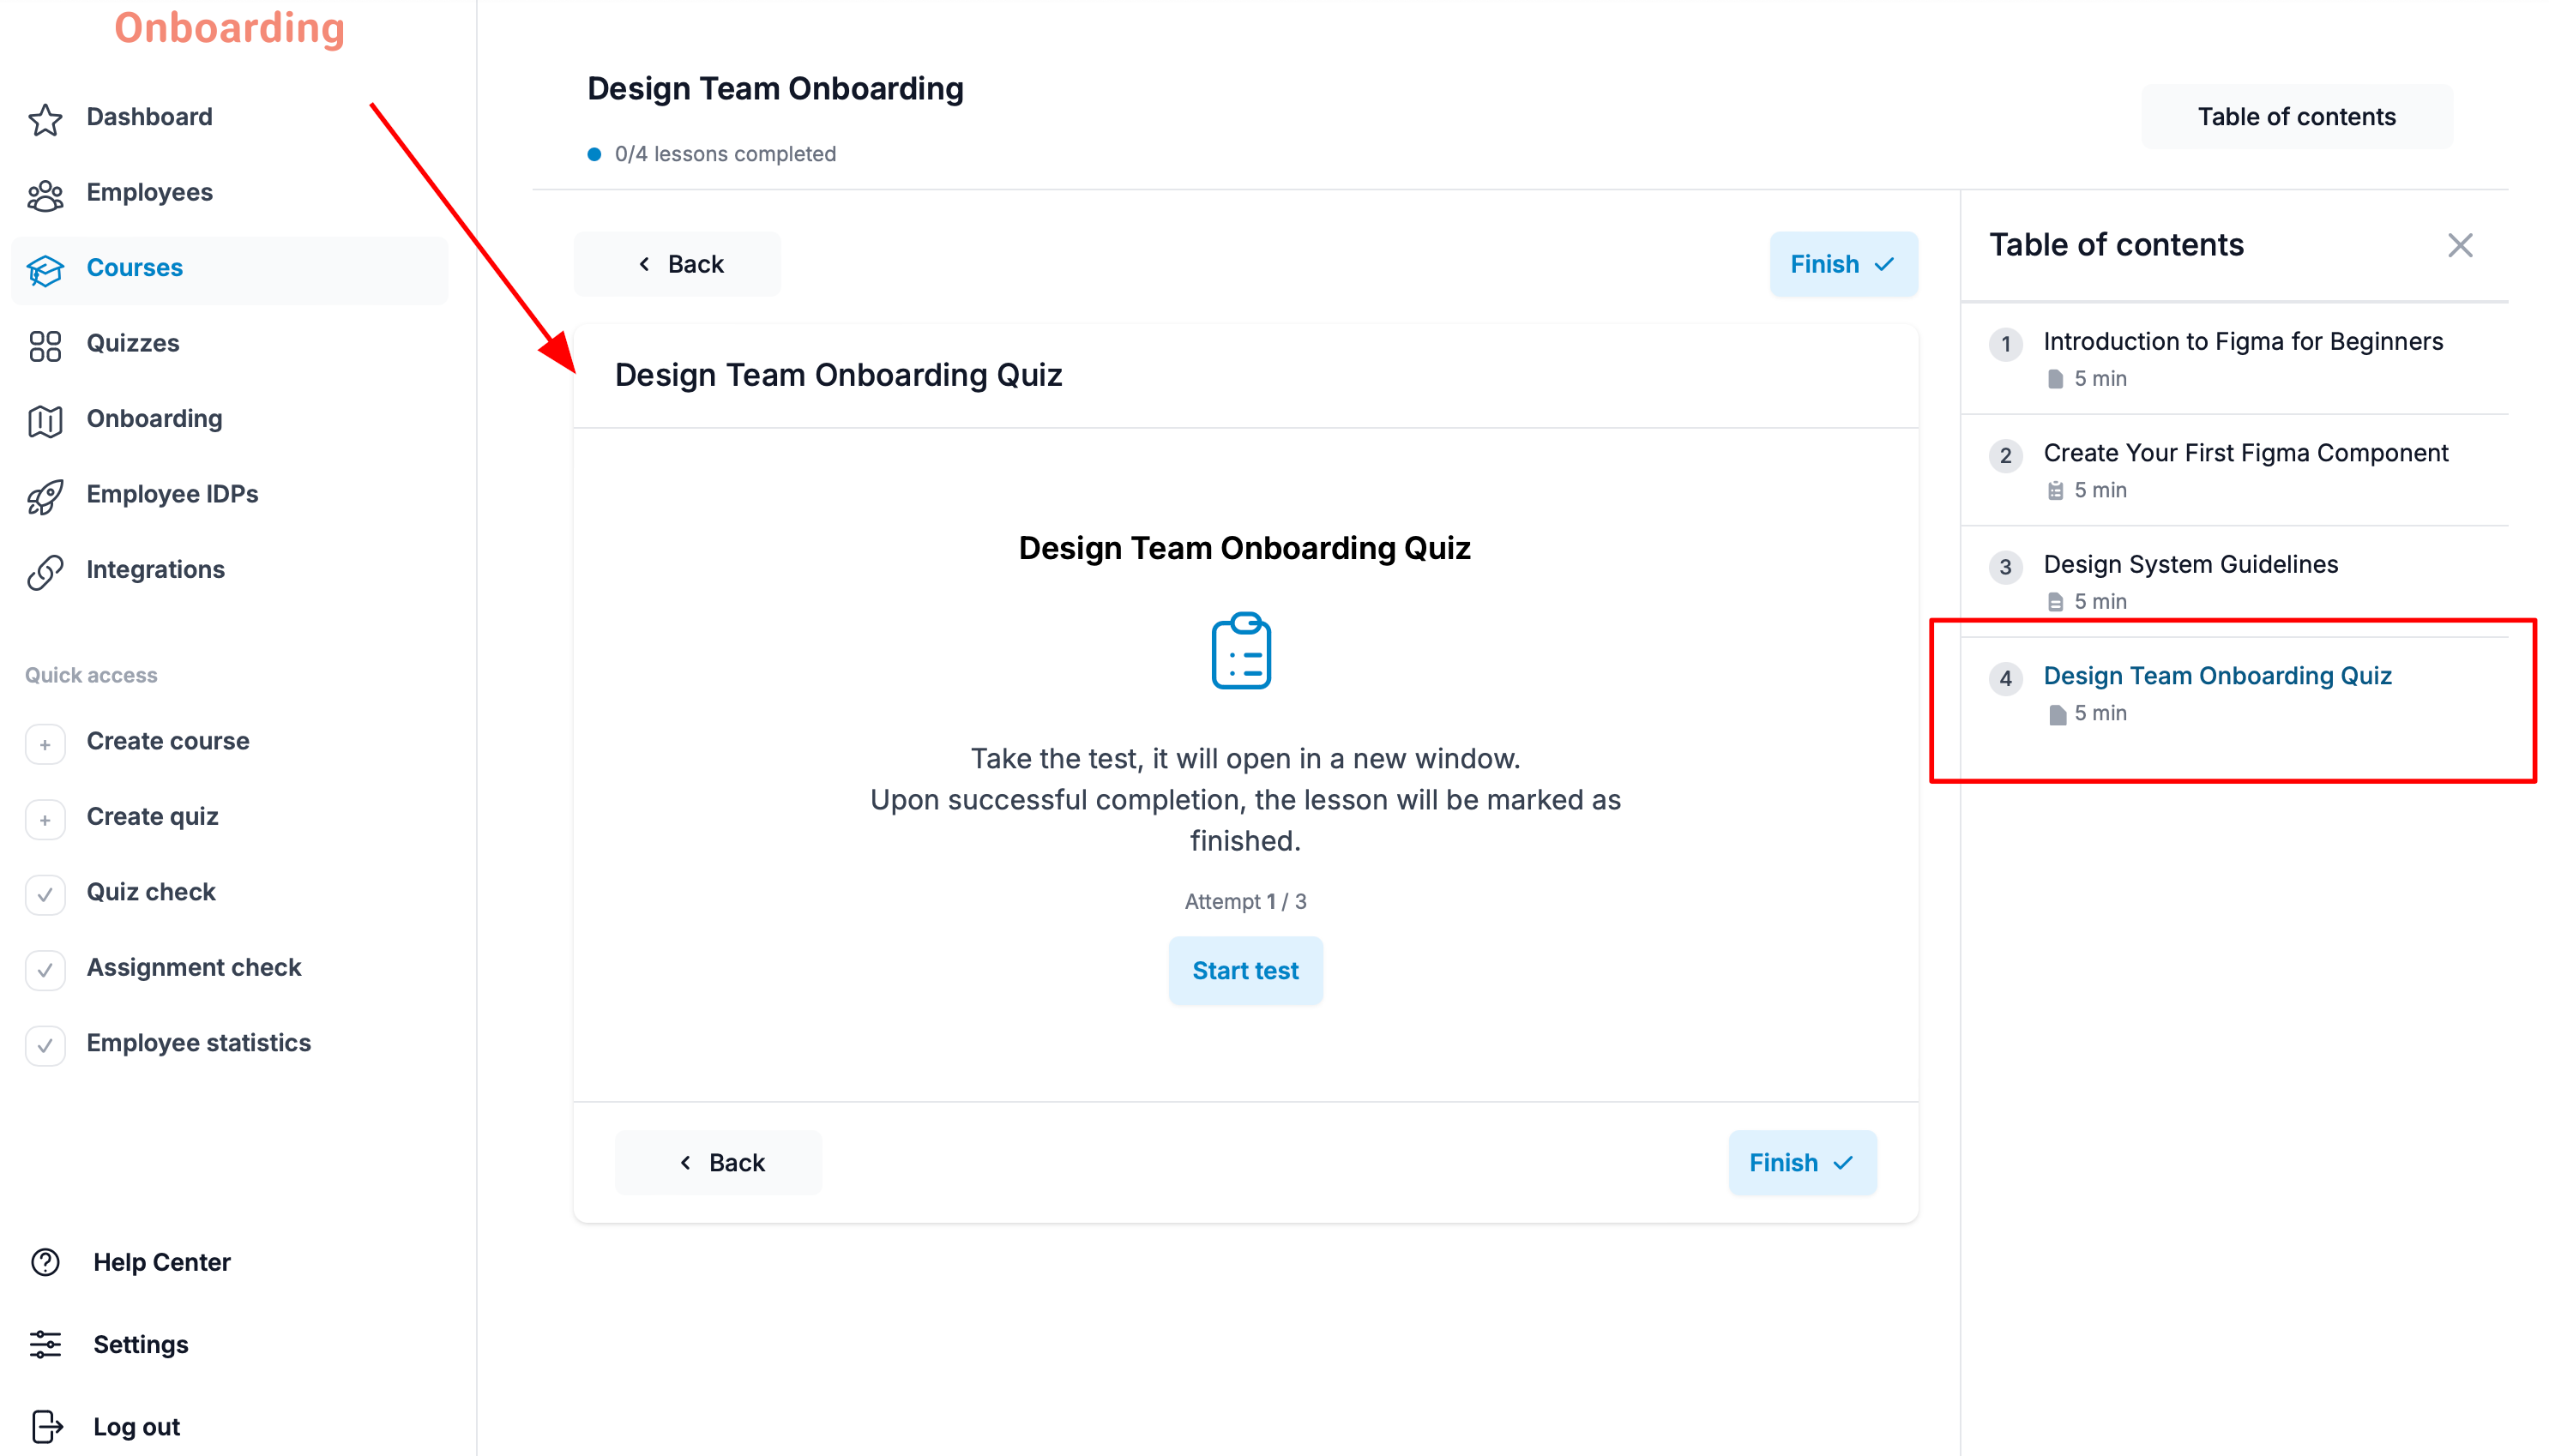
To make sure everything is set up correctly, open the «Courses» section and select the course the quiz is attached to. There you can check how the materials and the quiz appear on the platform.
This helps you confirm the lessons, assignments, and quiz are in the right order, and the training looks exactly the way you intended.
AI Quiz Assistant
The AI Quiz Assistant allows you to create quizzes automatically using artificial intelligence.
This feature is useful if you need to quickly assess employees' knowledge after they complete a course or create a quiz without manually adding questions.
How It Works
To create a quiz, simply:
- select the course the quiz should be based on;
- specify the number of questions.
AI will analyze the selected course and automatically generate quiz questions.
During the generation process, AI will use different question types available on the platform to create a more engaging and effective knowledge assessment.
Once the generation is complete, you can review all generated questions and check their content.
Creating a Quiz with AI
To create a quiz using AI:
- Go to the «Quizzes» section.
- Create a new quiz or open an existing one.
-
Complete the basic quiz settings:
- select a course;
- enter the quiz title;
- specify the minimum passing mark.
- In the Questions section, click «Generate with AI».
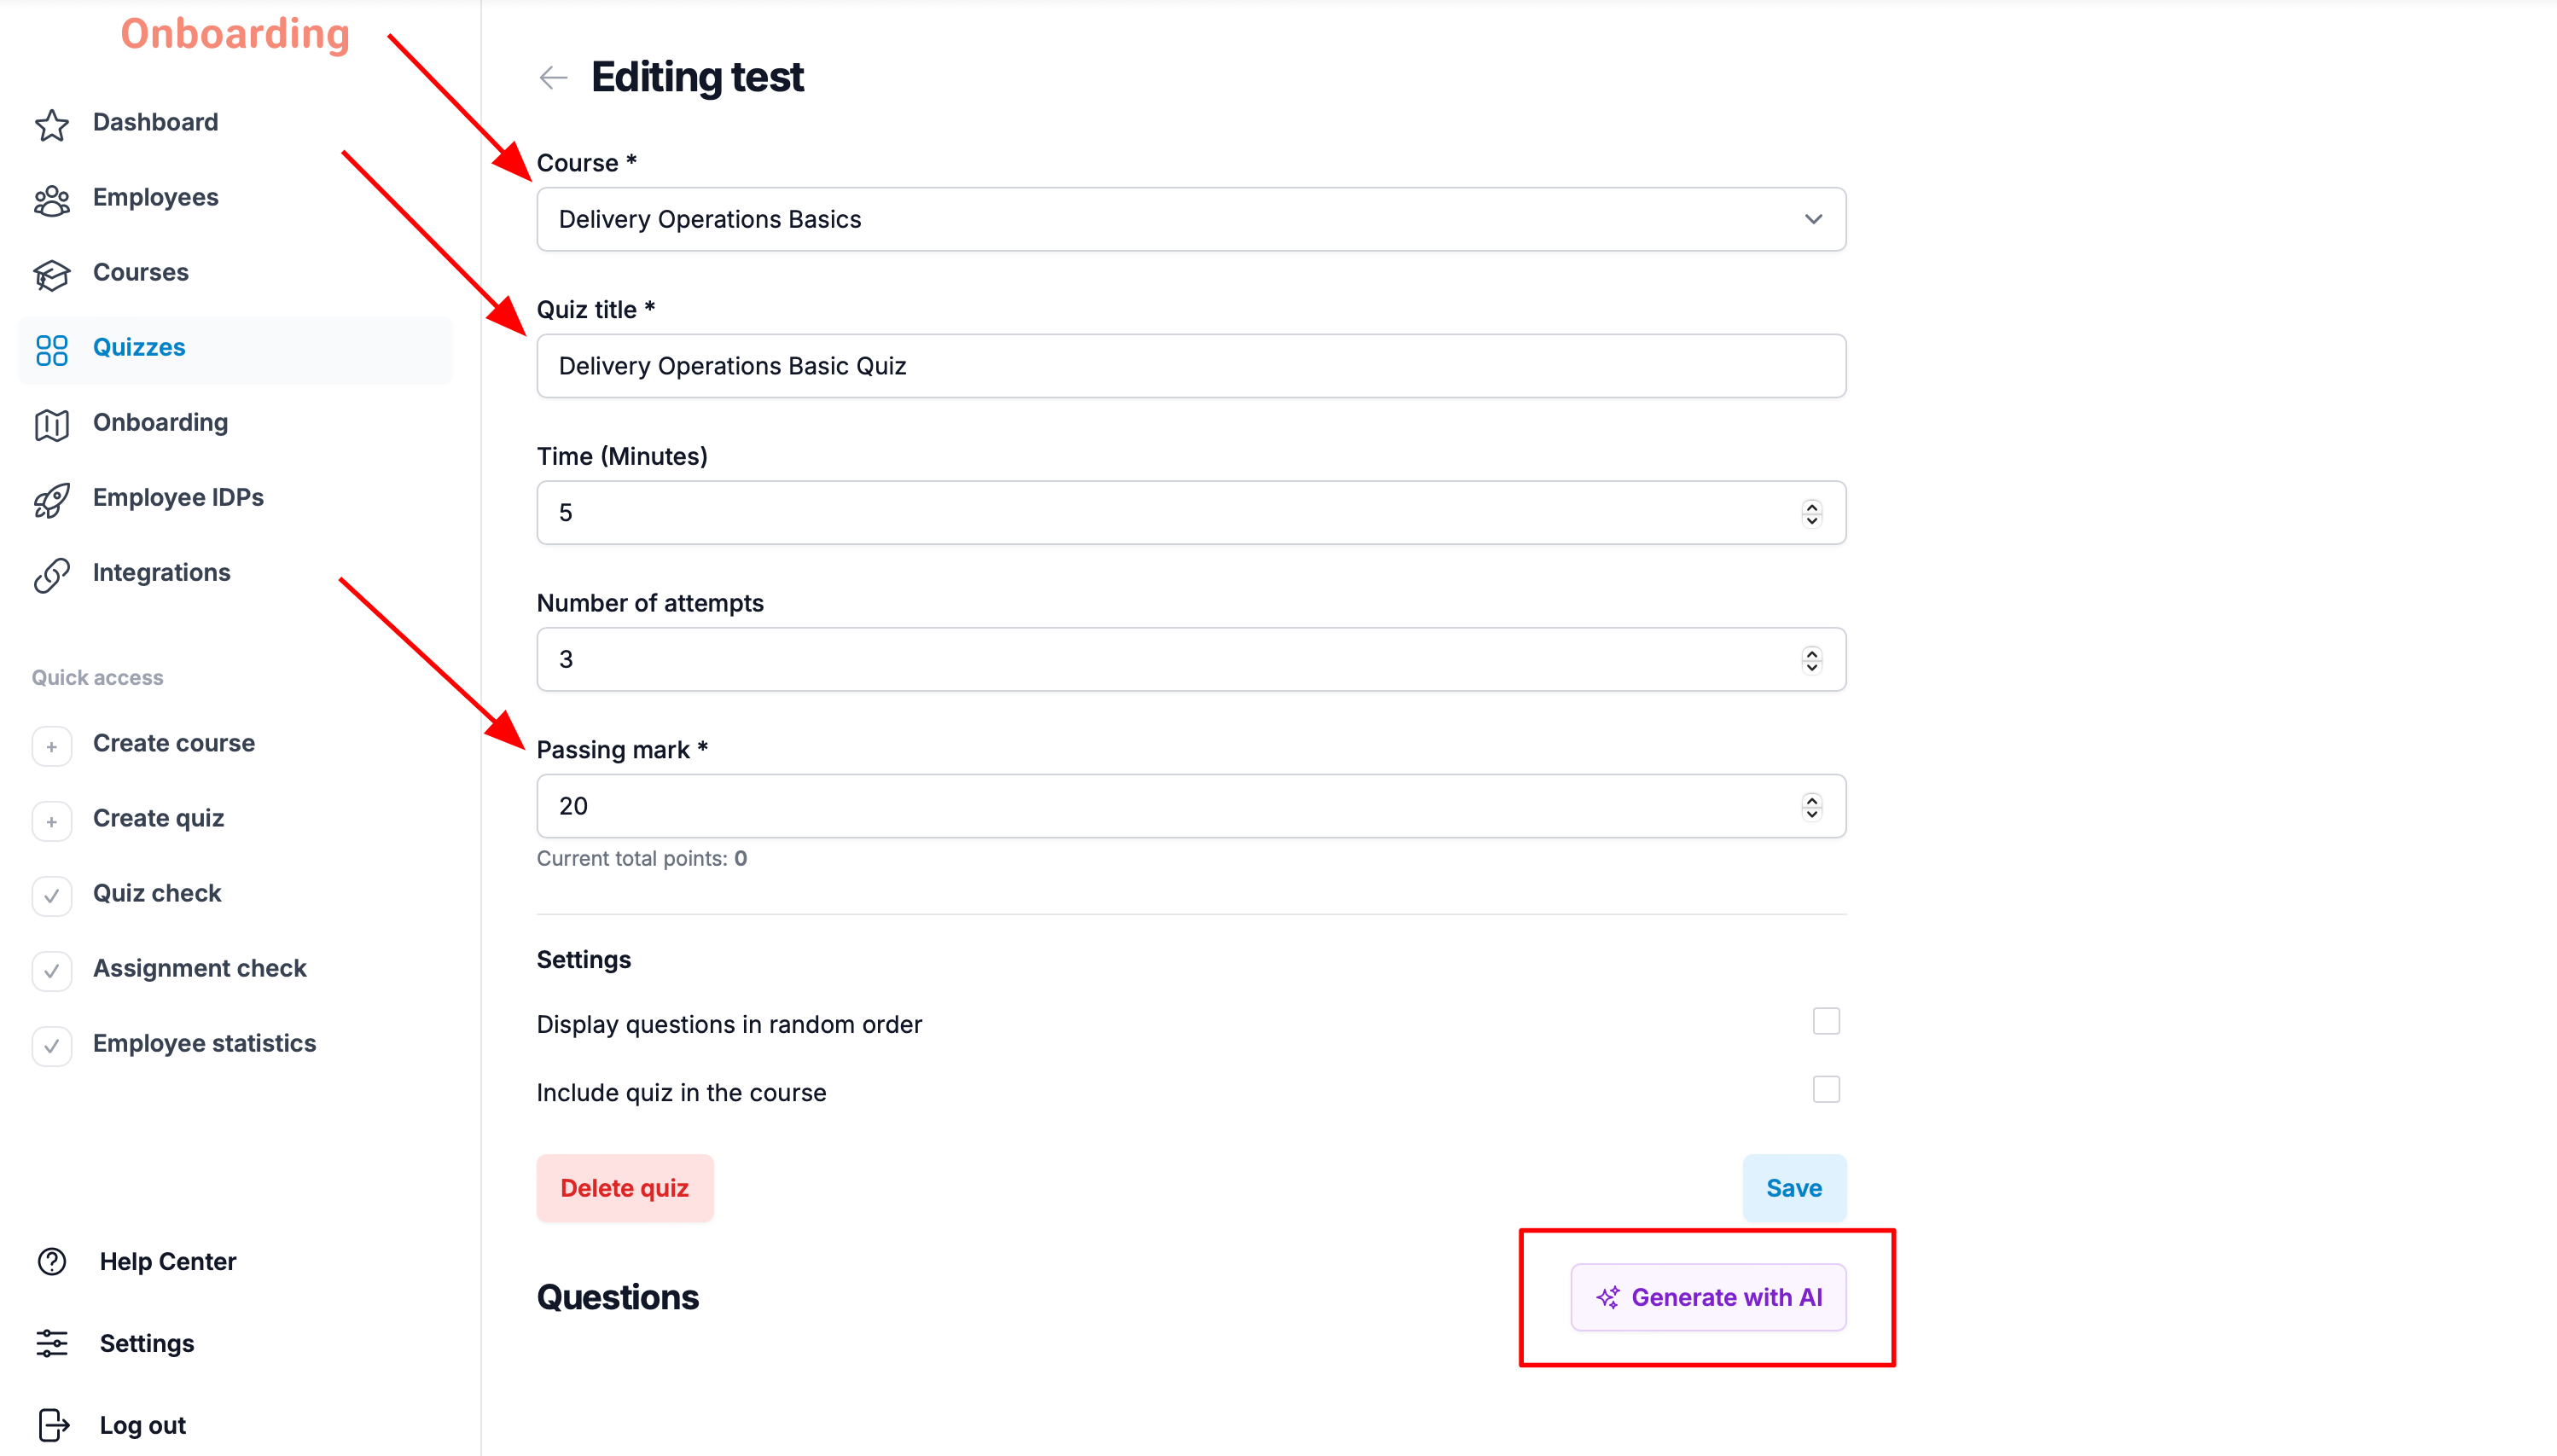
In the window that opens, complete the following fields:
- Number of questions — choose how many questions AI should generate.
- Content language — select the language in which the questions will be generated.
- Quiz Content — choose whether to add the generated questions to the existing quiz or replace the existing questions (if the quiz already contains questions).
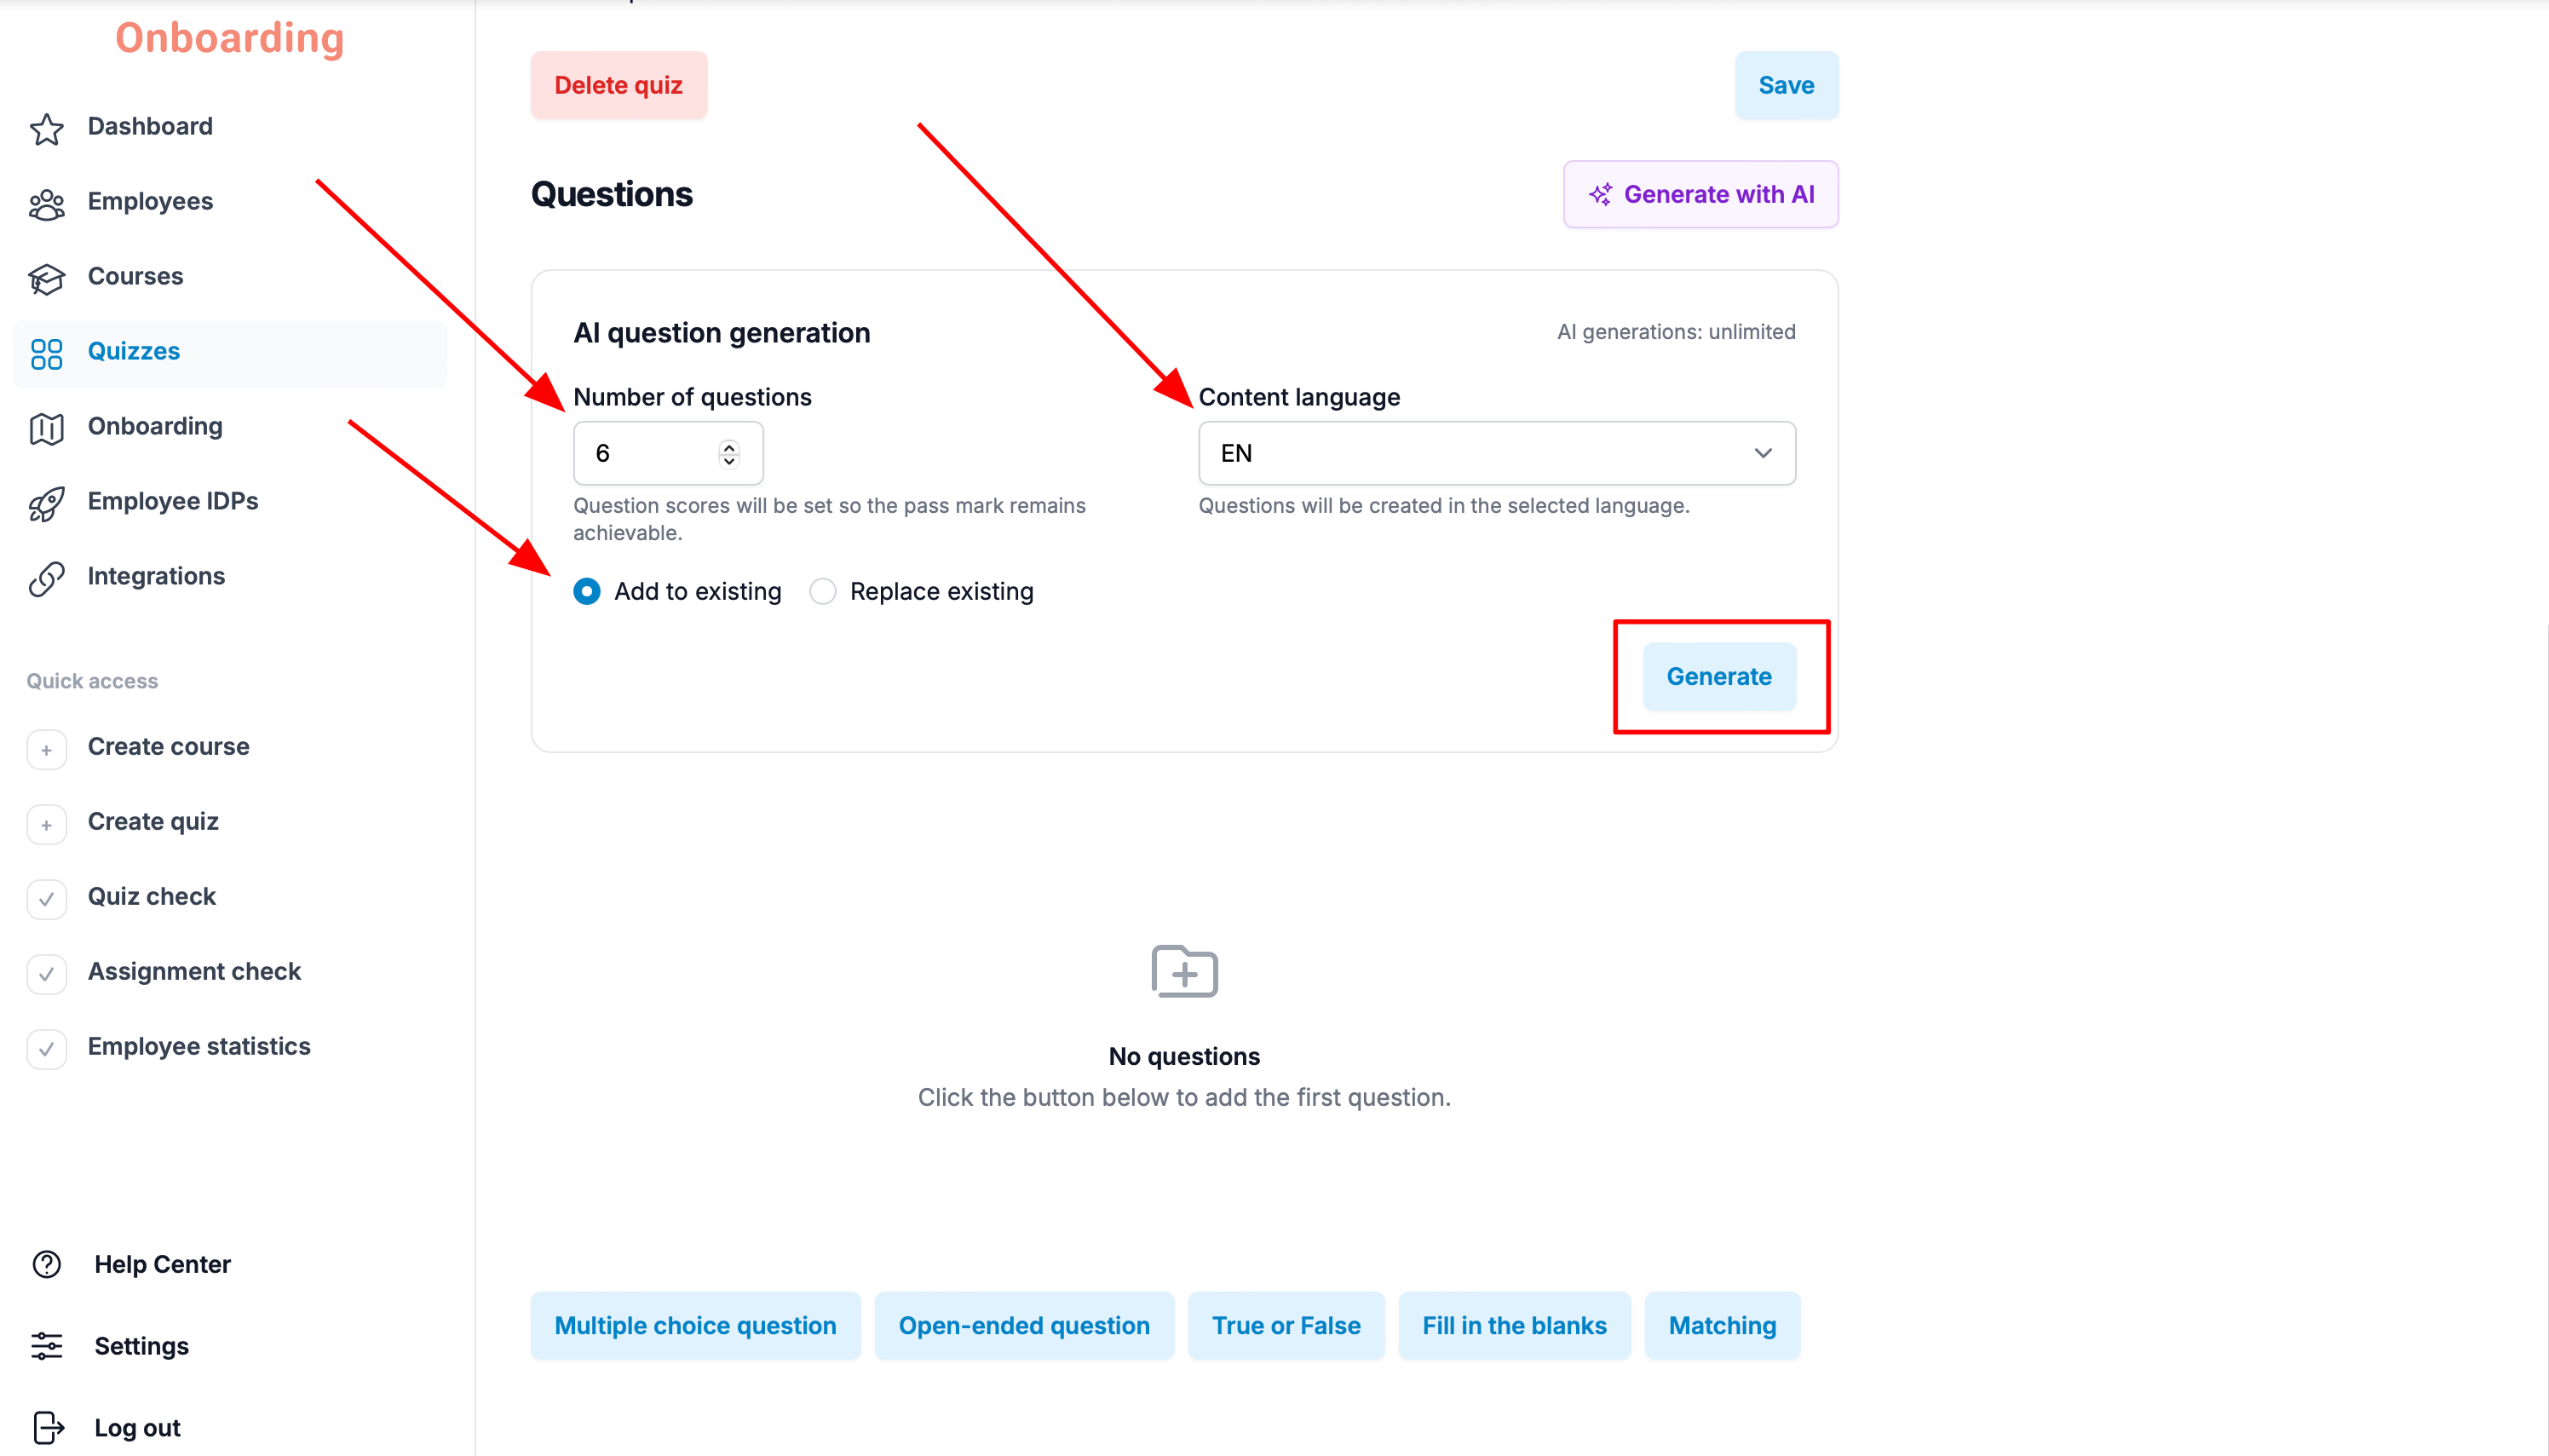
After completing all fields, click «Generate».
Quiz generation may take up to 2 minutes, depending on the number of questions.
The quiz has been successfully created and is ready to use 🎉
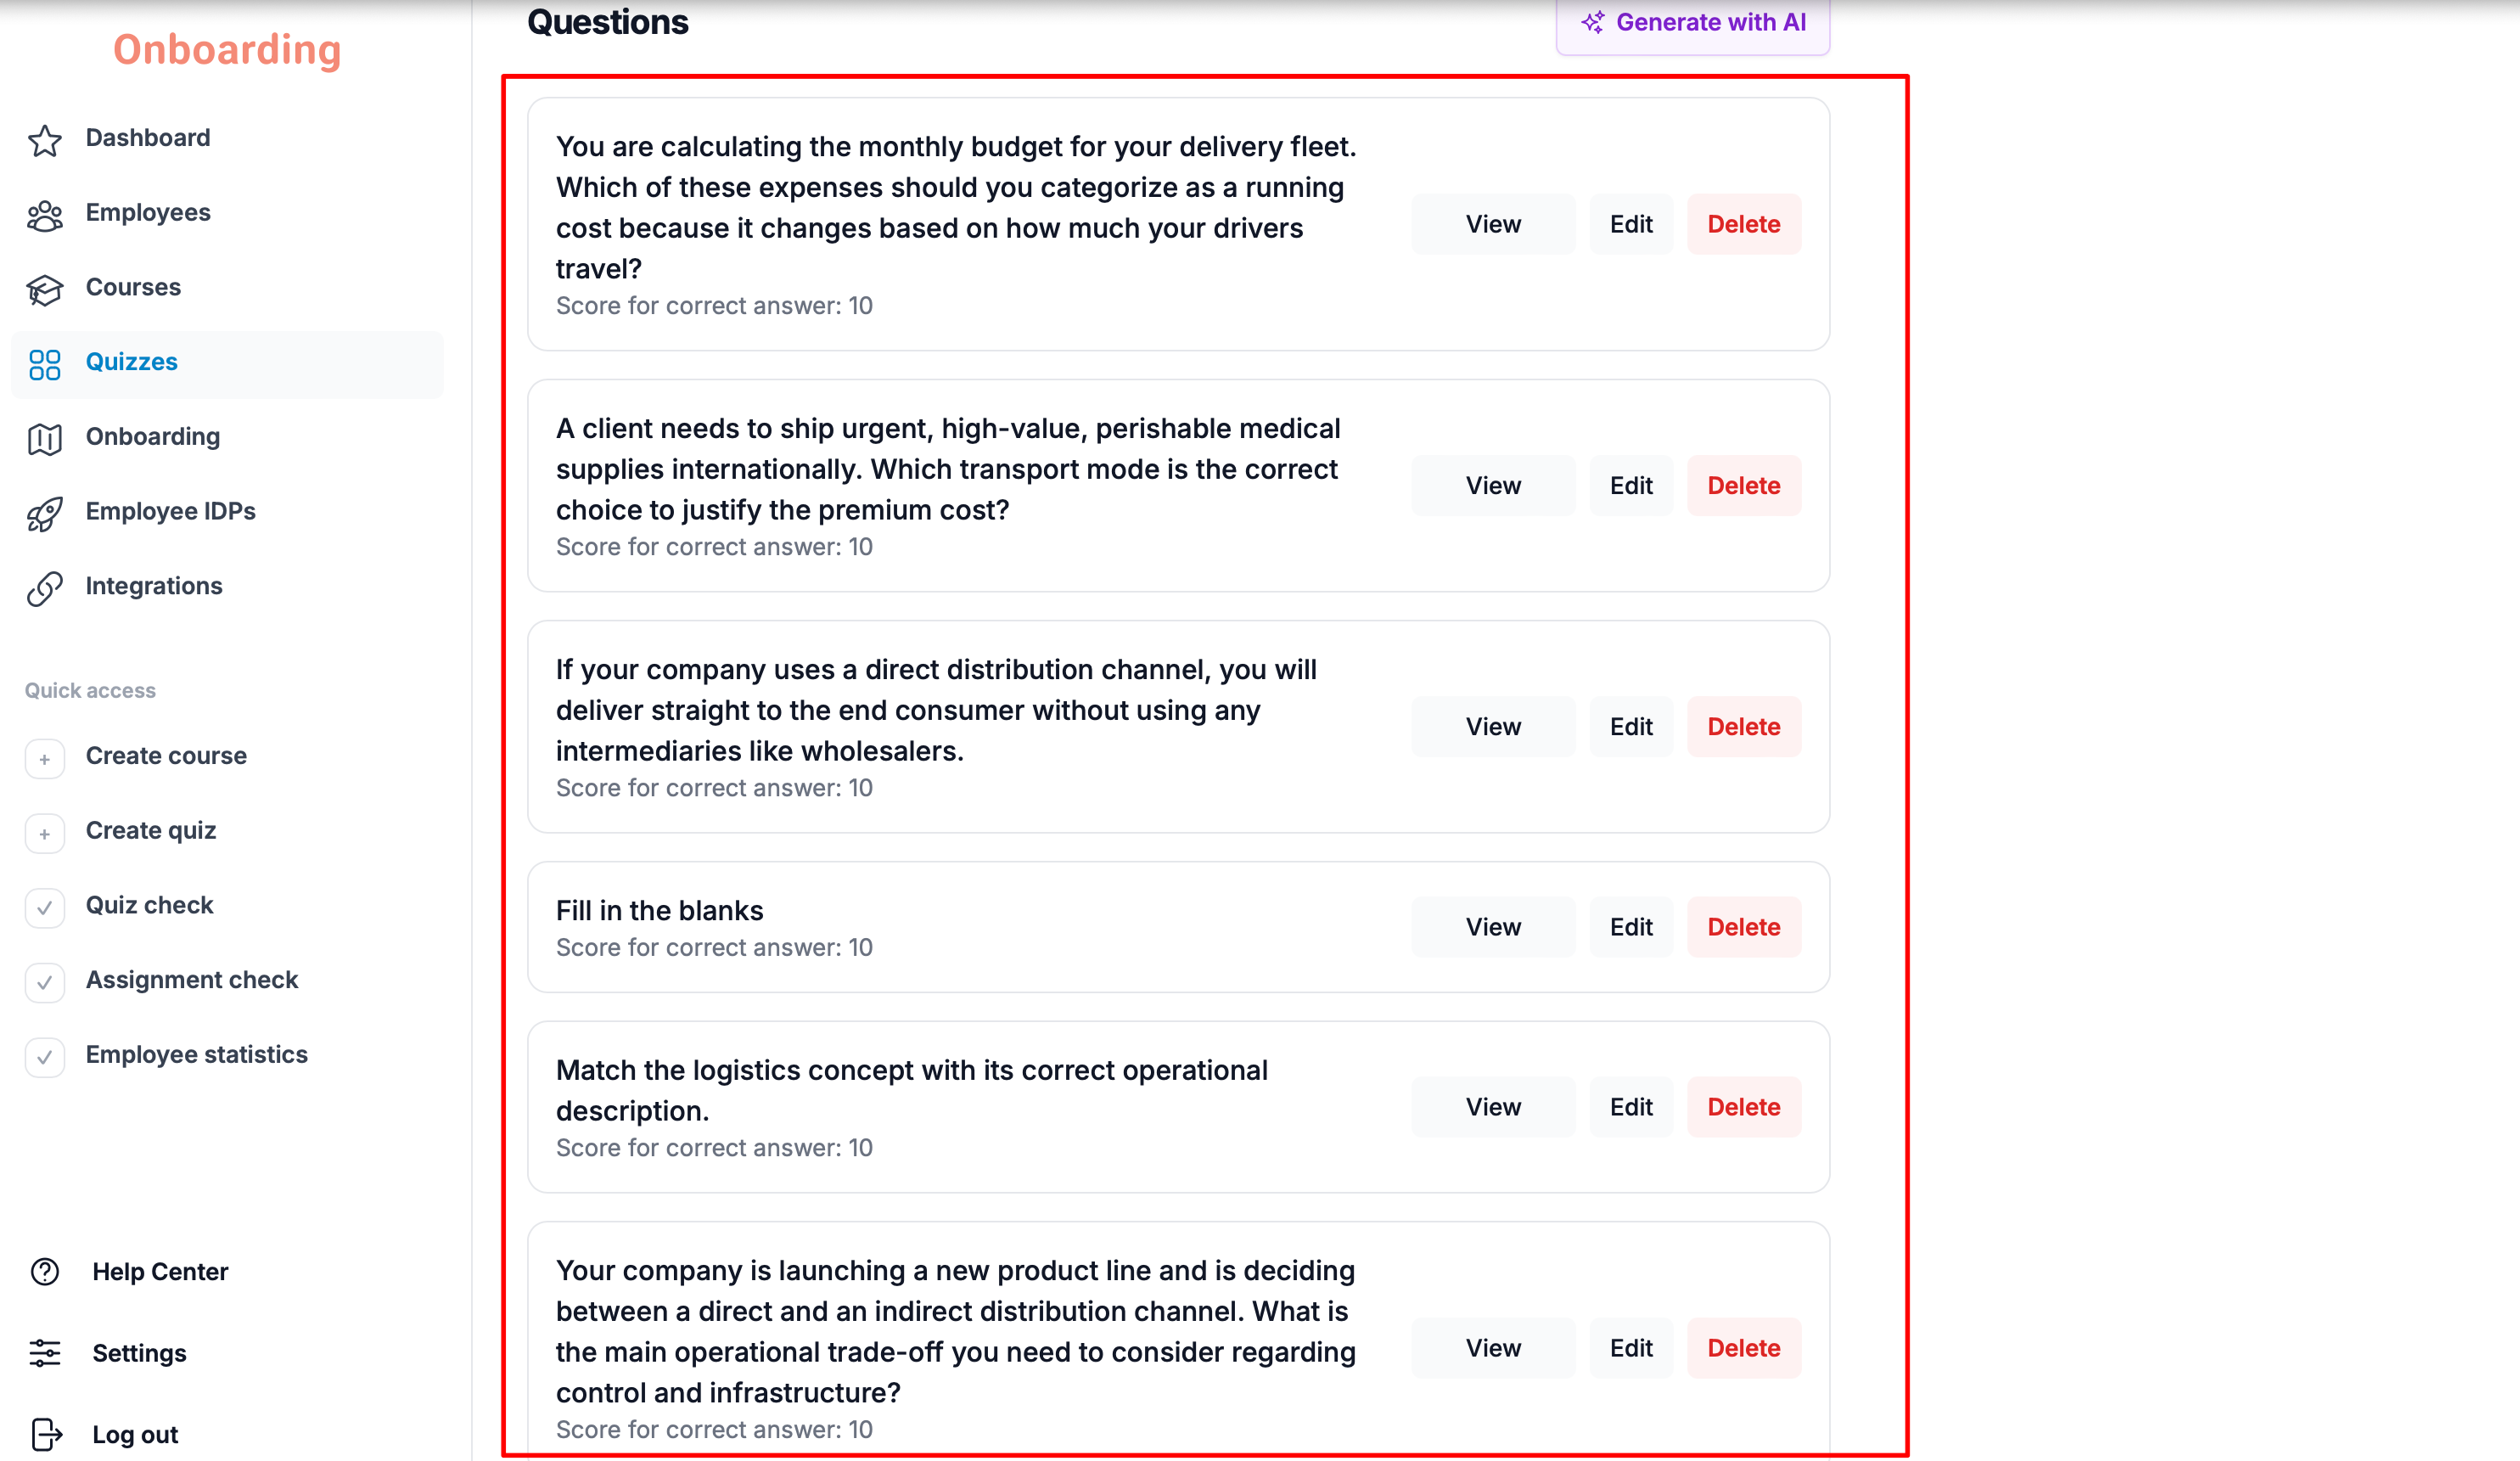
Before publishing the quiz, be sure to review all generated questions carefully. AI can occasionally produce inaccuracies or errors.
At this stage, questions created by the AI Quiz Assistant cannot be edited. If you find an error, delete the question and recreate it manually.
After you have verified that all questions are correct and the quiz is ready to be published, enable the «Include quiz in the course» checkbox and click «Save».
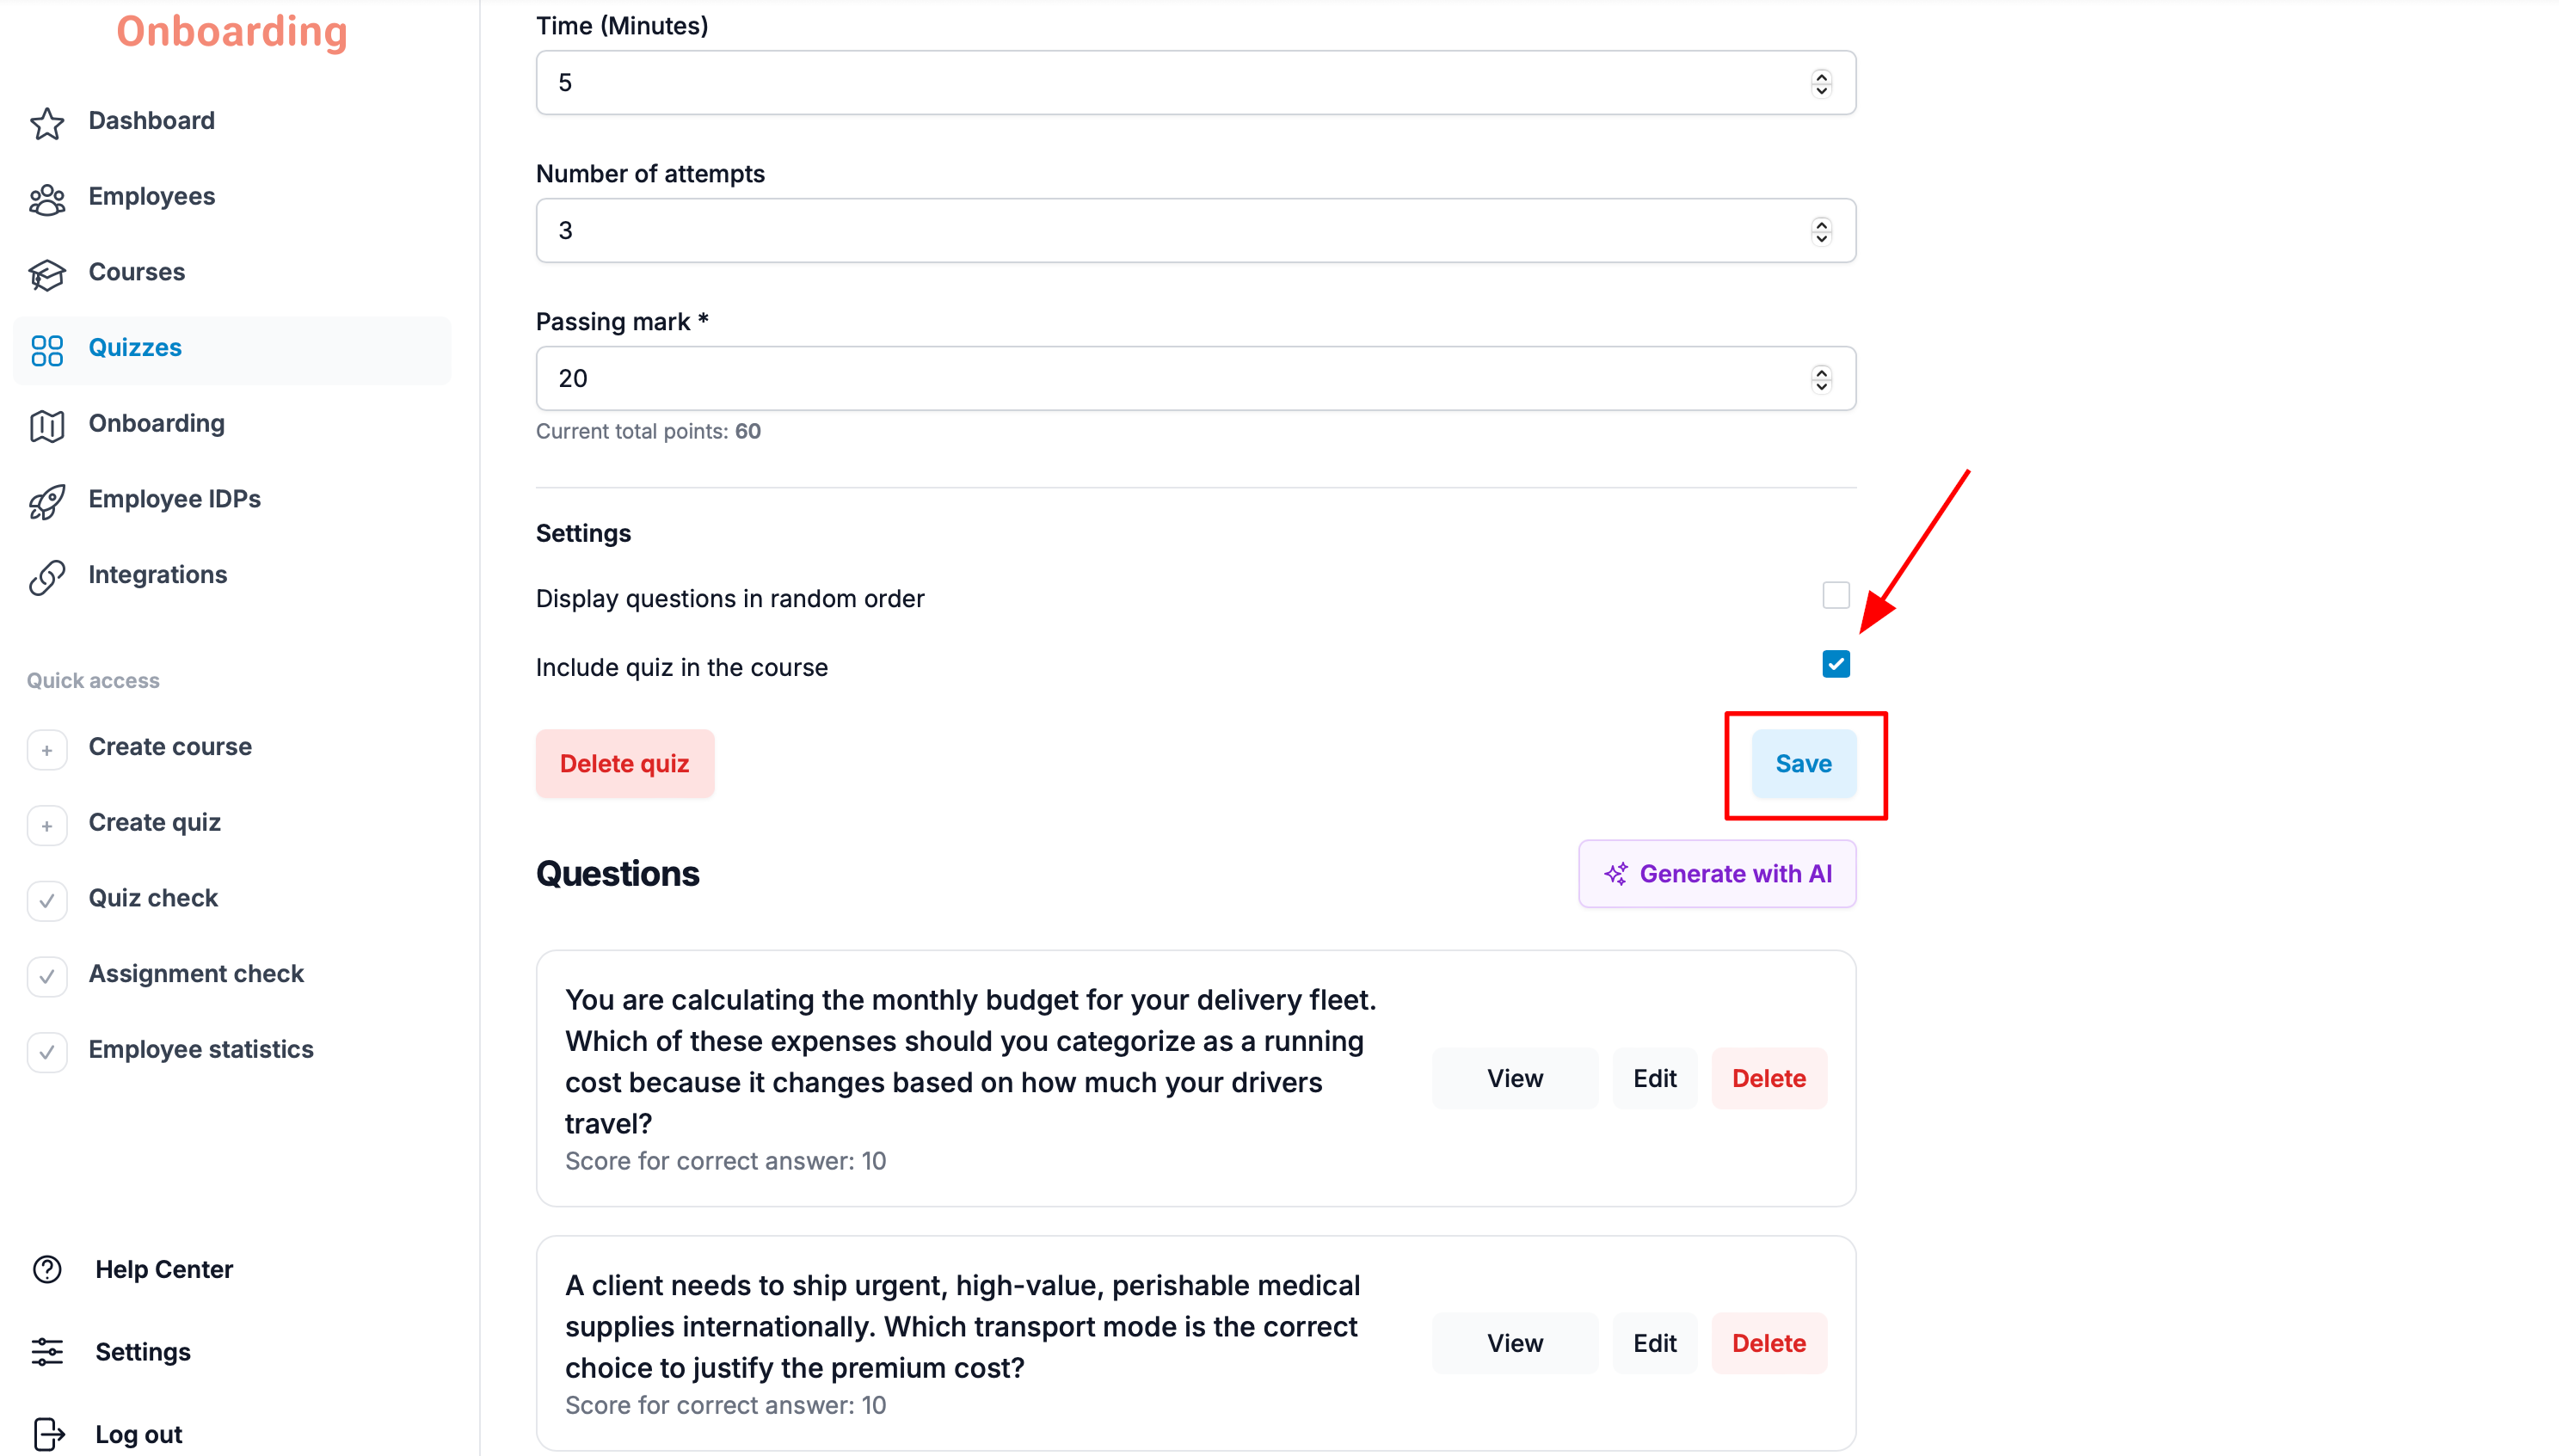
The quiz has been successfully saved and attached to the course 🎉
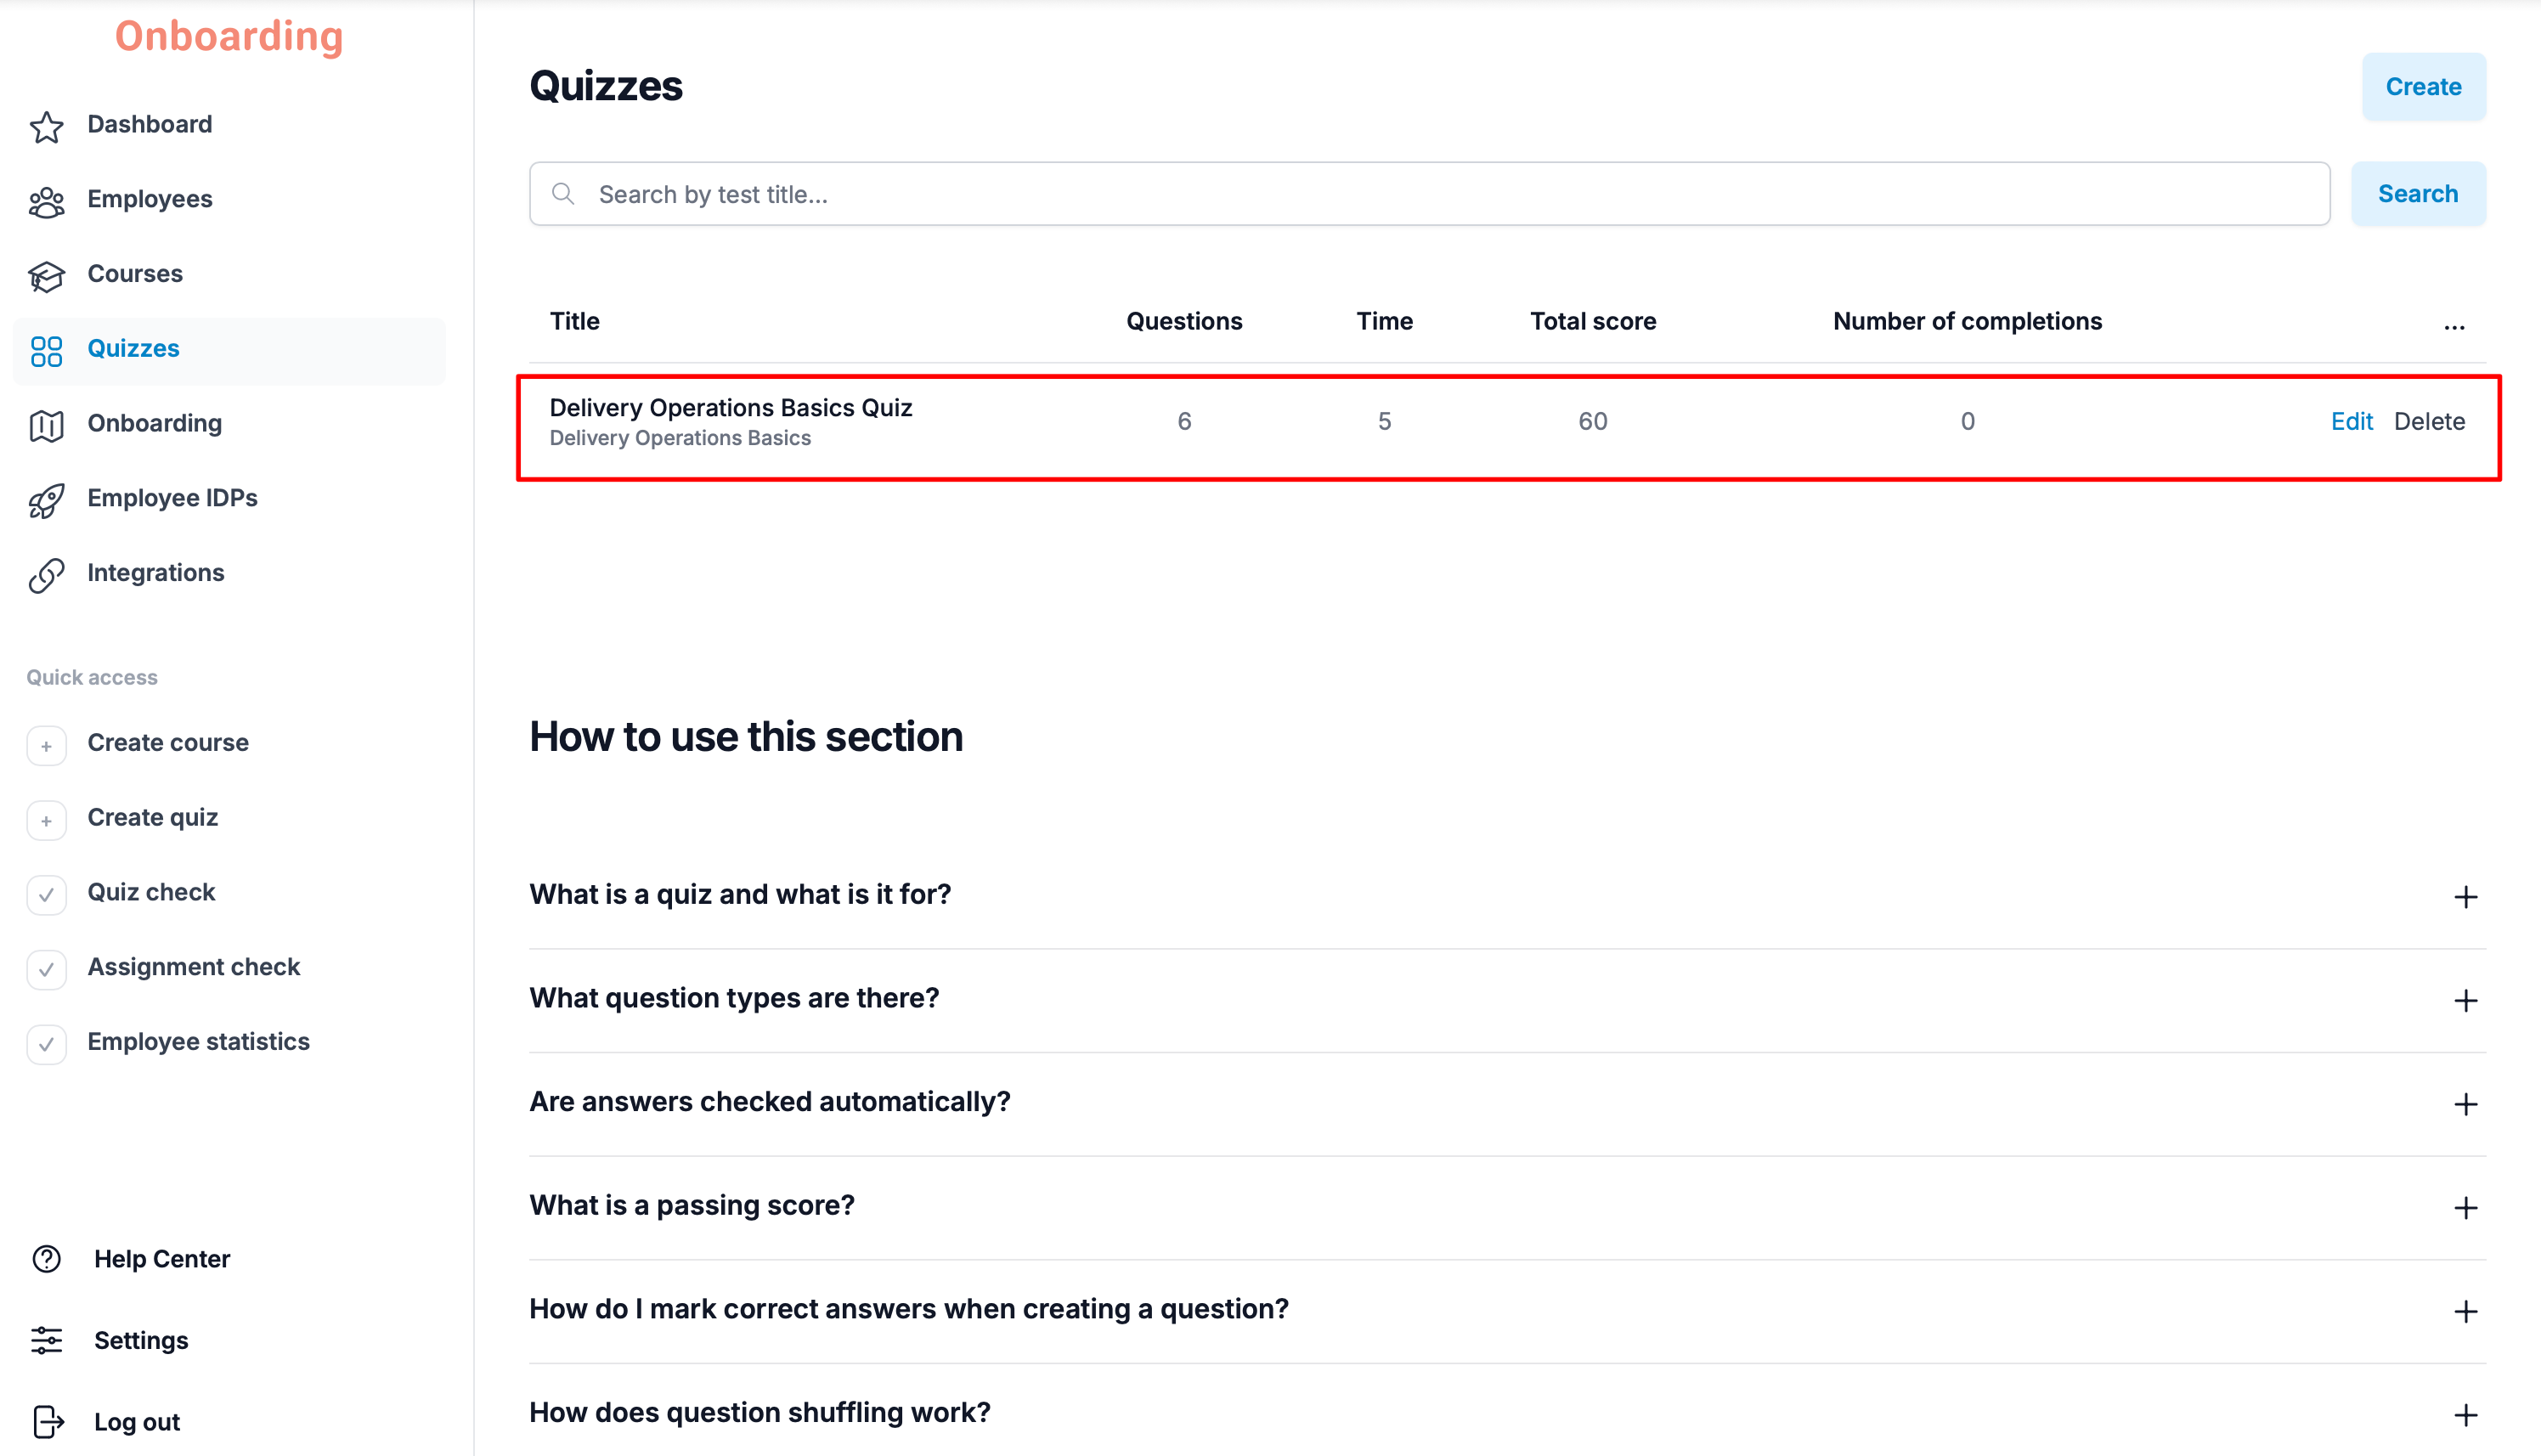
Editing Quizzes and Questions
To edit an existing quiz, open the «Quizzes» section. On the main page, you'll see a list of quizzes with the following information:
- Title – the quiz's name.
- Questions – the number of questions in the quiz.
- Time – the time allowed for completing the quiz.
- Total score – the sum of points across all the quiz's questions.
- Number of completions – the total number of attempts across all employees. If an employee has several attempts, each one counts toward the total.
To edit a quiz, pick it from the list and click «Edit».
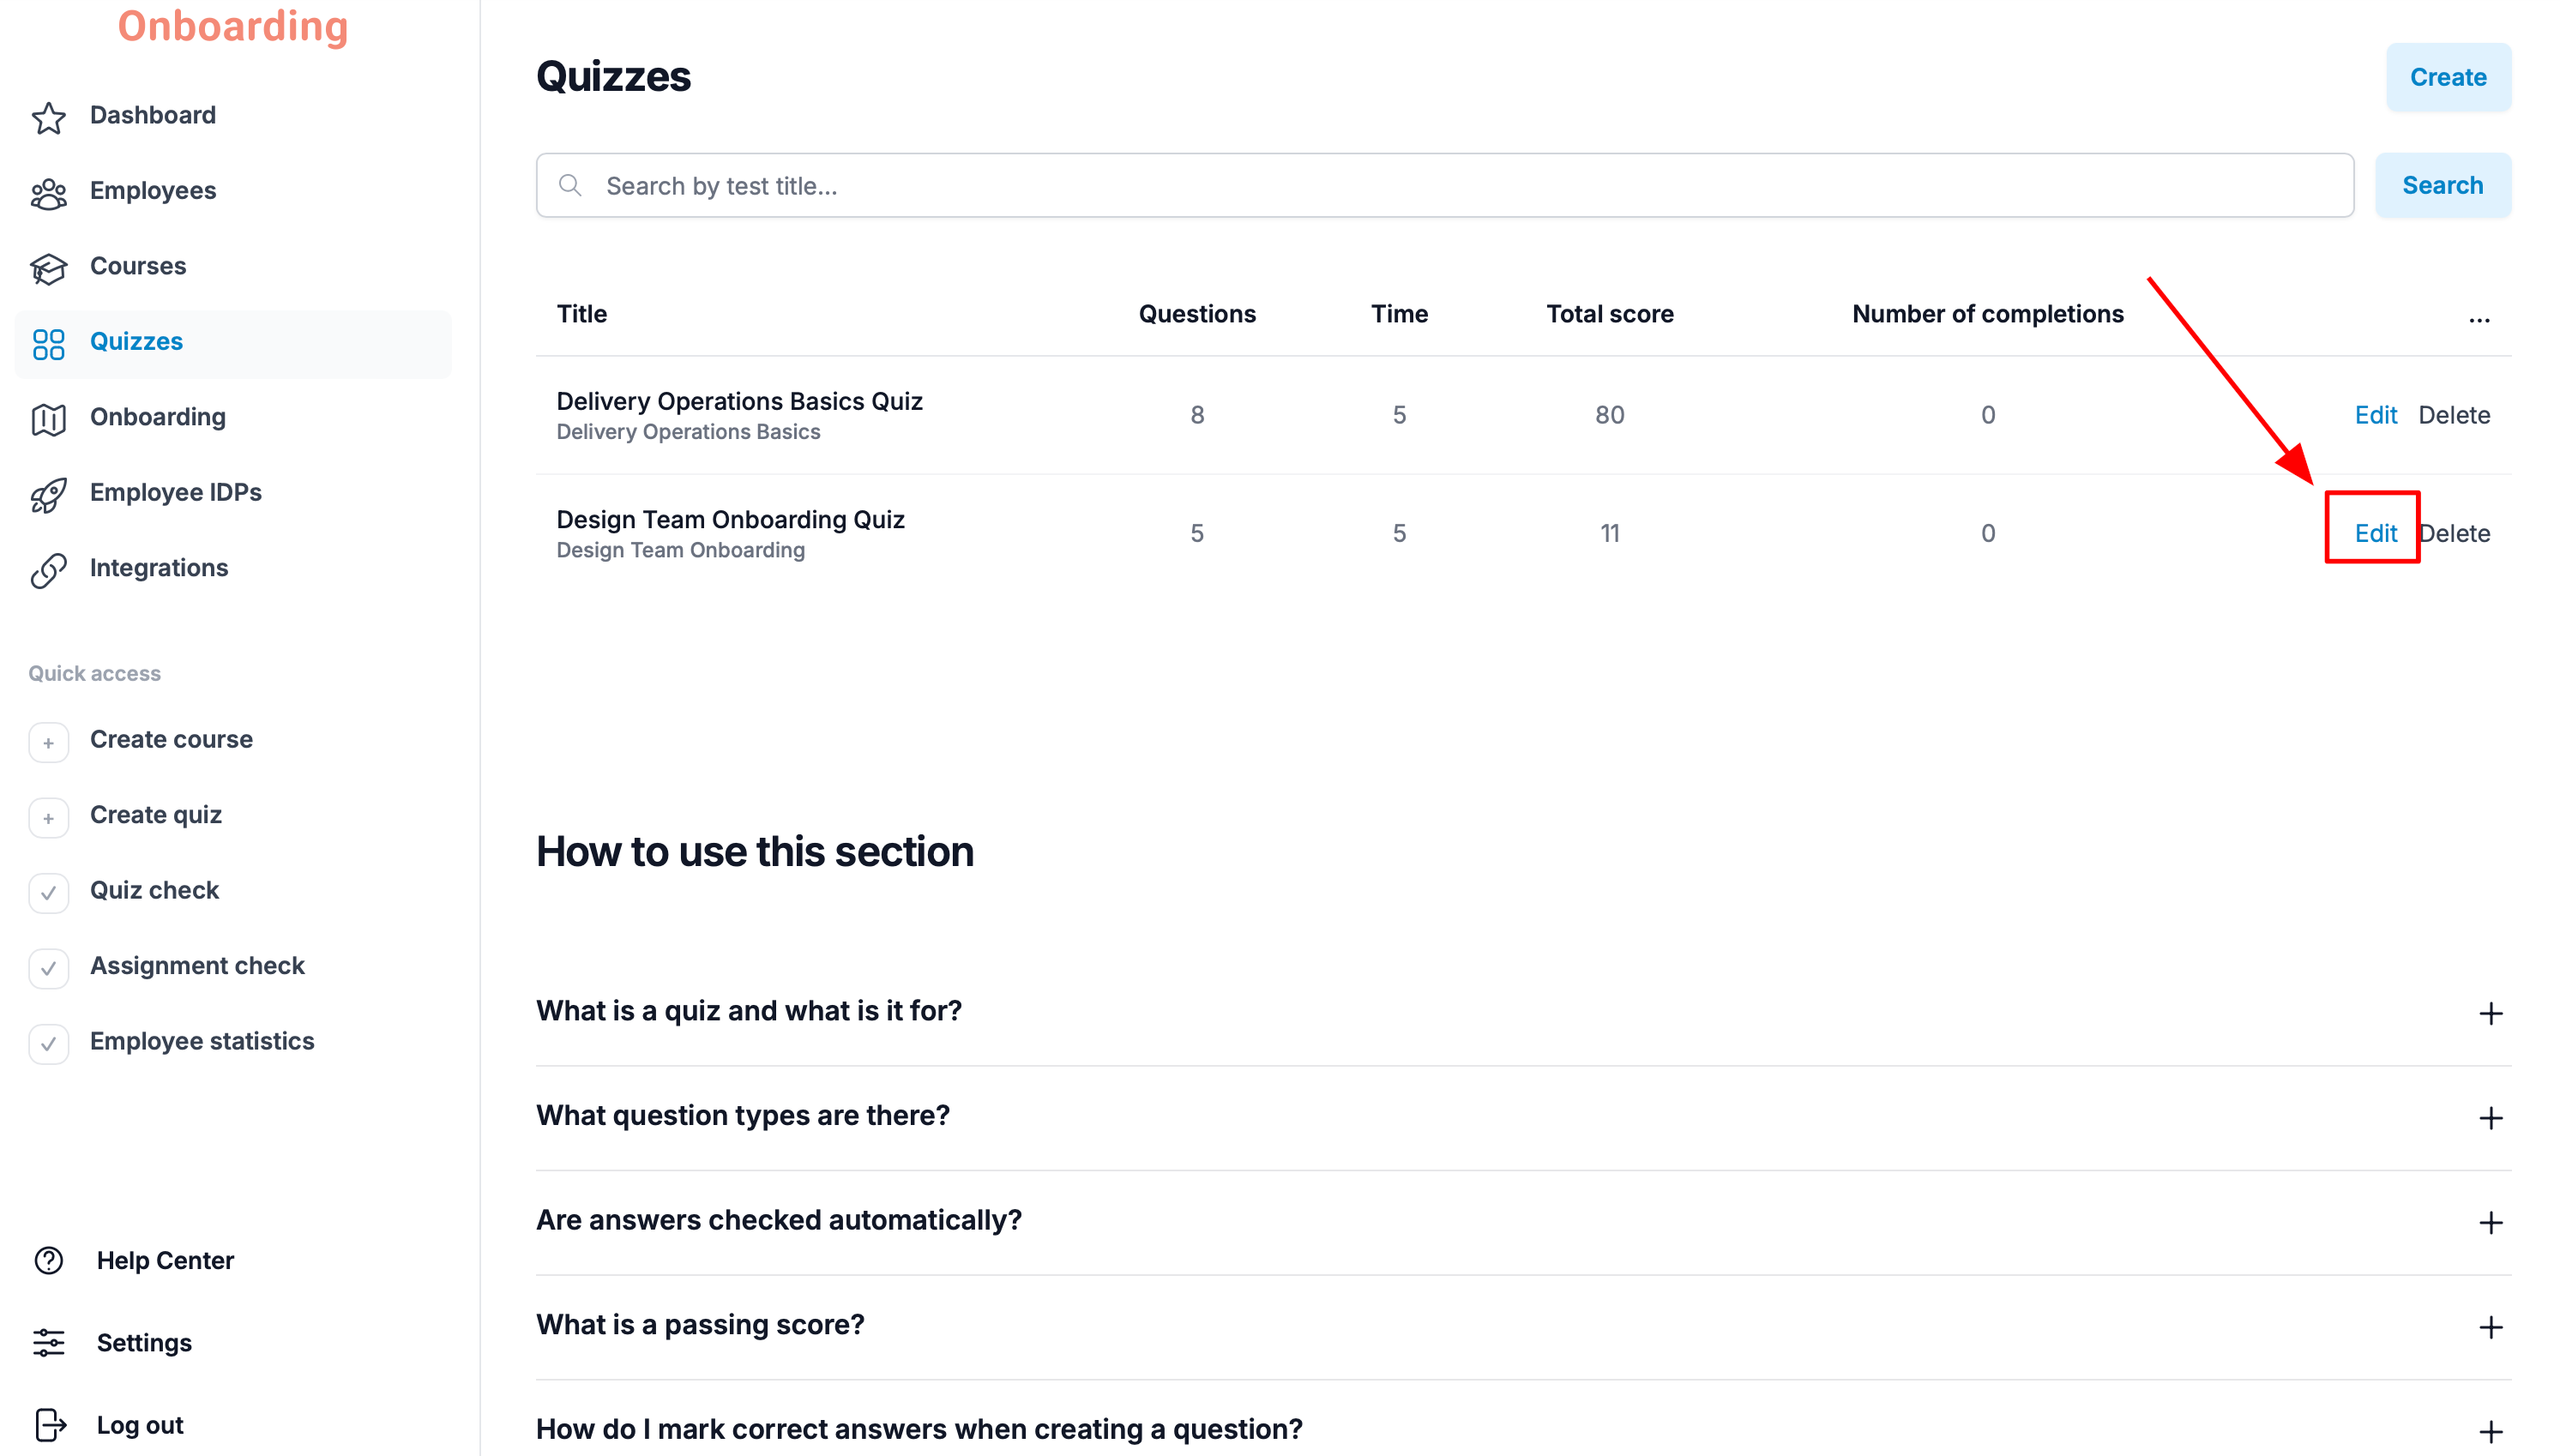
The quiz editor opens, where you can change both the basic settings and the questions.
Changing Quiz Settings
In the basic settings you can change:
- the course the quiz is attached to;
- the quiz title;
- the time limit;
- the number of attempts;
- the passing mark.
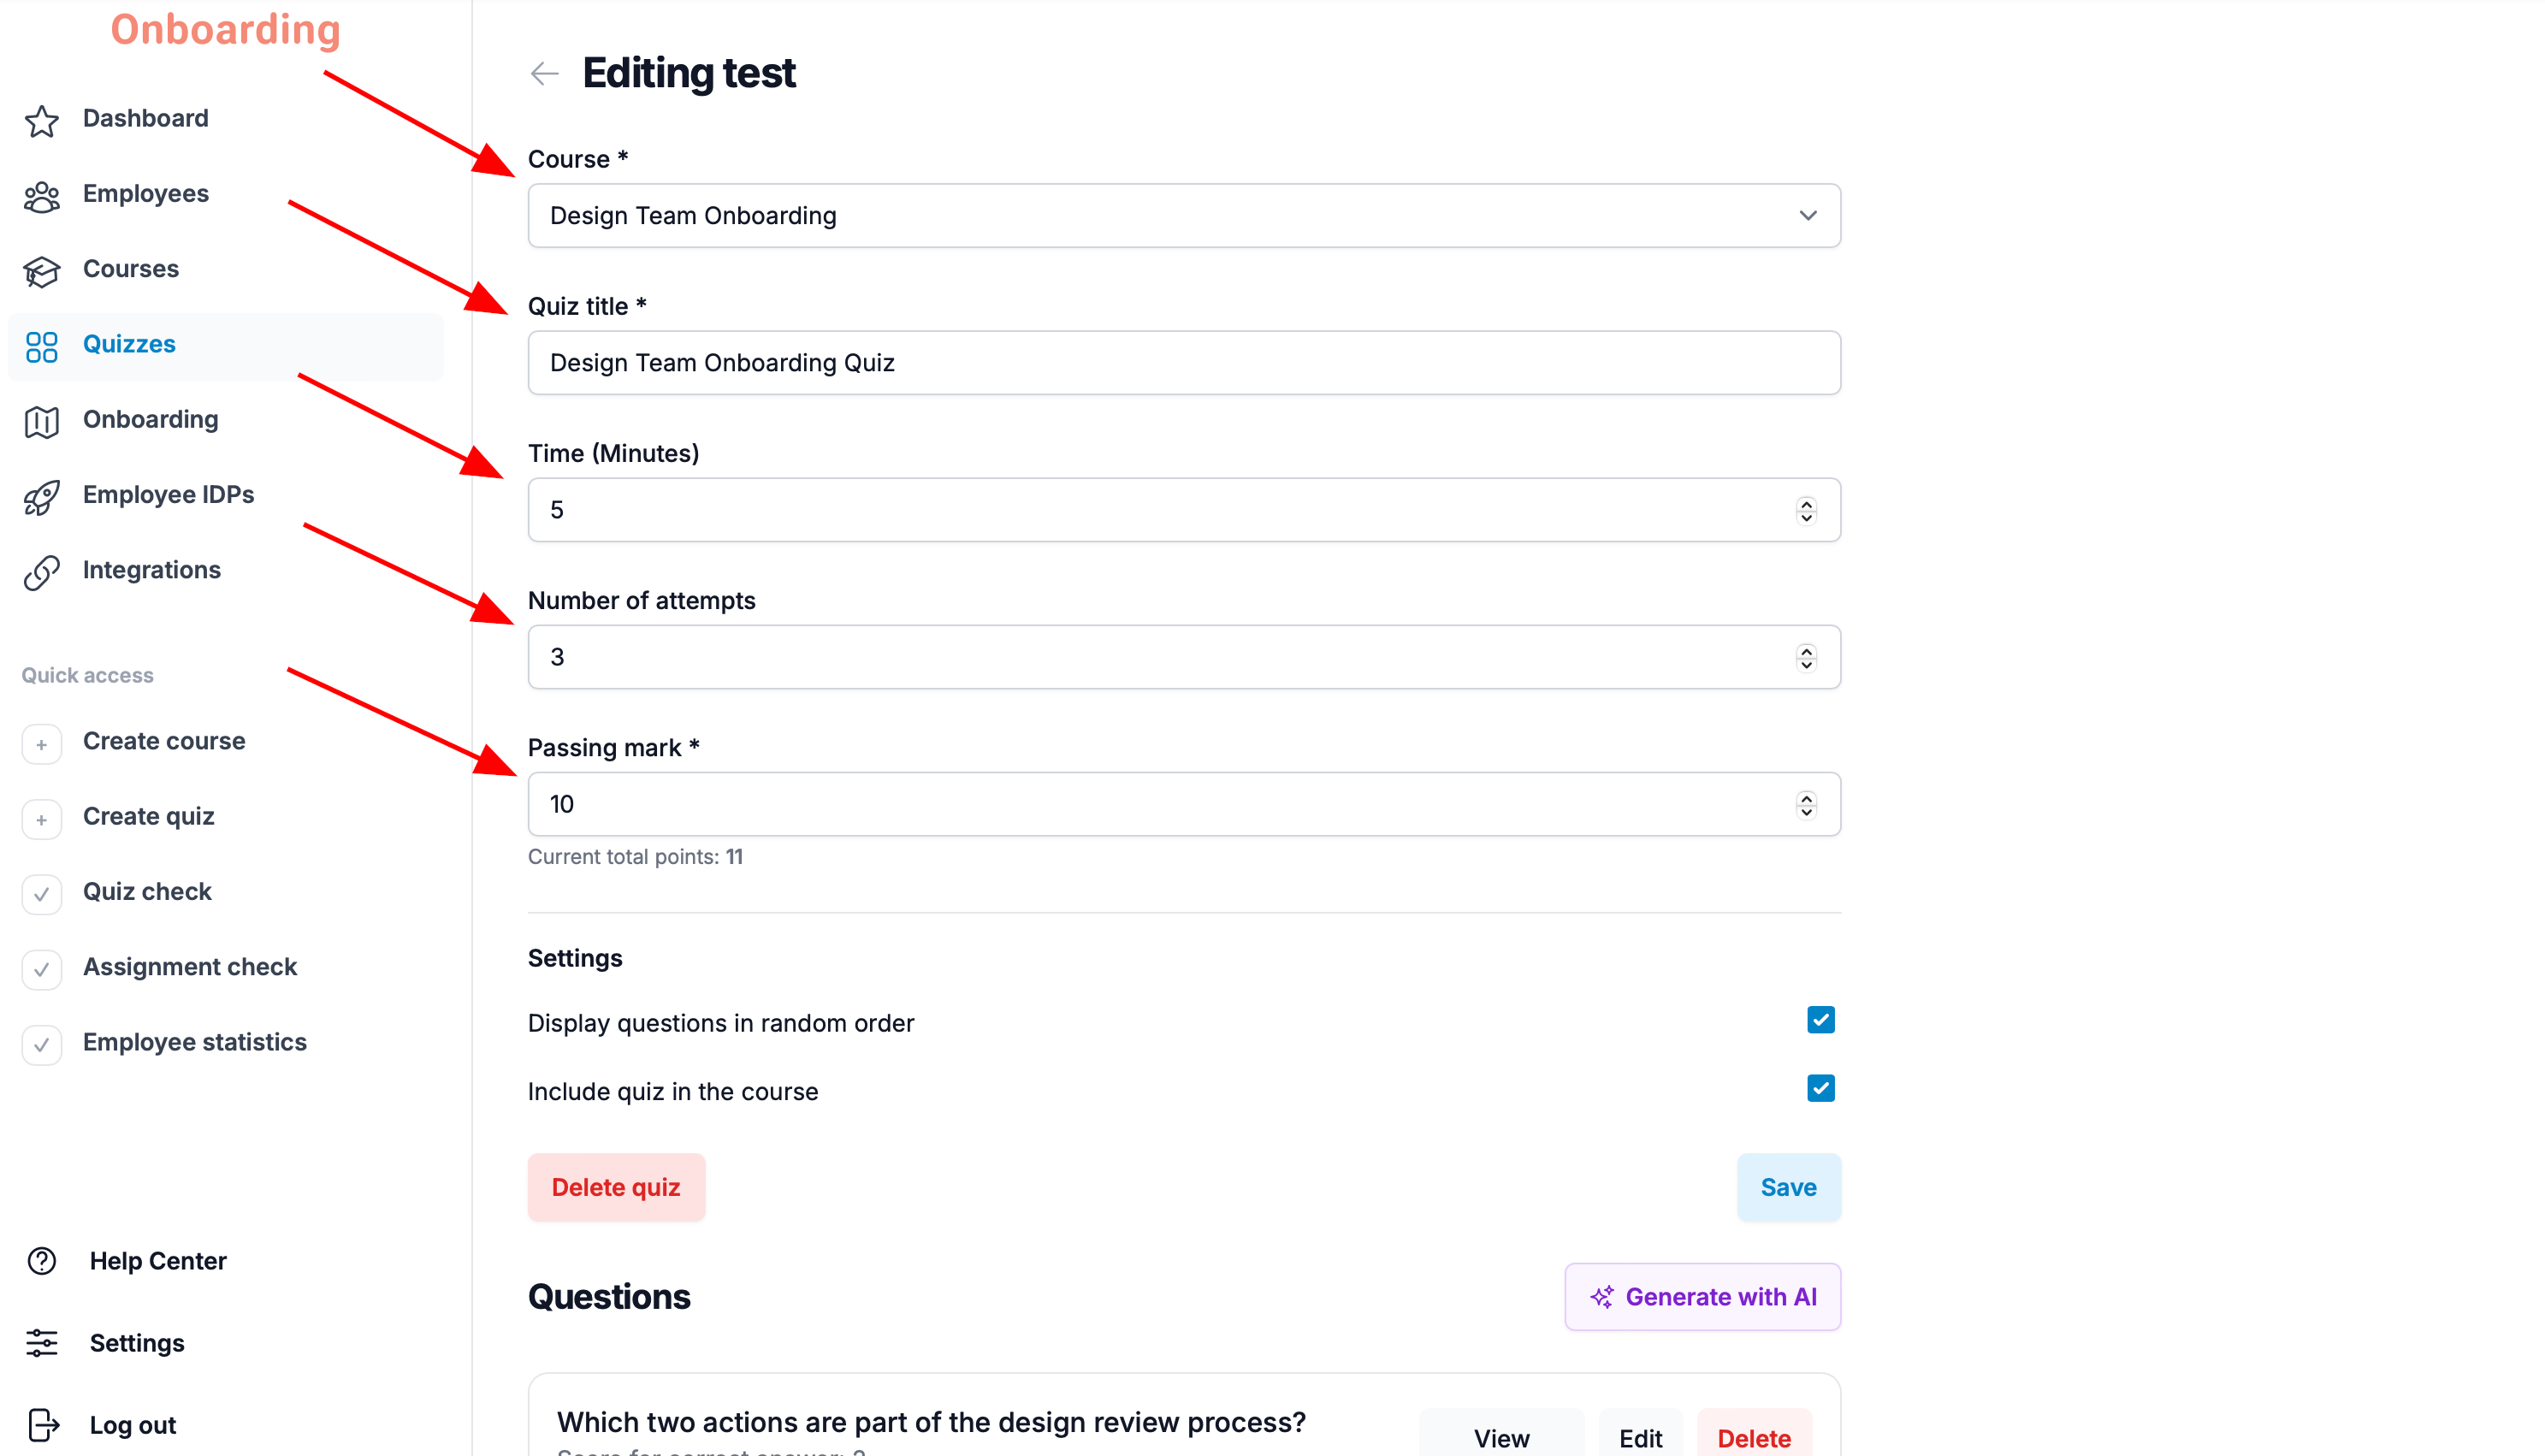
The passing score must be less than or equal to the total points across all the quiz's questions.
If you set a passing score higher than the current total and try to save, the platform will show an error and won't let you publish the changes.
In the «Settings» block you can:
- turn the «Display questions in random order» option on or off;
- enable or disable the quiz.
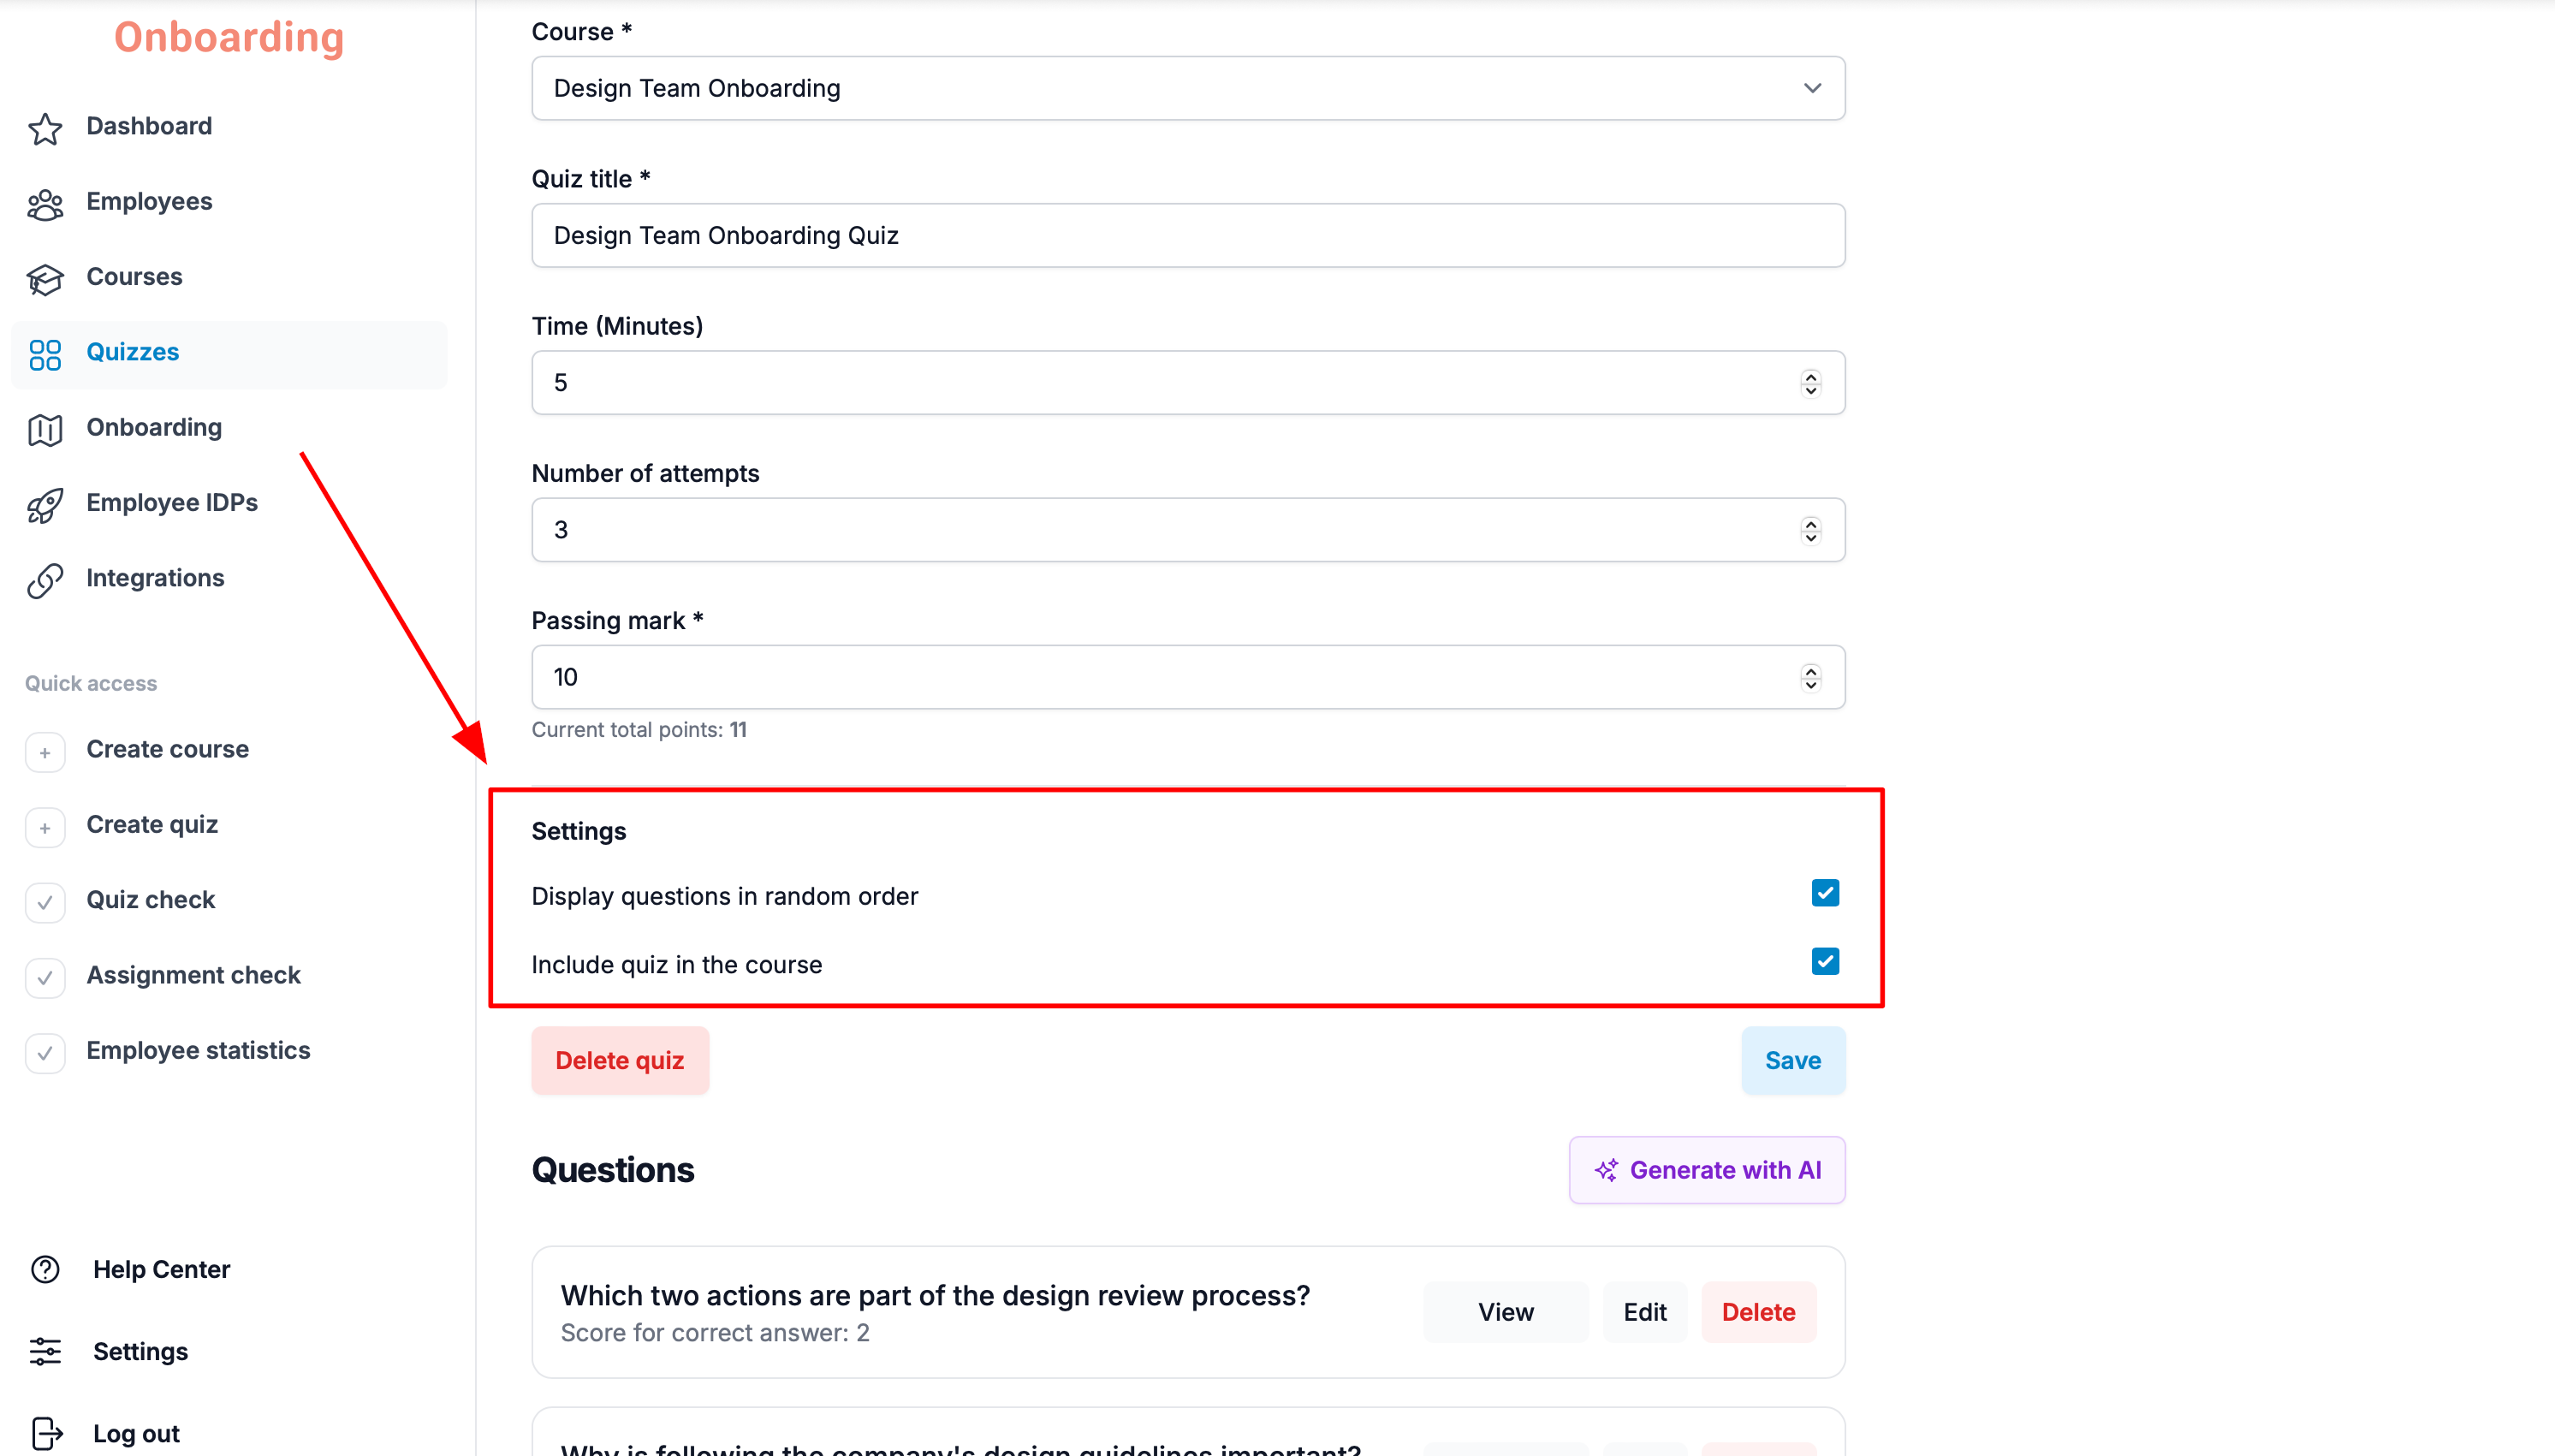
Disabling a quiz doesn't delete it from the system. It becomes unavailable to employees, but all its settings, questions, and statistics are preserved. You can re-enable the quiz at any time.
Editing questions
In the «Questions» block you can:
- edit a question;
- delete a question;
- add a new question in any of the available formats.
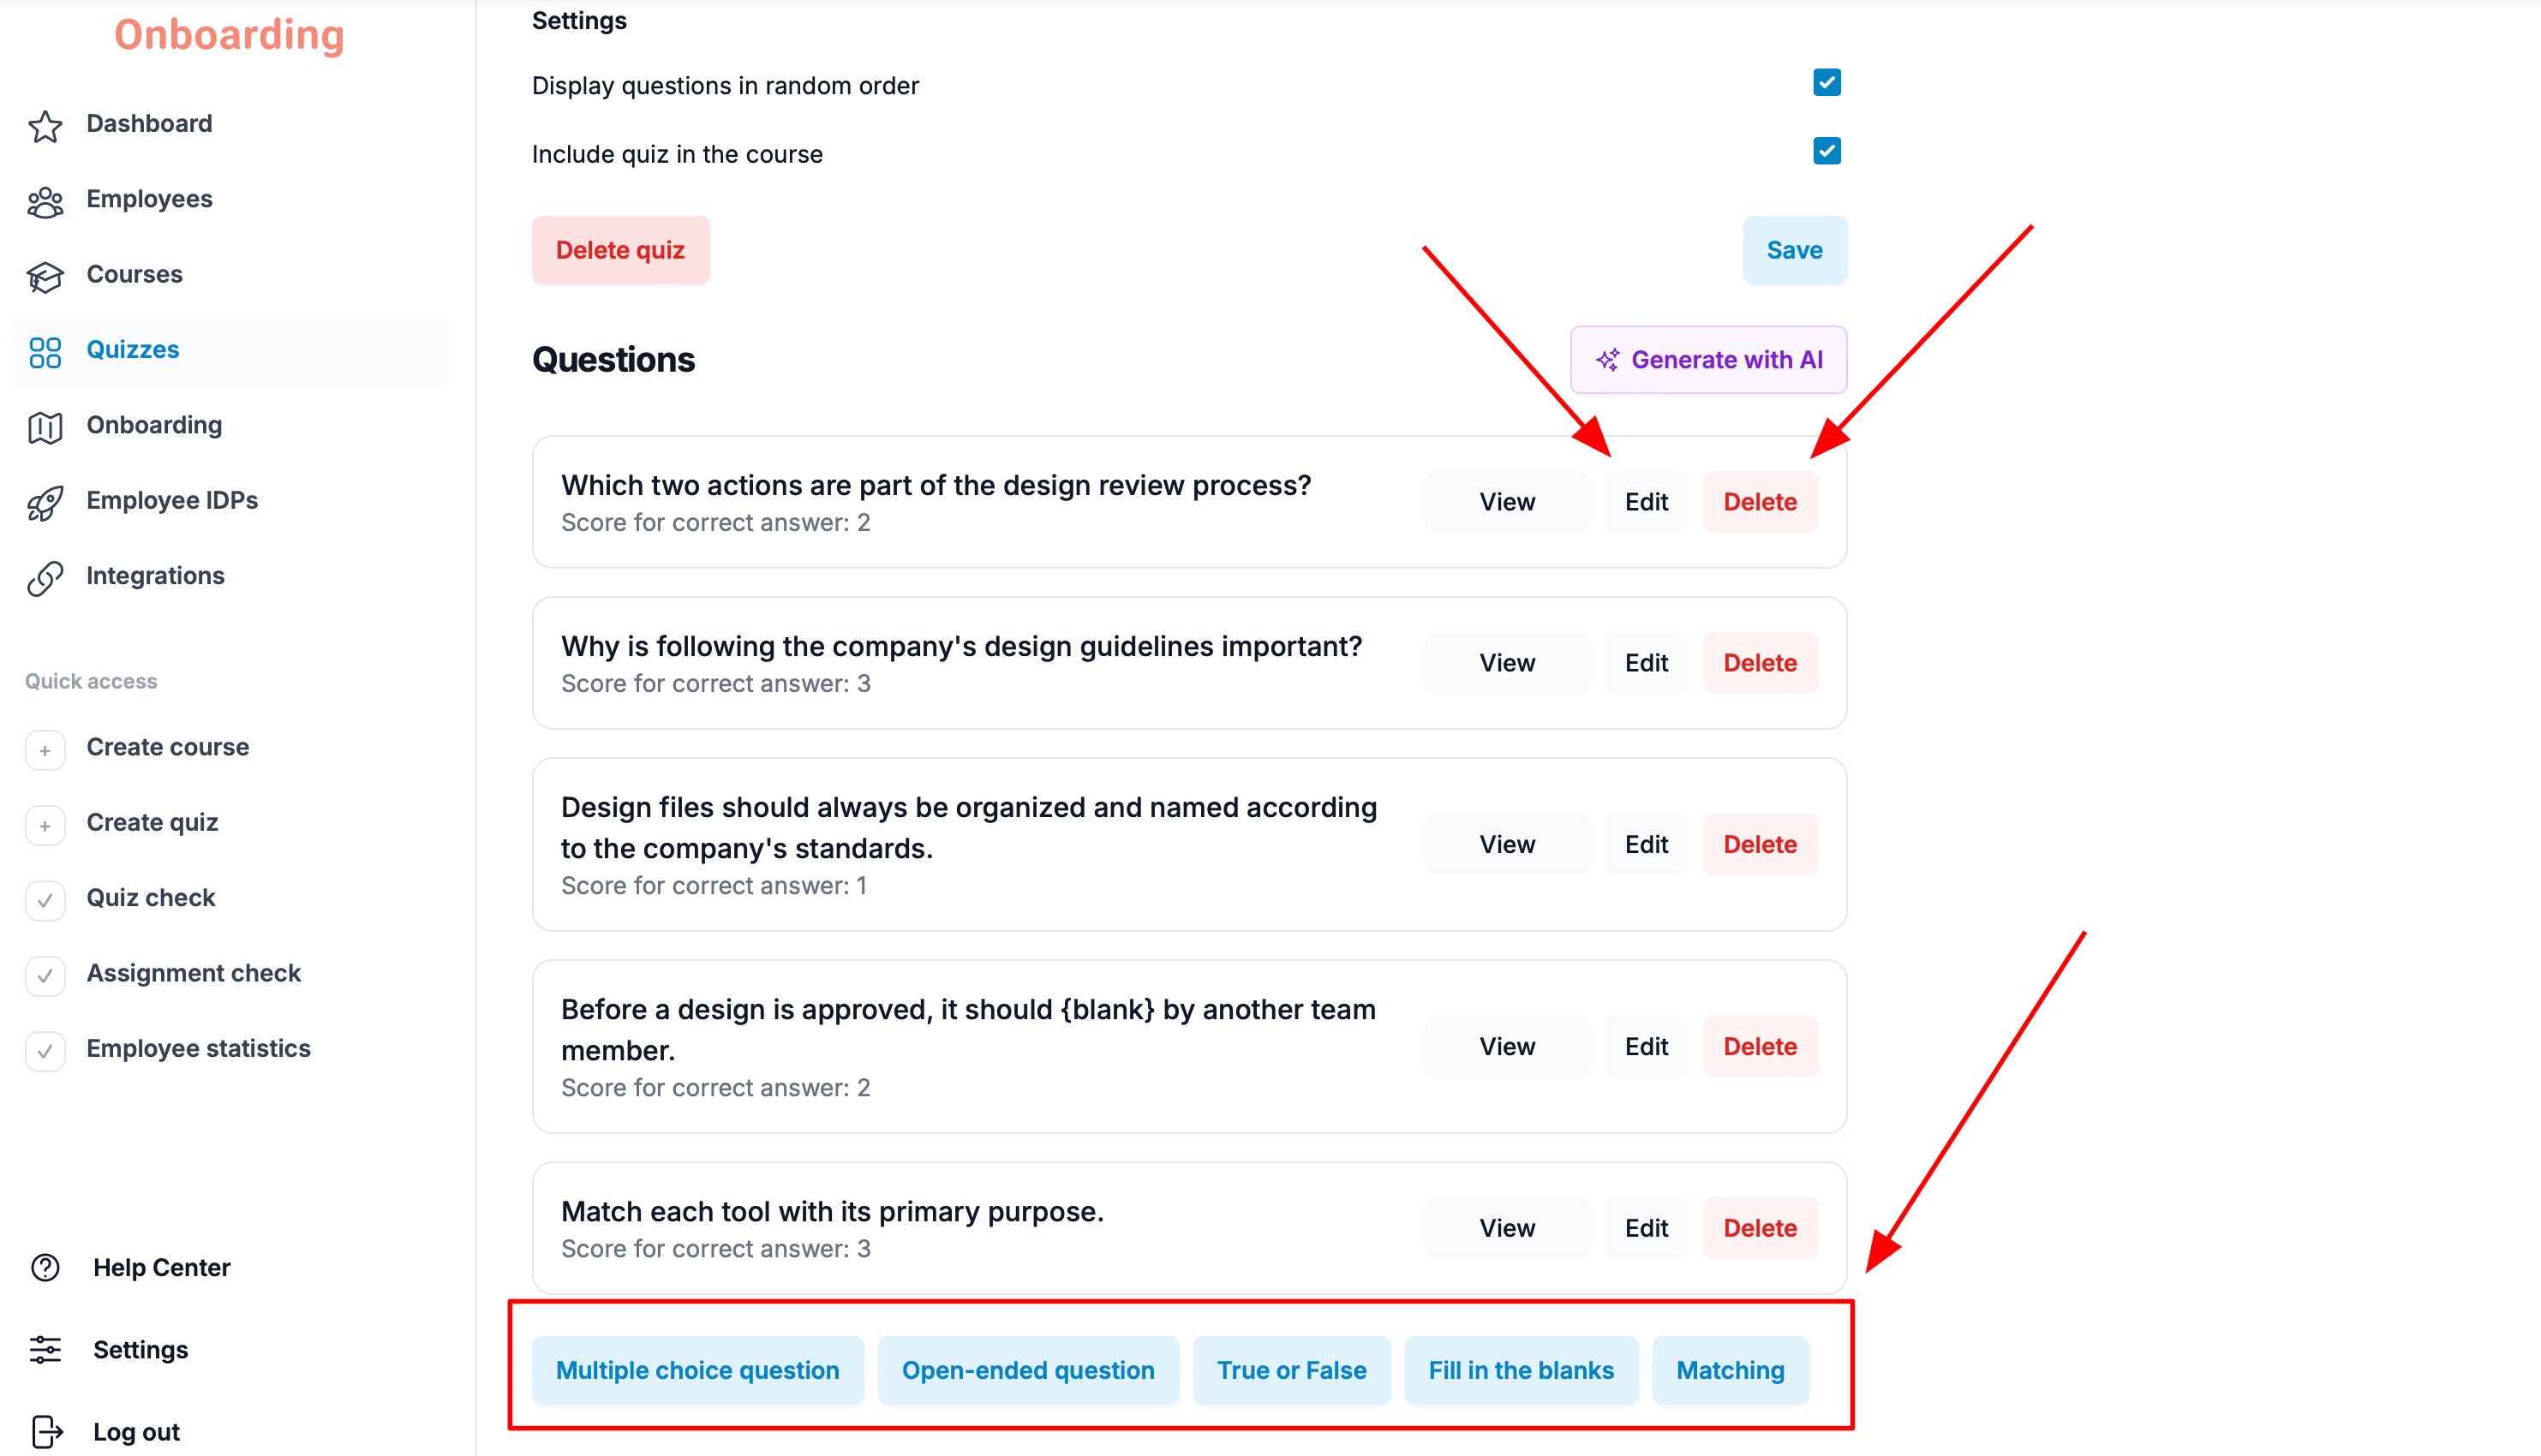
To edit a question, click «Edit» next to the question you want to update.
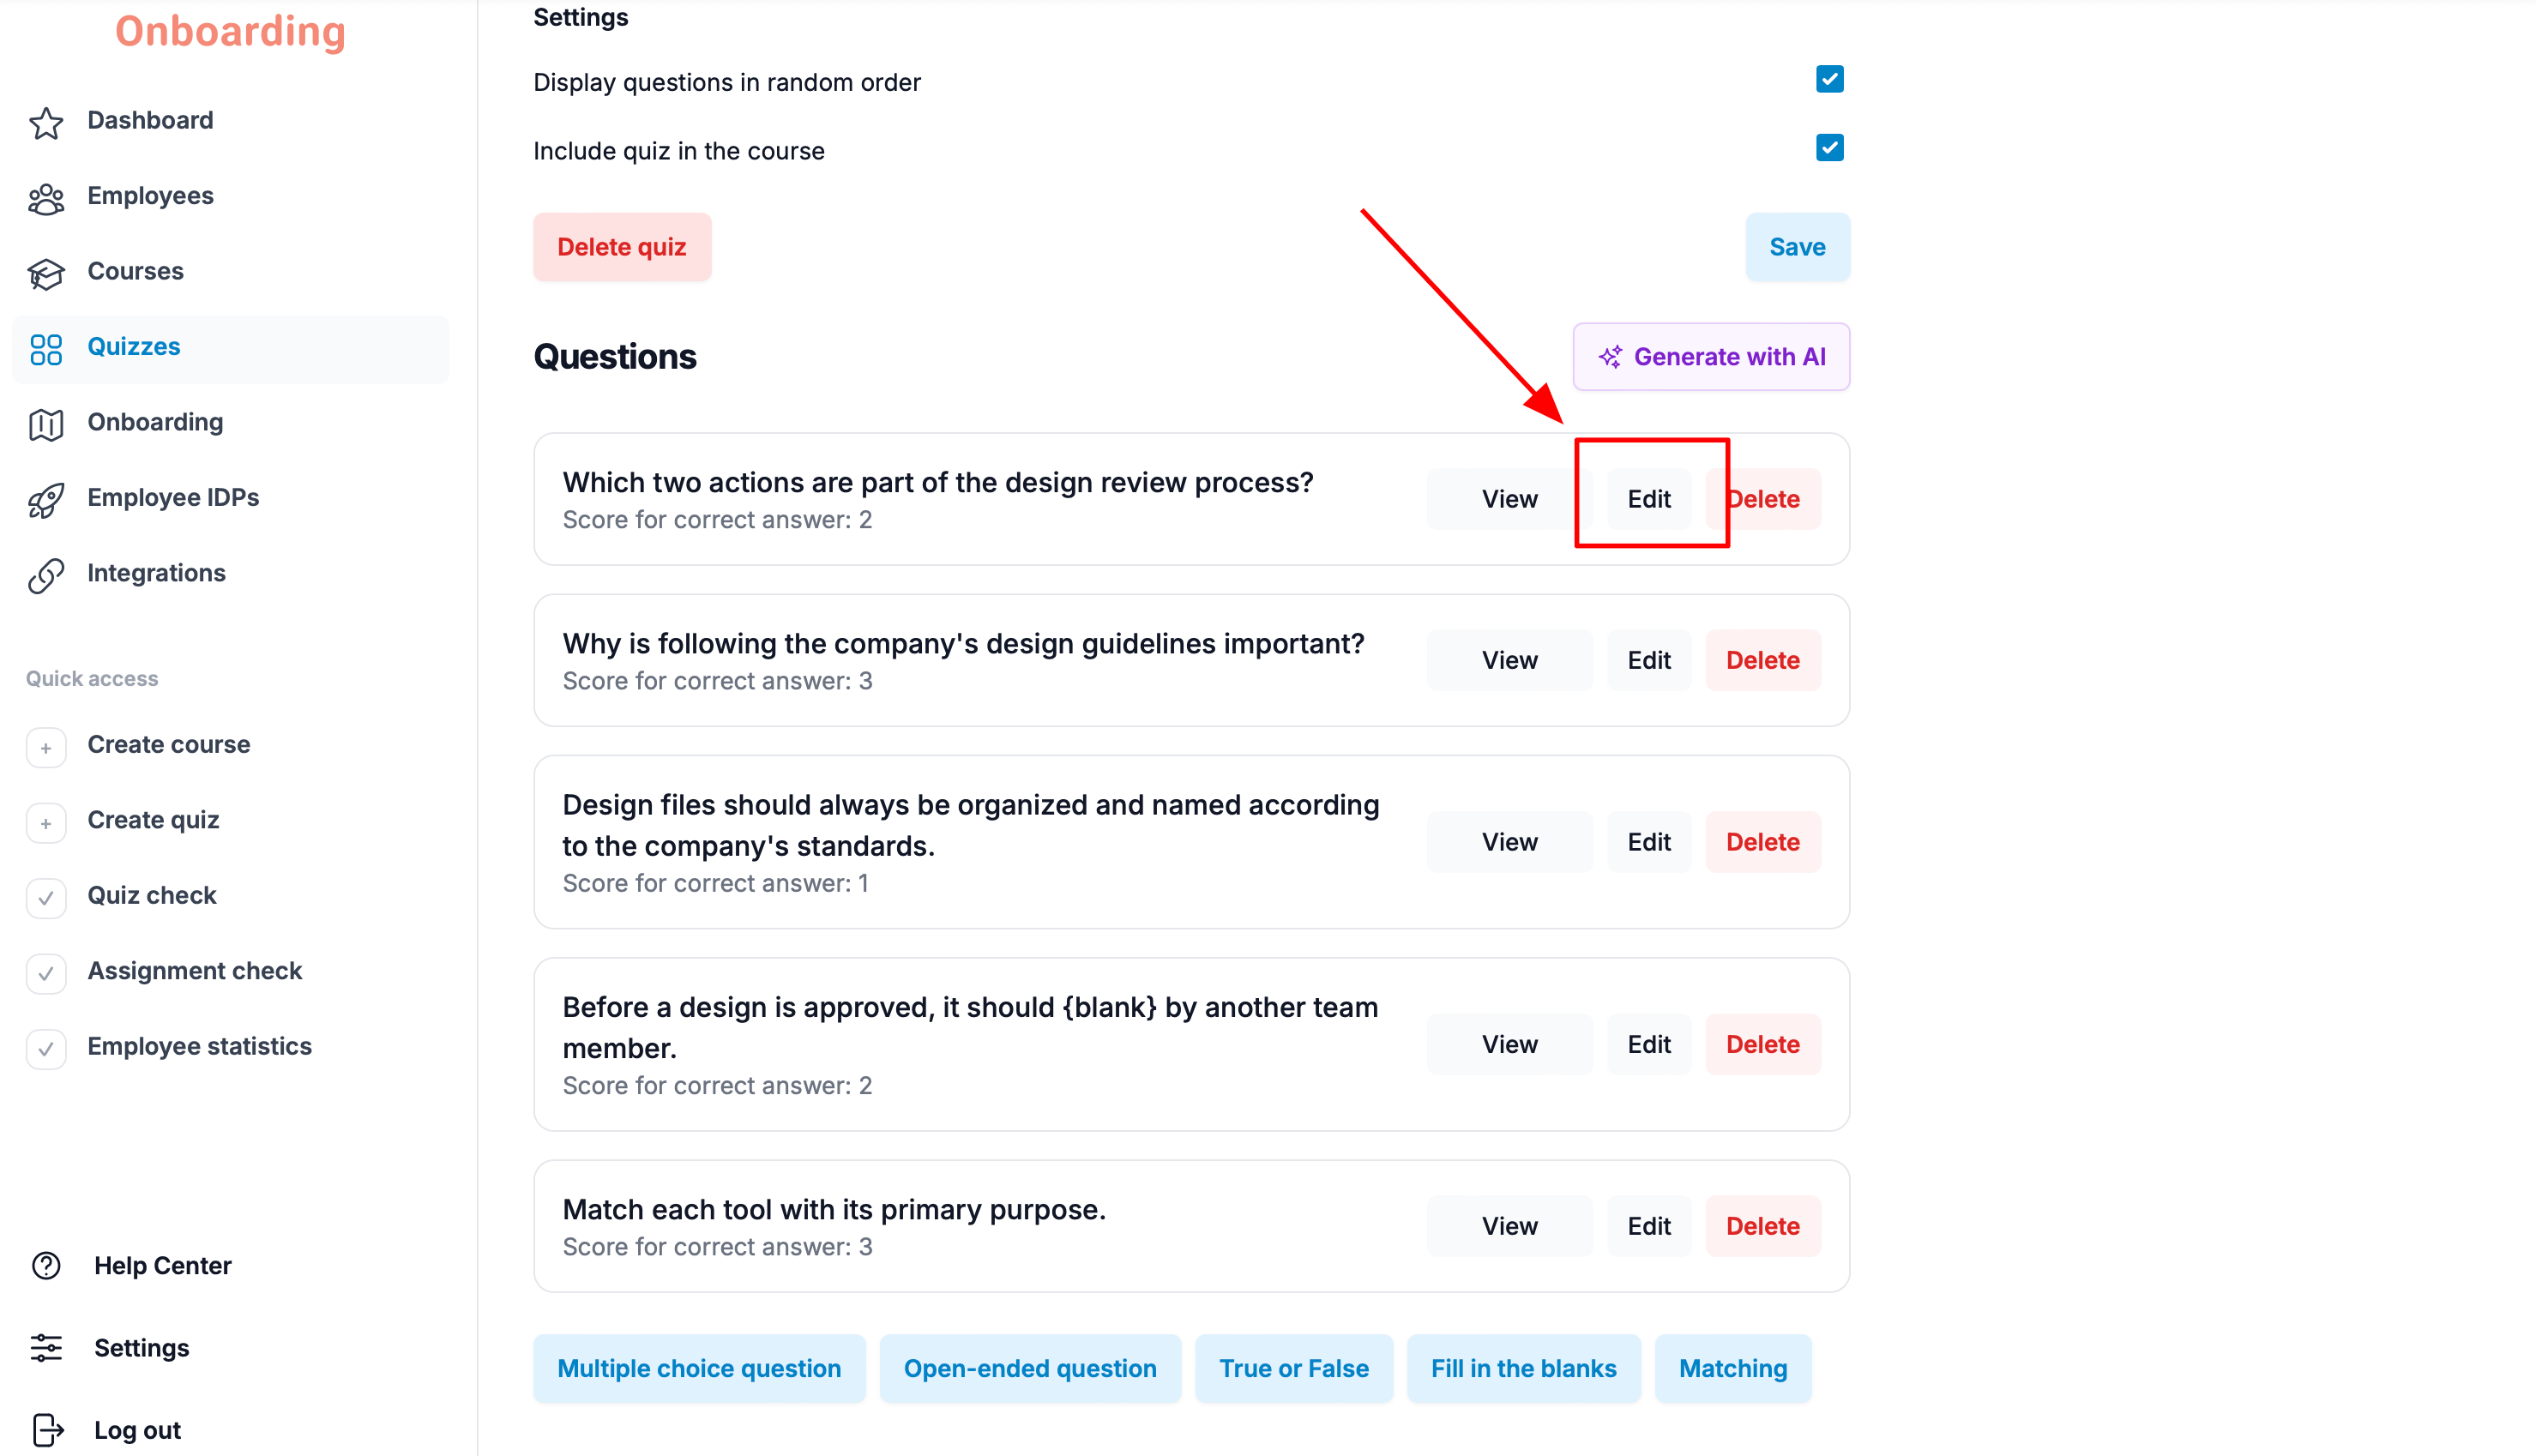
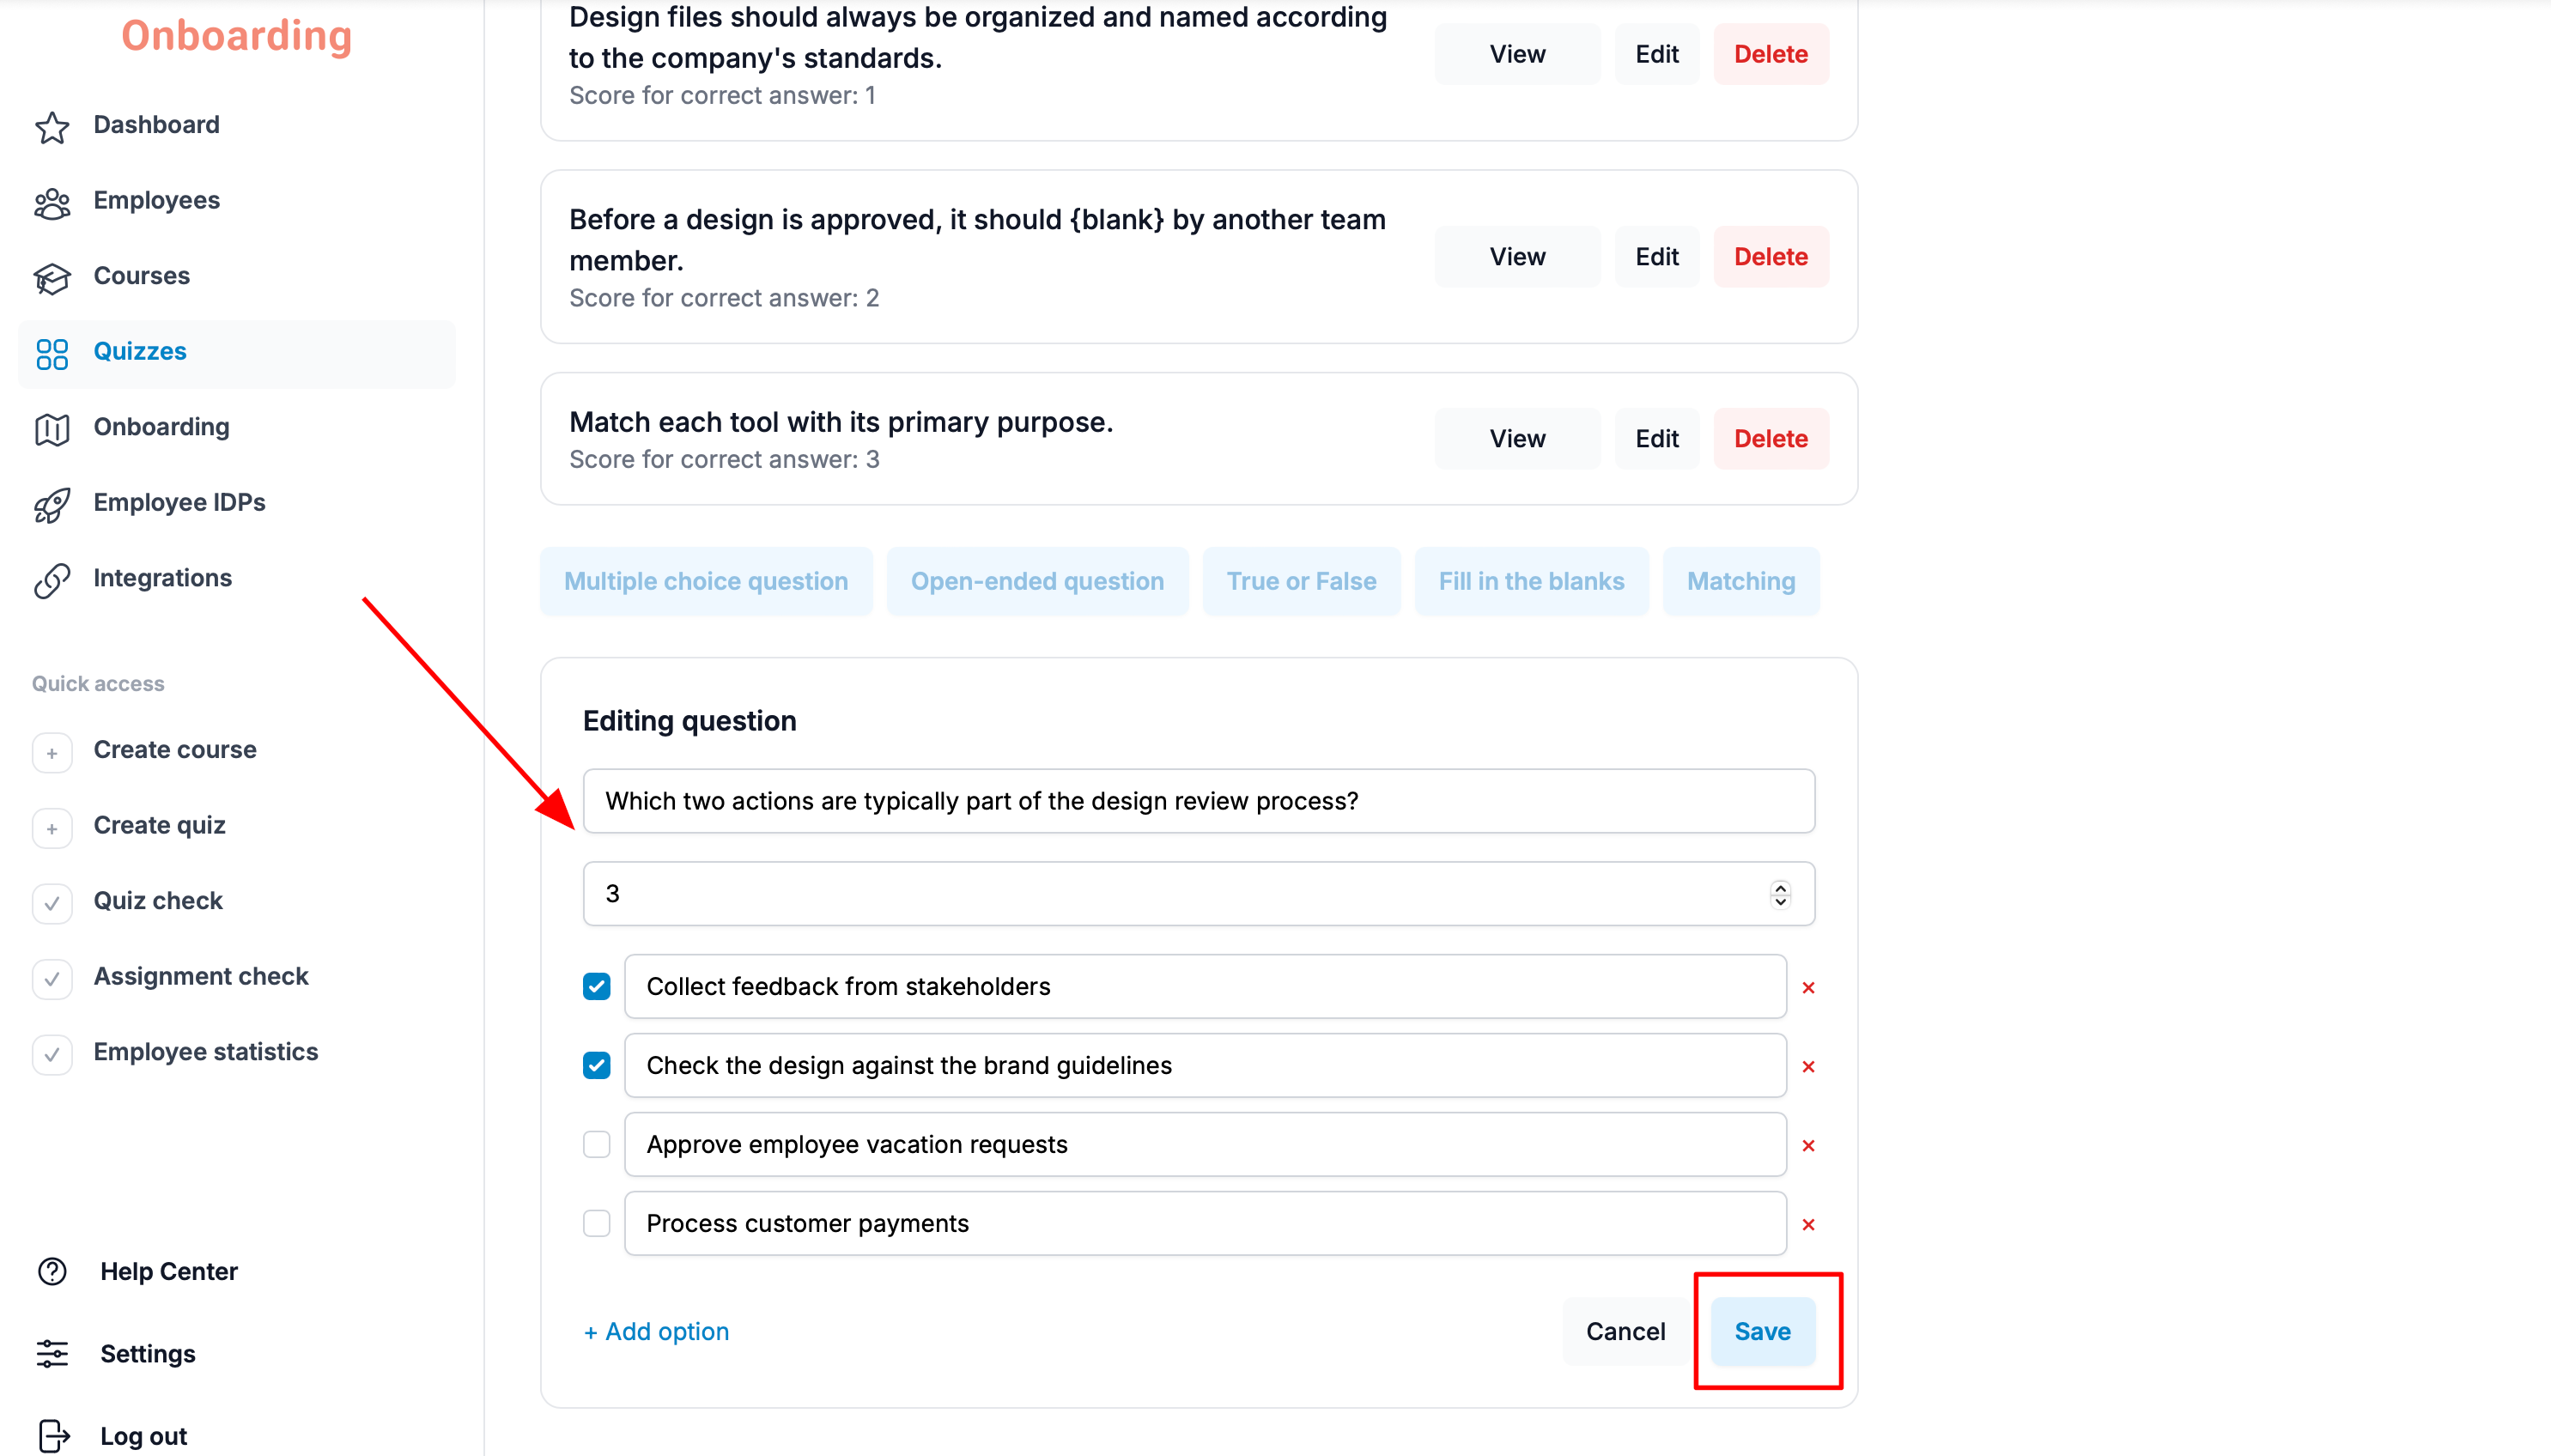
The editing window will open. Make the necessary changes to the question and click «Save».
The question has been successfully updated 🎉
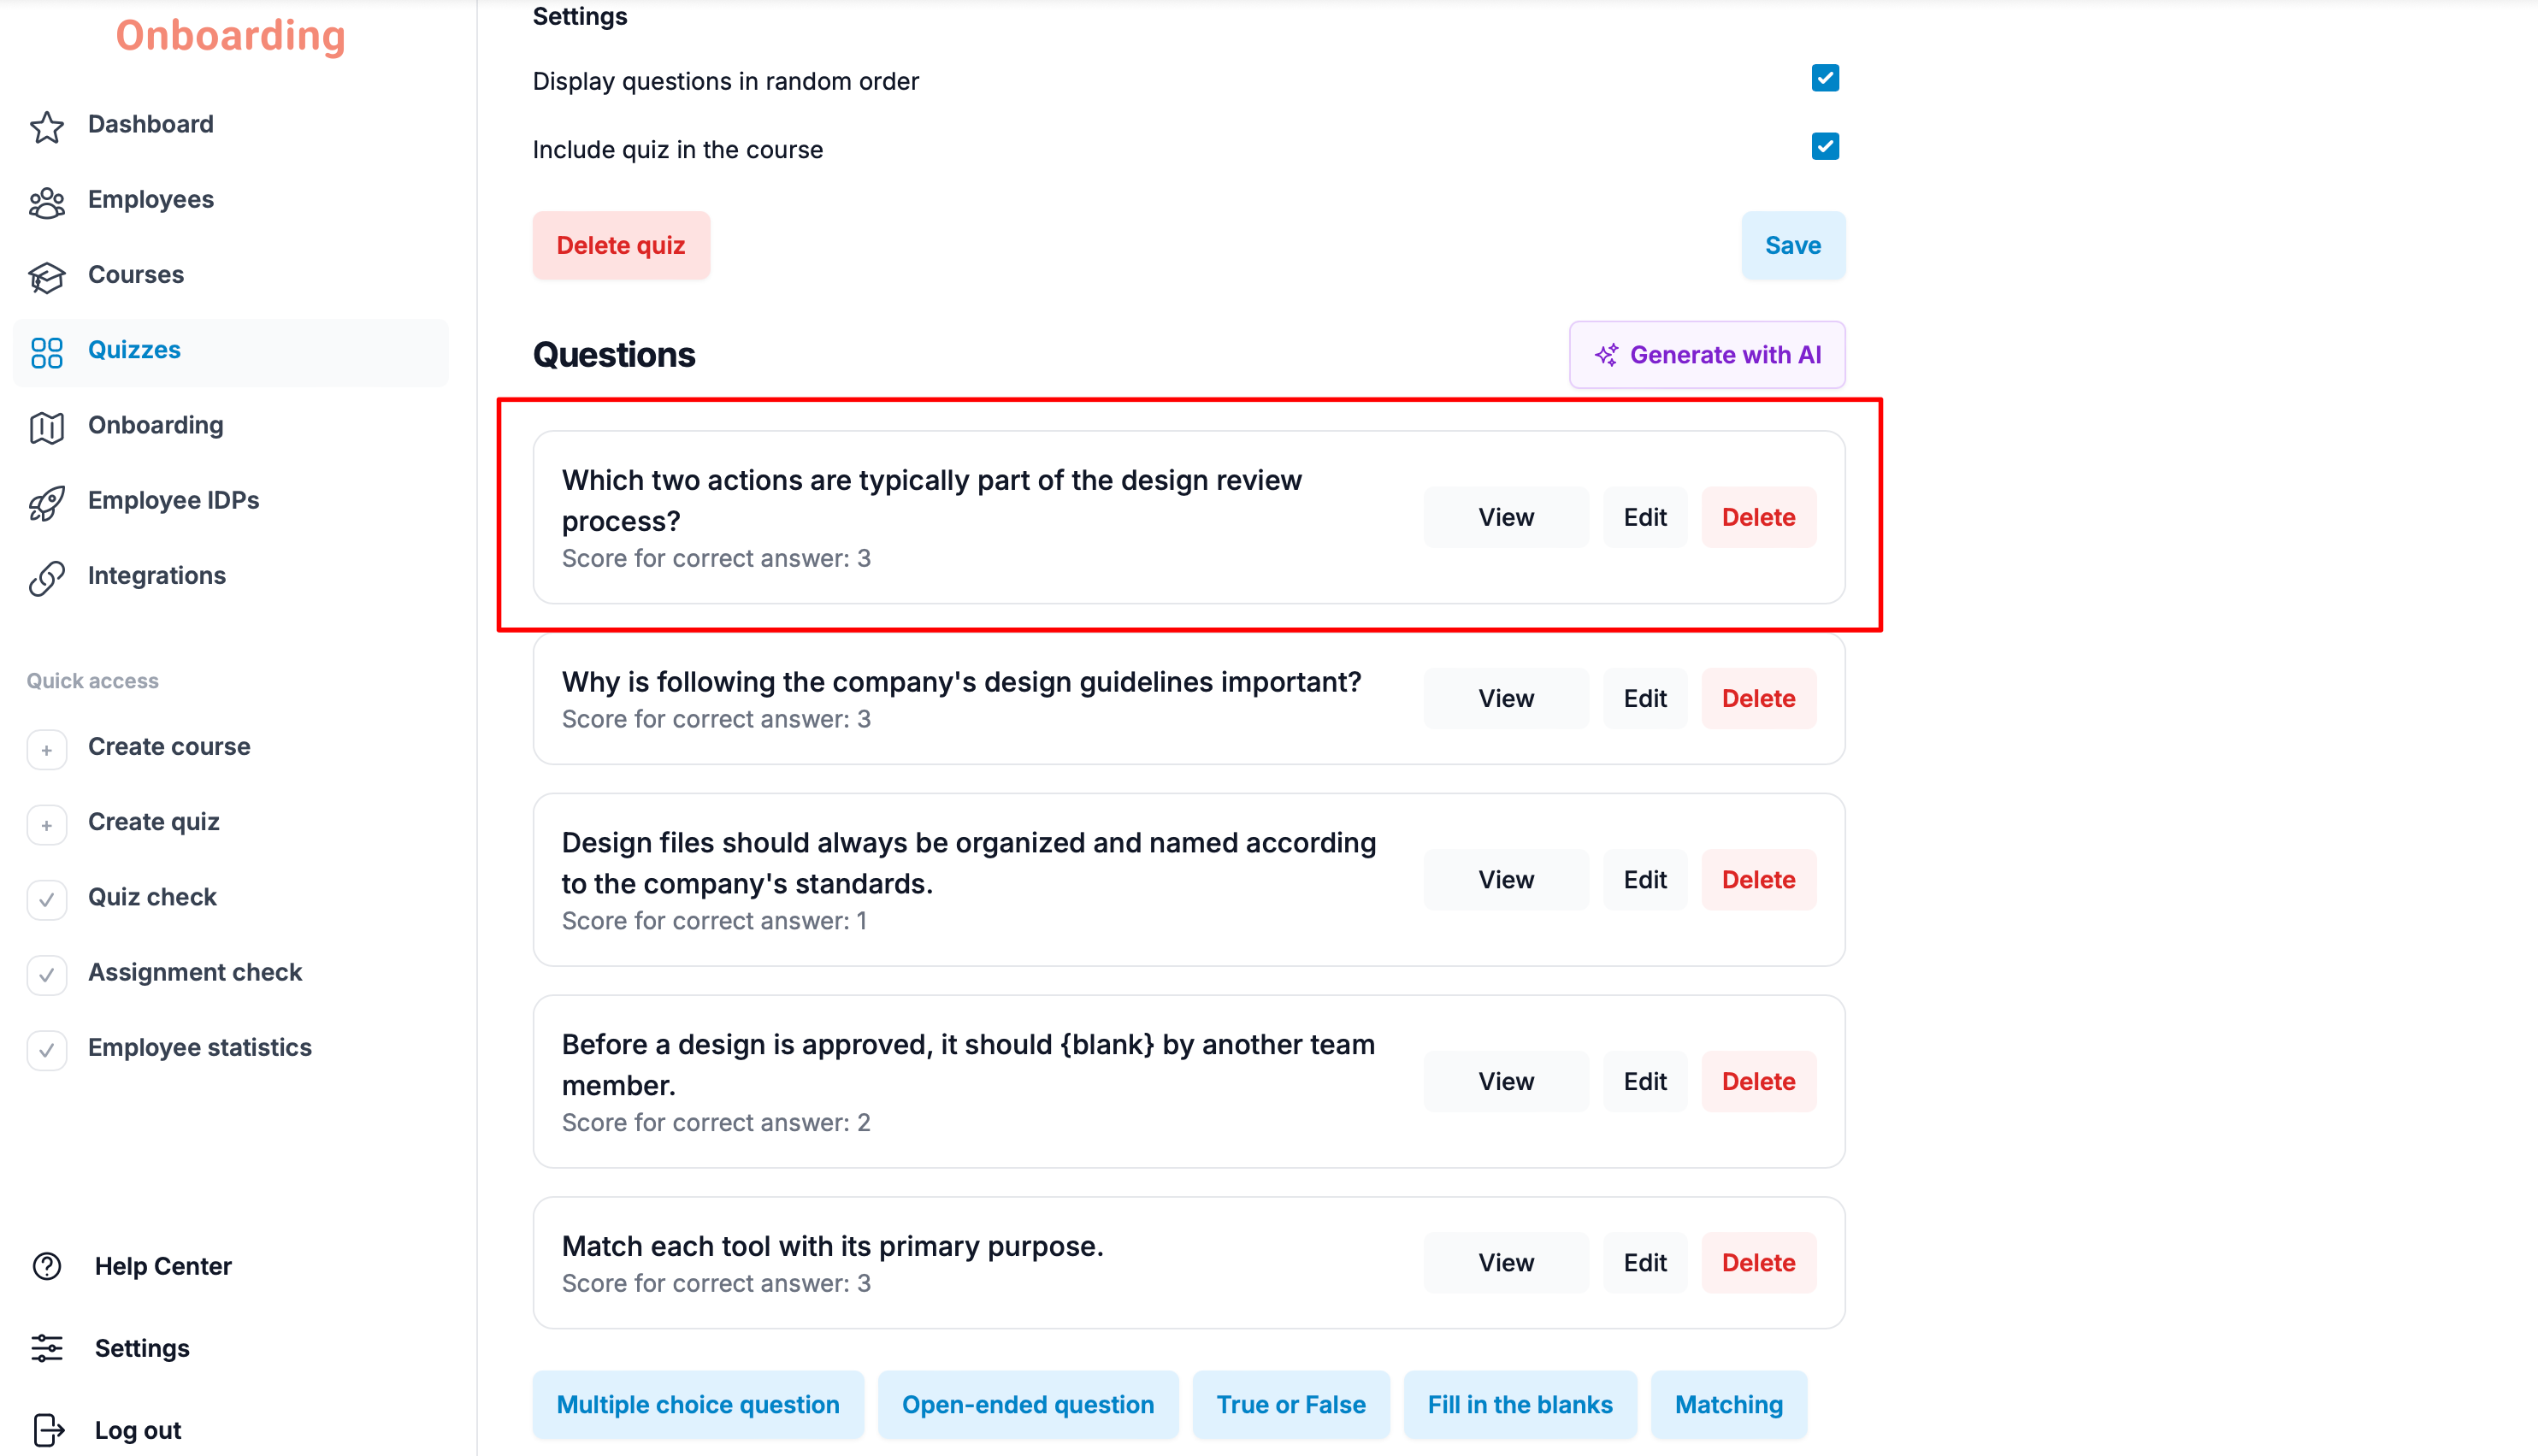
Employees who haven't started the quiz yet will see the updated version of the question.
Employees who have already completed and passed the quiz will keep their results. They will continue to have access to the previous version of the quiz and won't need to take it again.
If at least one employee has started or completed the quiz, you'll see information about how the changes affect employee progress.
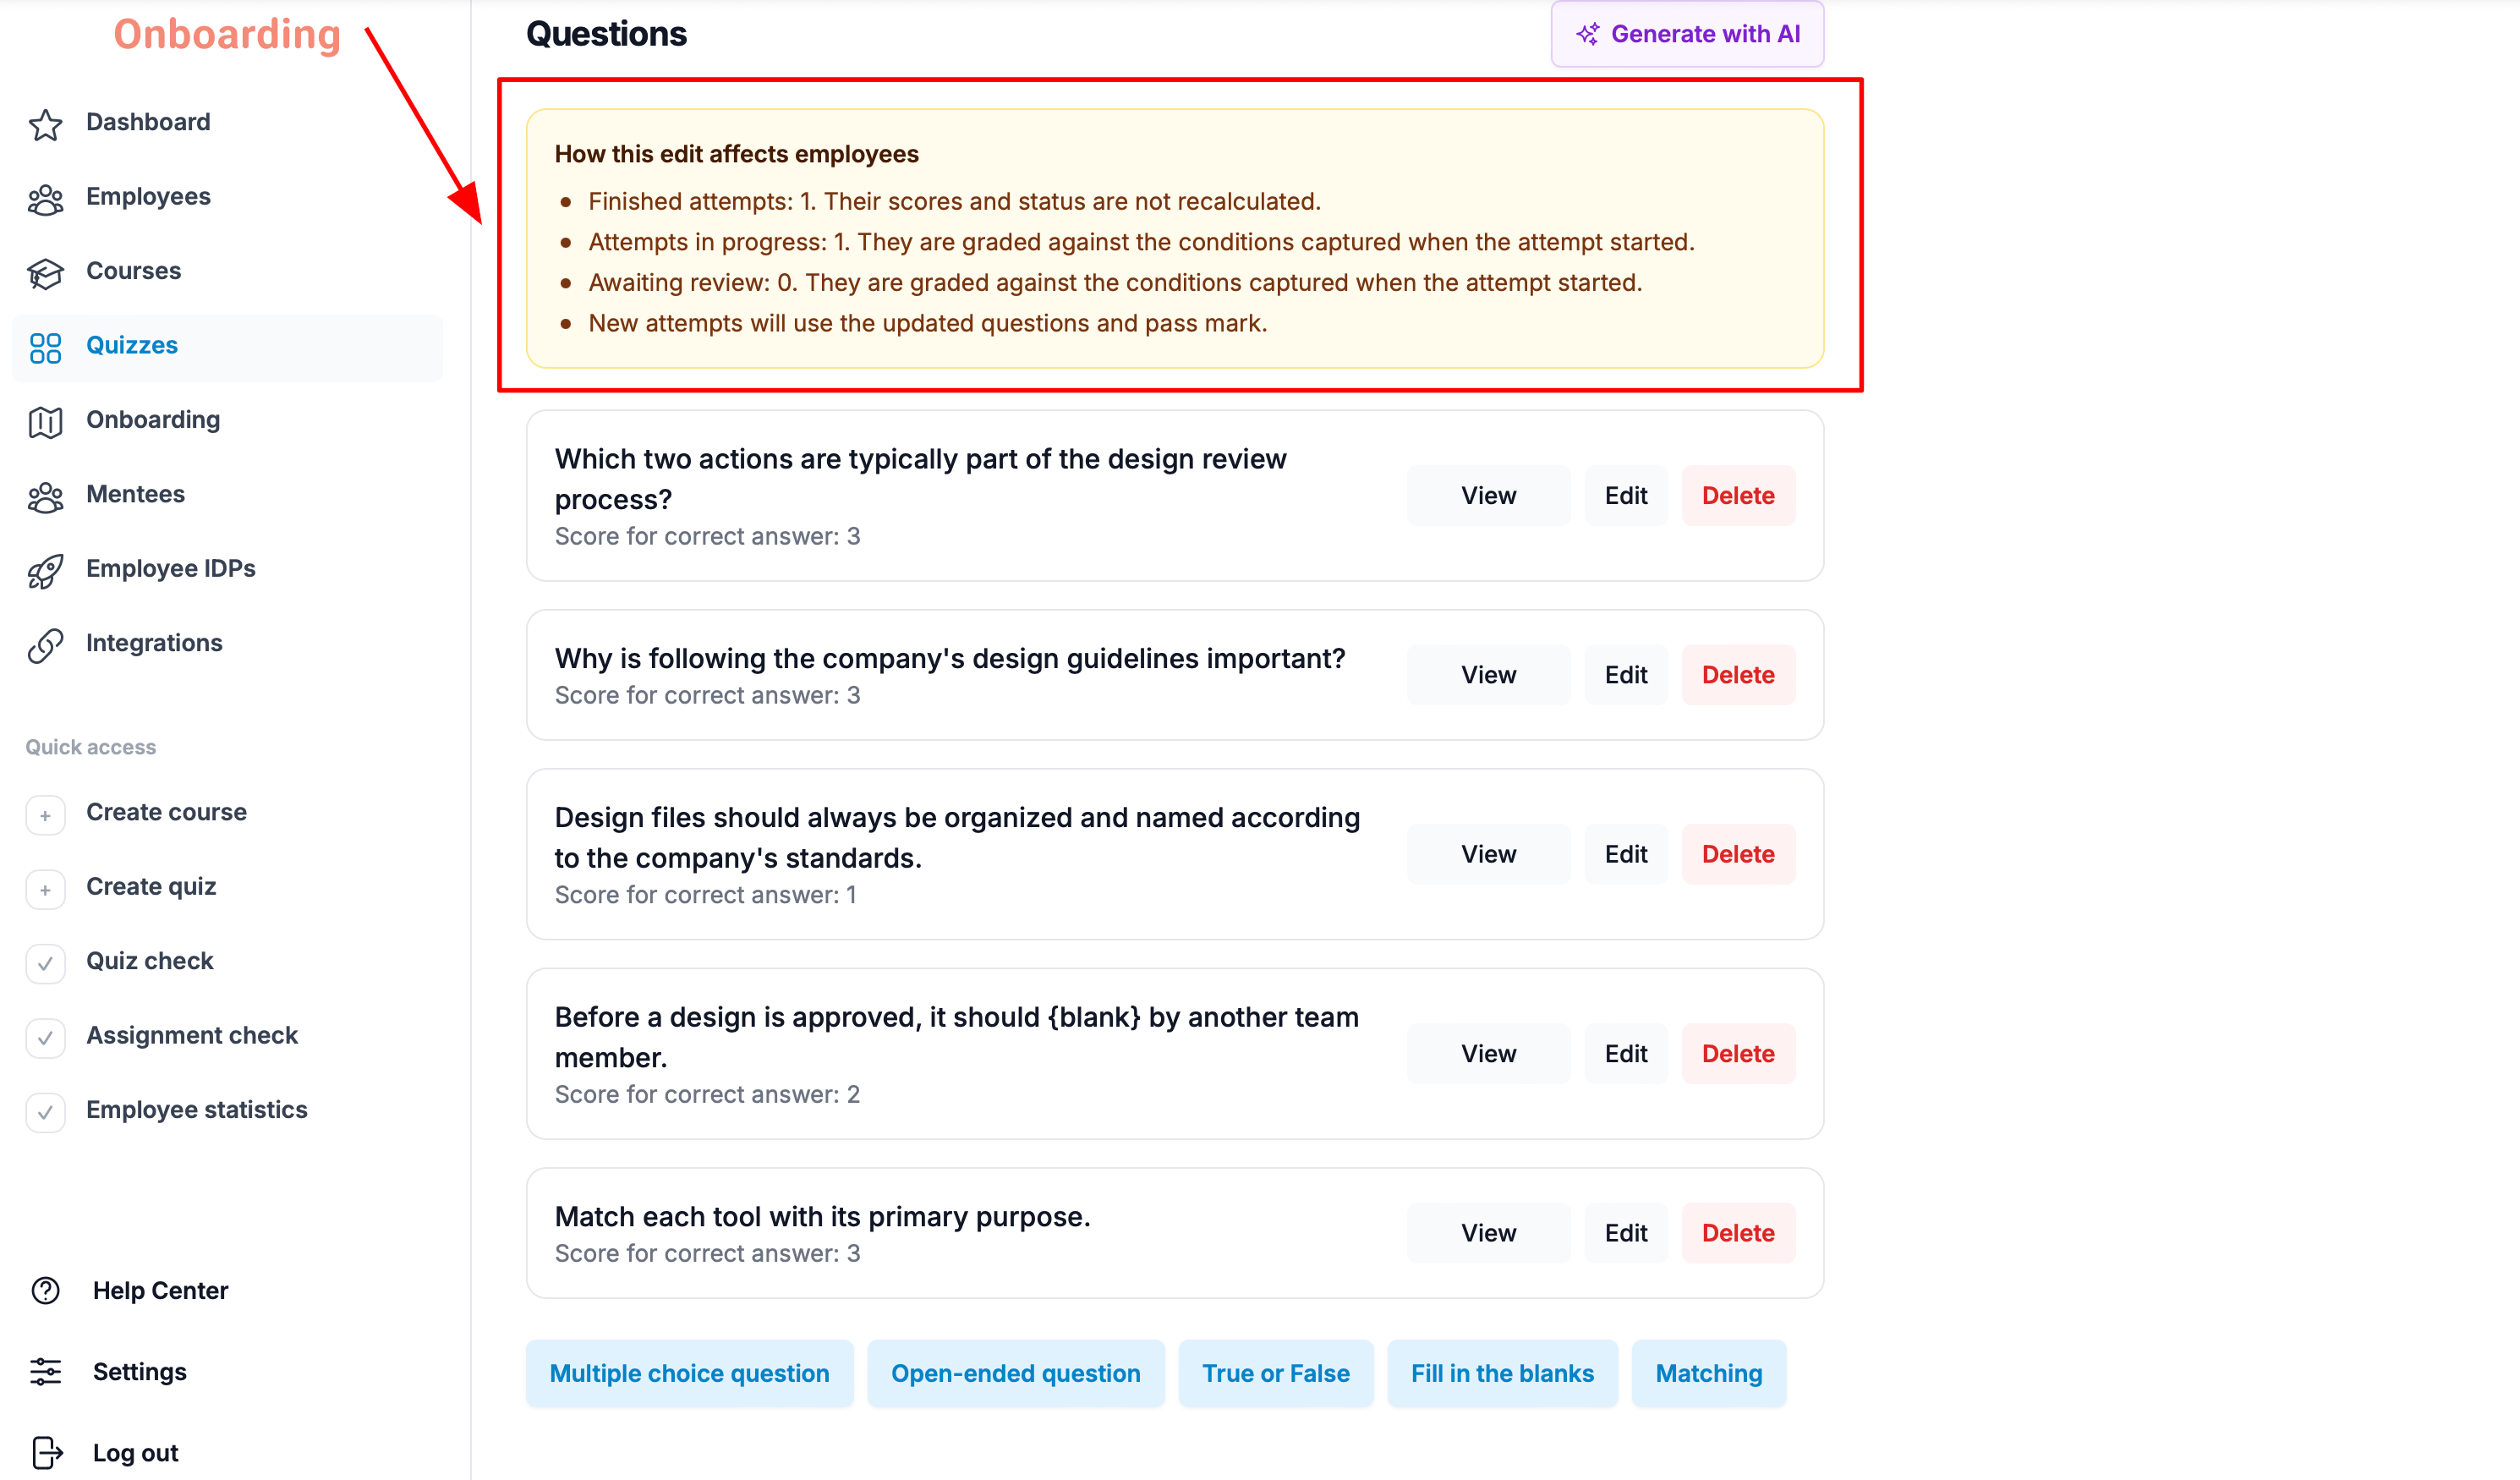
When you're done, click «Save».
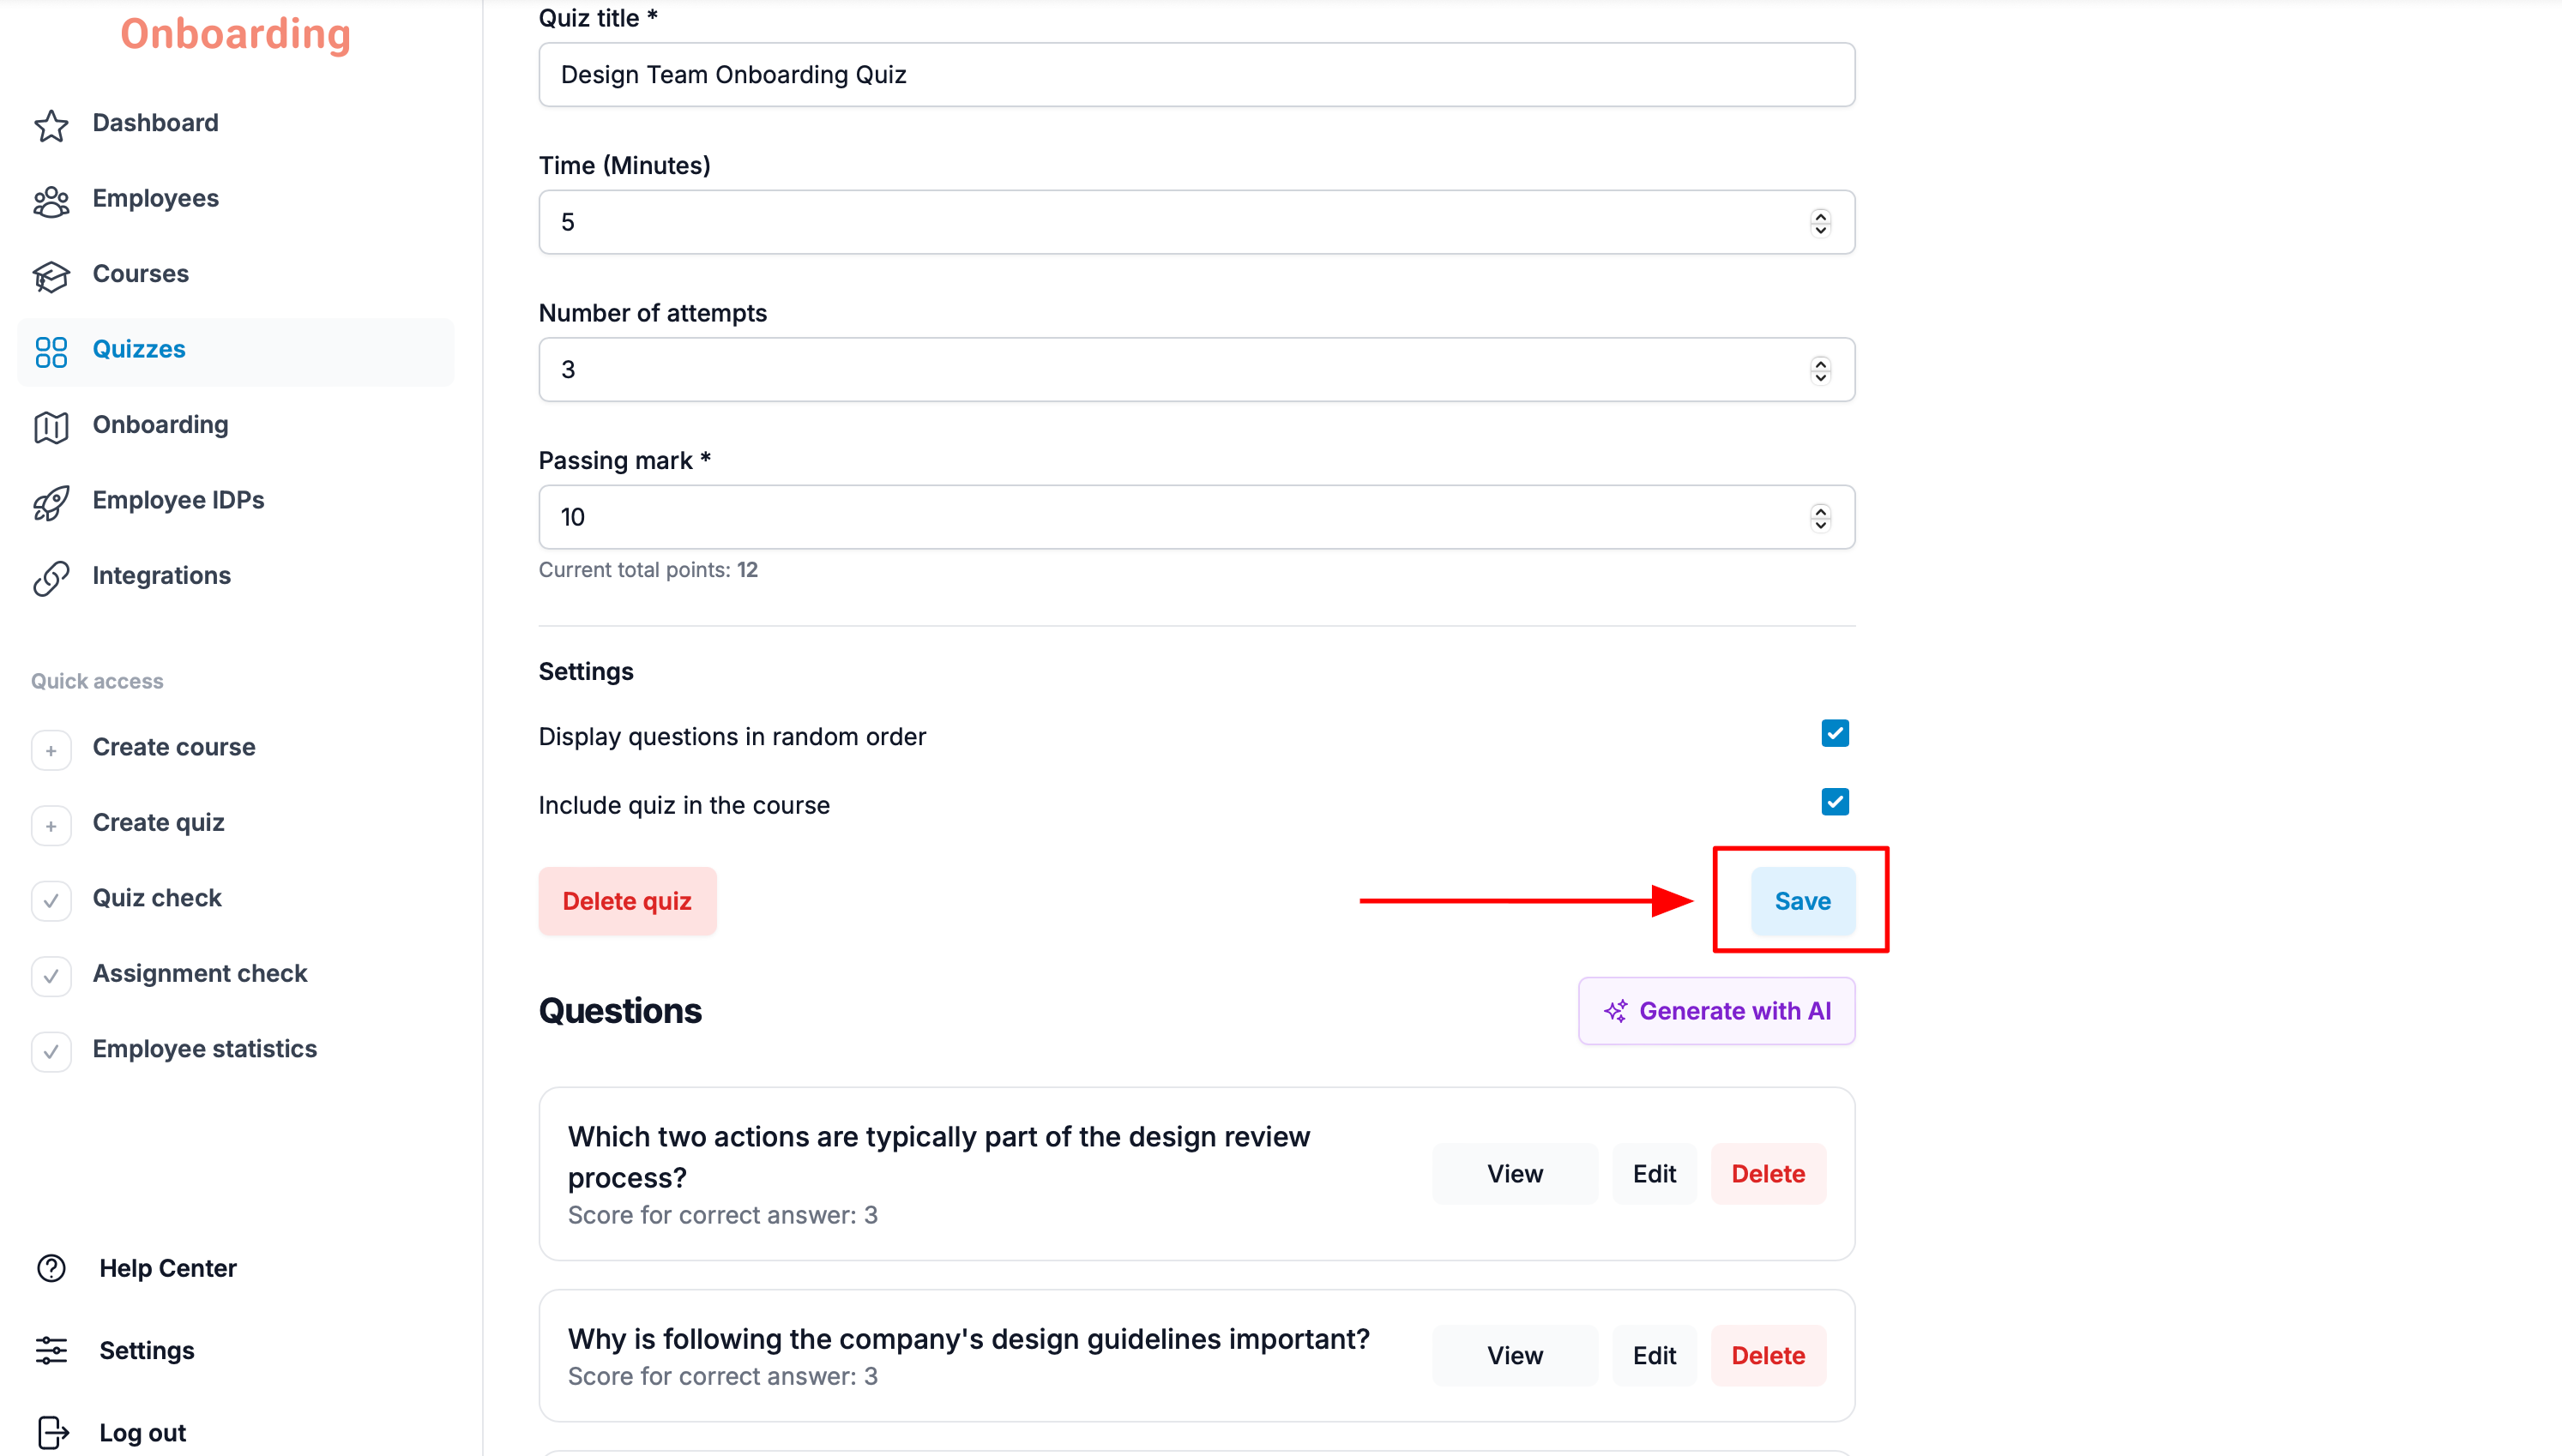
Your changes have been saved 🎉
You can't manually change the order of questions in a quiz.
Moving a quiz within a course
After being created and published, a quiz automatically sits at the end of the course it's attached to.
If you like, you can move it and place the quiz after any lesson or assignment.
To do that, open the «Courses» section, pick the course you need, and click «Edit».
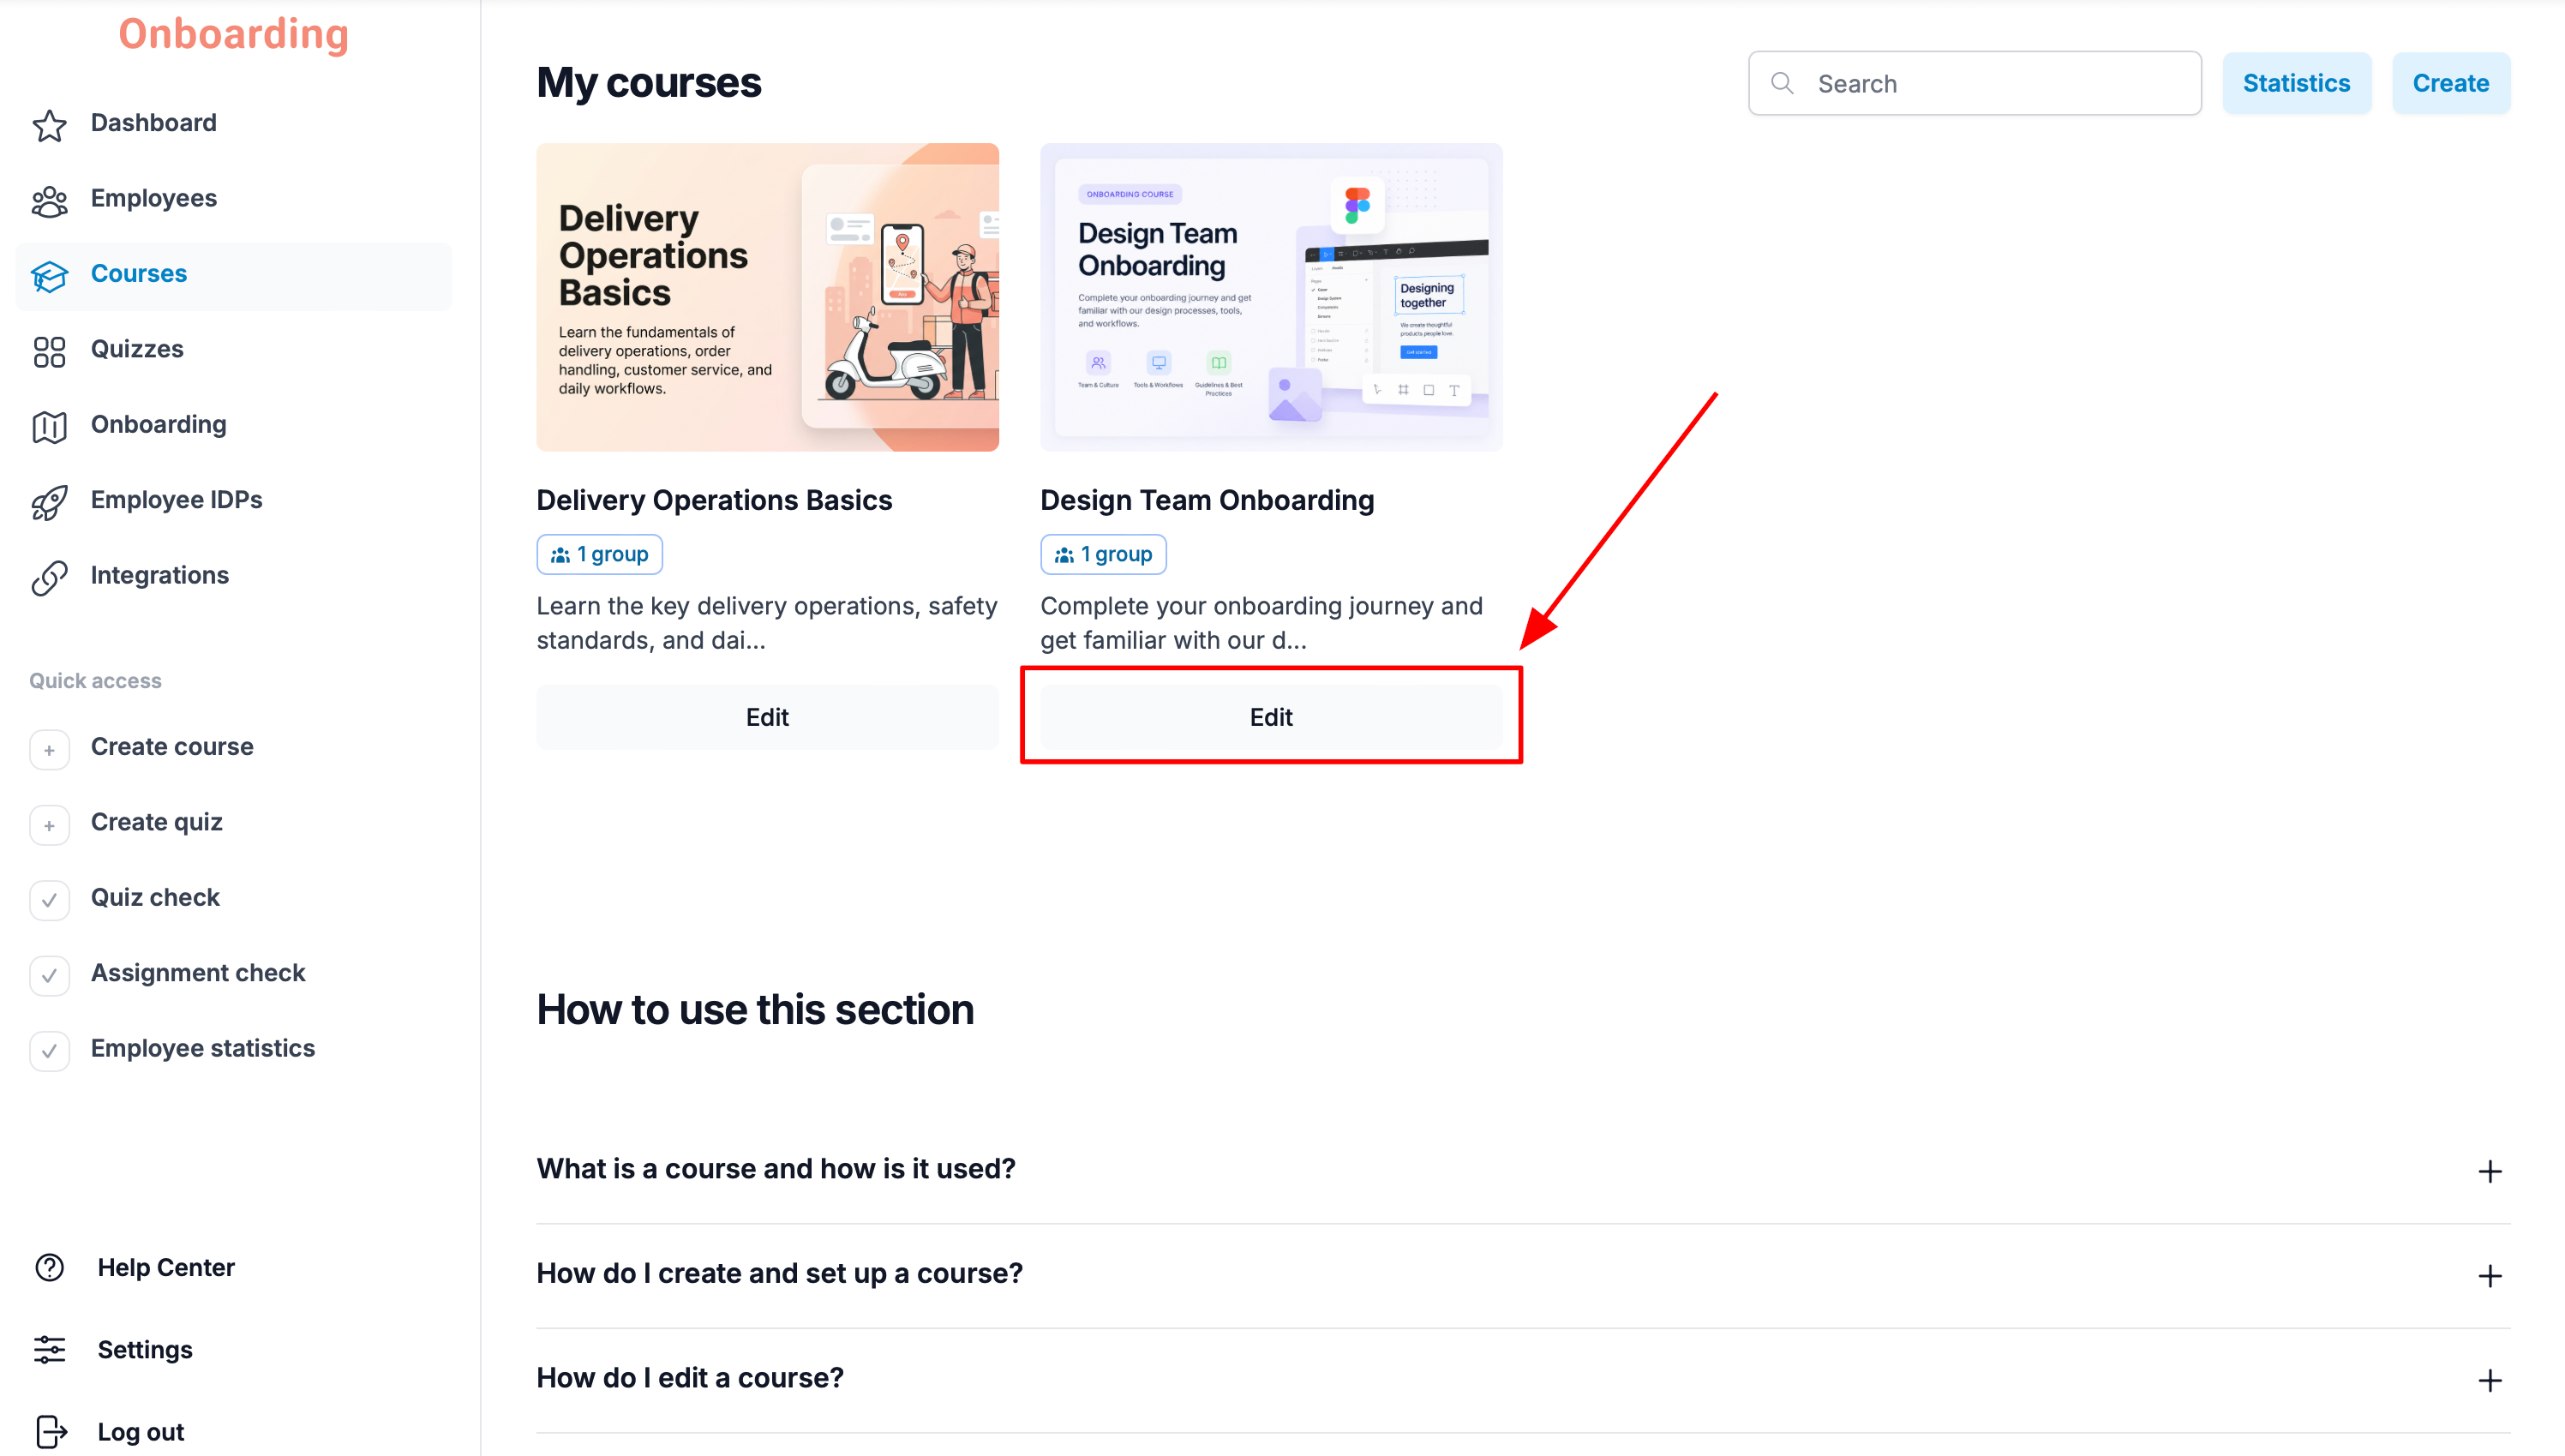
The course editor opens. In the «Course content» block, find the quiz among the rest of the course materials.
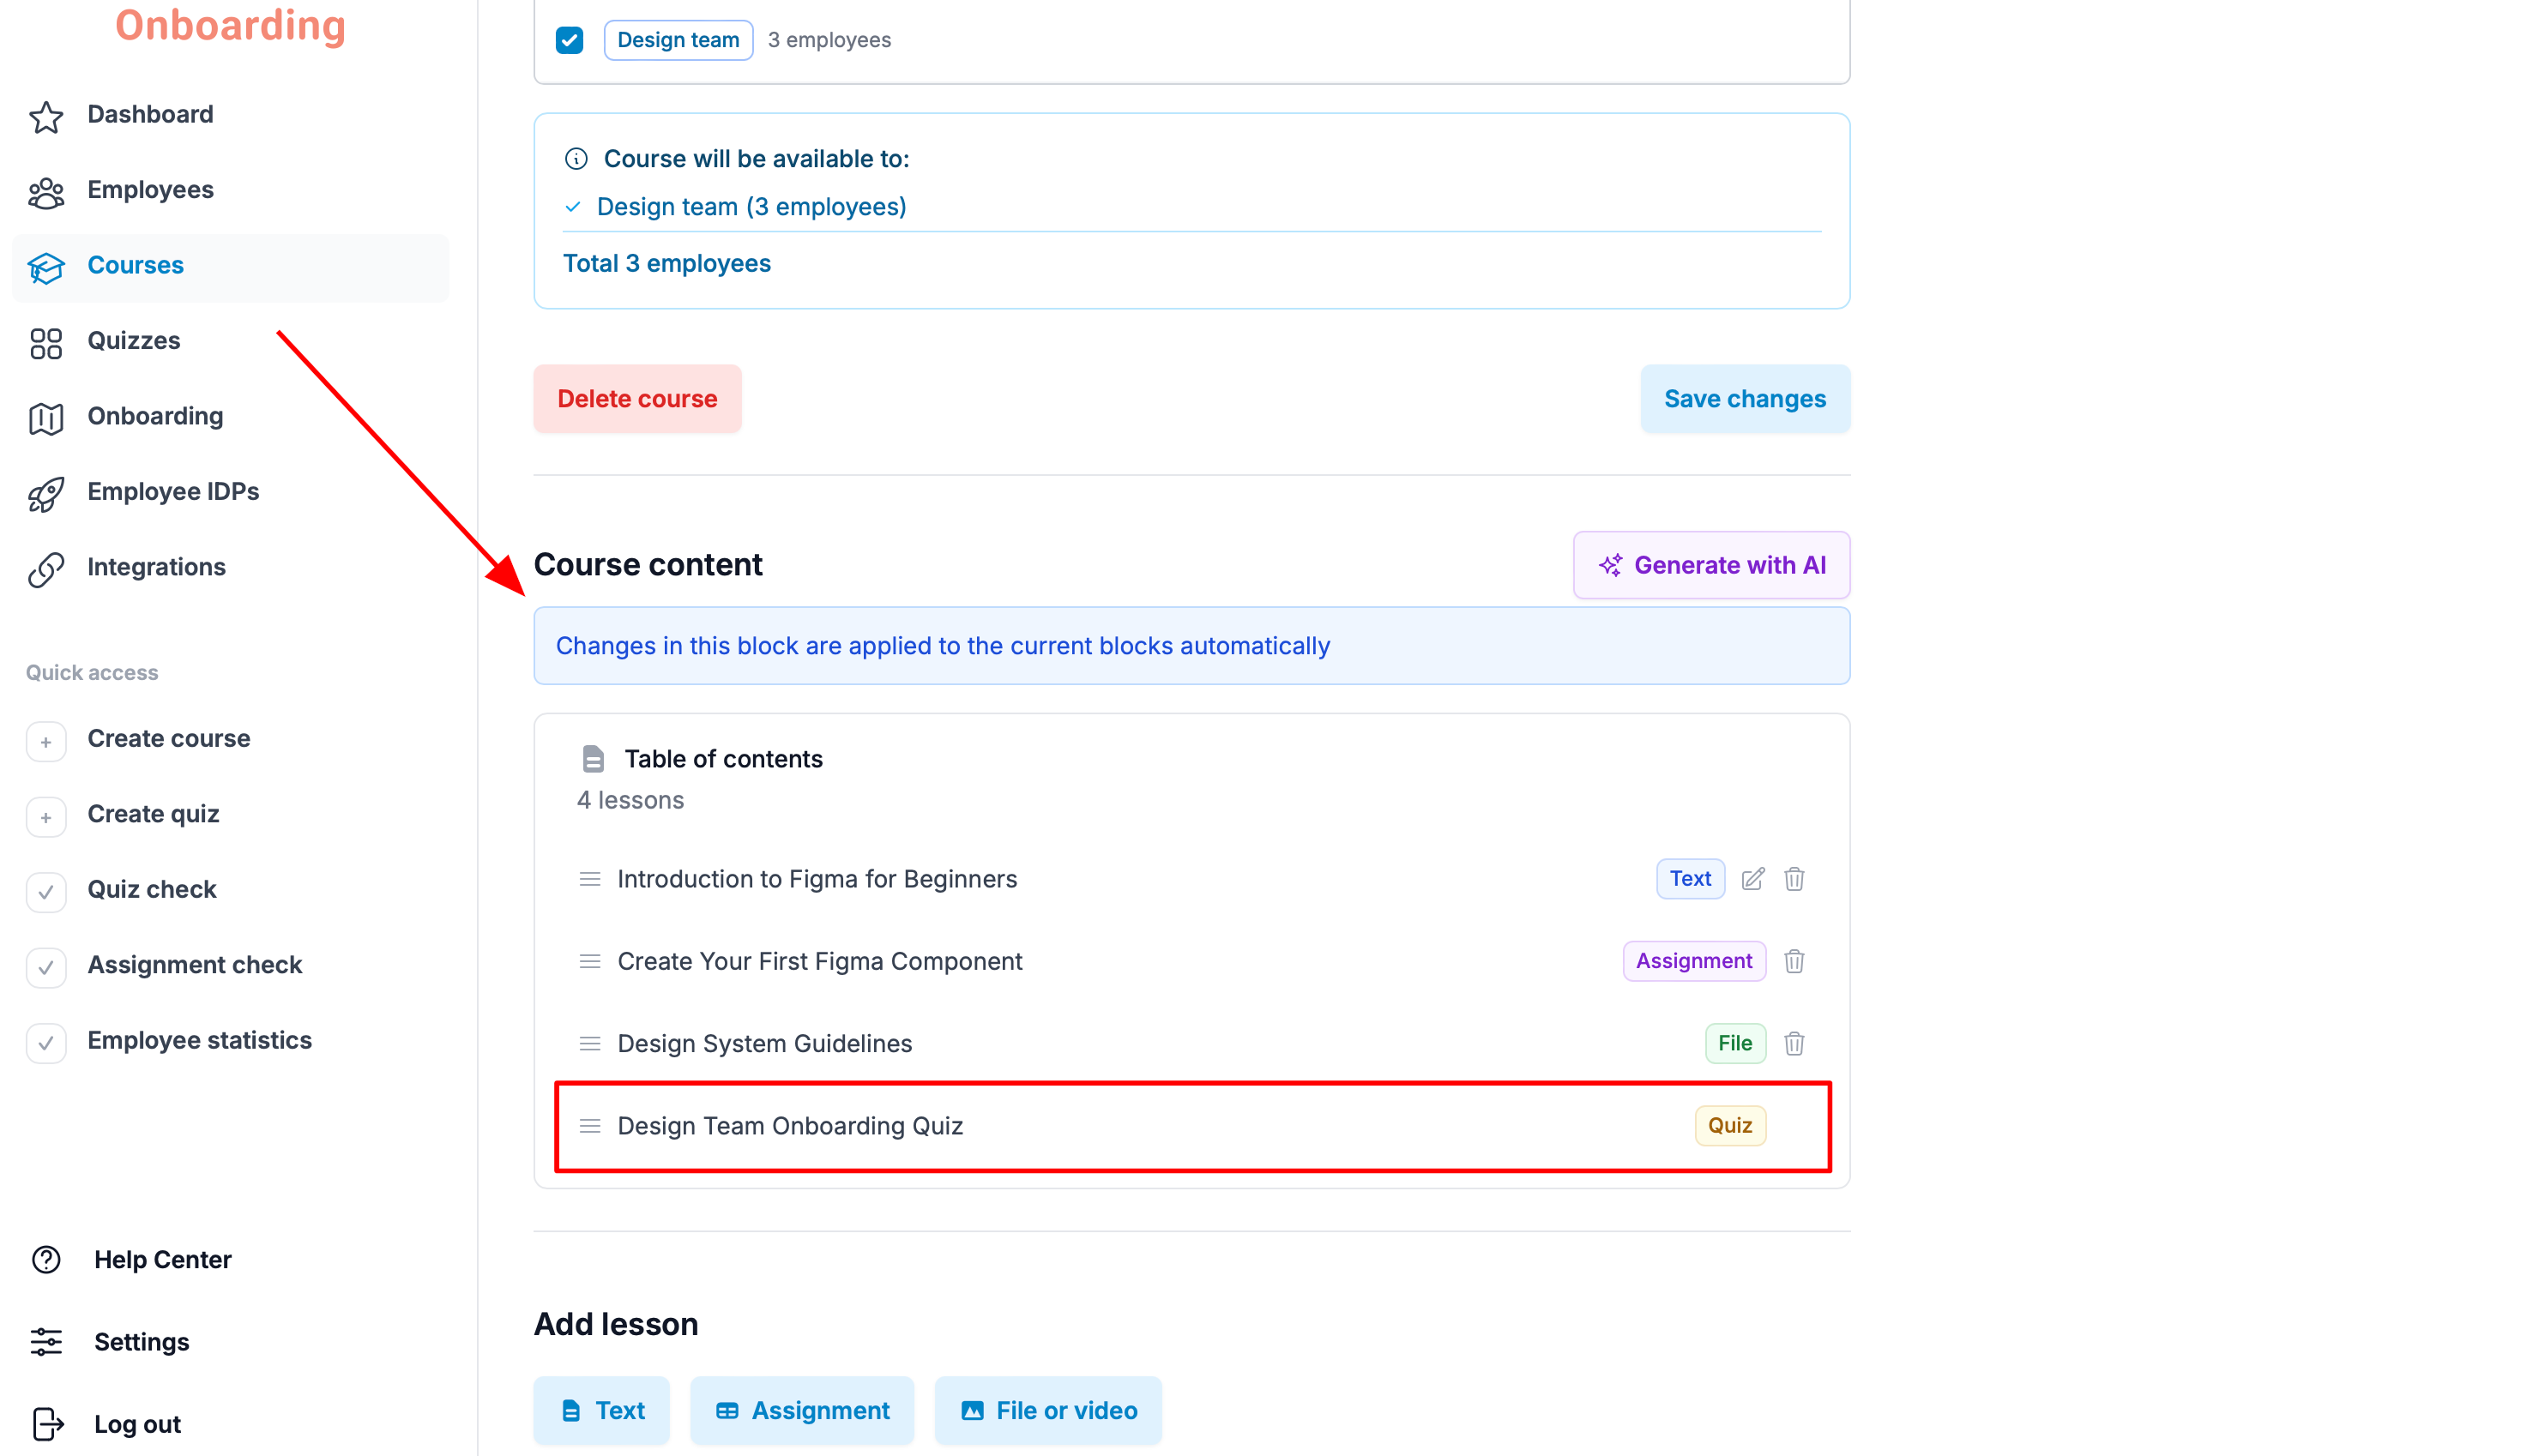
Drag the quiz to wherever it belongs in the training program — after a specific lesson, topic, or assignment, for example.
All changes in this block take effect automatically and are immediately visible to every employee with access to the course.
Click «Save changes».
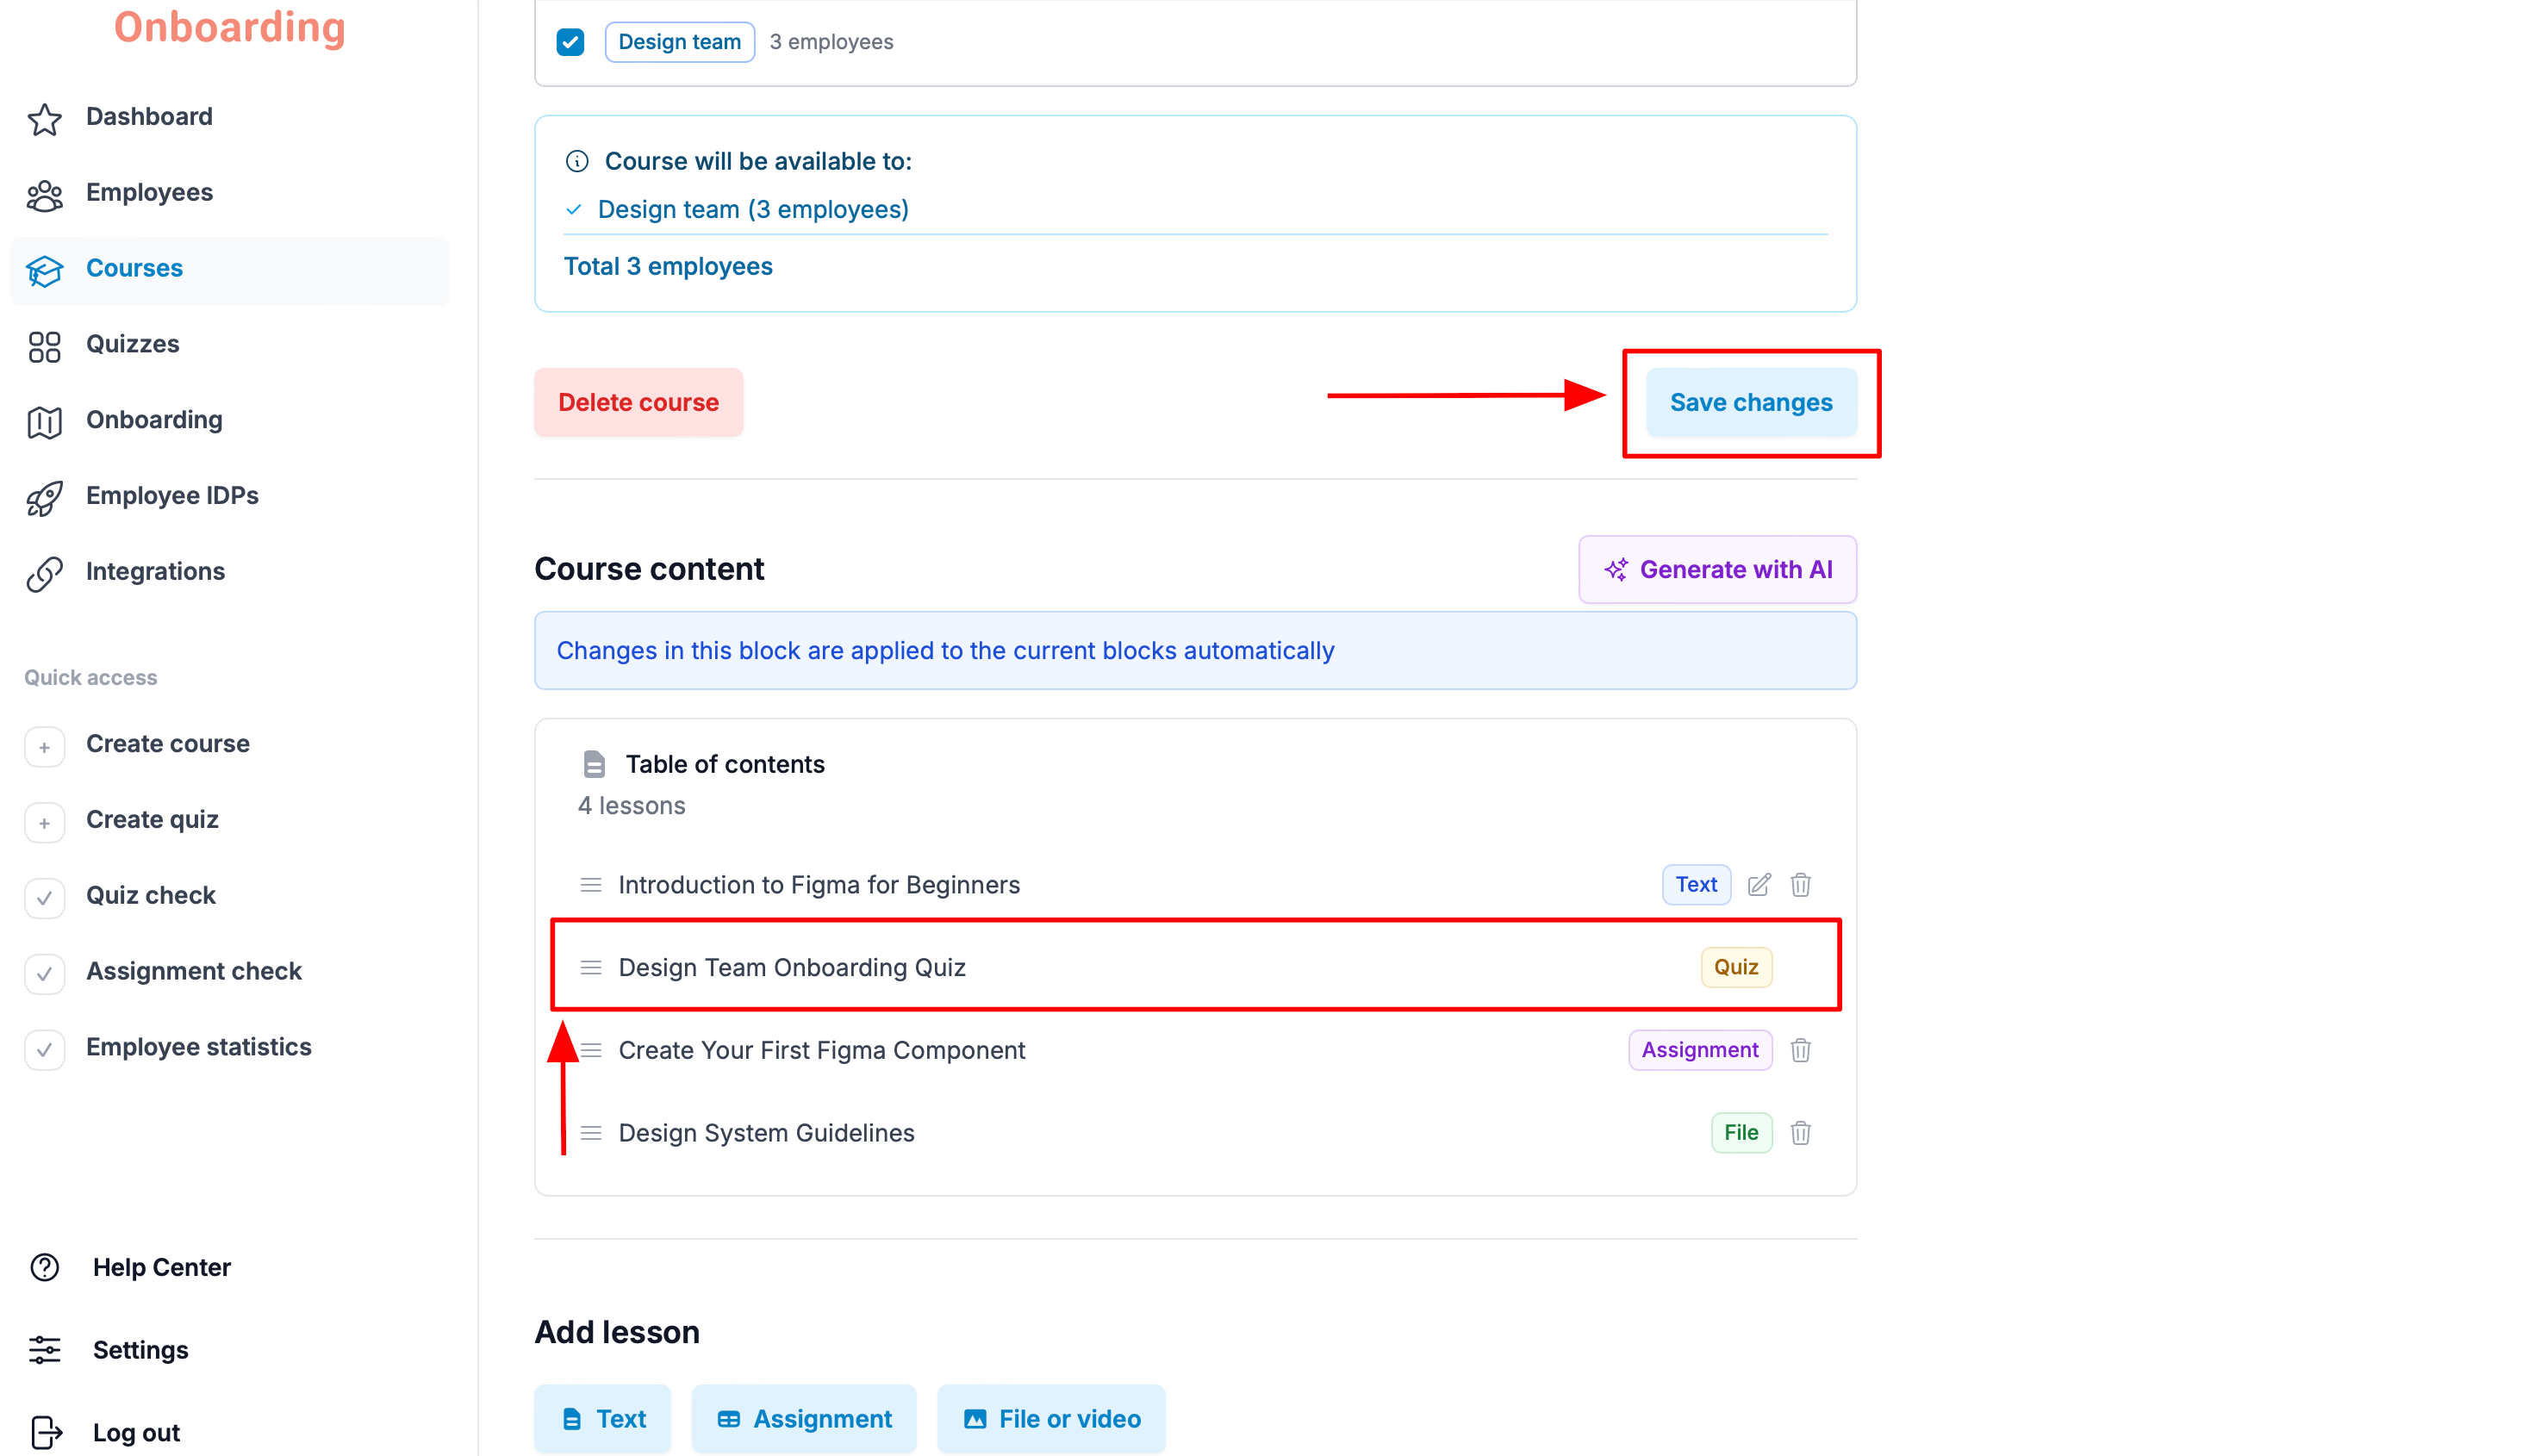
The changes are now visible to the course's users 🎉
How quiz changes affect employees
Changing basic quiz settings
All basic changes you make to a quiz applies to employees who haven't yet successfully completed the quiz, including those who:
- have just been assigned the quiz;
- haven't opened the quiz yet;
- started the quiz but haven't finished it;
- took the quiz but didn't reach the passing score and have to retake it.
Basic settings include:
- the course the quiz is attached to;
- the quiz title;
- time limit;
- number of attempts;
- passing mark;
- the «Display questions in random order» option.
Deleting a quiz
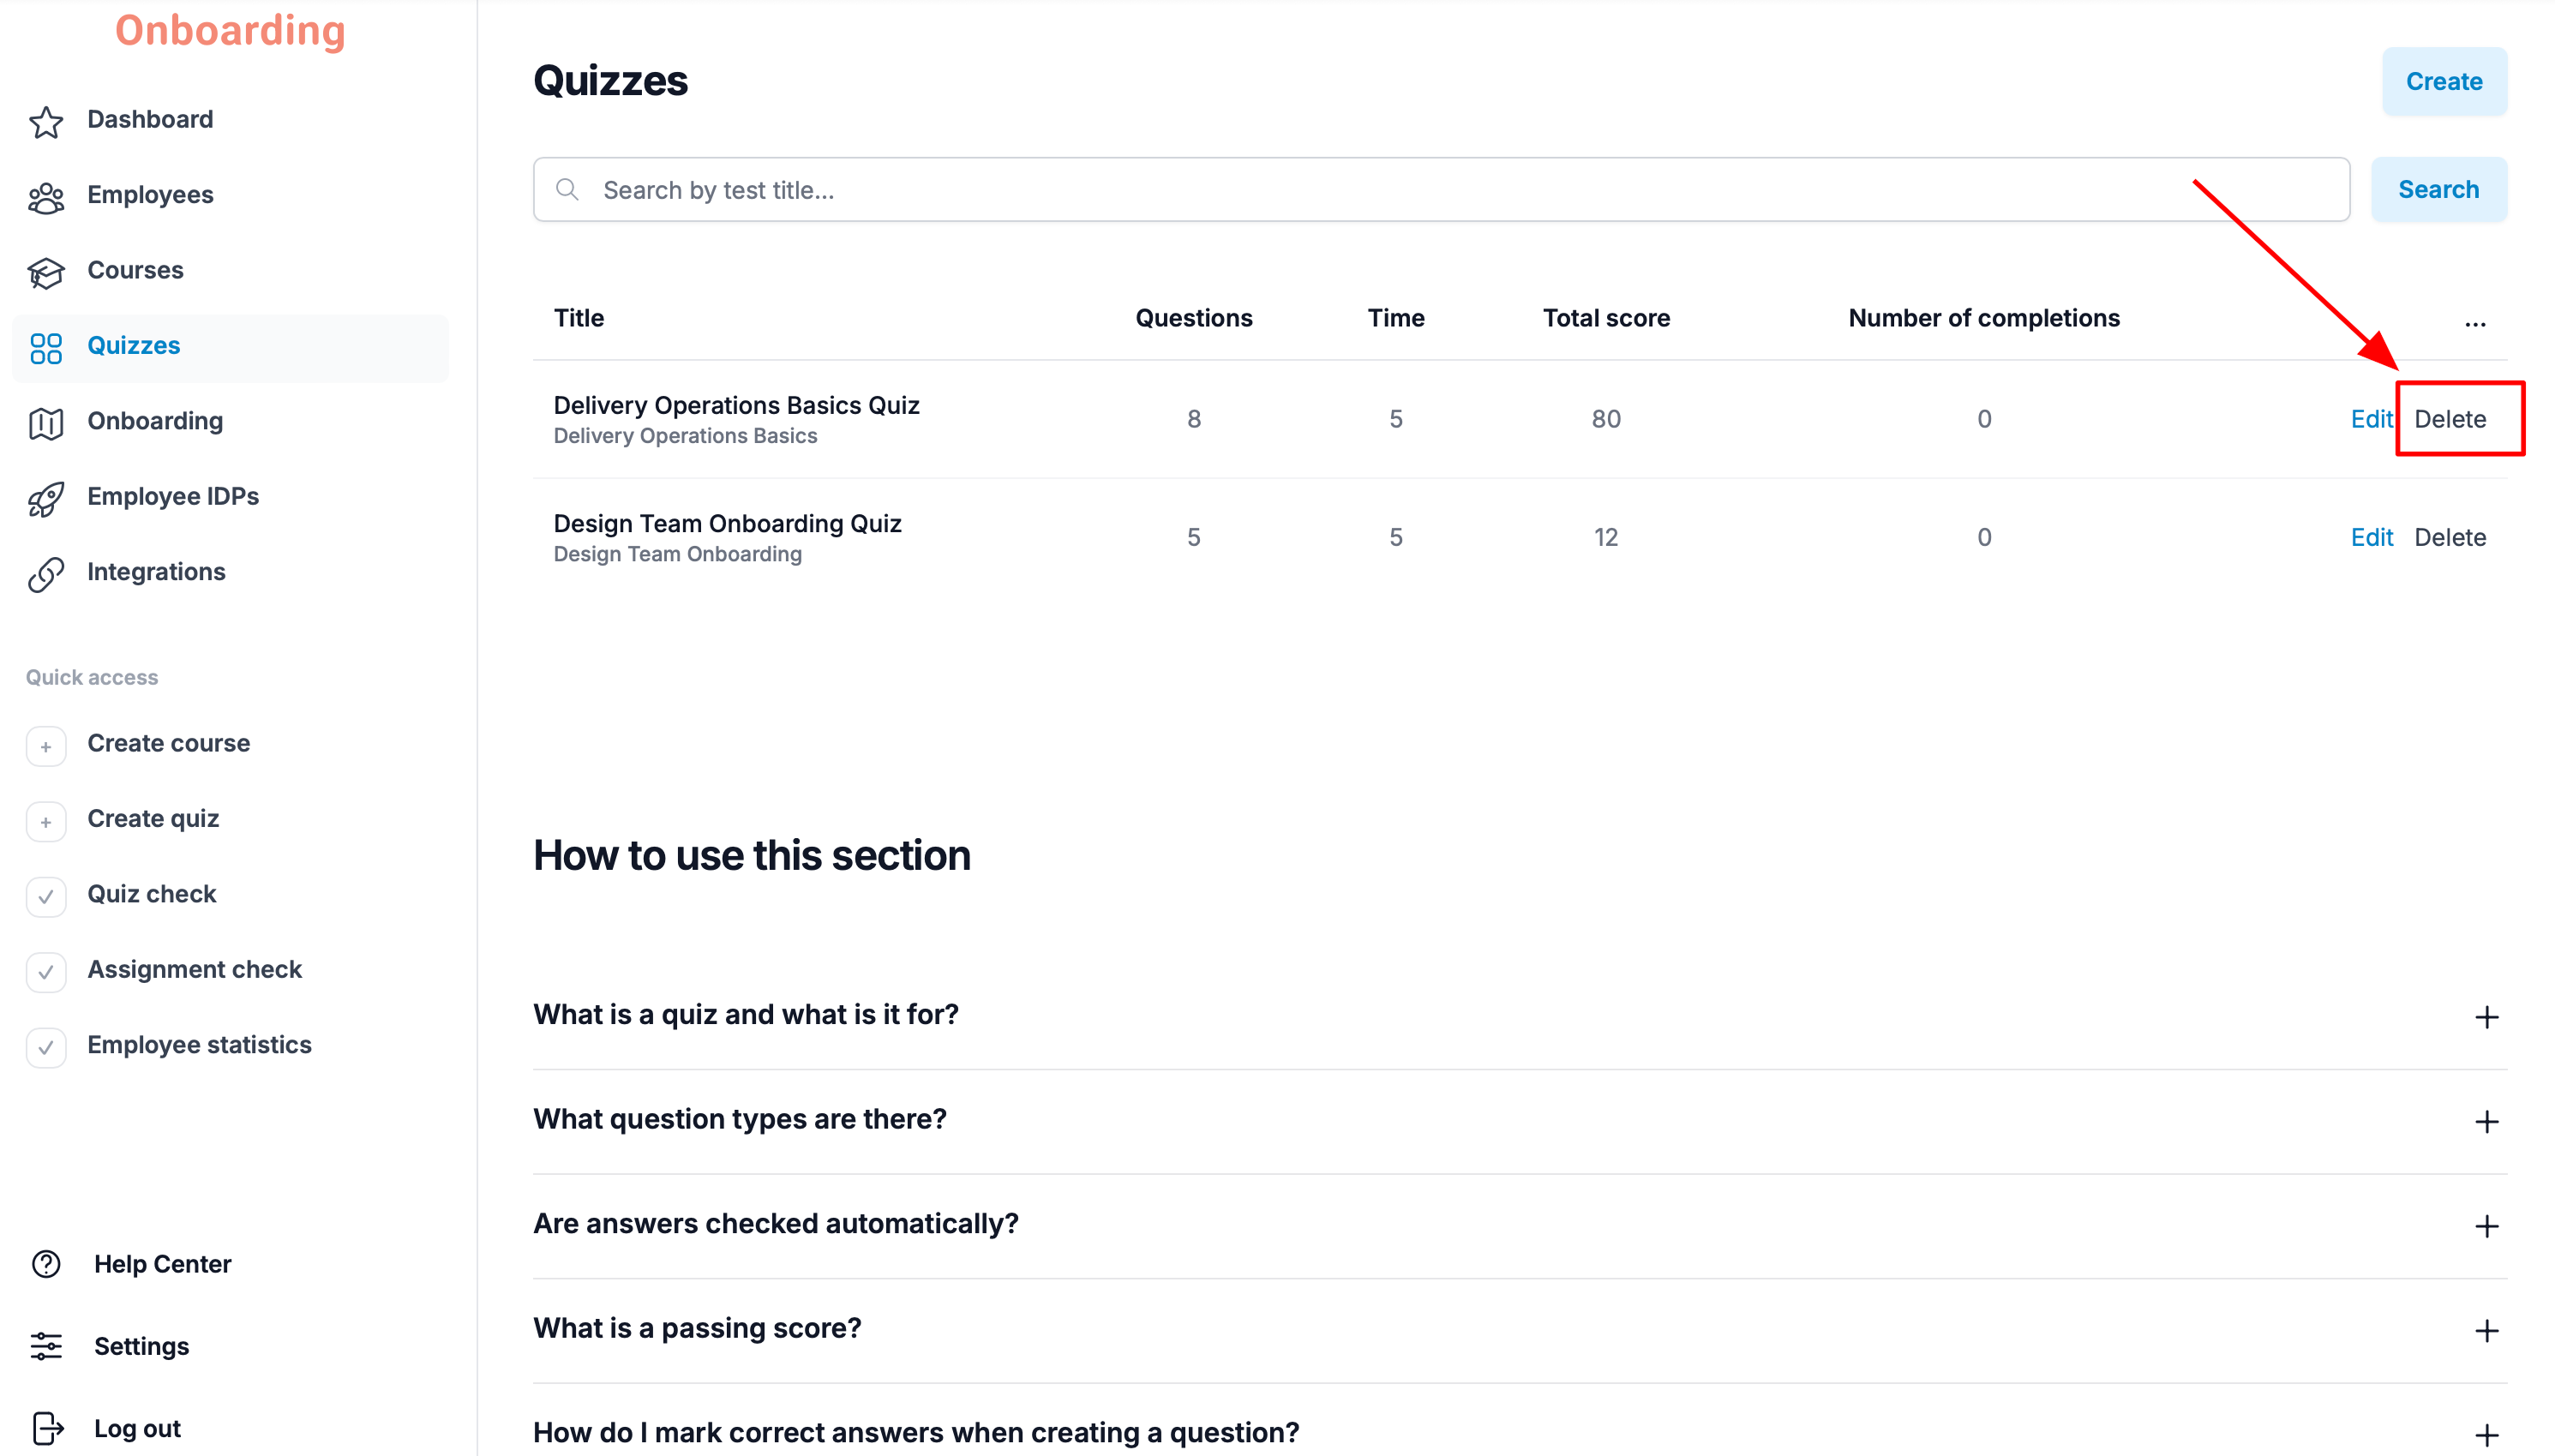
To delete an existing quiz, open the «Quizzes» section, pick the quiz you need, and click «Delete».
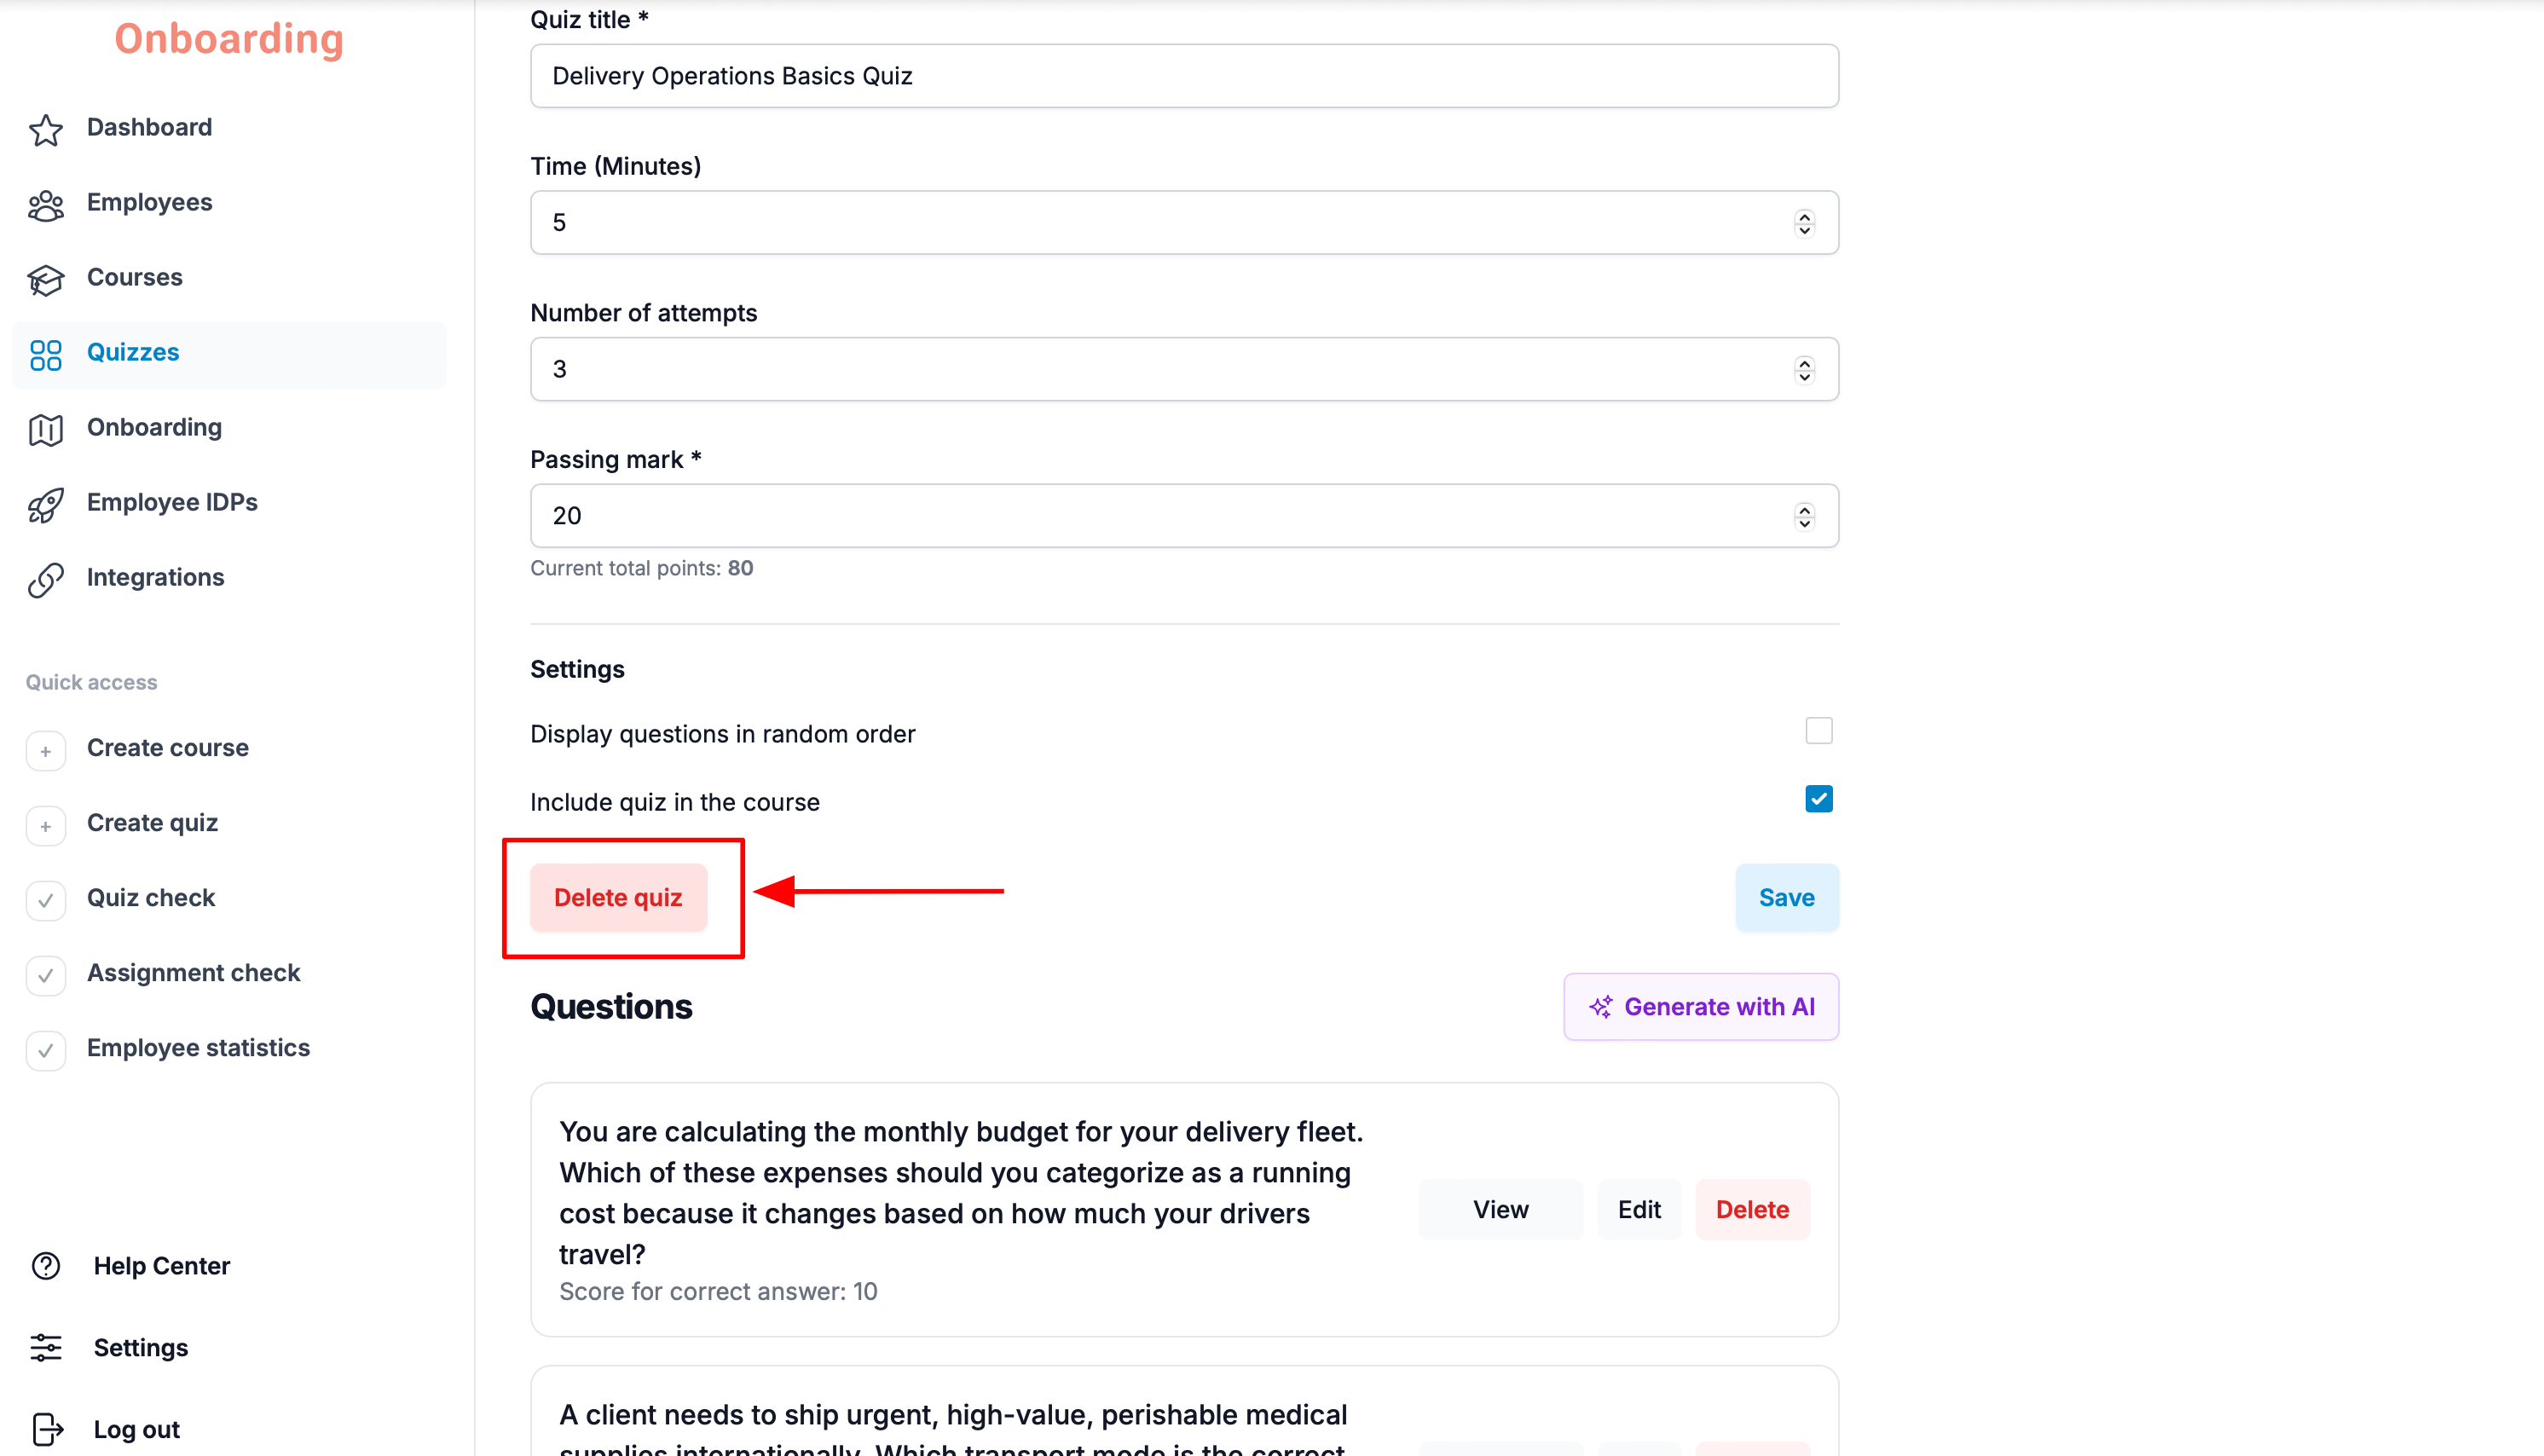
You can also delete a quiz from its editor: click «Edit», then click «Delete quiz» above the «Questions» block.
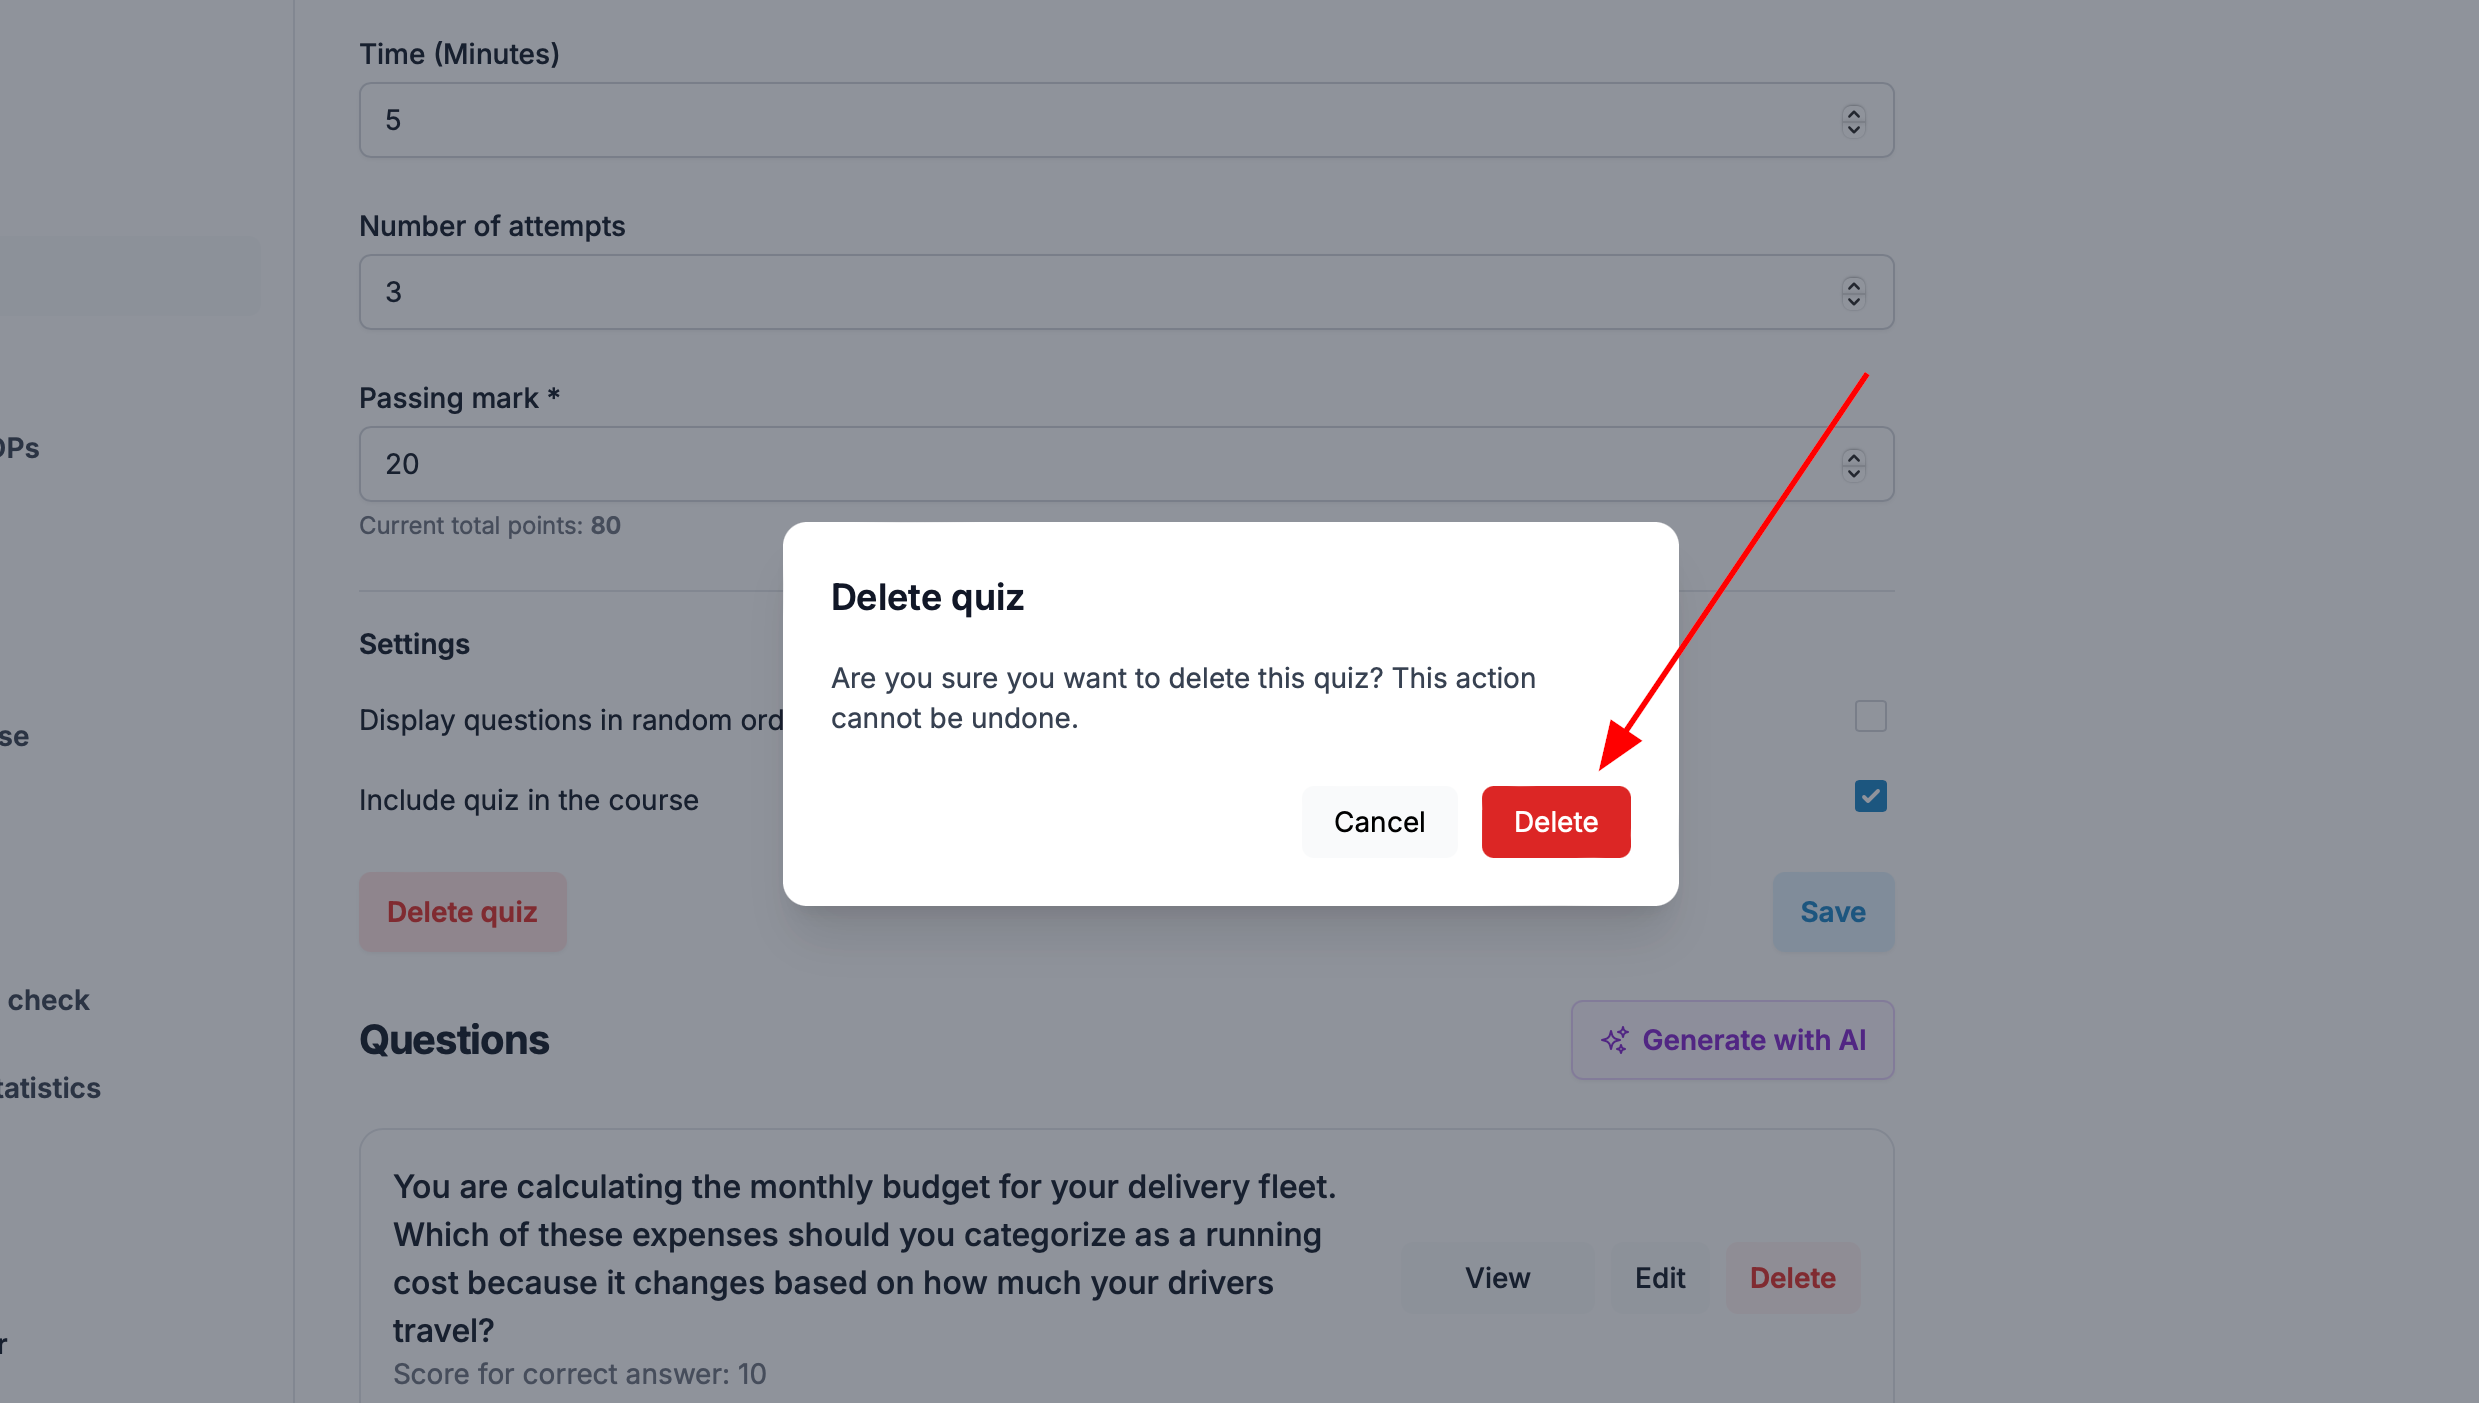
Confirm the action by clicking «Delete» again in the window that appears.
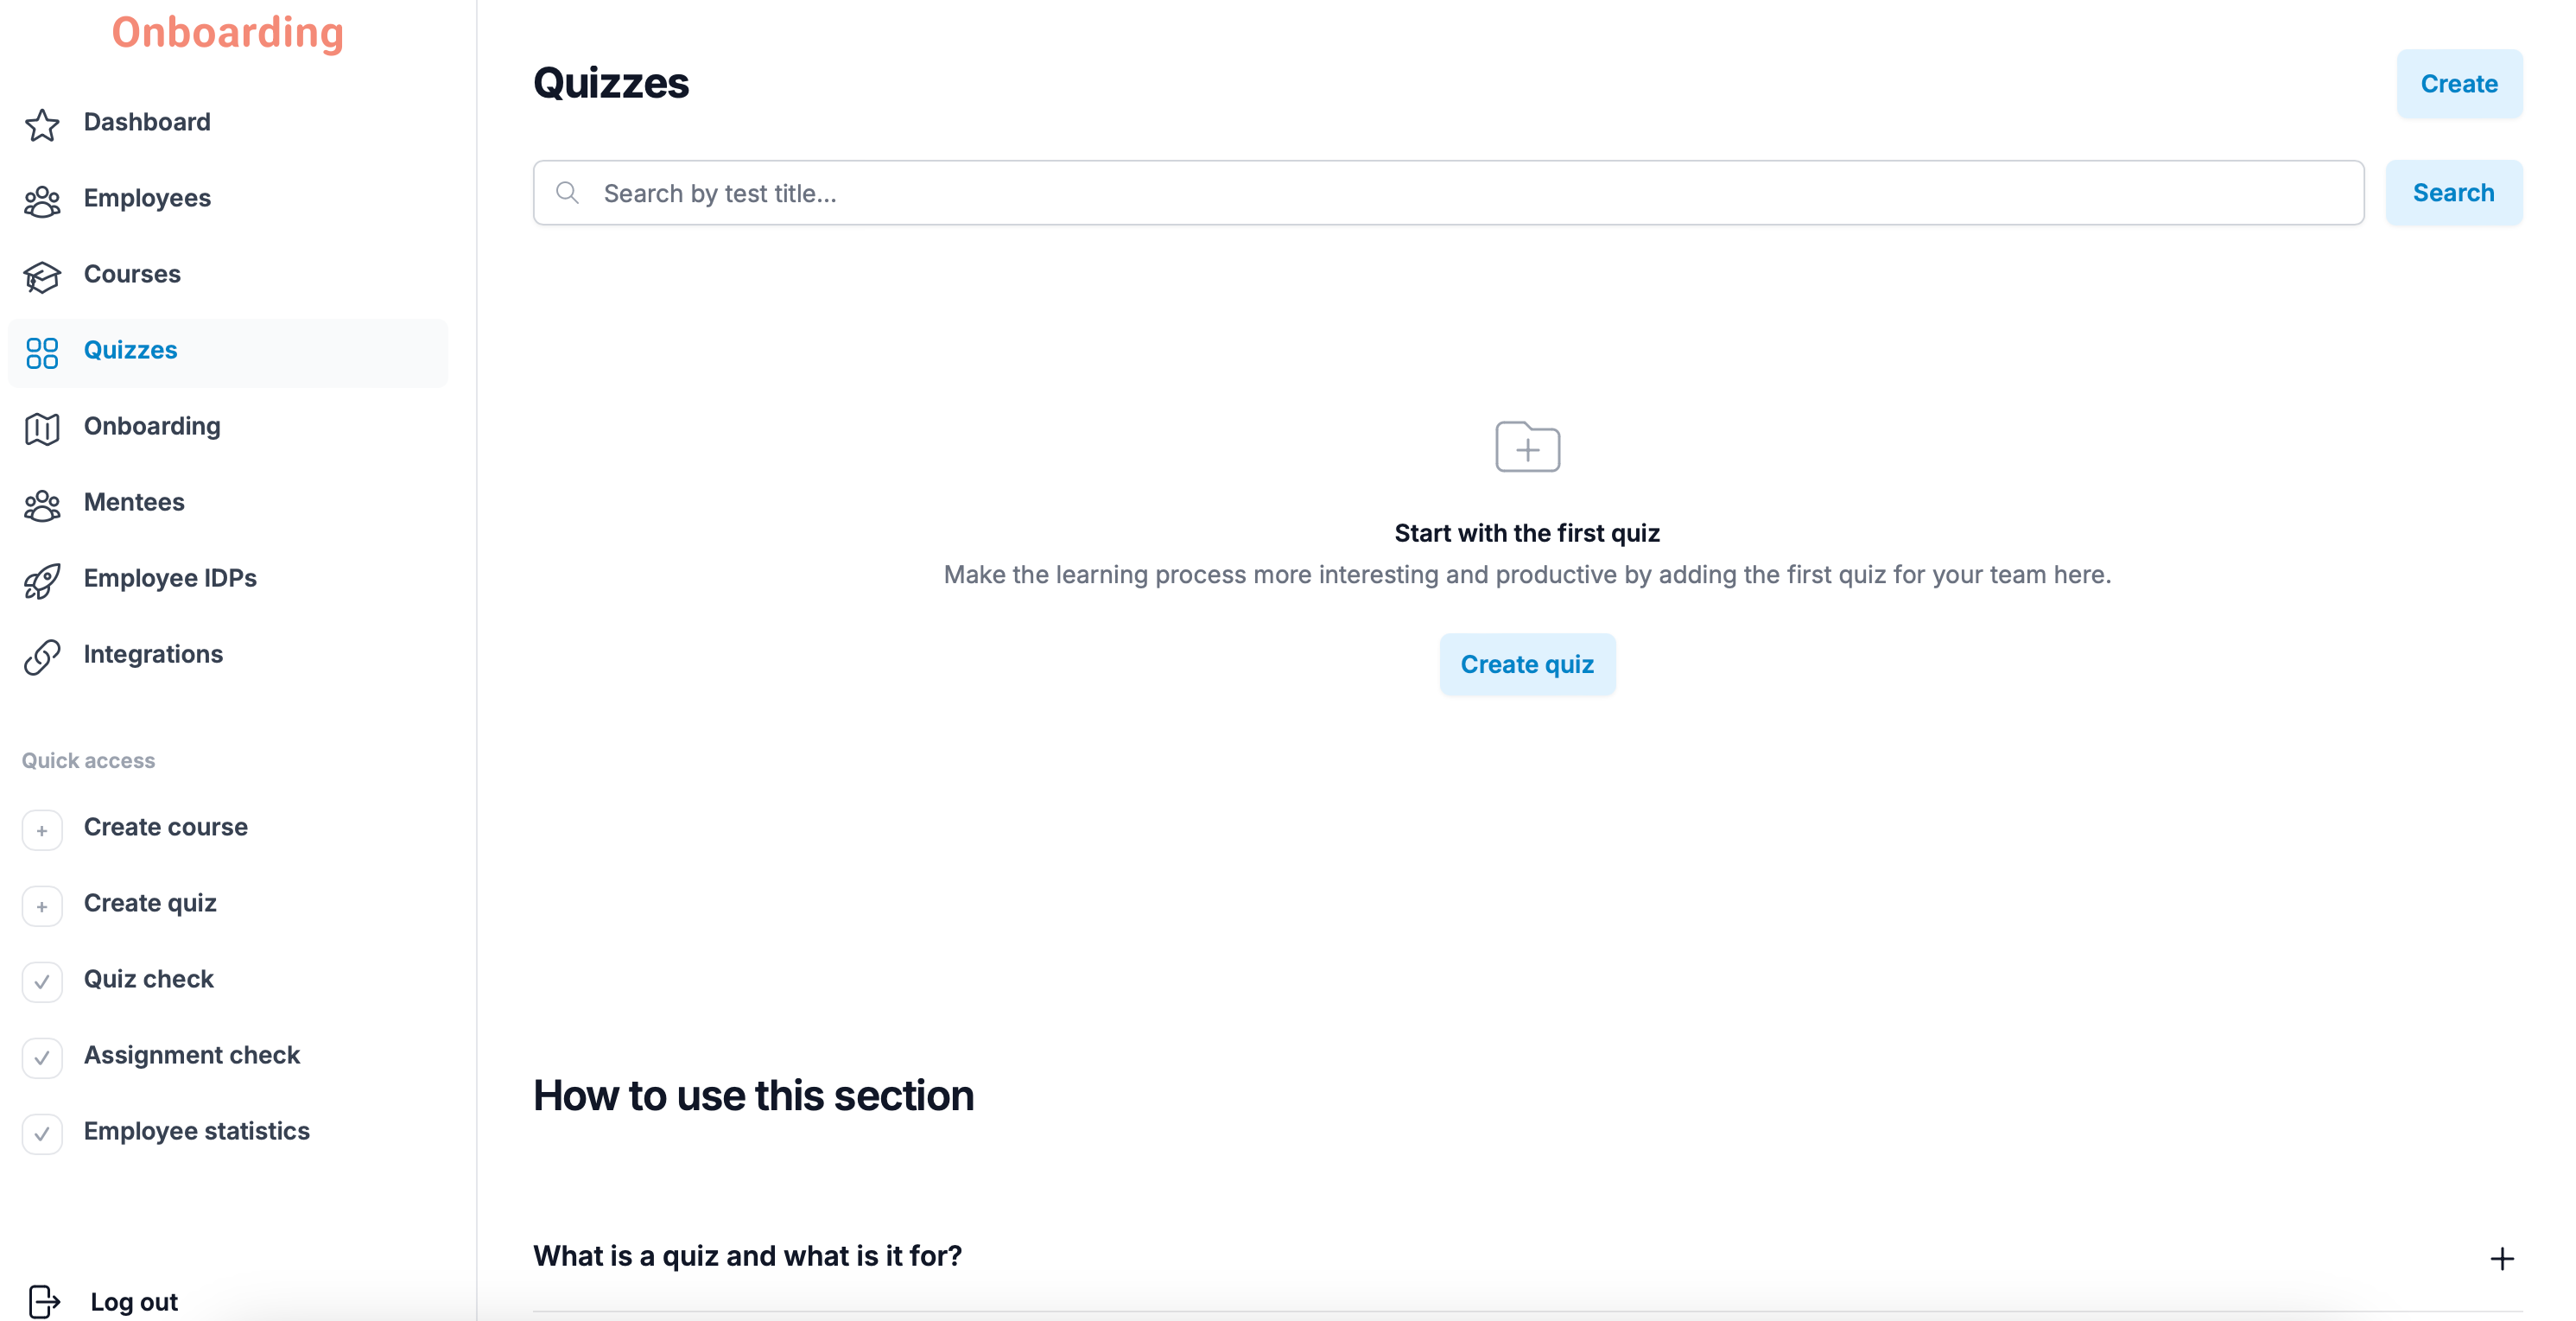
The quiz has been deleted and no longer appears in the list of quizzes.
Deleting a quiz cannot be undone. Once you confirm the deletion, the quiz cannot be restored.
Deleting a quiz also removes all the data connected to it, including employees' results, statistics, analytics, and quiz progress.
Still have questions?
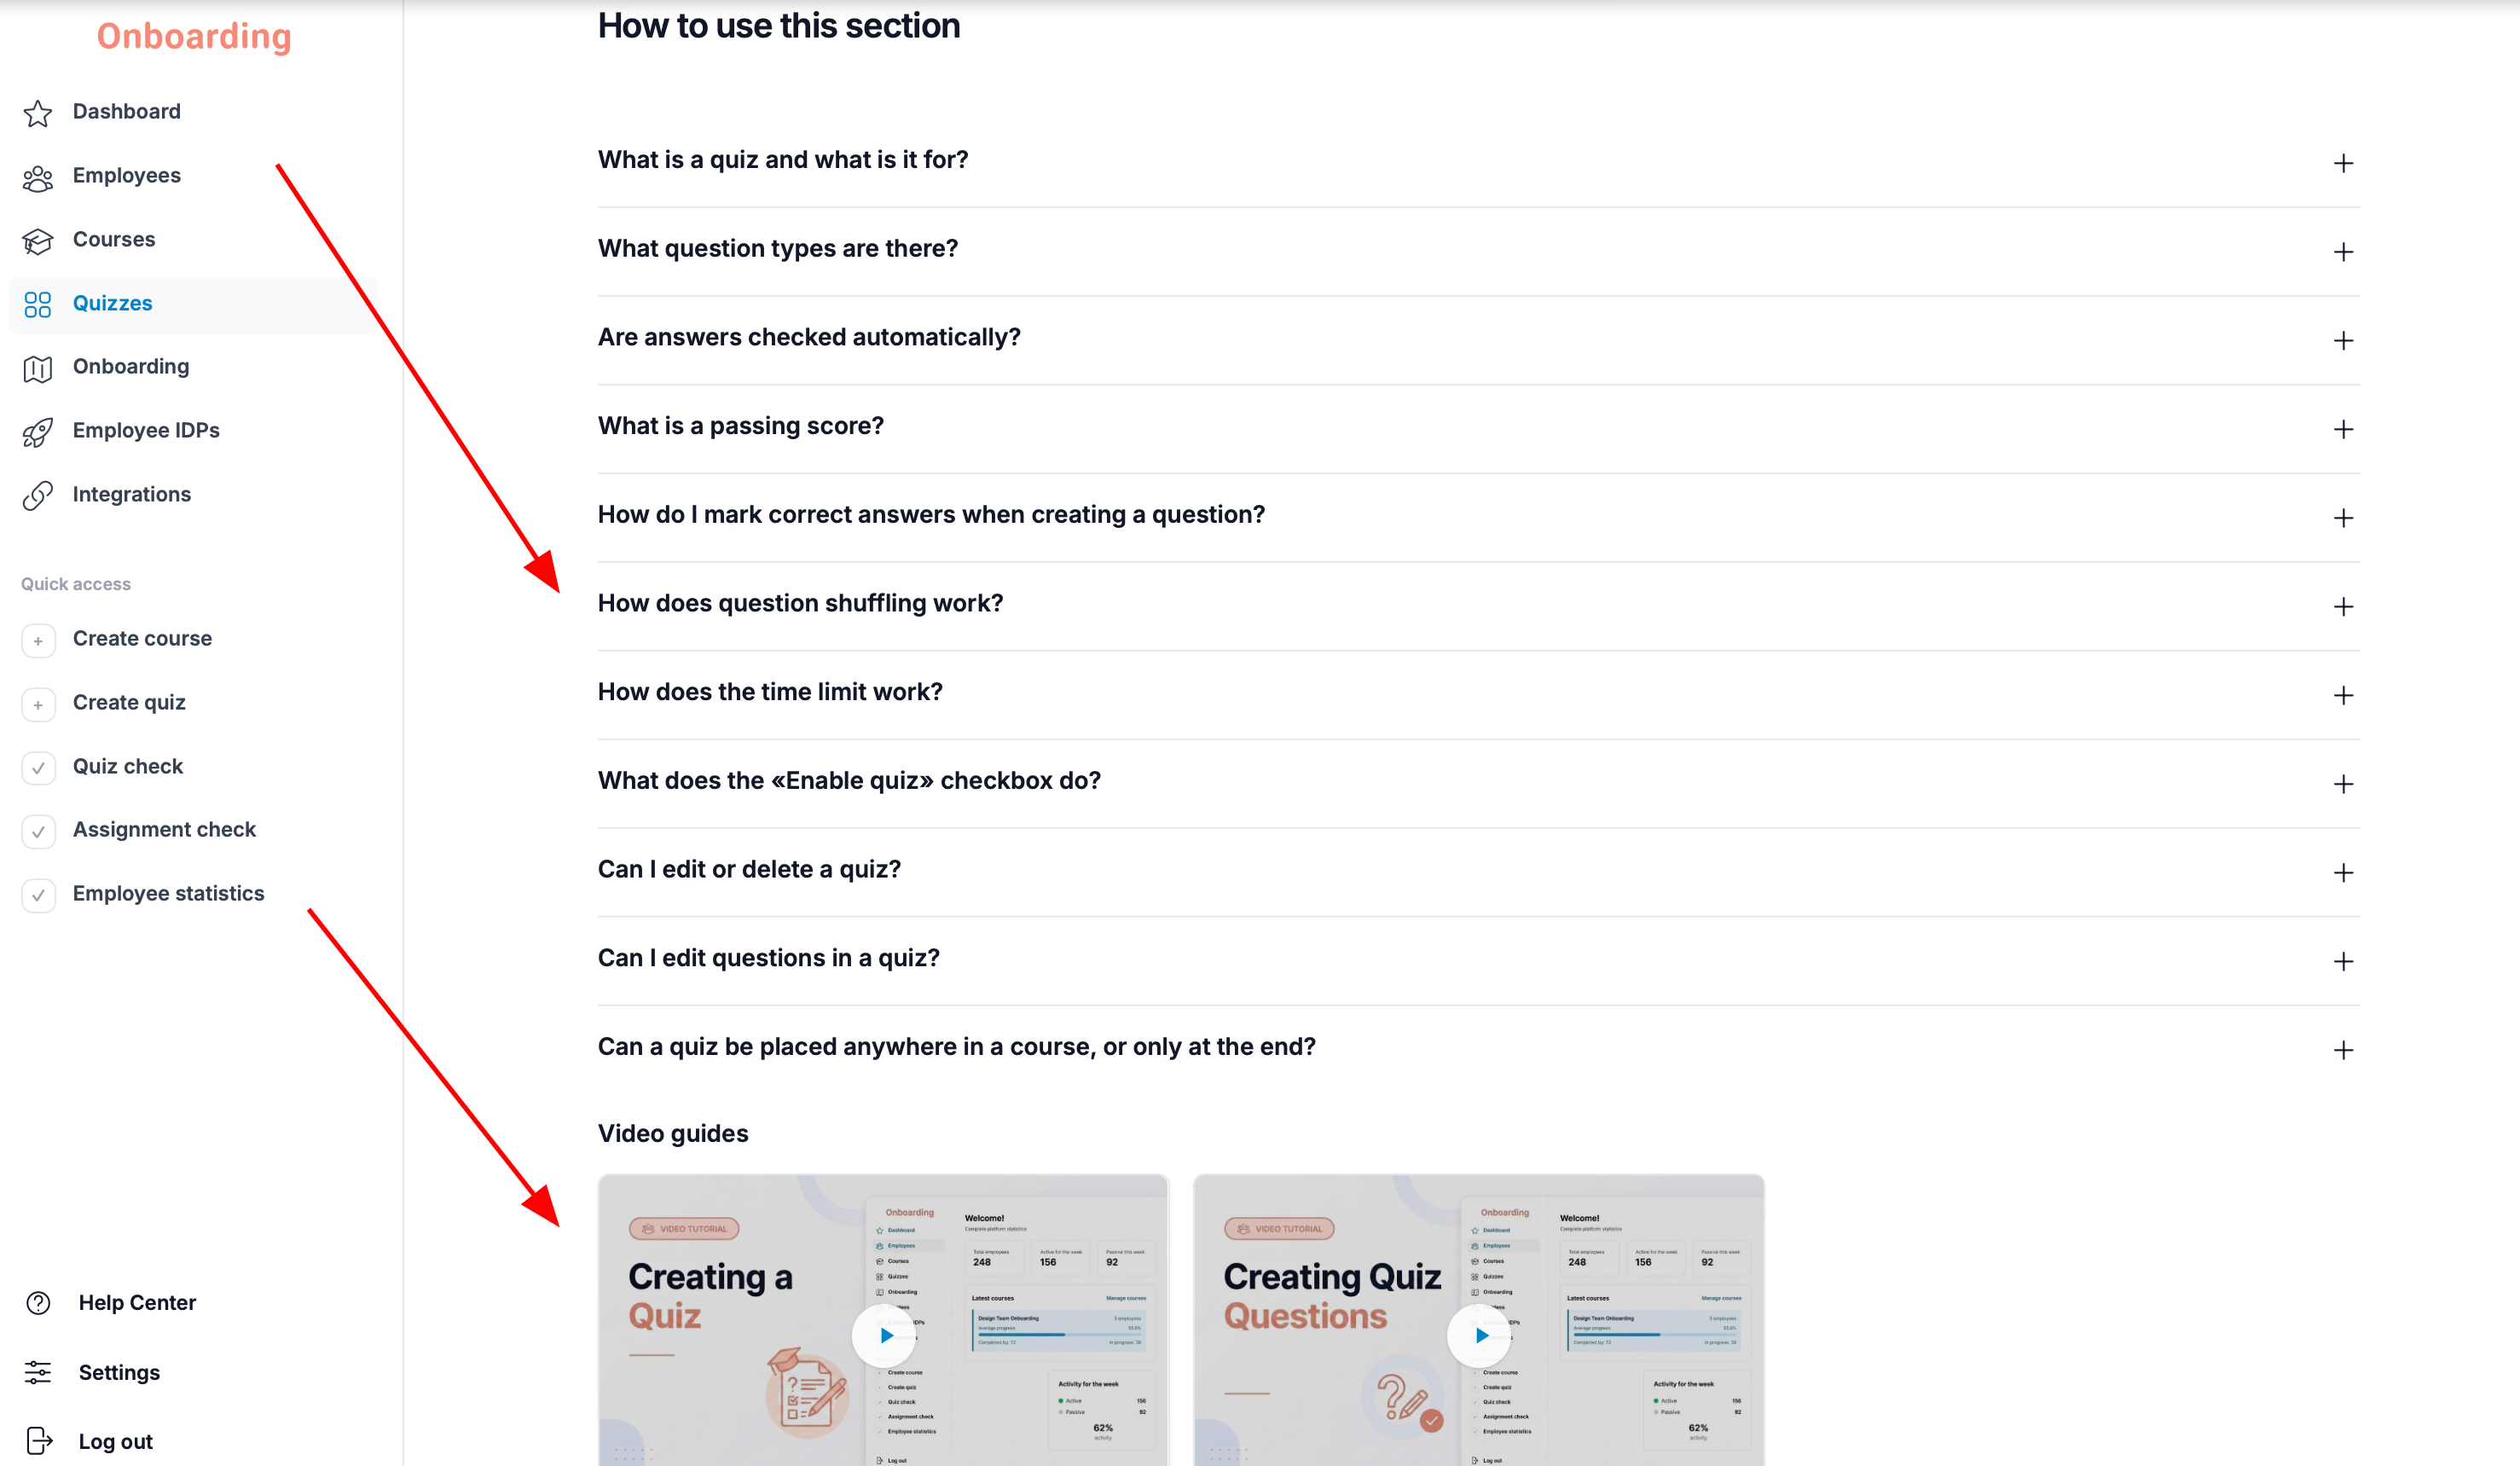
For your convenience, every section of the platform includes a built-in «How to use this section» block with answers to the most common questions and short how-to guides. You'll also find quick links to the Help Center and step-by-step video tutorials covering the section's features.
If you've forgotten how to do something, check there first — chances are the answer is already waiting for you.
If you've hit a technical issue or can't find the answer in the Help Center, write to us at hello@onboarding.team.
We'll look into your request carefully and do our best to help as quickly as possible.